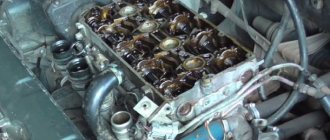
When assembling the cylinder head after replacing the gasket or repairing the cylinder head, it is important to tighten the bolts to the torque recommended by the automaker. But different instructions suggest using two different schemes for tightening the VAZ-2107 cylinder head with a torque wrench. Let's figure out what is their difference, and how the cylinder head is tightened on a VAZ 2107 , and with what force.
The table below shows both options for the cylinder head tightening torque diagram on a “classic” VAZ, depending on the type of bolt. Because classic bolts require only two passes , but modern torsion bolts , due to their properties, require four passes . In the article we will look at everything in more detail.
| Bolt type | Diagram and tightening torques of the VAZ-2107 cylinder head bolts |
| Classic bolts | During the first pass, the bolts are tightened to 4.0 kgf/m. During the second pass , tighten the bolts with a torque of 11.5 kgf/m. Bolt No. 11 size M8x45 is tightened with a torque of 3.8 kgf/m. |
| Torsion bolts with elastic deformation | On the first pass , tighten the bolts with a torque of 2.0 kgf/m. During the second pass, it is necessary to tighten with a force of 8 kgf/m. During the third pass, tighten all the bolts at an angle of 90 degrees. For the fourth, you need to tighten all the bolts 90 degrees again. Bolt No. 11 size M8x45 is tightened with a torque of 3.8 kgf/m. |
The correct tightening torque for the cylinder head on a VAZ-2107
The correct tightening torque is a guarantee of continued uninterrupted operation of the cylinder head. Thus, the attention paid by owners of VAZ-2107 cars to this nuance is completely justified. This question usually arises when the head gasket is changed. The last part costs a penny, but the efficiency and performance of the motor of the classic model largely depends on it. Read about everything in detail below.
- Reasons for proper tightening
- Preparatory work
- Removing the cylinder head - important points
- The nuances of replacing the gasket
- Tightening on VAZ model 2107
Gearbox assembly
Assembly of the VAZ 2105 gearbox
Rear axle gear parts
Reliable operation of the gearbox is ensured by strict adherence to the following assembly and adjustment procedures.
Differential assembly
Installing and adjusting the drive gear
Final drive gears
The correct position of the drive gear relative to the driven gear is ensured by selecting the thickness of the adjusting ring installed between the thrust end of the drive gear and the inner ring of the rear bearing.
Select the adjusting ring using mandrel A.70184 and fixture A.95690 with indicator.
Adjusting the drive Installing the differential box
Checking the preload of the differential box bearings using tool A.95688/R
Checking the lateral clearance in the meshing of the main gears using tool A.95688/R
Video about “Assembling the gearbox” for VAZ 2105
VAZ (2 parts). Rear axle gearbox repair - Part 1 How to replace the rear axle gearbox, replacement tips. Dismantling the steering gear assembly of VAZ.
Basic faults
There is damage to the gasket in which the operation of the VAZ 2107 is strictly prohibited. But there are also breakdowns in which it is still possible to drive. So, here is a list of the main breakdowns:
- Destruction of the gasket between the lubrication and cooling channels. With such a breakdown, antifreeze begins to seep into the engine sump. Of course, mixing with engine oil occurs. If there is a suspicion of a gasket failure, then you need to remove the dipstick and check the lubricant level. It's also worth looking at the consistency of the oil. In this case, the antifreeze turns light brown. In the event of such a breakdown, it is strictly forbidden to even start the engine, as this can quickly lead to jamming.
- Destruction between the cylinders and the cooling system occurs if the cylinder head gasket is of poor quality. It is quite possible that there was a weak tightening torque of the VAZ 2107 cylinder head during assembly. Under pressure, the integrity of the gasket is destroyed. The result is that air gets into the engine cooling system, and something terrible happens in the expansion tank. The temperature rises, there are huge bubbles and seething in the tank. Of course, it is undesirable to continue driving in this case.
- Sometimes (much less often than in the two previous cases) destruction occurs between adjacent engine cylinders. The result is a significant decrease in compression and unstable engine operation.
- And, of course, one cannot help but mention the banal marriage. In this case, the cylinder head gasket of the VAZ 2107 simply collapses, literally before our eyes. In this case, you can see how antifreeze begins to leak between the cylinder head and the engine block. In this case, tightening the bolts has no effect. Most likely, there is unevenness in the gasket itself, which leads to a similar result.
And now you have decided that you really need to replace the gasket, your car has one or more symptoms. What to do? Arm yourself with keys and other tools, and then begin preparation.
Lada 2107 2006, 74 l. With. — self-repair
Comments 2
Participate in the discussion can only registered users.
13.5 is normal, I think, otherwise antifreeze constantly leaks through the gasket if you tighten it loosely, either they started making such gaskets, or the bolts. Well, the main thing is not to overtighten, otherwise the cylinder walls will bulge a little inward, over time the hone will wear off and there will be a little oil starvation, Yes, and it’s harder for the piston to run in. Unless, of course, the block was sharpened with a false head.
Somewhere I came across the answer to this question. It seems on some nivoforum. They wrote there that the “old style” bolts with a 19mm wrench are tightened using the first method, and the 12mm bolts with the second method. I came to a conclusion similar to yours)
“>
How to tighten correctly?
You can tighten the bolts with the help of specialists or yourself. If you have never encountered the need to perform this task before, then below we will look at how tightly you should tighten the screws and in what sequence you should do it.
Be sure to strictly observe the tightening torque, since if the head bolts are overtightened, this will lead to cracks and damage to the cylinder head. If this happens, the car owner will have to carry out major repairs to the unit. The working surface of the hole, as well as the threaded connection of the screw, must be as clean as possible. A wire brush can be used to clean the cylinders. If during the task you find “blind” holes for the head screws, use a cleaning lubricant carefully. If the volume of the substance is greater than required, it will be difficult to install the pin all the way.
Before tightening, it is necessary to visually diagnose the condition of the bolts. If the fastening elements are damaged or worn out, their quality is generally low, then it is better not to tighten them with these screws; it is recommended to replace them with new ones.
It is recommended to lubricate the threads of new bolts with a small amount of engine oil or another type of lubricant.
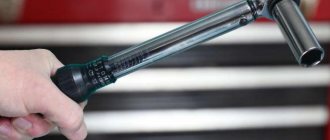
Tools and materials
To tighten the cylinder head, prepare only one tool - a torque wrench, which will allow you to determine the tightening force of the screws. It is best to purchase a key in a specialized store or rent it at a service station, since this tool can only be used for tightening and tightening. Using a regular wrench will not allow you to determine how many kilograms the tightening force is.
When purchasing bolts, it is recommended to give preference to branded parts. Be sure to look at the threaded part - it must be intact, without damage or defects; if any, the fasteners are replaced.
Channel “Engine Repair! And interesting!” published a video that describes all the nuances of the stretching process.
Algorithm of actions
The order and strength required when pulling the cylinder head bolts is as follows:
- In accordance with the diagram below, tighten all bolts using a torque wrench. The tightening torque on the first round of tightening the fasteners will be about 3.5 - 4.1 kgf/m. First, the bolts are tightened, which are located in the center of the block head - top and bottom. After this, the two upper and lower fasteners are screwed in, installed on the side of the screws located in the center. Then the two outer bolts are tightened. Please note that you need to tighten the left pins first, and then the right ones. Screw number 11, located at the bottom left, does not need to be touched.
- This is the first stretch circle. At the second stage, the bolts are tightened in a similar order. Only the force with which the fastening elements are tensioned by the tool will be 10.5 - 11.5 kgf/m.
- At the third stage, the bolt is tensioned, which is marked with number 11 in the diagram. The tightening force of this screw should be 3.5 - 4.0 kgf/m.
Features of the work performed using the example of some cars
To prove the proposition that each power plant has its own characteristics of tightening the cylinder head, let’s consider the nuances of performing work on specific models.
VAZ-2112 16 valves
A number of modifications of the VAZ-2112 were equipped with two types of 16-valve power plants (factory indexes - 21120 and 21124). These two motors, despite some design features, have identical head tightening technology.
These units use 93mm long tension bolts. In this case, reuse of fasteners is allowed, but under one condition - if their length does not exceed 95 mm (if it is longer, they should be replaced). 10 bolts are used to secure the head.
Tightening is carried out in three approaches:
- The bolts are tightened according to the order with a force of 2 kg/m;
- Turning 90 degrees;
- Repeated tightening to 90 degrees.
The drawing diagram is shown below.
Between the 2nd and 3rd approaches you need to take a 20-minute break.
Since these engines use tensile bolts, additional tightening is not required during vehicle operation.
VAZ-2107
On the VAZ-2107, all installed modifications of power units are 8-valve.
The block head is attached to them with 11 bolts, 10 of which are main, and 1 is an auxiliary side bolt (installed in the side protrusion).
On this car, tightening fasteners is also performed in three approaches:
- 10 main bolts are tightened in order with a force of 3.5-4.0 kg/m;
- The same bolts reach with a torque of 11.5-12.0 kg/m;
- The auxiliary is tightened with a force of 3.5-4.0 kg/m.
Additional tightening of the cylinder head is not required when operating the VAZ-2107.
"Samara", 10th family, Priora
On models of the Samara family (2108-21099), as well as VAZ 2110-2112 with 8-valve units, tightening is already performed in 4 approaches:
- Tightening with a force of 2.0 kg/m;
- Reaching with a moment of 7.5-8.5 kg/m;
- Turn 90 degrees;
- Repeated rotation by 90 degrees.
The break between points 3 and 4 is 20 minutes.
As for the VAZ of the “tenth” family, which are equipped with 16-valve engines, their tightening technology is the same as that of the VAZ-2112 (described above).
The same applies to the Lada Priora; on 8-valve units, a method with 4 approaches is used (VAZ 2108-21099), and on 16-valve units, 3 approaches are used (VAZ 2112 with a 16-valve engine).
"Volga"
On ZMZ-406 engines installed on the Volga, according to the automaker’s technical documentation, tightening the engine block head bolts is carried out in two approaches:
- With a force of 4.0-6.0 kg/m;
- With a moment of 13.0-14.5 kg/m.
But many car owners of this car note that this technology does not allow the cylinder head to be properly tightened, so they use techniques with a large number of approaches.
A common method is the cross method, performed in 4 stages and with the following efforts:
- 4.0-4.3 kg/m;
- 7.5 kg/m;
- 11.0 kg/m;
- 14.3-14.5 kg/m.
Subsequent tightening of the bolts is not required when operating on this engine.
When is it necessary to puff?
Unfortunately, not everyone understands how important this point is. And even more so, not every motorist understands what the tightening order should be and how this procedure occurs. But this does not mean at all that you should not be interested in this, because every owner of a VAZ 2106 should understand how important this is. After all, the wrong torque and tightening order can subsequently cause the vehicle owner to fail in the cylinder head. And this, in turn, will entail considerable financial costs.
Tightening the cylinder head pins
Previously, this procedure fell on the shoulders of technicians at service stations, because it was performed during the technical inspection of the car. However, later this need for maintenance was canceled, so now it is a concern for motorists. To understand how important it is, consider cases when you need to tighten bolts and observe the order and timing of this action:
- If engine oil begins to leak from under the cylinder head. Sometimes this is due to a worn head gasket, but it can also happen because the head screws have become loose. This is evidenced by an oil stain that appears at the junction of the head and the block.
- After disassembling the VAZ 2106 internal combustion engine, you first need to maintain the order and tightening torque of the screws. If this procedure is not followed, problems are guaranteed for your car.
- In addition, experienced drivers advise beginners to carry out this procedure from time to time, preferably every two to three thousand kilometers. After all, mechanics at service stations periodically encounter cylinder head bolts that become loose during engine operation.
Step by step guide
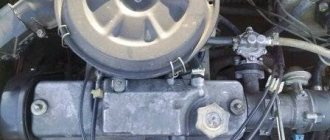
VAZ 2107 cylinder head in the engine compartment Many problems can be resolved after tightening the bolts, but if this does not help, then a major overhaul of this unit may be necessary, which involves removing not only the cylinder head, but also other parts of the block. Some parts may need to be replaced, such as gaskets, valve stem seals and valve guides.
Tools
To work we will need the following tools:
- a set of keys;
- micrometer;
Micrometer - flushing liquid;
- pliers;
- hammer;
- mandrels for removing and installing valves and caps;
- torque wrench;
Torque wrench - tiles (preferably the spiral is closed);
- desiccant.
Valve desiccant
Before starting repair work on the cylinder head, it must first be removed and cleaned of dirt.
Preparatory work and head removal
- The first step is to drain the coolant from the engine.
- We remove the carburetor.
- Having disconnected the pipes and hoses, remove the air barrier.
Disconnect the hoses and pipes - Remove the head cover.
- We align the marks on the crankshaft pulley with the mark on the camshaft drive and the marks on the camshaft pulley with the mark on its housing as shown in the photo.
Aligning marks - By disconnecting the camshaft lock washer, loosen the chain tension.
- Having torn off the bolt, remove the sprocket.
- Unscrew the fastenings.
- We remove the camshaft with the housing.
Camshaft - Having previously made marks using a marker, remove the rockers.
Removing rockers - Disconnect the wires.
- We remove the pipe and unscrew the bolts securing the cylinder head to the block.
- We remove the head.
- We inspect its condition and clean it of dirt.
Inspection of the head condition
This video shows the process of removing the cylinder head.
Checking status
Now it's time to dry out the valves. This is done with a special device. If chips, cracks, and rust are not visible, we conduct a further inspection. We evaluate the condition of the saddles, the repair of which is recommended every two hundred thousand kilometers.
Changing guide bushings
We inspect the guide bushings; if they are in unsatisfactory condition, they must be replaced.
A special tool is used to remove them. If you don’t have this on hand, you can get by with pliers and a clamp. After removing the bushings, we measure their diameter. We buy similar ones, the size of which is 0.05-0.07 millimeters larger than the ones being replaced.
The guides are pressed in using a mandrel, an electric stove, a hammer and lubricant.
- We place the head on a stand at the edges.
- We place the electrical device under the place of work.
- We wait until the metal heats up to about one hundred degrees (so that it expands).
- Now you need to properly lubricate the bushing with grease.
- Having removed it from the holders, we drive in new guides.
- When all eight are replaced, we wait for the cylinder head to cool down.
- The valves should not dangle and move freely, there should not be any jamming.
Checking the tightness of the head
Checking tightness To ensure a tight fit of the valves to the seats, do the following. Using lapping paste, lubricate the valve and insert it into the head. There are several techniques for rotating it, here are some of them:
- using a hose tightly placed on the part;
- using a device very similar to a corkscrew.
The main sign of good valve lapping will be a specific matte surface of the seat in the place where it contacts the part.
The tightness of the head can be checked by pouring kerosene into the collectors; you can also use gasoline. If done correctly, there should be no leaks for the first five to seven minutes.
When assembling the head, be sure to pay attention to the correct tightening of the bolts. It must be carried out strictly according to the scheme
In case of incorrect broaching, distortions may appear and, as a result, all your previous work will be crossed out. If you have any questions, watch the video.
How to tighten the cylinder head of a VAZ 2101
It's no secret that a well-repaired cylinder head is the key to stable, uninterrupted operation of the engine with maximum power output and normal fuel consumption, therefore repair of the VAZ cylinder head should be carried out with special attention, since any mistake can lead to damage to almost all engine parts and new expensive repairs.
Replacing the gasket
So, to do this job, we will need:
A 10 wrench, preferably a head with a wrench or ratchet A 13, 17 and 19 socket head Flat and Phillips screwdrivers Extensions Wrenches and ratchet handles A torque wrench is the main tool that is required to perform this job
Step-by-step guide with photos on replacing the head gasket
I’ll say right away that the photographs presented in this article show the process of completely removing the carburetor, intake and exhaust manifold. But in fact, you can do without removing all these nodes. You can completely dismantle the cylinder head with the carburetor and manifolds installed on it.
So, first read the instructions for removing the camshaft on a VAZ 2107. After that, unscrew the coolant supply pipes:
And after that we take it aside:
Also, do not forget to disconnect the wires from the oil pressure sensor:
We check that all hoses and pipes are disconnected so that nothing is damaged when removing the cylinder head. Then you can unscrew the bolts securing the head to the cylinder block, first we tear them off with a wrench, and then you can twist them with a ratchet to make things go faster:
After all the bolts are completely unscrewed, you can carefully lift the cylinder head:
And finally we remove it from the block, the result of which can be seen in the photo below:
Carefully inspect the surface of the head from the inside to understand why the gasket burned out and antifreeze passed between the joint (if such symptoms were present on your car). If there are traces of corrosion close to the channels, then this is not allowed and it is advisable to replace such a cylinder head. If the traces of corrosion are not very deep, then you can grind the surface of the head to even out the grooves over the entire area. Of course, after such a procedure it will be necessary to select a thicker gasket in order to maintain the compression ratio.
If everything is fine with the cylinder head and you just need to replace the gasket, then be sure to thoroughly clean its surface. I do this with a special spray for removing gaskets, which is applied for 10-15 minutes and then cleaned off with a brush.
After this, carefully wipe the surface dry, install a new gasket on the block so that it lies exactly along the guides and you can install the cylinder head. Next, you need to tighten the bolts in a strictly defined sequence:
It is also worth noting that this should only be done with a torque wrench. I personally use an Ombra ratchet. It is suitable for most work on domestic cars, and the torque varies in the range from 10 to 110 Nm.
As for the moment of force when tightening the cylinder head bolts on the VAZ 2101-2107, it is as follows:
first stage - tighten with a torque of 33-41 Nm; second (final) from 95 to 118 Nm.
The photo above does not show the assembly process itself, so please do not pay too much attention to the repair conditions. It just shows clearly how all this is done. Ideally, everything should be clean so that no debris gets into the engine.
How to remove
The cylinder head is removed from the engine of the car if, to eliminate the malfunction, it is not necessary to remove the VAZ 2105 engine itself or if it is only necessary to remove carbon deposits from the surfaces of the combustion chamber and valves. The cylinder head must be removed from the engine in the following order:
— drain the coolant from the radiator and cylinder block and remove the air filter;
— disconnect the wires from the battery, spark plugs and from the coolant temperature gauge sensor; disconnect the choke cable from the carburetor;
— using wrench 67.7812.9514, remove the spark plugs and coolant temperature sensor;
— disconnect the throttle drive rods from the intermediate lever on the cylinder head cover of VAZ 2107, VAZ 2105, VAZ 2104 and remove the cover;
— turn the crankshaft of the Lada Classic until the mark on the pulley aligns with the long mark on the camshaft drive cover, and the marks on the camshaft sprocket align with the mark on the camshaft bearing housing;
— disconnect the hose from the fluid supply tube to the heater, and from the exhaust manifold - the bracket securing the fluid drain tube from the heater;
— disconnect the hoses from the carburetor, the intake pipe and from the outlet pipe of the cooling jacket of the VAZ 2107 cylinder head;
— disconnect the starter protective shield and the exhaust pipe of the mufflers from the exhaust manifold;
NOTE It is better to leave the exhaust manifold and intake manifold with carburetor on the head. They can be removed later when disassembling the cylinder head.
— loosen the cap nut of the chain tensioner, press out the tensioner rod with a mounting blade and secure it with the cap nut;
— remove the camshaft sprocket and bearing housing together with the camshaft;
— unscrew the bolts securing the cylinder head to the block and remove the head of the VAZ 2104.
In order to reinstall and secure the head to the cylinder block, perform the described operations in reverse order, in this case:
- do not forget to install the cylinder head gasket and head cover gasket
Tightening diagram
It is necessary that all bolts are tightened as evenly as possible. To do this, they need to be pulled in two or three passes. During the first, the tightening torque of the VAZ 2107 cylinder head is 4 kgf*m. During the second pass, you need to set the moment to 11.5 kgf*m. The small bolt should be tightened to approximately 3.8. Installation of the camshaft is carried out in almost the same way; its fastenings will need to be tightened crosswise, but the moment here is not so important. The main thing is not to break the thread.
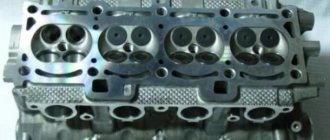
The cylinder head is made of an aluminum alloy containing a certain percentage of copper and tin in order to give it softness and elasticity. With these properties, it is pressed tightly against the gasket, preventing gas breakthrough.
The entire head is attached to the cylinder block with eleven bolts, ten large and one small, which are tightened with a certain sequence and force.
Replacing the gasket
1. Remove the cylinder head from the engine complete with intake and exhaust manifolds.
2. Disconnect the wire from the negative terminal of the battery. Drain the coolant.
3. Remove the carburetor.
4. Remove the ignition distributor with high-voltage wires.
5. Remove the block head cover.
6. Remove the camshaft assembly with the bearing housing. Disconnect the exhaust system from the exhaust manifold and remove the coolant drain pipe from the heater radiator.
7. Remove the chain from the camshaft sprocket.
8. Disconnect the supply hose from the heater radiator pipe.
9. Remove the hoses from the two pipes of the cylinder head.
10. Using a 13mm wrench, unscrew the bolt securing the cylinder head near the ignition distributor.
11. Using a “12” socket, unscrew the ten bolts securing the head to the cylinder block.
12. Remove the bolts from the holes.
13. Remove the cylinder head assembly with manifolds
14. Then remove the head gasket.
Dismantling the unit and preparing for repair
Carrying out work of this kind requires fairly high qualifications and special equipment. Removal of the cylinder head is carried out in the following sequence:
- The car is installed in a garage box, the battery is disconnected.
- The following elements are removed from the engine: air filter housing, carburetor and head cover.
- The upper timing sprocket is unscrewed from the camshaft and removed.
- Using a socket and a powerful wrench, the head mounting bolts are removed.
- After this, the assembly is carefully removed from the cylinder block.
- The gasket, or rather its remains, remains on the surface; they must be removed using a non-metallic tool to avoid damage.
VAZ 2107 engines use gaskets made of fire-resistant composition. After dismantling the head from the cylinder block during the repair process, it is necessary to transfer it to a workbench for inspection and repair. It is necessary to start with a thorough inspection and testing of all components to identify parts with significant deviations from the nominal values. All such parts will require replacement with spare parts.
The VAZ 2107 block head is installed on a wooden stand on the desktop. It plays the role of a fixing valve device during their disassembly. Defective parts are removed and replaced; all sealing gaskets are also subject to renewal. At this stage, preparation for repairs can be considered complete.
Why is correct tightening of the VAZ-2107 cylinder head important?
If you have replaced the cylinder head gasket, and besides major repairs, this is practically the only reason to disassemble the cylinder head, then the exact sequence and tightening torque of the VAZ-2107 cylinder head are critically important for the correct operation of the engine. Because any discrepancies in the fit of the valve cover lead to problems in the engine processes.
If the cylinder head of the VAZ-2107 is not tightened, then the parts of the engine will not be pressed against each other enough, even despite the presence of a gasket. The result is a drop in compression and burnout of the gasket. Also, working gases from the cylinders can enter the channels of the lubrication or cooling system and lead to the entry of these technical fluids into the combustion chamber. And this is already very bad - antifreeze in the oil will lead to insufficient lubrication of engine parts with all the ensuing consequences.
Antifreeze in VAZ 2107 engine oil
Traces of burnout of the cylinder head gasket on the cylinder block of a VAZ 2107
You also cannot tighten the cylinder head cover - this can damage it. Either cracks will appear in it immediately, or tension will arise, which will lead to this in the future. Also common is bolt rupture and thread stripping.
If you tighten the bolts in one place and not tighten them in another, the cylinder head of a VAZ-2107 car or its cover may warp. This will result in gaps that the gasket cannot compensate for. The result is the same as with loose bolts.
Rest
For other threaded connections, the tightening torques are as follows:
- M6 - 10 Nm;
- M8 - 25 Nm;
- M10 - 50 Nm;
- M12 - 105 Nm;
- M14 - 180 Nm.
Let us remind you that we previously published a collection of technological instructions for Lada Vesta. With it you can repair your car yourself.
Keywords: Lada Vesta engine | Lada Vesta clutch | gearbox Lada Vesta | front suspension of Lada Vesta | rear suspension of Lada Vesta | steering mechanism Lada Vesta | Lada Vesta brakes
5
Found an error? Select it and press Ctrl+Enter..
Coronavirus has an impact on AvtoVAZ, new details
What is the maximum speed of Lada Granta Lux
Replacing ignition coils and spark plugs on LADA cars
AvtoVAZ explained what to do if the symbols of the Lada Vesta instrument cluster flicker
How to tighten the cylinder head of a VAZ 2101
The order and tightening torques of the cylinder head bolts on a VAZ.
This order is necessary in order to correctly dock the cylinder head and cylinder block. To avoid distortions and excess metal tension.
Diagram and procedure for tightening the cylinder head on a VAZ 2101 - 07 (classic)
The cylinder head bolts are tightened in two steps.
First run: bolts 1 - 10 are tightened to a torque of 3.5 - 4.1 kgf*m.
Second pass: the same.
Tightening torque, N m (kgf m)
Cylinder head mounting bolts M12x1.25 1st step: 20.0 (2.0) 2nd step: 71.0–87.0 (7.1–8.7) 3rd step: tighten by 90 ° 4th move: turn 90° again
Nut of the stud securing the intake pipe and exhaust manifold M8 21.0–26.0 (2.1–2.6)
Tension roller mounting nut M10x1.25 34.0–42.0 (3.4–4.2)
Nut of the stud securing the bearing housing.
1 When is cylinder head broaching necessary?
Maybe not all car enthusiasts know, but modern cars do not require preventative cylinder head broaching.
Previously, pulling the cylinder head was a mandatory item during the first maintenance, but then the situation changed. Even relatively modern VAZ engines. Broaching the cylinder head is mainly required today for older models of VAZ, UAZ, Moskvich, etc. engines.
If you want your car to always work in excellent condition, you need to periodically pay attention to its repair and diagnostics. In particular, this refers to the operation of the cylinder head. What is the procedure for tightening the cylinder head of a VAZ 2106? How does the process happen and what is needed for this? We invite you to learn more about this here.
When is it necessary to puff?
Unfortunately, not everyone understands how important this point is. And that's it.
I unscrewed the spark plug and inspected it - it was all covered in black velvet soot (the carb was not adjusted), but I inspected it for antifreeze getting into the cylinder - it didn’t seem to have broken through yet. When I assembled the engine, I tightened it in 4 steps, the first 2 according to the book, the rest.
Do-it-yourself cylinder valve body maintenance.
The cylinder head (cylinder head) is the most important component in the car engine system. The process of tightening the cylinder head bolts will be within the capabilities of a car enthusiast with certain skills. To work, we need a special tool and self-confidence. The instructions provided will help you cope with the task and avoid common mistakes.
First, let's determine in what cases it is necessary to tighten the bolts.
We remove the cylinder head to replace the gasket between the block and the head. Also when repairing the engine or when repairing the cylinder head itself.
Signs of a burned-out cylinder head gasket are well described in the article - “Instructions for replacing the cylinder head gasket.”
We prepare the car for this work. The work can be done both on an inspection ditch and on a lift. Disconnect the negative terminal of the battery. Drain the coolant.
We install all the parts in reverse.
If a leak of engine oil or coolant is detected at the junction of the cylinder head with the cylinder block, remove the cylinder head and replace the head gasket. A leak can also occur due to warping of the block head due to overheating.
WARNING The head gasket is a one-time use, so each time the head is removed, the head gasket must be replaced.
1. Disconnect the wire from the “-” terminal of the battery.
Welcome, friends, to the DIY auto repair website. The cylinder head (cylinder head) is an important element of the power unit, which only at first glance seems simple.
The mechanism includes spark plugs, gas distribution valves, combustion chamber blocks, and so on.
In this case, the cylinder block itself and its head are separated by a special gasket made of a special material (usually steel asbestos).
The head and block are fixed using.
Features of the work performed using the example of some cars
To prove the proposition that each power plant has its own main characteristics, let’s consider the nuances of carrying out work on specific models.
VAZ-2112 16 valves
Numerous modifications of the VAZ-2112 were equipped with 16-valve power plants of two types (factory indexes - 21120 and 21124). These two motors, despite some design differences, have the same head clamping technology.
These units use 93mm tension bolts. In this case, reuse of fasteners is allowed, but under one condition: if their length does not exceed 95 mm (if longer, they must be replaced). 10 bolts are used to secure the head.
Tightening is carried out in three approaches:
- Bolts are tightened to order with a force of 2 kg/m;
- 90 degree rotation;
- Repeated extension to 90 degrees.
The traffic pattern is shown below.
Between the 2nd and 3rd approaches you need to take a break for 20 minutes.
Since these engines use traction bolts, no additional tension is required when operating the vehicle.
VAZ-2107
On the VAZ-2107, all installed modifications of power units are 8-valve.
The block head is attached to them with 11 bolts, 10 of which are main and 1 are auxiliary side bolts (installed in the side bar).
On this machine, fastener tightening is also performed in three approaches:
- 10 main bolts are tightened to order with a force of 3.5-4.0 kg/m;
- The same bolts reach a torque of 11.5-12.0 kg/m;
- The auxiliary is tightened with a force of 3.5-4.0 kg/m.
There is no need for additional tightening of the cylinder head when operating the VAZ-2107.
"Samara", 10th family, Priora
On models of the Samara family (2108-21099), in addition to the VAZ 2110-2112 with an 8-valve unit, tightening is carried out in 4 approaches:
- Clamping force 2.0 kg/m;
- Traction with a moment of 7.5-8.5 kg/m;
- Rotate 90 degrees.;
- Return 90 degrees.
The break between points 3.4 is 20 minutes.
As for the “tenth” VAZ family, equipped with 16-valve engines, their clamping technology is the same as that of the VAZ-2112 (described above).
The same applies to Lada Priora, on 8-valve units a method with 4 approaches is used (VAZ 2108-21099), and on 16-valve units - 3 approaches (VAZ 2112 with a 16-valve engine).
"Volga"
On ZMZ-406 engines installed on the Volga, according to the automaker’s technical documentation, the cylinder block cylinder head bolts are tightened in two ways:
- With a force of 4.0-6.0 kg/m;
- With a torque of 13.0-14.5 kg/m.
But many car owners of this car note that this technology does not allow the cylinder head to be properly tightened, so they use techniques with a large number of approaches.
The most common is the crossover method, which is performed in 4 stages and requires mandatory actions:
- 4.0-4.3 kg/m2;
- 7.5 kg/sq.m;
- 11.0 kg/m2;
- 14.3-14.5 kg/m2.
When working with this engine, no subsequent tightening of the bolts is required.
Article: 2101-1003265
Order code: 013316
- You may need
- show more
- Passenger cars / VAZ / VAZ-21021 drawing
- » href=»/catalog/vaz-3/legkovye_avtomobili-30/vaz_2102-4/blok_cilindrov_i_golovka_bloka-77/#part6277″>Washer 12Engine / Cylinder block and cylinder head
- Passenger cars / VAZ / VAZ-21042 drawings
- » href=»/catalog/vaz-3/legkovye_avtomobili-30/vaz_2104-5/blok_cilindrov_i_golovka_bloka-54/#part13471″>Washer 12Engine / Cylinder block and cylinder head
- » href=»/catalog/vaz-3/legkovye_avtomobili-30/vaz_2104-5/blok_cilindrov_i_golovka_bloka-55/#part13495″>Washer 12Engine / Cylinder block and cylinder head
- Passenger cars / VAZ / VAZ-21061 drawing
- » href=»/catalog/vaz-3/legkovye_avtomobili-30/vaz_2106-7/blok_cilindrov_i_golovka_bloka-57/#part19715″>Washer 12 Engine assembly / Cylinder block and cylinder head
- Passenger cars / VAZ / VAZ-21211 drawing
- » href=»/catalog/vaz-3/legkovye_avtomobili-30/vaz_2121-13/blok_cilindrov_i_golovka_bloka-46/#part58453″>Washer 12Engine / Cylinder block and cylinder head
- Passenger cars / AZLK / Moskvich-21411 drawing
- » href=»/catalog/azlk-9/legkovye_avtomobili-30/moskvich_2141-53/blok_cilindrov_i_golovka_bloka-59/#part148625″>Washer 12Engine mod. 2106 / Cylinder block and head
- Passenger cars / IZH / IZH 2126 with VAZ1 engine drawing
- » href=»/catalog/ij-7/legkovye_avtomobili-30/ij_2126_s_dvigatelem_vaz-307/blok_cilindrov_i_golovka_bloka-9/#part945826″>WasherEngine / Cylinder block and cylinder head
- Passenger cars / IZH / IZH 27171 drawing
- » href=»/catalog/ij-7/legkovye_avtomobili-30/ij_2717-607/blok_cilindrov_i_golovka_bloka-33/#part1693573″>Washer VAZ-2106 engine / Cylinder block and cylinder head
- Passenger cars / VAZ / VAZ-21011 drawing
- » href=»/catalog/vaz-3/legkovye_avtomobili-30/vaz_2101-3/blok_cilindrov_i_golovka_bloka-77/#part1793″>Washer 12Engine / Cylinder block and cylinder head
- Passenger cars / VAZ / VAZ-21031 drawing
- » href=»/catalog/vaz-3/legkovye_avtomobili-30/vaz_2103-106/blok_cilindrov_i_golovka_bloka-52/#part10144″>Washer 12Engine / Cylinder block and cylinder head
- Passenger cars / VAZ / VAZ-21052 drawings
- » href=»/catalog/vaz-3/legkovye_avtomobili-30/vaz_2105-6/blok_cilindrov_i_golovka_bloka-54/#part16577″>Washer 12Engine / Cylinder block and cylinder head
- » href=»/catalog/vaz-3/legkovye_avtomobili-30/vaz_2105-6/blok_cilindrov_i_golovka_bloka-55/#part16601″>Washer 12Engine / Cylinder block and cylinder head
- Passenger cars / VAZ / VAZ-21072 drawings
- » href=»/catalog/vaz-3/legkovye_avtomobili-30/vaz_2107-8/blok_cilindrov_i_golovka_bloka-59/#part23085″>Washer 12Engine / Cylinder block and cylinder head
- » href=»/catalog/vaz-3/legkovye_avtomobili-30/vaz_2107-8/golovka_bloka-58/#part23056″>Washer 12Engine / Block head
- Passenger cars / VAZ / VAZ-212131 drawing
- » href=»/catalog/vaz-3/legkovye_avtomobili-30/vaz_21213-731/golovka_bloka-51/#part2008903″>Washer 12Engine / Block head
- Passenger cars / AZLK / Moskvich-23351 drawing
- » href=»/catalog/azlk-9/legkovye_avtomobili-30/moskvich_2335-688/blok_cilindrov_i_golovka_bloka-6/#part1902846″>Washer 12Engine / Cylinder block and cylinder head
- Passenger cars / IZH / IZH 21261 drawing
- » href=»/catalog/ij-7/legkovye_avtomobili-30/ij_2126-606/blok_cilindrov_i_golovka_bloka-35/#part1690459″>Washer VAZ-2106 Engine / Cylinder block and cylinder head There are no reviews for this product yet.
Today, the next article in the series “Crystal VAZs or typical breakdowns of domestic cars” is dedicated to the “classics”: VAZ-2101, 2103, 2104, 2104, 2105, 2106 and 2107. These cars have been driving along our roads for decades and, despite Despite all the shortcomings that we will talk about, their popularity is still high.
Replacement
Now, knowing all the intricacies of the replacement procedure, you can talk directly about how you can remove the old rubber from the cylinder head on your own and install a new one in its place.
https://youtube.com/watch?v=7bStsitKlPU
To work you will need a certain set of tools and materials:
- Torque wrench;
- Wrench;
- Socket head;
- Screwdriver;
- Pad;
- Container for draining coolant;
- Clean dry rags.
We begin the replacement procedure.
- Remove the negative terminal from the battery. The procedure is standard, but it is prohibited to continue working without it.
- Fix the piston of the first cylinder at top dead center - TDC.
- Drain the coolant into a container prepared in advance.
- Relieve pressure in the fuel system if you have just recently driven into the garage after a trip.
- Next, disconnect the exhaust pipe from the exhaust manifold.
- The cylinder head cover is removed, and along with it it will not be superfluous to disconnect the receiver, throttle assembly, exhaust and intake manifold.
- Loosen the clamps that hold the air supply pipe to the throttle body. Remove it from the assembly, grasping it together with the air intake hose. Remove the air filter together with the housing in parallel.
- On the left end of the cylinder head there are mass wires that are disconnected and thereby the fuel frame is removed.
- Unscrew the fasteners that hold the front cover in place. Remove the cover and timing belt. Secure the crankshaft to prevent possible spinning.
Important cleaning step
Remove the tension roller and spacer washer along with it. Remove the mounting bolts to remove the timing pulley from the camshaft. Now you need to remove the back cover. To do this, unscrew the mounting nuts and bolts. Using a Phillips screwdriver, remove the screws, loosen the grip of the clamp and gradually begin to disconnect all the hoses from the head outlet. By unscrewing the fastening nuts, the fuel supply and drain hoses are removed from the fuel pipes. 10 mounting bolts are removed using a hexagon
Unscrew each bolt half a turn one after another to relieve tension and avoid deformation of the cover. Remove the screws and washers. Remove the head and gasket. Clean all contacting surfaces, remove all traces of metal shavings, and clean threaded connections and holes. Install a new gasket, taking into account the two centering sleeves. The holes with copper trim should be between the 3rd and 4th cylinders. These holes allow oil to pass through. Make sure that both valves on the first cylinder are closed, after which you can return the head to its place.
These holes allow oil to pass through. Make sure that both valves on the first cylinder are closed, after which you can return the head to its place.
Installation process
- Insert the mounting screws into the holes and tighten them. This is done in four stages according to the diagram below:
- At the first stage, tightening is performed with a torque of 20 Nm;
- At the second stage, a tightening torque is used in the range of 69.4-85.7 Nm;
- At the third stage, the fasteners are rotated 90 degrees;
- At the final cycle, a final tightening of another 90 degrees occurs.
After replacing, carry out the reassembly procedure, moving in the opposite sequence. If you disassemble the unit correctly, there should be no problems with assembly.
Loading …