It’s probably no secret to anyone that our cars need servicing much more often than foreign cars. This applies primarily to VAZ cars of all generations. As a rule, these cars are purchased by people with average incomes and constant servicing of the car at a service station is an unaffordable luxury. To save money, you need to learn how to do some work yourself. For example, it is necessary to be able to correctly tighten the bolts of the cylinder head of the VAZ 2110 8 valves, the tightening order of which is strictly regulated.
This work is difficult at first glance, but in reality, car enthusiasts, faced with it for the first time, cope quite successfully, thereby saving their time and money. It is worth knowing that the tightening of bolts on an 8 valve and 16 valve engine has some similarities and some quite important differences. For example, if their tightening torque is the same, then the pattern according to which this process occurs, that is, the order, is completely different. This must not be forgotten, otherwise all the work will be ruined by simply not following the order of tightening the bolts. If tightened incorrectly, it is quite possible that the gasket will be skewed or squeezed and, as a result, depressurize the structure and loss of performance characteristics of the VAZ 2110 cylinder head.
Lada 110
In what cases is it necessary to tighten the block?
It becomes necessary to tighten the bolts if the cylinder head was removed to change the gasket or repair some components. Also, some car owners recommend tightening after a certain period of operation of the car or after a certain mileage of the VAZ 2110. It is important to know that before installing the head it is always recommended to install a new gasket.
Reinstalling an old one, even if it is in good condition, may not give the desired result. A new gasket is inexpensive and for VAZ 2110 cars they are sold in almost all car stores. You also need to know that the bolts that secure the cylinder head wear out over time and, under constant stress, can even stretch to some extent. Re-installation of bolts is permissible, but only when their length is no more than 9.5 centimeters.
The length should not exceed 9.5 centimeters
They are also free from damage and rust. But since they are inexpensive, it is better not to skimp and purchase a new set of bolts.
Video
The video (Auto_Remont channel) describes in detail the process of installing and assembling the cylinder head on a VAZ 2112.
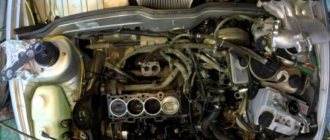
VAZ 2110 engine assembly
Assemble the engine on a VAZ 2110 car as follows. Place a clean cylinder block on the stand and screw the missing studs into the cylinder block. Install the generator mounting bracket and secure it with two bolts. Lubricate the bearing shells and thrust half rings of the crankshaft, as well as the pistons and oil seals with engine oil. When assembling the engine after repair, install new crankshaft oil seals. Install liners with a groove in the 1st, 2nd, 4th and 5th seats of the cylinder block, and liners without a groove in the 3rd seat of the cylinder block and in the main bearing caps. Place the crankshaft in the main bearings and insert the thrust half-rings into the seat of the middle main bearing (Fig. 2-18).
Video “VAZ cylinder head repair”
This video shows not only how the cylinder head bolts are tightened on a VAZ 2110, but also other work to restore this unit.
VAZ cars of the 2112 family were produced with two 16-valve valves: 21120 and 21124. The cylinder head of these engines has different intake ports. In theory, there are no other differences. And therefore, the tightening torque of the bolts on the VAZ-2112 cylinder head will be the same if we talk about any 16-valve internal combustion engine. Tightening is performed in three steps, although repair books give another option (it is for 8-valve engines).
The following video shows how the cylinder head is installed in 5 minutes:
Tightening torque of the VAZ-2112 cylinder head (16 valves): diagram
The tightening torque of the VAZ 2112 cylinder head (16 valves) is very important, since deformation occurs if the head is unevenly installed. This leads to the fact that after disassembly it will be necessary to grind off at least 2 mm from the surface of the block head. If all tightening torques are observed, then you will not have to sharpen the head, and if you do need to do this, then no more than a quarter of a millimeter.
Head design
The 16-valve engine uses a cylinder head containing the following elements:
- Two camshafts. They have five supports, cast iron, each with 8 cams. It is impossible to install an exhaust camshaft instead of an intake camshaft (and vice versa).
- 16 valves. They are installed on guide bushings.
- Seats are installed directly on the block head, which come into contact with the valve plates.
- Hydraulic compensators in the amount of 16 pieces.
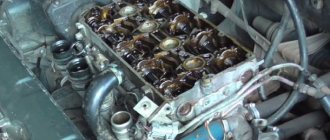
Installation and dismantling procedure
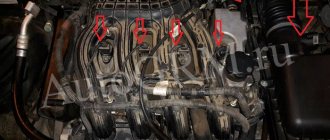
The part called the cylinder head is attached to the cylinder block with 10 screws. They are unscrewed with a 10mm socket wrench. The procedure for dismantling the cylinder head is shown in the first photo.
Reversal sequence (1-10)
The standard screw length is 9 3 mm. If the screw has been pulled out to at least 95 mm, it is replaced with a new one (AvtoVAZ requirement).
During installation, a different scheme is used (photo 2). Each screw is lubricated with machine oil, otherwise the efforts will be reduced to nothing.
The order of tightening the head is indicated in this photo
Tightening torque for cylinder head cover bolts
For VAZ-2112, the cylinder head tightening torque is standardized:
- First pass – the force is 20 N*m;
- Each screw is turned 90 degrees to the right;
- Wait 20 minutes, then turn the screws another 90 degrees.
At first the effort is very small. But at “step 3” it will be difficult to cope with the work. Use the lever.
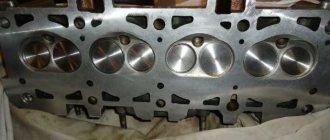
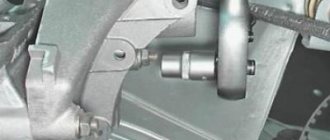
Why are guide bushings needed?
Before installing the cylinder head, perform the following steps: clean the threaded holes, as well as all holes for the bushings (photo 1). Each bushing is installed in place, and only then a gasket is placed on top.
Everything is ready to install the cylinder head
Metal parts adjacent to the gasket must be degreased. We looked at the cylinder head tightening diagram, but the cylinder head itself must be installed correctly:
- We place the cylinder head on the cylinder block;
- By moving the part in different directions, we ensure that the bushings fit into the recesses.
After “step 2” the screws can be tightened.
Sealant
No sealing compounds are used when installing the gasket! Solidol, CIATIM and other lubricants are not even needed. The main thing is that the metal must be degreased. And the cylinder head gasket must be new.
Tightening process and diagram (on an 8-valve car)
As we have already said, the procedure for tightening the cylinder head bolts on an 8-valve and a sixteen-valve unit is very similar. The tightening torque is the same in both cases, but the bolts are unscrewed and then tightened according to a completely different pattern. It is important to thoroughly clean the contacting surfaces before installing a new or old VAZ 2110 cylinder head. It is highly undesirable to do this with sandpaper, a file or other hard objects that can damage these surfaces.
Rough cleaning of the surface can lead to depressurization of the cylinder block system with ensuing dangerous consequences. For this purpose, special liquids are sold in the store. They are applied to a surface that may have remnants of an old gasket or other contaminants and are left to dry for some time. After some time, they are carefully removed and the surface remains perfectly clean.
Required Tools
- torque wrench;
Key for tightening to the required torque - rod compass;
- surface treatment liquid;
- knob;
- new gasket;
Cylinder head gasket - new bolts;
- rags.
Stages
After installing the head, you can proceed to tightening the bolts.
- Insert all bolts into their respective slots. Important! There should be no rust on the bolts and sockets; if there is any, be sure to remove it using special liquids. You can also lubricate them to make them screw in easier.
- We begin to tighten the bolts in four circles strictly according to the diagram for the VAZ 2110 using a torque wrench.
The diagram according to which the tightening takes place - The first one is tightened to 20 Nm (2 kgf/m).
- In the second circle we tighten 69.4-85.7 Nm (7.1-8.7 kgf/m).
- Next, following the diagram, use a wrench to tighten it ninety degrees.
- Then, going around the fourth circle, we tighten it another ninety degrees.
- Let's look at the work done. There should be no distortions in the places where the cylinder head comes into contact with the VAZ 2110 block. The gasket should not be squeezed out anywhere.
At this point, the process of tightening the GB cylinders can be considered completed, as you yourself have seen, nothing is difficult, and having completed the work once, the next time you can do it all literally with your eyes closed. The video we offer will help you better understand the process.
Loading …
Cylinder head cover and tightening order of its bolts
The metal cover installed on the cylinder head must not allow air to pass through. At points of contact with other parts, tightness must also be maintained. Therefore, sealant is applied to the edge of the lid. An example is shown in the photo.
Cylinder head cover before installation
Here you need to use materials: Loctite-574, ANACROL, etc. The screws on the cover are tightened with an “8” key.
Recommended screw tightening torque
The recommended screw tightening torque is only 3-4 N*m. Don't be surprised: the sealant will do its job. You just need to let it dry after putting the cover in place.
You can unscrew the screws in any order. Their number is 15 or 14. When installing, it is better to follow the sequence shown below.
The order of tightening the cap is marked with numbers and arrows
There is usually no need to replace the screws - the load is too small. We wish you success.
see also
The cylinder head gasket has smaller holes for coolant
0 2 1k
The cylinder head gasket on 2112 was broken
- 0 1 809
What is needed to replace the cylinder head gasket on a 2112?
- 0 1 1k
I unscrewed the cylinder head bolts, do I need to change the gasket?
- 0 2 1k
How to eliminate craters on the block and cylinder head?
- 0 1 0
The cylinder head gasket is a perforated sheet made of iron and asbestos or aluminum paronite with edging on the sides and holes for cylinder chambers and connecting bolts. The main task of the cylinder head gasket is to seal the connection between the planes of the cylinder block. In addition, the gasket maintains the required internal oil pressure in the engine system and also prevents mixing of coolant and engine oil.
Consequences of incorrect cylinder head installation
Correct tightening of the cylinder head is very important, since the performance of the motor directly depends on it. The cylinder head acts as a cylinder cover, and any violations in its fit affect the processes occurring inside the power unit.
Insufficient tightening of the head leads to a drop in compression due to loss of tightness at the junction of the cylinder head with the cylinder block, burnout of the gasket, breakthrough of working gases from the cylinders and their entry into the channels of the lubrication or cooling systems, penetration of technical fluids into the combustion chambers, which in turn is negative affects the functioning of the power unit and can cause very serious damage.
Excessive tightening also does not bring anything good; in this case, damage to the head often occurs - cracks appear, or fasteners are destroyed - bolts break, threads break, etc.
Uneven or incorrect tightening often causes warping of the head, due to which gaps appear at the junction of it with the block, which leads to the same consequences as insufficient tightening.
Signs of failure of the cylinder head gasket of a VAZ 2110
There are no specific warranty periods for the use of a cylinder head gasket. Its durability is influenced by such factors as: the degree of operation of the engine, its model, driving style and other reasons. However, there are several symptoms by which you can determine that the gasket has failed:
- at the junction of the block and the head there are leaks of engine oil or coolant ;
- using an oil dipstick, foreign light impurities or foam-like emulsion , which occurs when antifreeze penetrates through the connection with the cylinder head;
- the color of the exhaust changes to bluish-white, which indicates water entering the combustion chamber of the cylinder block;
- presence of oil stains in the coolant reservoir;
- The engine temperature rises due to the breakthrough of hot gases into the cooling system, which immediately heat the coolant.
Tips for replacing the cylinder head gasket
Removal and installation of the cylinder head gasket is carried out with the crankshaft set to TDC. It is also necessary to ensure that both valves of the 1st cylinder are closed.
It must be remembered that the cylinder head gasket must be changed after each removal of the engine head, even if this is not due to its unsuitability.
Part Features
The cylinder head is a structurally quite complex part. It is a massive plate in which there are channels for the circulation of fluids of the lubrication and cooling system, and technological holes - spark plugs, for injectors (in diesel engines), mounting holes.
Also on top of the cylinder head there is a so-called “bed” of the camshaft - a seat for its installation.
Despite its massiveness, the block head is a fragile part due to the voids inside, so excessive tightening force often leads to cracks in the walls and bridges.
For the manufacture of cylinder head, two types of metals are used - aluminum (the most common) and cast iron.
Preparing to remove the cylinder head
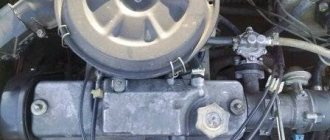
In order to install a new sealing element under the cylinder head of an 8-valve engine, it will have to be partially disassembled. First of all, remove the air filter - unscrew all the screws holding it in place and remove it.
If the VAZ has a carburetor, then this unit will have to be removed. Some people recommend leaving it in place, but in reality this is inconvenient and seriously complicates the work.
After dismantling the carburetor, the fuel pipes are disconnected from the cylinder head. Next, you need to unscrew the distributor - it is held in place by one nut. The assembly along with the wiring is removed to the side. If the fasteners are rusty or stuck, do not try to tear them off by force - spray with WD-40 and wait 5 minutes.
Read more: Changing the oil in the automatic transmission of a Hyundai Getz
Next, proceed to drain the coolant. It’s worth talking about this point in more detail. Proceed like this:
- place the car on a pit or ramp;
- remove the mudguard from the engine;
- place a container (about 10 liters) under the radiator drain;
- screw the plug there;
- open the distribution tank.
When the antifreeze leaks out of the radiator, it is also drained from the cylinder block. It has a separate plug. Place a container under it and unscrew it with a key. Upon completion of the procedure, return all plugs to their place.
Now it’s the cylinder head’s turn. First, use a socket wrench of the appropriate size to remove its casing. Place the removed nuts and washers so as not to lose them. In addition, to gain access to the head, the timing chain must also be disconnected. Carefully loosen the tensioner and remove it completely after unscrewing the gear. To prevent the chain from slipping off the last one, it is tied together with any soft wire.
Next, the camshaft is disconnected - it is attached in nine places. If the tightening is too strong, then use WD-40 again.
After dismantling the shaft, remove the fuel supply hose and exhaust manifold from the cylinder head. We will not dwell on this point - everything is simple here.
Now unscrew the head bolts - there are 11 of them (one is in the lower left corner on a separate “ear”). If the cover is stuck to the gasket, carefully pry it off using a long screwdriver as a lever (rest it on the pipe leading to the manifold).
Bolt tightening conditions
When installing the cylinder head, it is important to comply with the tightening technology, which includes a number of criteria:
Each engine has its own tightening order, which must be followed to ensure uniform tightening of the head to the block and to prevent the occurrence of stress on any surface areas. For example, on a VAZ 2105 it looks like this.
Force is another important factor for the correct fastening of this engine element. Attracting the plate is carried out in several approaches (their number differs on different motors), each of which is performed with its own force.
The cylinder head fasteners are tightened with quite a lot of force, which leads to them being pulled out. Therefore, on many engines, bolts cannot be reused; they must be replaced. But there are also motors for which replacement of fasteners is not necessary and their re-installation is possible.
All information regarding the cylinder head tightening technology is indicated in the technical specifications. documentation for the car, it is also often indicated on the packaging of head gaskets and fasteners.
The procedure for tightening the cylinder head on a VAZ 2110 during repair
It’s probably no secret to anyone that our cars need servicing much more often than foreign cars. This applies primarily to VAZ cars of all generations. As a rule, these cars are purchased by people with average incomes and constant servicing of the car at a service station is an unaffordable luxury. To save money, you need to learn how to do some work yourself. For example, it is necessary to be able to correctly tighten the bolts of the cylinder head of the VAZ 2110 8 valves, the tightening order of which is strictly regulated.
This work is difficult at first glance, but in reality, car enthusiasts, faced with it for the first time, cope quite successfully, thereby saving their time and money. It is worth knowing that the tightening of bolts on an 8 valve and 16 valve engine has some similarities and some quite important differences. For example, if their tightening torque is the same, then the pattern according to which this process occurs, that is, the order, is completely different. This must not be forgotten, otherwise all the work will be ruined by simply not following the order of tightening the bolts. If tightened incorrectly, it is quite possible that the gasket will be skewed or squeezed and, as a result, depressurize the structure and loss of performance characteristics of the VAZ 2110 cylinder head.
Lada 110
General rules for performing work, methods used
There are a number of general rules that must be followed when installing the block head:
- It is important to strictly observe the tightening torque. For these purposes, a special tool is used - a torque wrench. It is not recommended to perform this operation with regular keys;
- The head bolts must be pulled smoothly, jerking is not allowed. Since the tightening force on the last approaches is significant, extending the wrench arm with a pipe can simplify the procedure and ensure smooth, uniform tightening;
- Before installing the bolts, you need to carefully inspect the condition of the threads on them. There should be no dirt or foreign particles on the coils.
- The threads of fasteners should be lubricated with engine oil before tightening. But you should not pour grease into the holes for the bolts (especially for “blind” holes), since in the future it will not allow the fasteners to be fully tightened.
Despite the fact that each engine has its own characteristics of tightening the cylinder head, the general technology of this operation is the same. In general, two methods are used to tighten fasteners:
- In several approaches, bringing the tightening force to the required value;
- Tightening the fasteners to a certain force (in one or more approaches), and then tightening the bolts twice to a certain angle.
The tightening method is selected based on the type of bolts.
The first method is used when using non-stretching bolts (these are not used now, but they can be found on old cars). But often this type of fasteners requires tightening after a certain period of engine operation in order to compensate for the shrinkage of the cylinder head gasket. But such fasteners are allowed for reuse, and more than once.
The second method of tightening the block is relevant for most modern cars. And all due to the use of tensile bolts (the so-called TTY type).
Such fasteners, due to elastic deformation, are able to compensate for thermal expansion of the head and shrinkage of the gasket, but for this they need to be put into deformation mode (in fact, just stretched a little).
To do this, it is necessary to tighten the bolts twice to a certain angle. On some cars this angle is 45 degrees, on others it is 90 degrees.
But after the elements are put into elastic deformation mode, they will no longer be able to return to their original state, and therefore their reuse is not allowed due to the high probability of destruction.
Procedure and diagram
We advise you to tighten the torque of the screws if you have ever encountered such a process. The following will describe the general procedure for the Lada 2108, but it should be noted that each engine has its own operating nuances that need to be taken into account.
Necessary tools
You will need a torque wrench for this procedure. This tool is needed specifically for tightening screws and determining torque. It can be purchased at any specialized store, and its price fluctuates around 1,300 rubles (approximately 400 hryvnia).
Torque wrench with tensioning torque
Sometimes so-called “masters” say that it is not necessary to use a torque wrench for this procedure. They say that an ordinary wrench will work just fine, and in general, you can tighten the screws “by eye.” Naturally, it will be possible to tighten the screws, but it will be incorrect, and later this may cause other problems.
Stages
If you feel that the quality of the head screw is poor, then do not even try to tighten it. Replace it immediately to protect yourself from possible problems. In addition, before the actual procedure, you should check the quality of the thread. It is also advisable to lubricate it. Do not forget that reusing spring parts is unacceptable, since in this case you will not achieve normal tension.
The stages of tensioning the pins on the Lada 2108 are similar to those performed on classic car models. The diagram is provided below. The process itself should begin with the central bolts. It takes place in four steps.
- Using the above tool, all cylinder head bolts must first be tightened to a torque of 2.0 kgf*m. First, the two middle elements are tensioned, then the two lower and two upper ones, which are located on the sides of the middle bolts. Then you need to tighten the two leftmost and two rightmost screws, starting with the bottom ones. The order should be exactly like this. The numbers on the diagram indicate the order of the components.
- Then, in the same order, using the same tool, you need to tighten the components with a torque of 7.5 - 8.5 kgf*m.
- After this, all pins must be tightened 90 degrees.
- Then they should be turned again, again by 90 degrees.
General procedure
Although tightening the cylinder head has many nuances and features, the general technology of the operation is not complicated, it is only important to comply with the conditions.
The general algorithm of work is as follows:
- We study the documentation (tightening order and force);
- We prepare the tool;
- We inspect and wipe the surfaces of the block and head, clean the mounting holes (with a rag or compressed air);
- We lay the gasket;
- We put the block head in place (the correct placement of the gasket and head is ensured by guide bushings);
- Lubricate the threads of the fasteners;
- We install the latter in the holes and tighten them by hand;
- We specify the drawing scheme, the number of approaches and the force of each of them, as well as the time of breaks between approaches (all this is indicated in the documentation);
- We make the first approach, observing the tightening order (for convenience, you can mark the bolts according to the order with a marker). In the photo is a VAZ 2103;
- We carry out all subsequent approaches.
Some vehicles additionally require re-tightening of fasteners after a certain period of vehicle operation. This information must be indicated in the technical documentation.
When is it necessary to remove the cylinder head?
On cars that came off the assembly line of the Volzhsky Automobile Plant, regardless of how many valves the power unit has and which drive (rear or front) is used, tightening is carried out after disassembling the cylinder block. As noted above, usually dismantling the head is needed to replace the gasket, the service life of which is 60,000 or a maximum of 80,000 kilometers. The deterioration of the sealing element seriously affects the operation of the engine, and therefore it is better not to use the machine until it is repaired.
Some nuances
The tightening torque is one of the main factors for the normal fit of the block head. But this criterion is influenced not only by the applied force, but also by the fasteners themselves:
- General condition of the bolts – new or used;
- Presence of lubricant on the threaded part;
- Thread condition.
The type of power plant (petrol, diesel), as well as the number of valves, does not affect the cylinder head tightening technology. But this does not mean that the force and tightening procedure are identical for all motors, and before seating the head, you should definitely study the conditions for performing the operation and all its features.
Replacing the gasket
There are a few things to consider when replacing the gasket. So, if the cylinder head is dismantled for another need, then it will have to be changed. The old one cannot be used in the future. The new one, fortunately, is inexpensive.
After removing the worn seal, the surface located under it must be thoroughly cleaned. It is important to work carefully so as not to leave scratches. It will not be superfluous to sand the area with fine-grained sandpaper. Be sure to degrease the surface and remove all debris - even a small grain will not allow you to achieve a tight seal even with the most correct tightening.
Check the functionality of the valves of your VAZ car. If necessary, replace the seals in them. Then put the gasket on and put the head back in place.
Common Mistakes
Despite the fact that automakers clearly indicate the procedure and nuances of tightening the cylinder head, many car enthusiasts make mistakes when assembling the engine. The most common of them are:
- Pouring oil into the mounting holes to lubricate the threads (the liquid is incompressible, so poured oil will not allow the head to be properly tightened);
- Over-tightening (exceeding tightening forces leads to damage to the cylinder head and the fasteners themselves);
- The use of damaged or inappropriate keys (the edges of the bolt heads may be torn off, after which it will be problematic to tighten or unscrew them normally);
- Use of unsuitable bolts as replacements (fasteners from different engines may differ in length, thread spacing, head height and diameter);
To avoid problems in the future, you should use only fasteners designed for a specific engine and fully comply with the work conditions.
Tighten the engine bolts correctly
In the table below we have indicated the tightening torques for all threaded connections on the VAZ-2112 engine.
Tightening torque of threaded connections (table)
Measuring tool
Despite the fact that performing work according to the tightening rules requires a special approach, such a procedure will not take a lot of time.
The only thing required to perform such work is a torque wrench.
This wrench is used to measure the tightening torque.
You can get such a tool in any store, but its price is often steep and can sometimes reach 2,000 rubles.
Features of the work performed using the example of some cars
To prove the proposition that each power plant has its own characteristics of tightening the cylinder head, let’s consider the nuances of performing work on specific models.
VAZ-2112 16 valves
A number of modifications of the VAZ-2112 were equipped with two types of 16-valve power plants (factory indexes - 21120 and 21124). These two motors, despite some design features, have identical head tightening technology.
These units use 93mm long tension bolts. In this case, reuse of fasteners is allowed, but under one condition - if their length does not exceed 95 mm (if it is longer, they should be replaced). 10 bolts are used to secure the head.
Tightening is carried out in three approaches:
- The bolts are tightened according to the order with a force of 2 kg/m;
- Turning 90 degrees;
- Repeated tightening to 90 degrees.
The drawing diagram is shown below.
Between the 2nd and 3rd approaches you need to take a 20-minute break.
Since these engines use tensile bolts, additional tightening is not required during vehicle operation.
VAZ-2107
On the VAZ-2107, all installed modifications of power units are 8-valve.
The block head is attached to them with 11 bolts, 10 of which are main, and 1 is an auxiliary side bolt (installed in the side protrusion).
On this car, tightening fasteners is also performed in three approaches:
- 10 main bolts are tightened in order with a force of 3.5-4.0 kg/m;
- The same bolts reach with a torque of 11.5-12.0 kg/m;
- The auxiliary is tightened with a force of 3.5-4.0 kg/m.
Additional tightening of the cylinder head is not required when operating the VAZ-2107.
"Samara", 10th family, Priora
On models of the Samara family (2108-21099), as well as VAZ 2110-2112 with 8-valve units, tightening is already performed in 4 approaches:
- Tightening with a force of 2.0 kg/m;
- Reaching with a moment of 7.5-8.5 kg/m;
- Turn 90 degrees;
- Repeated rotation by 90 degrees.
The break between points 3 and 4 is 20 minutes.
As for the VAZ of the “tenth” family, which are equipped with 16-valve engines, their tightening technology is the same as that of the VAZ-2112 (described above).
The same applies to the Lada Priora; on 8-valve units, a method with 4 approaches is used (VAZ 2108-21099), and on 16-valve units, 3 approaches are used (VAZ 2112 with a 16-valve engine).
"Volga"
On ZMZ-406 engines installed on the Volga, according to the automaker’s technical documentation, tightening the engine block head bolts is carried out in two approaches:
- With a force of 4.0-6.0 kg/m;
- With a moment of 13.0-14.5 kg/m.
But many car owners of this car note that this technology does not allow the cylinder head to be properly tightened, so they use techniques with a large number of approaches.
A common method is the cross method, performed in 4 stages and with the following efforts:
Subsequent tightening of the bolts is not required when operating on this engine.
How to tighten the cylinder head correctly?
The head is mounted on ten bolts and centered on the VAZ 2112 16V cylinder block with two bushings. According to the book, a simpler engine with an 8-valve head (8V) could optionally be installed on the “twelfth” model. The same rules apply when installing and tightening both types of head bolts. However, the tightening torque of the VAZ 2112 cylinder head, measured in Newtons per meter, depends on the type of engine installed on the car.
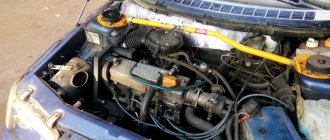
The photos below show the visual difference between the motors.
Tightening rules
When tightening, you should pay attention to the length of the old bolts for the 16V head - it should not exceed 95 mm. If parts are too long, they should be replaced with new ones.
Many engine repair specialists recommend replacing all bolts, regardless of their condition. On 8V motors longer bolts are used, their maximum length is 135.5 mm. But since a larger torque is used when tightening, the bolts reach almost the yield point. Therefore, at 8V they must be replaced with new parts.
When tightening, it is necessary to strictly follow the order of compression of the bolts, since this procedure ensures uniform fit of the parts over the entire surface. The second indispensable condition is compliance with the degree of force when tightening, since excessive force will deform the gasket and head and can cause destruction of the bolt or thread.
The video (by Marat Ibatullin) briefly outlines the process of tightening the cylinder head on an 8V engine.
Required Tools
The list of tools and materials for installing the head in place will be small:
- a head with a size of 10 mm and a knob for attaching bolts;
- torque wrench up to 50 N/m (for 16V) or up to 100 N/m (for 8V) and a 10 mm socket for final tightening;
- rags for wiping surfaces;
- new gasket between the cylinder head and the block;
- new bolts needed to mount the head.
Performing the operation without a torque wrench
Since the force is precisely indicated on all of these vehicles, it is impossible to do without a torque wrench when seating the cylinder head. But on some cars it is quite possible to do without it and use ordinary wrenches and an extension socket to tighten it.
Let us immediately note that performing work without special equipment. The tool is allowed only on “old” engines (Moskvich, VAZ of the first models).
A feature of tightening the cylinder head without a torque wrench is the need to “feel” the force applied. Otherwise, the general method of work is the same as using special equipment. tool:
- We tighten all the bolts by hand;
- We do the 1st approach, applying medium force (we try to pull all the bolts with the same force, smoothly and without jerking). Be sure to follow the tightening order;
- We carry out the second approach, increasing the force (in order to more accurately “feel” the force, the key with an increased shoulder should be pulled “toward” rather than pushed “away”);
- We do the third approach with high force (turn until the bolt stops).
One of the options for tightening without a torque wrench is to double tighten the fasteners after completing the 2nd approach.
Since not everyone can “feel” the applied force without the skills, it is better not to use the method without a torque wrench, because the consequences of improperly tightening the cylinder head are quite serious and can lead to very serious damage.
Therefore, before engine repairs involving removing the cylinder head, you should stock up on a special tool, especially since it will not be superfluous and there will always be a use for it.
What is needed to replace the cylinder head gasket of a VAZ 2110 (8 valves)
Required tools :
- ratchet with 10mm socket heads; “at 13”, “at 17”, “at 19”;
- wrench with Torx bit;
- screwdriver;
- torque wrench;
- wrench for removing spark plugs.
Suitable accessories :
- the TRIALLI gasket set has article number GZ1017022, its price is 500 rubles ;
- The VICTOR REINZ cylinder head gasket has article number 613666000, its price is 280 rubles ;
- The original VAZ (VATI) cylinder head gasket has article number 21083100302020, its price is 140 rubles .
The price of gaskets is relevant for the summer of 2017 for Moscow and the region.
Set the piston of cylinder 1 to the TDC position on the compression stroke. We fix the camshaft toothed pulley from turning with a clamp. We unscrew the candles.
A) Using a 10mm wrench, unscrew the two nuts securing the throttle drive cable bracket to the receiver and remove it. B) Remove the crankcase ventilation hoses and the supply hose from the valve cover fittings. C) Using a 10mm wrench, unscrew the two nuts securing the valve cover and remove it.
Using a 10mm wrench, unscrew the bolts of the front timing cover: two on the side and one in the center. Remove the timing cover.
We check the coincidence of the mark on the camshaft timing pulley with the installation antenna on the rear cover of the timing drive. Using a 17 key, unscrew the pulley.
Using a 10mm wrench, unscrew the nut securing the protective casing and bend the casing.
We see that the timing belt also requires replacement.
Disconnect the oil level pressure sensor connector.
Using a 10mm wrench, unscrew two nuts and one bolt securing the plug. Evenly, using a 13mm wrench, unscrew the six nuts securing the rear camshaft bearing housing. Remove the rear camshaft bearing housings from the studs.
Then, also evenly and using a 13mm wrench, unscrew the four nuts securing the front camshaft bearing housing and remove it.
Unscrew the four nuts securing the muffler to the exhaust manifold.
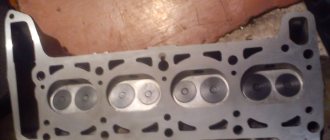
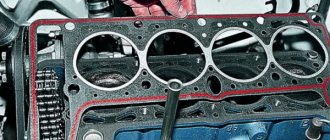
Using an E14 Torx head, unscrew the 10 bolts on the cylinder block and remove the block.
A number of repairs to the car’s power unit involve removing the cylinder head. Dismantling the cylinder head does not cause any particular difficulties, but fitting the unit into place when assembling the engine requires full compliance with the installation technology, in particular the tightening of fasteners.
Tools
Although this part can be replaced right near the house, it is better to carry out all replacement operations in the inspection hole. To replace you will need the following tools:
- Set of sockets for ratchet. Heads must be from 10 to 19;
- Torx key;
- Several screwdrivers;
- Candle key;
- Torque wrench.
A special liquid, WD-40, will also come in handy, which will help when unscrewing soured bolts. As the practice of such repairs shows, during disassembly it is often necessary to use other tools, so having them will never hurt.