February 25, 2020 Lada.Online 10 054 0
As an additional equipment, LADA vehicles can be equipped with a towing device (trailer hitch or towbar). The towing device is designed for articulated coupling of a vehicle with a towed trailer. The design of LADA vehicles provides for the possibility of installing a trailer hitch without additional mechanical influences (drilling holes, welding) on the vehicle body. The following are instructions for installing and connecting a standard towbar on cars of the Lada Priora family.
For each LADA car model, several trailer hitch options are offered for installation, differing in design, but identical in the method of attachment to the car body.
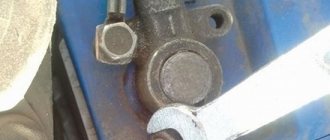
The trailer hitch, regardless of the model and design of the device itself, is attached to the rear power elements (side members) of the car body.
Tightening torques for threaded connections
:
- M6 – 9.8 Nm (0.98 kgf/m);
- M8 – 24.0 Nm (2.4 kgf/m);
- M10 – 47.0 Nm (4.7 kgf/m);
- M12 – 81.0 Nm (8.1 kgf/m).
Tow bar for Lada Priora
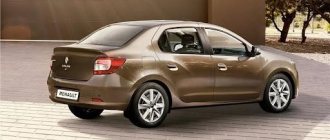
Lada Priora is almost the most common car on the road today. They make it here, quite efficiently, fully maintaining the entire technological regime, and the machine is quite capable of satisfying the average resident of our country, who only needs a car to go to work and back, and sometimes to go on vacation to the nearest forest. The car is available in three body styles: sedan, hatchback and station wagon. So everyone can choose a Priora according to their taste and needs: for some, a large and voluminous trunk is important, while others strive for compactness and maneuverability on the road.
But today we are not interested in this, but in how to install a towbar on a Priora with our own hands, and at the same time not break anything in the car.
Model selection
First we need to decide how we will look for a tow bar for ourselves. It’s not difficult to find anyone on a Priora, and it makes no difference whether it’s a hatchback or a sedan. a towbar based on a tow ball, standard for our country and all neighboring countries It is very simple, but fully capable of satisfying those who want to drive their car with a trailer. Externally, in the back of the car we can only see a pipe and a ball sticking out on it. In the part of the car that is invisible to us, there also remains a frame with brackets that secure this entire structure to the car’s subframe.
When a towbar is made, the mounting frame is first made, and therefore, depending on the depth of the subframe, the ball itself and the pipe on which it is attached are brought to the visible part. Everything is done simply on Priora - it is a standard car. The ball in this entire structure plays the role of a fixed hinge around which the trailer drawbar moves. Due to the perfectly smooth shape of the trailer, it turned out that the trailer can move both horizontally and vertically without causing any inconvenience to the driver.
There are also the following types of trailed equipment:
We install the towbar VAZ-2172 (Snowball)
- Based on a trailer bracket.
- With tow hook.
Towbar LADA Priora
By the way, the towbar usually created a lot of inconvenience when driving. Usually, when making a sharp turn, the trailer could suddenly jerk the car to the side due to the fact that it is not firmly fixed. It often happened that the hook was torn off by the trailer. This happened because after long use the hook slowly wore out and the weld simply came off.
What is the device
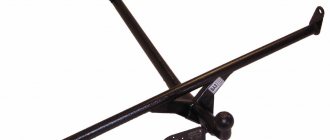
A towbar is a towing device (TCU) that is installed at the rear of a car’s subframe and is used to couple with a trailer or tow rope. It consists of the following elements:
- beams;
- two mounting brackets;
- An L-shaped pipe with a ball at the end, which acts as a hinge around which the coupling mechanism wraps;
- socket box for installing the trailer plug connector.
From behind the car you can only see a piece of pipe with a ball onto which the trailer drawbar is placed. You can make such simple equipment for your car yourself or buy a ready-made one. For Lada Priora cars, purchased coupling devices of the following brands are most often used:
- Bosal produced by Bozal-Autoflex LLC;
- 2170C from ;
- VAZ-05, produced by , is especially popular among Priora station wagon owners.
The trailer hitch is attached to the subframe of the vehicle with bolts or a welded connection.
Models of towbars with the required markings
One of the most popular models with the necessary documentation and markings is 2170C from the domestic company Trailer. The device is equipped with a ball that can be easily dismantled for any need. The towbar kit includes a passport with information about the configuration and manufacturer's details. On the packaging you can find notes indicating the maximum weight allowed for transportation. The only disadvantage of the 2170C model is the square cross-section of the beam and its large volume. The first factor does not allow installation of the device on a station wagon, and the second excludes the possibility of installation on a car with a small body. Due to the large weight, the part will weigh down the hatchback body, making the car clumsy.
READ Denner adds chief technology officer to Bosch's board of directors.
Domestic towbar
The next tow bar, which is especially popular among Priora station wagon owners, is the VAZ-05 model from the Leader-plus company. This product is a welded type device. It has a removable ball and two longitudinal fasteners. This makes it possible to securely fasten the part to the car body. Another advantage of the model is its original appearance, which visually enlarges the body of the Priora station wagon. One of the significant disadvantages of this tow bar is the lack of spacer bushings included in the kit. Because of this, if the bolts are tightly tightened, the side members of the car may bend. Installation of this model of towbar requires a fairly close location of the left corner of the product to the exhaust pipe. Therefore, in order to avoid joining the standard and removable elements of the car, drivers are often forced to perform exhaust tuning. It is also worth noting that due to its mounting method, the tow bar is not suitable for installation on a Priora hatchback or sedan . These models of domestic cars do not have holes for its installation, and to make them themselves, drivers sometimes do not have the necessary tools.
Types of devices and their features
Owners of a Lada Priora often purchase the following towbars for their vehicle.
How to attach the device
- Unknown manufacturer. Such designs are not marked; there are no manufacturer’s details in the passport or on the packaging. The big disadvantage of this product is the corner that protrudes 5 cm under the floor of the spare wheel.
- From . Model “2170-C”, equipped with a removable ball. The advantage of such a product is the presence of packaging and a passport with details, a seal and other features of the purchase process. It is necessary to take into account that the cross beam has a square cross-section and a large volume.
- . Welded structure VAZ 2110-2112-03. The optimal solution for the Lada Priora sedan is to purchase a towbar model VAZ-05. This product is equipped with a removable ball and 2 longitudinal mounting bolts. The original appearance is another advantage of this design. Please note that the removable ball of this model requires periodic removal and installation. In this case, the threads of the bolts are stretched under a certain load, gradually deforming. This towbar is sold without spacers. Without them, when tightening the bolts, the side members bend. The installation of such a unit involves the close location of the reinforcing corner of the left paw to the muffler pipe.
- From . Welded model "V-10". In terms of design and configuration, it is in greatest demand among Lada Priora sedan car owners.
Who produces towbars for Priora?
Nowadays, stores selling spare parts for cars have a huge selection of towbars from various manufacturers. The most successful of them are towbars from the following, the city of Stupino.
There are also products in stores that cannot be identified, so to speak. Experience shows that it is better not to trust such homemade products. Their reliability is not confirmed by documents. From the above three manufacturers, you can choose any one. But the most popular among Russian car owners is the B-10 towbar from AvtoS.
Basis of classification
The towbar for the Lada Priora sedan is classified according to a number of criteria.
Sign
1 manufacturer 2 price 3 components 4 technical characteristics
You can buy a tow bar for your car from an unknown manufacturer. Such a device is not marked. The disadvantage of the design is the presence of a corner protruding 5 cm under the floor of the spare wheel. You can choose similar products. This model has a removable ball and a cross beam with a square cross-section.
It is allowed to install a tow bar on a Priora from . If the Lada sedan is tuned with a device of the VAZ-05 model, then the removable ball will need to be periodically removed and mounted. This towbar is equipped with 2 bolts, the threads of which are stretched and deformed under a certain load.
The device in question is sold without spacer bushings, which has a negative effect on the side members (they bend). Installation of this model on a sedan involves the close location of the reinforcing corner of the left paw to the muffler pipe. To make your own towbar, you will need the following materials:
- ball mechanism with lugs;
- pipe 1 m long;
- corner;
- nuts, bolts with a diameter of 14 mm, washers.
If you plan to make a removable towing device, then you will need additional angles, nuts and a tailgate. The latter elements are designed for convenient transportation of loads of considerable length. Installation work is carried out using a rectangular pipe and a sheet of metal.
Which tow bar to choose for Priora and the necessary tools for installation work
Towing devices for the VAZ-2170 are produced by different manufacturers, and the products differ not only in cost, but also in quality. The most common models of towbars for Priora are from the following brands:
- Bosal (1226a and 1228);
- VasTol;
- Vamer;
- AutoS;
- Leader.
To choose a high-quality towed product for a Priora, you need to look at the cost, appearance and equipment. The average cost of a trailer hitch is 3000-4000 rubles. In addition, the package should include fasteners (bolts, nuts, washers, grommets), bushings, and may also include a socket with wiring. If you choose products from the popular manufacturer Bosal, then it is important to know the following:
- Trailed Bosal 1228 is intended for Priora 1 or pre-restyling type cars. A distinctive feature on the trailer hitch is the length of the protruding ball.
- The Bosal 1226a towbar is intended for Priora 2 or the restyled version (after 2013), but it is also suitable for pre-restyled cars.
The main difference in the devices is the length of the protruding ball. On Priora 1 the bumper protrudes less than on Priora 2 (restyling). The whole point is in the size of the bumpers, and if your Priora 1 has a new bumper (restyling), then you only need to buy a towbar with an extended ball protrusion.
Towbars from different manufacturers differ not only in quality, but also in design. The most popular are the models shown in the photo above. However, there are other modifications.
This towbar is designed for installation on a Priora station wagon. There are other options, for example, as shown in the photo below.
This model is suitable for Priora cars of all body types and has compact dimensions. However, its disadvantage is that the longitudinal fastening is less reliable than in previous versions.
When choosing a tow bar for a Priora, you should check with the seller for which versions of the car it is intended (pre-restyling or restyled) so that you do not have to change it. In any case, if the towbar is installed for permanent use, then you should not save on such a device by buying cheap models from unknown manufacturers.
This is interesting! A towing device is installed on a car not only to be able to transport trailers with cargo. Car owners also use such devices to protect the rear bumper from damage. After all, the most common type of accident is when another car drives into the back of your car, the driver of which does not react to the traffic situation in a timely manner.
After purchasing a tow bar for a Priora, you can install it. You can do this yourself. To do this, you will need to prepare the necessary set of tools (screwdriver, 19mm wrenches and preferably a torque wrench), as well as a drill with drills, a soldering iron, electrical tape, heat shrink, corrugation, etc. To prevent the occurrence of corrosion processes at the junction of the tow bar with the car body, it is necessary to treat these areas with bitumen-based anti-corrosion preparations.
Installation
Now let’s move on to the nuances of installing a tow bar on Priora cars. There are several main steps here.
So it looks something like this:
- you choose a suitable tow bar;
- buy a trailer hitch that matches the Priora design;
- install the metal part;
- install electrical wiring;
- reassemble the car in reverse order;
- carry out a road test;
- hitch the trailer;
- check it in action with an empty and full trailer;
- testing the operation of lighting equipment;
- you are happy with the result.
But the installation itself includes the installation of metal structures and work with the electrical part.
Each stage is quite important, so I’ll tell you about them in more detail separately. The attached photos are not for instructions, but rather for reference.
Mechanical installation
If you bought a good towbar, it will be equipped with stiffening plates, a lining for the trailer hitch pad, and rubber inserts for shock absorption.
Although experts recommend installation at professional service stations, not everyone adheres to this recommendation. Therefore, if you want to do everything yourself, prepare a specific set consisting of:
- drills;
- drills 12.5 mm;
- sandpaper of different fractions;
- wrenches to match the size of the bolts on your car;
- anti-corrosion composition for metal;
- rags;
- degreaser;
- water with rags to remove dirt;
- good lighting;
- inspection hole or, in extreme cases, a reliable jack.
First, you need to note in which places you will have to drill holes for the subsequent installation of the trailer hitch. Make sure there is no wiring running through there, otherwise there will be even more problems.
Holes are drilled, sanded and the exposed metal is coated with anti-corrosion compounds.
All that remains is to carefully fasten the tow bar with the fasteners included in the kit, not forgetting about the stiffening plates, inserts and shock-absorbing pads. Tighten all the fasteners and make sure that the tow bar fits properly on the Priora. If everything is ready, you can move on to the next stage.
Some craftsmen take ready-made drawings and weld towbars with their own hands. This is a stupid idea because the results can be seriously disappointing. As a result, you will still have to buy a factory trailer hitch and install it.
Electrics
This stage is more difficult to implement, because not every car owner without the proper experience is ready to do such work with their own hands.
This is a completely reasonable fear that you should not be ashamed of.
It’s better not to take risks, but to entrust the connection to professionals. After all, you risk the integrity of the entire electrical wiring, and if connected incorrectly, there is a risk of fire.
The connection goes something like this:
- access to the wiring harnesses from the Priora rear lights is provided;
- The trunk is first emptied and the mats are removed;
- the dimensions are turned on so that the tester can be used to find the required wiring on the left lamp;
- a piece of wire about 60 cm long is attached to it and marked;
- Dimensions are turned off;
- right turn is activated;
- similar markings are made;
- Next on the list is the left turn signal;
- the brake light is now detected and marked;
- all wiring is connected into a single harness;
- it is discharged through the technological opening;
- the wiring is pulled to the trailer hitch socket;
- further, according to the diagram, the marked wires are connected to the towbar electrics;
- trailer plug is connected;
- functionality is checked.
Do not forget about the mandatory need to insulate all wires. Here you need to be extremely careful not to leave exposed wire. Otherwise, the risk of burning out all electrical components, short circuits, and vehicle fire immediately increases.
These words may seem scary, but I am not at all discouraging you from doing everything yourself. It's just important to understand what potential risks you may face. That's why you need to think twice. I would give preference to an auto repairman if he lacks proper experience in working with electrical equipment.
That's all for me. I hope I was able to help you a little.
Malfunctions of auxiliary systems and ignition
P0337 - crankshaft sensor shorted to ground;
Error P0422
This failure is called "neutralizer efficiency below threshold." Eliminated as follows:
- It is necessary to turn off the car ignition and connect the diagnostics. After that, turn on the ignition and look for other errors. First of all, they should be eliminated.
- Check the catalyst manifold for damage. If there are any, then we replace it. If there is no damage, then move on to the next point.
- We inspect the exhaust gas system in the area between the converter and the muffler. It must be sealed and not damaged. If the latter are present, eliminate them. If no complaints are found, then the converter itself is probably faulty and requires replacement.
- After replacing or eliminating identified deficiencies, you need to warm up the engine to a temperature of 70 degrees and set the speed to around 2000-3000. In this mode, wait at least four minutes. The error should not appear within this period of time.
It should be noted that the efficiency of the neutralizer is checked with special gas analyzers.
About the towbar on the VAZ-2114
The process of installing a towbar on a VAZ-2114 is a rather complicated procedure, because it will require physical strength and some knowledge in the design of the car.
Before examining the installation process itself, it is worth understanding that not everything is as simple as it seems at first glance. Incorrectly installed fasteners can lead to corrosion damage to the cavities of the side members and other surfaces.
Such a destructive process will lead to rupture of the fastening elements, which in turn may result in the trailer coming off while moving and causing a traffic accident.
Everything can work out, of course, but there may be sacrifices, so installation should be carried out only in accordance with the instructions and recommendations of the manufacturer.
Depending on the type of towbar and its design features, the fastenings are already on the body itself, but you should understand that the fastening elements are not always suitable, and therefore they may have to be expanded using a drill.
Towbar "Region 12"
The example for installation was the most common towbar, which, as practice shows, is installed by the majority of VAZ-2114 owners - this is “Region 12”. The quality of these products has been proven over the years and is recommended by many motorists and automotive experts.
Now, let's move on directly to the installation, but before that, let's decide what is needed for the process. Of course, an indispensable attribute of any car repair is a set of keys and sockets. You will also need a drill with sharp metal drills, or, as a better option, a milling cutter to widen the holes in the side members. Next, a sealant will be useful for installation. And lastly, another pair of hands.
Towbar assembly algorithm
So, when the complete set is assembled, you can consider the sequence of actions aimed at installing the towbar:
- First of all, we drill out the mounting holes in the side members. After the operation, it is recommended to paint the bare metal and then treat it with anti-corrosion mastic. This will protect the iron from corrosion.
Technical data for towbar wiring location
Connecting wiring to the general electrical circuit
Types of tow bar (tow hitch)
We have sorted out the process of installing a towbar (towbar) and can directly consider the types of towbars. They are divided by design and installation method.
It is worth remembering that the towbar from model 15 will not fit the 2114, since they have different bottoms and lengths.
A clear diagram of the types of towbars that fit the VAZ-2114 can be seen below.
A type of towbar that can be installed on Lada 14 and 15 models
READ Replacing Priora radiator with Panasonic air conditioning
Mechanical part of tow bar installation
First of all, you need to take into account that the ball of the device must be in the center of the rear bumper. It is necessary to achieve maximum accuracy, because otherwise there is a risk of trailer sway. This means that the mounting bolts on the subframe must be installed according to the previously marked marks.
Before installing the towbar, prepare the following:
- Electric drill;
- Metal spacer plates to strengthen the fastening;
- Set of keys, screwdrivers;
- Anticorrosive
Please note that the station wagon received a reinforced rear suspension, so the mounting points will be different.
Pay attention to the mounting points, mark the normal extension of the device beyond the edge of the bumper so as not to scratch it each time you install the trailer. Carry out the work according to the algorithm:
- Remove the rear bumper. To do this, unscrew the mudguard mounting bolt using Torx-20. Use a Phillips screwdriver on both sides to unscrew the screws that secure the bumper to other parts of the body.
- Then unscrew the bolts securing it to the body from below. Having opened the trunk lid, unscrew the remaining bolts with the “10” key.
- Pull the bumper slightly towards you. Disconnect the wires from the parking sensors. Remove the bumper and place it on a soft cloth.
- Mark the mounting locations. Drill holes with a radius of 6-7 mm, make the same holes in the plates to make the device more stable.
- Treat everything with anticorrosive. Place the brackets, securing them with bolts.
- Install the towbar. But don't overdo it to keep the spar intact.
- Connecting electrical wiring to the Lada Priora trailer hitch socket and light alarm.
Installation of equipment
Having selected the desired towbar and all related equipment, we must begin installation. First of all, we stock up on equipment, we will need: a drill, mounting bolts, a soldering iron, anti-corrosive.
First of all, we look at the Priora sedan and select the desired location for mounting on the subframe. This should be clearly in the center of the rear bumper, since the towbar must pull the trailer exactly in the center of the car so that the trailer does not move to the side when driving. If this happens, it is guaranteed to lead to an accident.
So, we attach the brackets to the subframe and mark the places where we will drill the mounting holes. Having drilled them, you need to immediately treat them with anti-corrosion agent so that rust does not spread along the subframe.
Now we need to use the diagram to find all the signal wires from the lighting devices and connect them all to the socket on the towbar. The socket is necessary to connect or disconnect the electrical circuit of the trailer and the vehicle when the trailer is parked separately. The trailer usually already has a fork, especially if the trailer is new. To connect new wires to old ones, it is better for us to use soldering, since by simply wrapping them with insulation we risk that the wires may become disconnected at the most necessary moment and this will lead to breakdown of the car’s electrical equipment.
To connect to the electrical network, follow these steps:
- Disconnect the negative terminal from the battery;
- Remove the bar that is located inside the trunk, closer to the edge. Find the wires that go to the rear signals;
- Lead the wires to the towbar socket - you need to solder the bends to the standard wiring. Insulate connections;
- Route the wires to the outlet. Connect it, carefully closing the connections;
- Only after this can the tow bar be installed inside the device;
- Reinstall the trunk trim and then the bumper.
Features of the socket connection
To connect the towbar to the vehicle's electrical wiring, we recommend using stranded copper wire. The ideal option is a wire in which each core has a cross-section of at least 1.5 square meters. mm. The wire must have a double layer of insulation.
After connecting the trailer according to our diagram and checking the functionality of its lighting equipment, it is advisable to take care of protecting the internal elements of the outlet from moisture. It would be a good idea to use graphite lubricant, which will also prevent oxidation of the contacts.
Every year the number of car enthusiasts who install a tow bar on their cars is growing. This is due to the fact that:
p, blockquote 1,0,0,0,0 –>
- the number of organizations providing trailer rental services is increasing;
- Traveling with campers (caravan trailers) is becoming popular;
- the number of owners of hydro- and ATVs is growing;
- Carriages are widely used for transporting vehicles.
p, blockquote 2,0,0,0,0 –>
Also, many motorists install towbars and universal electrical connectors (sockets) “just in case,” assuming that in the future they may use trailers.
p, blockquote 3,0,0,0,0 –>
Let's look at the connection diagram for the towbar socket, so that later you can connect any device on a rigid hitch without any problems.
p, blockquote 4,0,0,0,0 –>
p, blockquote 5,0,0,0,0 –>
How to install a tow bar on a Priora
It must be installed so that the hook with the ball is located exactly in the middle of the rear bumper.
Installation of the tow bar on the Priora is carried out after checking the reliability of fastening
This is necessary for the safe transportation of the trailer, which should not move relative to the axis of the vehicle. Therefore, you need to determine the location for its installation on the subframe. In this case, it may happen that in order to attach the mounting bracket, you will need to do tuning of the exhaust pipe.
To install the trailer hitch you will need the following tools and accessories:
- an electric drill or welding machine if you bought or built a hitch with a welded joint;
- set of screwdrivers and keys;
- reinforcing plates;
- anti-corrosion coating, for example, Anticorrosive paste.
If you are the owner of a Priora station wagon, you should look under the car and see if the holes already in the subframe are suitable for installing a trailer hitch. To install a towbar on a Priora sedan or hatchback, you don’t have to look for such holes, and in any case, you will need either welding or drilling holes in the right place.
The procedure for installing a towbar on a Lada Priora is as follows:
- Remove the rear bumper of the car. Even if it doesn’t interfere much, working without a bumper will be easier and faster.
The towbar is secured to the reinforcement plate using a bolt and nut
- Mark locations for installing brackets and drilling holes.
- Drill holes with a diameter of 13 mm and weld reinforcing plates in this place.
- Treat the holes with anti-corrosion paste to avoid the appearance of a corrosion center at the drilling site.
- Install the right and left brackets, and attach the beam with the ball to them. When tightening the bolts on the brackets, do not use excessive force to prevent the spar from moving.
- After connecting the towbar to the vehicle's on-board network, reinstall the rear bumper.
Each car owner can install a towbar on a Priora independently, without contacting a service center, but at the same time he will have to register changes in the design of the car with the traffic police. You don't have to do this if:
- The car manufacturer provides the possibility of installing a trailer hitch;
- the installed towbar has a certificate;
- installation was carried out in a certified service center.
Holes for installing a trailer hitch are available only in Priora station wagons, which means that owners of sedans and hatchbacks can safely undertake installation of the device with their own hands, since they need to register it with the traffic police in any case.
Instructions for installing a tow bar on a VAZ-2170 Priora: mechanical installation
Almost every towbar kit contains instructions for installing a tow bar, which should be used as a basis when performing installation work. The only point is that the manufacturers of such products recommend entrusting the work at the service station to specialists, but there is nothing complicated in the procedure for installing a towbar on a Priora, so we will consider in detail each step of installing the product.
The process begins with the towbar being pre-prepared for installation. This procedure involves installing fasteners, and is carried out according to the diagram that comes with the kit. The assembly diagram of the towbar (as well as its installation) differs depending on the configuration of the product. Below are several options for towbars for Priora cars:
- The first version of the towbar for Priora. Produced by different manufacturers, and is the more common option. However, you should not choose it if the car is equipped with LPG. After all, to fix such a tow bar, you will need to dismantle the cylinder, which means you cannot do without visiting a car service center. Use the diagram below to assemble and prepare the product for installation.
- The second version of the towbar for Priora. The optimal solution for Priora cars with installed gas equipment.
Product configurations may vary slightly among different manufacturers. Let's consider both options for installing towbars on Lada Priora sedan, hatchback and station wagon cars. Most trailer hitches are universal and fit Prioras in different body types.
First, let's look at how to install a towbar on a Priora of the first type. Below are instructions that will be useful if it is not included in the kit.
Once the tow bar is prepared for the installation process, you can begin to implement the appropriate actions.
- It is better to carry out work in an inspection pit to increase the convenience of performing the relevant manipulations. And most importantly, there is no need to remove the rear bumper in order to install a towbar on the Priora.
- Having freed up space in the trunk, we attach the tow bar from below and try it on using the mounting holes. In this case, the muffler can be removed completely or disconnected from the mounting with a rubber corrugation.
- Next, use a screwdriver to remove three rubber plugs from the spare wheel niche, which are shown in the photo below. These are technological or inspection holes that are designed to drain water that gets into the trunk.
- Below in the photo are these plugs, only from the luggage compartment, from where they should be removed.
- The place for attaching one point of the towbar is ready. Before installing the product, you need to prepare two more remaining installation mounting points (transverse fastening). The second part of the towbar is attached to the spar. Below in the photo is the left side member (driver's side) with standard holes.
- The right side member (passenger part) with a marked hole, which will be used to secure the transverse fastening of the tow bar.
- We drill the holes indicated above in the side members with a 13 mm drill. This is necessary in order to make through holes in the trunk for installing M12 mounting bolts.
- We get a hole in the trunk, with the help of which we will fix the towbar.
- Next, using a 16-17 mm drill (as a rule, it is difficult for a bushing to fit into a 16 mm hole, so it is better to drill it out to 17 mm), we drill out the hole in the spar from below in order to install the bushing inside. The bushing is needed in order to ensure the rigidity of the spar, and at the same time prevent its deformation when tightening the fastening bolts and nuts.
- After drilling holes in the side members, do not install bushings inside, as they may “sink” inside, after which they will need to be removed. They must be installed together with the towbar.
- After this, you can begin installing the tow hitch. However, it is first recommended to clean the connecting points on the side member and in the lower part of the niche for the spare wheel from dirt. After this, treat them with primer and apply an anti-corrosion substance (in extreme cases, you can use a sealant).
- Next, we lean the trailer against the car and screw it in from the luggage compartment side with nuts. To do this you will need the help of a friend.
- One person leans the tow bar from below and holds it, and the second person secures it with nuts in the luggage compartment. You should immediately secure the transverse part (on the side members), and then the longitudinal part (in the niche for the spare wheel).
- In the luggage compartment, it is also recommended to treat the joints with an anti-corrosion agent or sealant to prevent the possibility of moisture penetration.
- Before tightening the nuts with a wrench to “19”, it is recommended to replace the washers from the kit with others of a larger diameter, which will eliminate the possibility of subsequent deformation of the trunk body part.
The manufacturer recommends installing the bolts so that the head is at the bottom. This is done in order to prevent the subsequent development of corrosion on the threaded part, which will make it difficult to remove the towbar. As a rule, car owners neglect this recommendation, since the legs of the bolts sticking up make the luggage compartment inconvenient to use.
Finally, tighten the nuts that secure the towbar to the spare wheel well.
To prevent the thread from rusting, it is recommended to treat it with grease or nigrol.
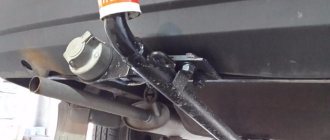
Finally, we pull the wire from the socket into the luggage compartment, after which we carry out the connection procedure, but you can read about this in the corresponding section below.
When routing the wiring harness from the outlet, it is important to consider its location. It must be pulled over the device, not under it. The photo below shows how the wiring harness from the towbar socket should be positioned correctly.
A detailed description of how to install a tow bar on a Priora is shown in the video below.
Actually a Priora with an installed trailer hitch.
Let's consider another option for installing a towing device of a different modification.
Connecting a towbar to a Lada Priora car
Installing a tow bar on a Priora is not limited to just installing the mechanical part of the device. It must be connected to the car's electrical network by attaching a connector to the socket for connecting the lighting devices of a trailer or trailer. For this purpose, the serially produced trailer hitch kit contains wires of various colors and a socket of the appropriate design, with a closing lid.
To connect the tow bar on any Lada Priora model, you must:
- Remove the strip in the corner of the trunk and part of its decorative trim. This is where the wires go to the rear signal lights and taillights of the car.
- In the wiring harness going to the taillight, you need to find the turn signal, side light, brake light, and ground wires.
- Connect the taps to the required wires to the tow bar socket. To do this, strip the corresponding cables and solder taps to them. After this, it is necessary to insulate the connection points.
- Route the connected wiring harness under the bumper, leading the ends to the trailer hitch socket.
- Connect the socket by soldering the wires according to the attached diagram. Secure the connector to the socket box.
- Reinstall the trim and trim in the trunk, as well as the car bumper.
All sockets for the towbar have identically numbered contacts and the corresponding colored wires for connecting them, namely:
- The pink color of the conductors corresponds to pins 5 and 7 on the connector, which go to the side lights of trailers;
- green and blue wires are, respectively, the left and right turn signals on Lada Priora cars, and they are connected to pins 1 and 4 of the towbar socket;
- the brake light corresponds to the sixth pin of the connector and the red or orange color of the wire;
- the black wire is ground, or the negative terminal of the battery, and it needs to be soldered to pin 3;
- The last contact of socket No. 2 is connected to the wire from +12 Volts.
Having attached the trailer and connected its plug to the connector on the trailer hitch, you need to check the operation of the signal lights. Having connected the towbar, you can consider the installation work completed.
How to connect a towbar socket
Connecting a towbar socket is not a difficult task, especially if you have such a universal component as a towbar connector. It is convenient when the socket and plug have the appropriate number of connectors. A socket consisting of 7 sockets corresponds to a 7-pin towbar plug, and a socket with 13 sockets corresponds to a 13-pin Euro wiring.
In this case, with the presence of a special connector, connecting the towbar consists of the usual combination of the socket and the corresponding socket. You should first familiarize yourself with the location and appearance of the connected connectors. If they visually match, you can try to attach one to the other.
A high-quality towbar socket has a cover that protects it from external influences while the towbar is not attached to the trailer.
Simplified connection
You can make the electrical connection a simpler procedure. To do this, you just need to combine some wiring into groups to create a more effective symbiosis of supplying electrical signals. So, you can splice the contacts of two reversing lights, 2 brake lights, side lights and fog lights in pairs, since they always light up synchronously when used. Use brackets if necessary to attach an additional socket.
Alternative connection option
The next way to connect the trailer hitch is to make changes to the electrical system of the machine. These changes consist of connecting the same wires leading to the rear light and signal electrics of the car's trailer with the wires from the coupling device. If your car has a more complex electrical circuit, you will have to spend a little more time connecting the wiring of your towbar than in the previous case.
If the light and signal lamps of your car operate without the participation of a special microprocessor, a suitable option is to connect a seven-channel (having 7 contacts) towbar connector. Before starting the procedure, check whether there are the required number of wires of sufficient, but not excessive cross-section. If necessary, you can make the wiring elements yourself by taking two- or three-core 1.5 mm copper wires marked “PVS”.
When making a direct connection, you must have both the towbar connection diagram and the socket diagram of your car in front of your eyes!
To connect, you need to feed one single-core wire to the turn signals, brake lights, fog and side lights, and license plate lights. In addition, you should connect 2 wires, which are called “to ground”, and to the reversing light (if equipped). All of the listed 11 wires make up the towbar-socket wiring.
Switching on using a matching block
When connecting a trailer hitch, a modern electronic control unit requires the presence of an adapter, that is, a coordination unit between the electronic elements of the car, the towbar and the towed part of the vehicle. With this switching on, the car's rear light signals, reversing lights and other electrically dependent elements of the car will be harmoniously combined and work smoothly.
The activation of the vehicle's towbar electronics presupposes the fact that a trailer is being used, which should notify traffic participants behind about possible maneuvers with light signals. The correct connection of electrical contacts will affect the possibility of further operation of the car with a trailer in accordance with the rules.
Schematic electrical diagrams, connecting devices and pinouts of connectors
Connecting a towbar (truck trailer) is a simple procedure. Connecting a trailer to a car is really easy, but connecting the electrical to the trailer can already be a bit of a hassle. In such cases, you will need a wiring diagram for the towbar socket. And there are several types of connectors:
- seven-pin (7 pin) European-type connectors;
- American-type seven-pin (7 pin) connectors;
- thirteen-pin connectors (13 pin);
- special connectors.
The most common types of sockets have 7 and 13 contacts. In Russia, 7-pin devices are usually used, and 13-pin sockets can be seen on many cars from Europe and the USA. The difference lies in the use of additional contacts necessary to activate fog lights and other electrical components of caravans that are popular abroad.
Rules accepted throughout the world provide for the installation of left/right turn signals and stop signals on trailers for passenger cars. The connection diagram for a passenger car trailer socket depends not only on the number of contacts, but also on the standard of the country, so a trailer with European wiring cannot be connected to a socket with Russian wiring without modification. If you install it without modification, then the right dimensions of the BTS will not light up.
Installation diagram
If the towbar on the Priora is chosen correctly, then there will be no problems with installation. And the standard installation sequence includes the following steps:
- Dismantling of some auto parts.
- Installation of the metal structure of the coupling device.
- Installation of electrical wiring.
- Reassemble the car in reverse order.
- Carrying out a road test in conjunction with a trailer. Including testing of lighting equipment.
Due to the importance of the installation stage of metal structures and electrical equipment, we will analyze these stages in more detail.
Installation of a trailer hitch on a Priora
If you bought a tow hitch of a different modification, then there will be no problems with its installation either. The procedure is slightly different from the one described above. Let's consider only the main nuances, but in general the procedure is performed in the same way. First, there are instructions that will definitely help in the process of assembling the trailer hitch.
Below we will look at the process of installing a product of this type, as in the photo below. Pay attention to the mounting feature of the left side, which differs from the tow bar in the diagram above.
And directly a detailed description of the process of installing the trailer hitch on the Priora:
- We apply the product to the bottom and mark the places where through holes need to be drilled.
- Next, we arm ourselves with a drill with drill bits and make through holes to secure the fasteners on the trunk side. First, we drill two holes with a 13 mm drill in the right side member (passenger side).
- On the left we perform a similar procedure, but only in one hole (the near one).
- Next to the left side member, where one through hole was made, you need to drill another one with a 13 mm drill. We drill it according to the markings in the car body. The photo below shows how it should end up on the left side in the trunk.
- And the holes from the luggage compartment on the right side.
- Using a “10” drill, we drill two holes according to the markings for the longitudinal fastening of the tow bar. Holes are drilled in the lower part of the spare wheel niche, with the help of which the device will be fixed.
- Using an 18 mm drill, we drill holes in the spar to install the bushings.
- Next is a matter of technology. Before installing the towbar, do not forget to treat the places where it is attached with primer and anti-corrosion agents to eliminate the possibility of moisture ingress and, as a result, metal corrosion.
- The right side is fixed using a standard plate, which comes in the kit.
- There is no plate provided for the left side, only washers. However, it is recommended to find or make a plate, which will provide an increased degree of security for the attachment point.
- Do not forget to tighten the nuts with a force of 40-50 Nm.
Finally, we run the wiring into the body department, after which we proceed to connect it. The photo below shows how it should turn out in the end.
The instructions for installing a tow bar are not complicated, and depend on the modification of the device, since products from different manufacturers have different mounting points, which means the installation features vary.
Basic faults
Exceeding the permissible load can affect the condition of the trailer hitch. Because of this, it becomes deformed, but may even break off on its own. If it has a removable ball, it may come off. The question is when the malfunction will appear - while the car is standing or while it is driving.
The second problem is the lights going out due to insufficiently strong wire connections. In order to avoid getting into an unpleasant situation, pay attention to the fastening of the bolts, the connection of wires, and their insulation. The main thing is not to exceed the maximum permissible load of the device, even if the trailer is capable of carrying more weight.
Ways to connect an outlet
There are two methods for this action - standard and universal tga.
It is worth understanding each of them in more detail.
Staff
This method is the most practical. But, it is only suitable if the truck already comes from the factory with the necessary connector for installing a Krone trailer and a MAN semi-trailer.
If there is one, then you just need to select the required plug, which needs to be connected according to the wiring on the Truck Carnehl or Schmitz.
This anti-lock installation method does not require any intervention in the electrical wiring.
Universal
If your car does not have a standard socket, you can install it yourself. The only nuance is the presence of an on-board computer in the car.
If it is missing, then to connect the contacts it is enough to use twisting, special clips, or soldering.
Installation work
More often, the towbar is equipped at the factory with a pad for the platform, stiffening plates and rubber shock-absorbing inserts. Although professionals advise installation at service stations, more often drivers are interested in how to install a tow bar on a car with their own hands. In answering this question, we will list the necessary equipment and tools. It will include:
- Drill with drills.
- Multi-grade sandpapers.
- Water with a cloth to remove dirt.
- Degreaser.
- Rags.
- Anti-corrosion composition.
- Jack or inspection hole.
- High quality lighting.
Video about installing a tow bar
The mechanical installation sequence is simple. To begin with, the driver drills holes in the appropriate places, but not in contact with the electrical wiring. We clean them with sandpaper and treat them against corrosion. Afterwards it is necessary to apply a sealant for waterproofing.
Next, we attach the towbar using the fasteners included in the delivery kit, using, among other things, inserts, shock-absorbing pads, and stiffening plates. The main thing is to carry out a high-quality tightening of all elements at the last step.
Error codes on the Priora dashboard
When entering self-test mode, combinations of numbers and letters may appear on the display indicating the part of the circuit where a malfunction is detected.
Usually, after entering the service mode, one or more numbers appear on the device:
- 2 – a critical overvoltage was detected in the on-board network, caused by a short circuit or breakdown of the unit;
- 3 – an error has been detected in the fuel level sensor, a circuit break is possible;
- 4 – there is overheating of the cooling system, or the corresponding sensor is broken;
- 5 – the thermometer that determines the temperature outside is broken or there is an open circuit in versions before 2012, mounted optionally;
- 6 – the engine has boiled, you need to wait for cooling or check the serviceability of the sensors;
- 7 – the oil pressure in the crankcase of the power plant is too low, the sump may leak or the lubricant level has dropped significantly;
- 8 – breakdown of the brake line or units of the corresponding system;
- 9 – the battery is discharged or the element is faulty; it can also appear after the car has been idle for a long time in the cold;
- E – the firmware has failed or there is a critical error in the EEPROM data packet.
READ How to seal a car battery with your own hands
Electrical wiring installation
It is better to entrust the connection to professionals to prevent electrical wiring damage. When installing electrics yourself, the steps are as follows:
- Emptying the luggage compartment, including carpets.
- Opening access to the electrical wiring harnesses of the vehicle's rear optics.
- Turn on the dimensions to search for the corresponding wire on the left lamp using a tester.
- Fasten and mark a 0.6 meter piece of wire in this place.
- Turning off the side lights.
- And turning on the right turn signal for subsequent similar markings.
- Further, the rear lights with brake lights are also determined.
- And then the electrical wiring is connected into one bundle, which is removed through the technological hole.
- Pulling wires to the towbar socket. For information on how to connect a towbar socket, read this article.
- Connecting the marked wires with the coupling electrics according to the diagram.
- Connecting the trailer plug.
- Functionality check.
At the stage of connecting the electrics, it is important to pay special attention to the insulation of the wiring, because if the standards of this stage are not followed, there is a possibility of a car fire.
Thus, choosing a towbar for a Priora is similar to the process for other cars. However, it is worth being familiar with the classification of towing devices, having information about manufacturers that produce devices specifically for this car, and also knowing how to install a towbar on a passenger car with your own hands.
Part installation steps
Models “V-10” and “VAZ-05” do not have a negative impact on the functionality of the standard parking sensors. Moreover, they can be installed on any modification of VAZ-2110 type cars, including Lada Priora. Auto mechanics recommend buying welded structures, as they are more reliable than removable counterparts.
Installation of a towbar on Priora is carried out after checking the reliability of fastening. For this purpose, special reinforcing plates are used. Their installation is described in detail in the diagram. To secure the towbar, you will need to make a hole in the car body. Its diameter should range from 12.5-13 mm.
Then the hole is treated with anticorrosive. This solution will prevent rust from appearing in this place. The towbar is secured to the reinforcement plate using a bolt and nut. At the same time, a washer is placed. The next step is to connect the towbar.
In some cases, wiring involves removing the rear bumper. To prevent moisture from entering, the wires are insulated. It should be noted that some car owners make their own tow bars.