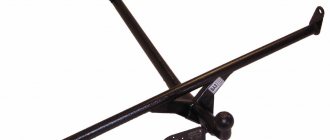
When operating a vehicle, situations arise when it is necessary to transport large items and some cargo. A car trailer is used for transportation. However, to make towing possible, a trailer hitch must be installed on the vehicle. To install a towbar on the VAZ 2114, standard places are provided for attaching a towing hitch, which allows motorists to equip their vehicles with this part.
Types and criteria for choosing a traction coupling device
The choice of towbar model largely depends on the operating conditions of the given traction element. TSUs are divided into:
- Removable.
Fairly easy to install. Thanks to this, they are very popular among owners of VAZ 2108, 2109, 2114 and 2115 models. They are mounted with 2 or 4 bolts. The process of installing or dismantling the product takes 20-30 minutes.
- Fixed.
They are a massive non-demountable structure. They are attached to the car by welding or “fitting” onto massive bolts. Devices of this type allow you to tow other cars and trailers with increased load capacity.
- Quick release.
Collapsible structures, often equipped with a mechanism that allows the towbar frame to be folded. The coupling ball is dismantled. Devices of this type are suitable for transporting low-capacity trailers.
Also, the tow bar for the VAZ 2114 has the following varieties:
- With low load capacity. The total weight of the loaded trailer must not exceed the load rating of 1500 kg.
- With increased load capacity. The curb weight of the trailer varies from 3000 to 3500 kilograms. To be able to transport such a trailer, you must have a category E driver's license.
When installing a towbar on a VAZ 2115, VAZ 2114, VAZ 2109 and VAZ 2108, the corresponding trailer hitch is used. Experienced motorists recommend purchasing traction coupling devices manufactured by "Trailer", "Leader-Plus". To determine which towbar to install on the car, you will need to study the markings. It is indicated on the body of the part.
As for the selection criteria, it is worth paying attention to the following factors:
- Manufacturing company.
Manufacturer's arguments
Every car owner who has encountered such a problem has wondered: why didn’t the developers initially provide a tow bar?
Indeed, it would be easier that way. But AvtoVAZ employees who work on designing passenger cars have a professional opinion on this matter. Naturally, they are aware that owners install towbars on the VAZ-2115 with their own hands, but they strongly do not recommend doing this.
By all means, trying to prevent:
At the same time, the instructions for the VAZ-2115 car have a clause that states that trailers can be towed, but the total weight of additional luggage should not exceed 500 kg.
In this case, how will it be possible to tow the same luggage without a trailer hitch?
What you need to prepare before installation
Before the installation process of the towbar, you will need to prepare the vehicle, as well as the tools necessary for installation. The vehicle is driven to an overpass or inspection hole, the car is de-energized, and, if necessary, the bumper is dismantled.
Among the tools for installation, you need to prepare a set of keys, an electric drill with a cutter, as well as a tow bar, wires and a socket.
Installation process
Installation of a towbar on a VAZ 2114 is carried out according to the following algorithm:
- The cross beam of the trailer hitch is attached to the side members. The rear holes are drilled using a drill with a cutter.
- Afterwards, you need to remove the soundproofing coating from the trunk side and place the plates in the rectangular holes of the side members. Fasteners are already welded to them. The holes are expanded using a drill.
- Next, a transverse beam is applied to the side members and secured with bolts. The nuts will need to be tightened, but do not tighten them.
- The final stages of installation will be the installation of a longitudinal metal part with a towbar. To do this, insert fasteners into the holes in the spare tire niche, attach the element to be installed to them, and lightly tighten the nuts. Two metal structures of the towbar are fastened together using 2 or 4 bolts, the hook is set according to the symmetry of the machine, the tow ball is installed, and the fasteners are completely tightened.
When installing a towbar with your own hands on VAZ 21099, 2114, 2109, 2115, 2108 cars, you need the instructions that are included with the trailer hitch. It is recommended that two people work together.
Option #1
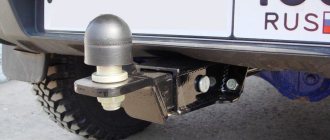
As you can see, from the outside, such a towbar is attached to the bumper beam, and the holes are drilled directly through the plate. Remote mounting points are located on the bottom of the trunk.
The main disadvantage of this design is that when towing a trailer or other vehicle, the forces that will act on the rear of the vehicle in the transverse direction will sooner or later cause the destruction of the central bumper brackets.
These brackets are weak against lateral impacts and are easily deformed during an angular impact on the bumper, causing it to move. In addition, attaching the product to the trunk floor will require strengthening the latter due to the weak external fastening.
If you are asked to help pull another stuck car out of the mud, then the bumper itself may also be deformed - its channel may not withstand the load and bend.
The only “advantage” of such a product is ease of installation.
Connecting the socket
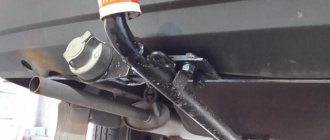
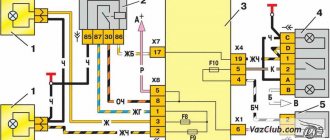
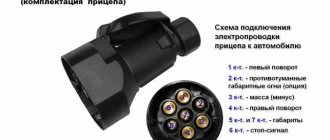
After the tow bar has been installed, proceed to connecting the socket with wires. They provide an electrical connection to the vehicle's towbar. The pinout looks like this:
- Yellow (Left turn signal).
- Free.
- Black (Mass).
- White (Right turn signal).
- Free.
- Red (Stop light).
- Blue (Parking lights).
After making the connection, the wires are pulled into the holes in the niche for the spare wheel. The socket is powered from the car's rear headlight connectors.
Recommendations for use
When operating a Lada car with a towbar, you must follow some rules for operating this part:
- After each trip, the traction element is treated with special anti-corrosion solutions, dirt and moisture are removed from it.
- The coupling ball, when not in use, is covered with protective lubricant and a special cap.
- When transporting a fully loaded trailer hitch, the vehicle speed should not exceed 90 kilometers per hour.
- Transportation of extra-heavy, large-sized trailers is carried out using a towbar with increased load capacity.
- After installing the trailer hitch, the part is registered with the traffic police.
The towbar expands the vehicle's capabilities. A machine equipped with a trailer hitch is capable of towing trailers or other vehicles. However, you should select towbars that are suitable for your specific vehicle model.
Useful video
Published on December 24, 2017A towbar is a towing device that is developed individually for each car model of a certain brand. It is used to attach a tow hitch and securely fix it.
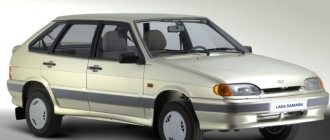
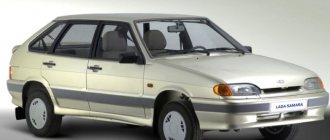
VAZ 2114, otherwise called “Samara 2”, is a five-door hatchback, a modified version of the previous VAZ 2109 model. Production of the car began in 2003. In 2007, an eight-valve environmentally friendly engine was added to the standard package. In 2008, wide moldings were replaced by narrow ones. The next generation of cars already acquired a 16-valve engine (2009). Production was stopped at the end of 2013 by the AvtoVAZ plant.
A few secrets on how to install a towbar on a VAZ 2114
Some motorists regularly use a trailer. In order to couple a trailer and a car such as a VAZ 2114, a special device is required. It's called a tow bar. This device allows motorists to transport any cargo on pre-attached trailers. If a car enthusiast does not know how to install a towbar on a VAZ 2114, then he should act according to the plan given below in the text.
The most popular types of towbars:
- flanged;
- welded;
- removable.
Each of the listed types of towbars has its own characteristics. Welded towbars are highly reliable, and removable towbars can be dismantled. Flange towbars must be installed on a special platform.
How to install a tow bar on a VAZ 2114
The first thing you should pay attention to before installing towbars is the towbar. It must be of high quality and well cooked. It will be better if the towbar is made of thick enough metal.
The dimensions of the towbar (as well as the holes) must be consistent. Under no circumstances should it be necessary to bend any parts or drill holes in order to couple the vehicle and trailer.
It is believed that before installing the towbar, you should check the quality of the paint. It must reliably protect the device from any environmental influences. This also applies to rust.
You should also prepare a complete set of necessary tools. This may require keys, as well as an electric drill with a cutter.
A few words about workmanship
Made well, the metal is thick. Well cooked. All holes and geometric dimensions were accurately maintained; nothing had to be bent or re-drilled during the installation process.
One minus - the paint job is, to put it mildly, lousy. They simply blew black paint onto the metal for show; there was no talk of any preparation (priming, degreasing the surface, etc.). As a result, bare metal sticks out in some places, and paint remains on your hands in some places as soon as you pick up the tow bar in your hands. Of course, I understand that the thickness of the metal of the towbar is enough to survive a couple of cars without rotting. But a rusty piece of iron sticking out from under the car spoils the whole appearance of the car. And it will be rusty in a couple of days.
In general, I decided to paint the part of the towbar protruding from under the car. I bought a can of black paint, sanded it a little, degreased and blew out 3-4 layers with intermediate drying for 15-20 minutes.
Installing a tow bar on a VAZ 2114
- First you need to install the cross beam. To expand the side members on the rear, use a drill with a cutter. After this, you should raise the sound insulation, which is located in the trunk area.
- The next step is to insert the plate into the holes of the side members located at the rear. If there is a need to expand the hole, this can be done using the same electric drill with a cutter. It is best to carry out such work together.
- The next step requires attaching the cross beam to the side members. After this, it must be secured with bolts as soon as possible. Next, you need to fasten the plates with already welded nuts directly onto the bolts.
- Then you need to remove the muffler. You can also simply disconnect it from the 2 rubber bands located at the back. This is necessary so that the muffler falls down under its own weight. The nuts can be tightened, but not tightened.
- Now it’s the turn to secure the longitudinal metal part with the towbar. Another stage of work is installing bolts. They should be installed in the holes that can be found in the spare tire. When this is finished, you need to attach the metal part, and then lightly tighten the nuts.
- It is necessary to connect 2 metal parts using 4 bolts. In order to do this as quickly as possible, you need to tighten the nuts not all the way. After baiting all the elements, you need to align the hook along the axis of symmetry of the machine. The fasteners should also be firmly secured.
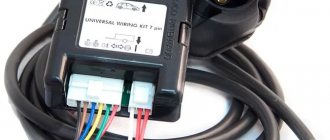
When this work is completed, you should connect the towbar to the car's wiring. These works should be performed strictly according to the instructions supplied with the device. In any case, the wire must be cut into several parts. They should be the same. When the wire parts are ready, you should strip the ends and screw them to the socket. The back of the socket should be sealed with sealant. This is needed for insulation.
The socket itself must be secured with self-tapping screws on the bracket. Instead of self-tapping screws, you can use bolts. After this, the socket should be connected to the wires of the harness. Wires should also be placed inside the trunk. This can be done through several holes that are located in the spare tire niche.
From the luggage compartment side, the wires should be tightened into knots so that they do not “come out”. Otherwise, all the work will be done in vain. If the wires are located at the bottom, they can be secured using electrical tape. Everyone can cope with this task.
Description of the technical process
- Remove the rear bumper of the car. Under the bumper mount there are two holes that open cavities inside the side members.
- Measure the distance between the outer edges of the holes inside the side members. Cut a piece from the pipe with a length equal to this distance.
- Mark the middle of the resulting segment.
- At the edges of strips 20 cm long, cut holes 5 × 5 cm. Place the strips with holes in the middle of the pipe and weld to it at a distance that allows you to insert a hook with a ball between them. If the hook has mounting holes, drill the same ones in the plates, corresponding to them, and secure the hook between them using bolts and nuts 10.
Attaching the towbar to the side members
After completing point No. 11, you have practically made a towbar with your own hands. All you have to do is install it and connect the socket to the car wiring.
Useful tips
- Due to the fact that a breakdown of the structure while driving can cause a lot of trouble. Avoid butt welding metal. Therefore, it is preferable to attach steel strips to the edges of the beam by cutting holes in them to the size of the pipe section, putting them on its ends, and then welding them.
- Do not use an angle grinder without protective glasses, and do not cook without a mask: take care of your eyes.
- If you want to paint a new towbar with your own hands, then first, thoroughly prepare its surface for painting. To do this, pickle it with any product that contains phosphoric acid to convert rust. Then sand the surface with waterproof sandpaper, pouring water on it to wash away the waste. Dry the assembly, degrease it with solvent for nitro paints or acetone, and cover it with adhesive primer from a spray can. Dry the soil according to the instructions. Sand with 400 grit sandpaper and water until the surface is evenly matte after the water dries. The surface is ready - dry, degrease with alcohol or B-70 gasoline (the solvent will smear the fresh soil). Then you can paint. After this preparation, your paint will last a very long time.
