Scheme for switching on fog lights: 1 – fog lights;
2 – relay for turning on fog lights; 3 – mounting block; 4 – switch for fog lights with a control lamp (on the left) and a backlight lamp (on the right); 5 – external lighting switch (fragment); A - to power supplies; B - to the instrument illumination regulator On cars, in a variant version, fog lights can be installed in the front bumpers. The diagram for switching on the fog lights is shown in Fig. The headlights are turned on by switch 4 using auxiliary relay 2 type 113.3747-10 installed in the engine compartment on the left mudguard. The fog lights can only be turned on if the exterior lighting is switched on with switch 5.
There are several options for mounting headlights. First of all, I will say that only options for mounting in the bumper are being considered, otherwise there is no point in PTF. The most optimal are the domestically produced OSVAR or Avtosvet headlights, they shine well, are relatively inexpensive, some of them have plastic covers, and you can find spare glasses for them, which is essential for PTF.
The easiest way to mount it is on the plastic in the bumper. This is how they fasten in many car repair shops, but this method of fastening seems to me not reliable and not durable, because it still needs to be fastened to strong metal structures. Below we will outline how to install PTF.
There are two holes in the bumper for the standard mounting location for the PTF, for the standard L-shaped fasteners. The easiest way is to lie under the bumper and attach the PTF yourself to its regular place, you will see: both the markings in the plastic and the holes in the bumper beam (there are 4 of them, two for each headlight), relative to the bumper mounting bolts, they are located closer to the edges of the bumper. First you need to screw the PTF onto the standard holes, adjust the height and width, and then adjust the tilt. After installing the PTF in the bumper, proceed to pulling and connecting the wires as shown in the diagram.
Car modifications 2115
VAZ-2115.
The very first car that was produced since 1997. It was equipped with a 1.5-liter carburetor engine producing 76 horsepower. The maximum speed was 165 km/h, and the acceleration time from 0 to 100 km/h was 13.2 seconds. VAZ-21150. The next modification, released in 1998, was equipped with a 1.5-liter carburetor engine producing 68 horsepower. was discontinued in 2000.
VAZ-2115-20. A modification of the car released in 2000, equipped with a 1.5-liter VAZ-2111 injection engine with a power of 77.8 horsepower. The maximum speed was 170 km/h, and the acceleration time from 0 to 100 km/h was 14 seconds.
VAZ-2115-40. A modification with a 1.6-liter injection engine, which has been produced since 2003. The car's maximum speed was 158 km/h, and the acceleration time to 100 km/h took 13.2 seconds.
VAZ-2115-91. A car with a 1.3-liter Wankel rotary piston engine producing 135 horsepower. The maximum speed is 190 km/h, and the acceleration time to 100 km/h is 9 seconds.
VAZ-21154. The latest modification of the car with a new VAZ-11183 engine with a volume of 1596 cm3 and a power of 81 horsepower. Produced since 2007. The maximum speed and acceleration time to 100 km/h are exactly the same as that of the VAZ-2115-40.
Pros and cons of cars
In Russia, the VAZ 2115 became the most popular. It was believed that the sedan body was more popular. However, with the advent of a large number of foreign cars, hatchbacks began to be in demand. Considering the popularity of cars among the younger generation, I want them to be in great demand. Acceleration up to 100 km. faster than the “tag”, because its weight is less. The choice of model should be determined based on your needs. The hatchback can accommodate more cargo. And if you fold the rear seats, the interior volume turns into a large trunk. It is not possible to load large cargo into the sedan.
The advantages of the 2114 include a smaller rear body. Many drivers note the parking factor - it is easier to park than a sedan
Although experienced car enthusiasts say that it is important to feel the dimensions of the car, and any parking will not be difficult
But the presence of a heavy trunk lid should also be considered a disadvantage. While driving, the fastenings become loose and extraneous sounds appear. Moreover, the “fourteenth” model has problems with rear window contamination, and only a windshield wiper can solve it.
The driving parameters are actually no different, because they belong to the same segment of the automotive industry. The cost of spare parts is low, and there are no problems with the availability of one or another part. Relatively inexpensive and the cost of repairs. In the secondary car market, the cost of VAZ 2114 and 2115 is low, which means it is affordable. With proper care and careful operation, the car will bring a lot of positive emotions.
Instructions - how to connect fog lights via a relay and a button using the example of a Chevrolet Niva
As can be seen from the diagram above, to connect the fog lights you will need:
- PTF themselves;
- fog lamp relay;
- headlight on/off button;
- fuse 10 A;
- wires and connecting terminals.
You will also need some tools for the job: screwdrivers, a sharp wire stripper and electrical tape.
- Determine the location of the relay. Since this component is small in size, it can be easily hidden behind the dashboard.
- We determine the location of the PTF on/off button;
- We measure the length of wires required for connection;
- Next, we stretch the copper wire from pin 30 to the battery (+), after installing a 10 Amp fuse in a convenient place;
- We connect the fog lamp button to pin 85 and install it in the selected location. As a rule, the front PTF button is installed in place of the standard buttons, where the plug is located;
- Relay contact 86 is connected to ground in any convenient place;
- We install fog lights. Manufacturers have made sure that those owners who wish to install fog lights do not invent a “bicycle”. The front bumpers of the Chevrolet Niva have special niches for this purpose, which are closed with plugs. In order to remove them, you need to unscrew the screws on the inside of the bumper. We insert the headlights and look at the wire markings.
- We supply the positive wire to them from pin 87, the negative wire from the car body;
- We are testing.
VIDEO INSTRUCTIONS » alt=»»>
Useful rules - you need to know
When choosing the fog lights themselves and the location for their location, you should carefully read the accepted standards, which are strictly prescribed in the traffic rules.
Thus, in Russia, only factory-certified PTFs are allowed to be installed. This is confirmed by the E22 sign in a circle, which is applied to the PTF body.
- There should be two fog lights themselves - no more and no less.
- They should be installed at a distance of no more than 40 cm from the edge of the side marker diffuser and no lower than 25 cm from the level of the road surface. Most modern cars have standard places on the bumper for installing PTF.
- If fog lights are not included in this package, plugs are installed in their place, which are easily removed and PTFs are installed in their place.
Improper installation of fog lights can lead to an accident or cause discomfort to drivers of oncoming cars. Follow all the rules and you will never get into an unpleasant situation.
Possible malfunctions and ways to eliminate them
And finally, let’s look at typical faults that can cause PTF failure:
- Burnout of lamps. We replace them with new ones (see section above).
- The fuses have failed. We open the mounting block and check fuses F8 and F9. If necessary, replace with inserts of the same rating (10 A).
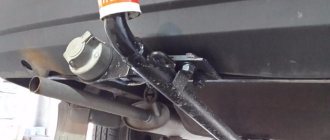
- There is no minus power supply to the lamp. We crawl under the bumper and check the wire connecting the PTF lamp to the car body. Either it is torn, or the place where it is clamped under the headlight bolt has simply oxidized.
- There is no minus power to the relay. We open the engine compartment and check the wire coming from the 86th contact of the relay to the body. Either it is torn, or the place where it is clamped under the bolt has simply oxidized.
- A break or short circuit to the body of the wires supplying the PTF bulbs. In the second case, when replacing the fuse with a working one, the latter immediately burns out. We inspect the PTF power wires, find them, and fix them.
- The headlight relay is faulty. We exchange it for a rented one and check it. If everything works, we buy a new relay.
- The PTF switch is faulty. We remove it, call a tester, change it.
- There is no voltage at the 85th relay contact. We turn on the PTF and measure the voltage with a tester relative to the body. If it is not there, we look for a fault in the mounting block.
On this, perhaps, the conversation about the fog lights of the VAZ 2114 can be completed. Now we know how to install them ourselves, and, if necessary, repair them.
Previous Fog lightsHow to install fog lights on a Gazelle Business Next Fog lightsHow to change a fog light bulb on a Hyundai Solaris
Why do you need PTF on the VAZ 2114?
Fog rarely extends to the ground, so a small layer of clear air remains between it and the earth's surface. Fog lights form a beam of light that is narrow in the vertical plane (but wide in the horizontal plane), which is directed parallel to the road surface. Thus, the PTF VAZ 2114 illuminates the fog from below and the road is well illuminated. A wide beam of light improves visibility of the roadside and side markings, which helps you avoid leaving the roadway. There is a common misconception that effective PTFs can only be made with yellow steles. In reality, both yellow and white headlights illuminate the road equally well. These colors are distinguished by the maximum light energy in the spectrum, in contrast to red, green or other light radiation. It should be remembered that even the best “fog lights” are not a panacea. In heavy fog, with correctly adjusted PTFs, visibility does not exceed 10 meters, but this is quite enough, considering the speed of movement. In some cases, cars are equipped with red rear PTFs, which improve visibility of the car during fog.
Installation and connection of fog lights is done in 3 stages:
- installation of PTF in the bumper;
- connecting wiring to the mounting block via a relay;
- installing a button in the panel.
Wiring diagram for fog lights
Well, I think everything is clear here! The diagram is not complete: the mass of the PTFs themselves on the body is not indicated, which must be done without fail. You need to secure the mass in a safe place, naturally on metal! Before fastening, be sure to clean the metal from dirt and tighten the mass well so that there is no loss of tension. Otherwise, the PTF will burn dimly and unevenly.
Installing fog lights in the bumper
As stated above, you have two options - either install a new bumper with ready-made cutouts for the PTF, or cut it yourself with a jigsaw. To do this, remove the bumper, mark the mounting holes, and cut with a jigsaw.
Next, we install the “glasses” - they cover the cutout on the outside of the bumper, they consist of two parts: a decorative one - outer and inner - attaches the glasses to the bumper using side latches and holds the PTF. (How to remove the bumper?)
Connecting wiring to the mounting block via a relay
- First of all, open the hood, find the mounting block and unscrew its two fastenings to the body on the sides, remove the cover from the mounting block.
- From the bottom of the mounting block, unfasten the two outer wire blocks marked “7” and “8”.
- Take the installation kit: put the wires from the kit on the relay.
- We add the other ends of the wires to the block of wires “7” and “8” according to the diagram.
- We plug the wire blocks back into the mounting block and fasten it back to its original place
- Next, we attach the relay to the car body in any place you like: for example, next to the same mounting block.
- We run a length of wire from the mounting block blocks (which we have already installed) to the fog lights and connect them. We also attach a lot of foglights to the car body.
Installing a button in a panel
To install the button (which comes with the mounting kit), you need to partially disassemble the front panel.
Fortunately, the factory came to the rescue and installed wiring for the PTF in all Samar configurations, so all we have to do is remove the center console and find a block in the wiring for connecting the button.
To disassemble the panel, use the article: How to remove the instrument panel and remove only the center console:
Next, find the wiring block - install the button, assemble the panel.
Next, we check the headlights for functionality.
Do not forget that the fog lights turn on only after the side lights are turned on!
After installing the PTFs, they need to be configured and adjusted!
Checking the functionality of the PTF
After the work has been carried out to connect the fog lights on the VAZ 2114, it is worth checking their functionality. If everything is done correctly, then when you turn on the side lights and press the button, voltage will begin to flow to the relay, after which the lights should light up. If you turn off the headlights, the fog lights should also go off, regardless of the position of the button. If everything is done correctly, then the next step is to adjust the light beam so as not to blind oncoming drivers. Having done this by eye, the light from the fog lights should be 10-15 meters ahead of the car, but no more. It is best to contact a service station with special equipment to adjust the headlights, or read the instructions in more detail on how to do it yourself. Useful: How to adjust the headlights and PTF on a VAZ 2114? Correct adjustment is the key to safety on the road, not only for you, but also for other road users. By installing fog lights, car enthusiasts want to get not only direct functionality, but also improve the appearance of the car. Since public roads require driving with the optics always on, fog lights can take over this function. Thus, you can install high-quality lamps in them and spend less on constantly replacing burnt-out light elements in the headlights. As described earlier, at the most unexpected moment, PTF can help you out when visibility deteriorates when driving along the highway during fog.
VESKO-TRANS.RU
AutoNews / Reviews / Tests
Which fog lights are better to install on a VAZ 2114
We found out which PTFs are best suited for the VAZ 2114. Good road lighting is very important for a smooth ride. Fog lights provide better visibility in bad weather
Even today they are used for a better look as a complement to the high beams. So at some point the question is, which PTF is better for the VAZ 2114?
VA series 1 2114
there was no fog. In the latest modifications, of course, cars that come with PTF and others have plugs for installation.
There are drivers who are satisfied with the regular version of the PTF on the VAZ. Unfortunately, most of them search and communicate to choose the best model for their car.
Types of fog lights
Fogs 4.5 types:
Headlights are made for a specific car model with the same supports and body as the original.
Universal headlights have mounts that allow you to install them on any car in the bumper, radiator grill, or hang the bumper.
Depending on the type of lamp, lights are divided into:
Halogen bulbs are cheaper than other options. However, they tend to burn out and require frequent replacement.
Xenon headlights are better than halogen PTF to illuminate the road
and last longer. But strict light curtains are imposed on oncoming drivers, and they will be fined for being too bright. LED headlights are more energy efficient and don't even have the same battery drain as the latter two headlights. They are durable and provide excellent illumination of the road. If installed incorrectly, in other words, ventilation, LED headlights overheat and become inoperable.
PTF is available in plastic, duralumin and magnesium cases. Duralumin and magnesium options are considered more durable and reliable.
Fog lights are equipped with plastic or glass light lenses. Plastic diffusers wash out over time and let in terrible light, which affects road visibility and traffic safety. If glass diffuser headlights are selected, make sure they are designed for design, you can change them.
If the fog lights
not in use, for greater safety, of course, close them with plastic plugs.
Selection bias
To determine which fog lights to install on the Vase 2114, you need to know the right aspects of choice.
Bumper Fuse Box Fog Lights
.
KIRJACH H1 VAZ 2115 fog lights unpack the car and check
Light. 900 rubles per pair Lighthouse H1 lamp 100% Super light. 200 rubles per pair Installation work. priceless.
- Strong business. The situation on Russian roads, the headlight housing must be made of a material that is resistant to damage and temperature fluctuations. It is preferable that the design includes plugs.
- Robust lights and wires, relays and lights included.
- Wide spot light, uniform light distribution and low scattering and refraction losses.
- Adjustment and adjustment of the light spot vertically and horizontally.
- Don't blind oncoming drivers.
- Easy replacement of a burnt out lamp. Look at the purchase instructions for replacing the lamp. The easier and faster this can be changed, the less time it will take for the lamp to suddenly burn out. Ideally, no further replacement is required after replacing the lamp.
- Profitability. When selecting headlights, try to avoid excessive electrical and generator loads. Lamps up to 55 W are almost always enough.
- Thick durable lenses.
- Excellent aerodynamic characteristics.
- Compliance with machine design.
and better. Of the available PTFs, in most cases the following models are installed on the VAZ 2114:
Do-it-yourself overexposure of buttons on a VAZ 2114
Replacing the standard button backlighting on a VAZ 2114 will require the preparation of certain tools, materials, as well as some time. To work you will need the following list of necessary things:
- soldering iron with a thin tip;
- solder;
- tweezers;
- small knife or flat screwdriver;
- LED elements of the desired color.
Which LEDs and in what quantities should I buy?
The buttons installed on the dashboard of the model in question come in old and new styles. In the first case, small light bulbs or LEDs are used as a backlight element, and in the second, boards with sealed SMD LEDs are used.
Bulbs, LEDs and SMD elements can be used as backlighting elements in buttons.
Each button is equipped with two LED elements: one is responsible for illuminating the button itself, and the second indicates the activation of a particular function. The exception is the low beam headlight button - it does not have a power indicator LED. Therefore, if you plan to replace the LEDs on all five buttons, you will need to purchase 9 backlight elements. The type of the latter can be determined only after disassembling the button. The old model requires 12 V LEDs with a diameter of 3 mm. The new sample uses elements marked 0805. When using standard LEDs, it is recommended to additionally install a resistor with a resistance of 500 Ohms to 1 kOhm along the power circuit (directly in the button), which will prevent the element from burning out.
To prevent the LED from burning out, it is recommended to install a resistor in series
How to remove buttons
To remove the buttons on the front console, do the following:
- Remove the negative terminal from the battery.
- We take out the plug of the on-board computer or the BC itself, if it is installed. To do this, just hook it with your finger and pull it towards you.
- We put our hand into the hole formed and feel the back of the buttons.
- Carefully press the buttons out.
- We remove the blocks with wires.
- Having completed the necessary actions with the buttons, install them in the reverse order.
Replacing the backlight of the front panel buttons
Since replacing LEDs on old and new button versions is somewhat different, each process should be considered separately.
Overexposure of old-style buttons
After removing the buttons from the instrument panel, perform the following sequence of actions:
- Pull the top of the button and remove the lid that is pressed.
- Insert a flathead screwdriver into the button and remove the inner part. You need to remove it carefully so as not to lose the springs.
- Use a multimeter to determine the polarity of the LEDs.
- We bend the leads and dismantle the LED element.
- We bend the leads of the new LEDs and insert them into the button body, observing the polarity, after which we shorten the leads with side cutters to the required length.
- Reassemble the button in reverse order.
Overexposure of new buttons
On modern buttons we change the LEDs this way:
- We disassemble the button, as in the previous paragraph.
- After opening we find a board with installed LEDs. We determine the polarity of the elements and solder them with a soldering iron with a thin tip.
- In their place, we carefully install new SMD LEDs of the desired glow color.
- We reassemble the button.
Video: overexposure of VAZ 2114 buttons
Modernization of the buttons for turning on the headlights and low beam
The buttons for turning on the headlights and low beam headlights are made as a single element. The absence of an LED indicating that the headlights are on low beam causes inconvenience to many motorists. This is due to the fact that it is often unclear whether the headlights work or not. To solve this problem, they resort to modernizing the button. In addition to the tools listed above, you will need a similar button from which the necessary parts will be removed. The finalization process itself consists of the following steps:
- Remove the button from the panel.
- Using a minus screwdriver, we pry up the keys, take them out and see that the LED is initially missing.
- We disassemble the button housing by pressing on the latches with a screwdriver. At this stage the buttons should be in the pressed position.
- We remove a couple of pins and contacts from the spare button, and then install them in the body of the element being modified.
- We take out the board with two LEDs from the spare button and replace it with the board with one LED element.
- Using a soldering iron, we connect the board to the new terminals.
- To supply power to the new contacts, we connect the contacts with copper wire according to the photo.
- Using a sharp knife or screwdriver, make a hole in the button cover.
- We assemble the part in the reverse order and install it in place.
Product change process
Anyone can replace a failed component of the low or high beam system. You will need the following tools:
- awl (thin screwdriver);
- magnet equipped with a long handle (optional).
After this, follow the instructions:
- Open the hood with the car's ignition off. Find the headlight units on both sides of the car.
- Unscrew the protective box of the light source on the headlamp from both sides. After removing the box cover, you will see under it a block with three contacts that are responsible for powering the lighting system, as well as a spring-type holder.
- Disconnect the block, and then, using a squeezing movement of the product fasteners, release the lighting element. You can remove it from the standard mounting location.
To replace and replace with another bright light product, follow the instructions in reverse order.
When do the hazard warning lights turn on?
Its use is mandatory in the following situations:
- if a traffic accident occurs;
- if you had to make a forced stop in a prohibited place, for example due to a technical malfunction of your car;
- when in the dark you are blinded by a vehicle moving towards you;
- the hazard warning lights are also turned on in the event of towing by a motor vehicle;
- when boarding and disembarking a group of children from a specialized vehicle, an information sign must be attached to it - “Transportation of children.”
Installing headlights
Before proceeding with installation, the bumper should be dismantled and thoroughly cleaned of dirt. After this, you need to make markings, having previously selected the location of the future fog lights. The best option is to install them directly under the headlights.
The holes for the PTF should be marked taking into account the size of the “glasses” - decorative plastic elements mounted around the headlights. They consist of two parts - outer and inner, fastened together and thus holding the headlights. The outer part has a special protrusion that fits inside the bumper. Its dimensions should exactly correspond to the dimensions of the installation window being cut out.
After the marking is completed, holes are drilled in the bumper for the saw to enter and both mounting sockets are cut out using a jigsaw. Their edges will need to be carefully processed with a file in order to remove all irregularities and burrs (after this treatment, the protrusion on the outer part of the “glasses” should fit into the socket without much effort, but with a certain interference).
After this, all that remains is to secure each of the headlights with a pair of bolts - and their installation will be completed.
PTF connection diagram VAZ 2114
Connecting fog lights
After the installation of fog lights on the VAZ 2114 is completed, you will need to connect them to the internal electrical network of the car in the following sequence:
- Mount the power button on the main panel. For this purpose, all trim levels of the 14th are equipped with a special boss, in the place of which it should be installed.
- Remove the speaker grille from the panel and find a pair of unoccupied connectors under it - a large one for connecting headlights, a small one for connecting the backlight of the button itself.
Installing the PTF power button
- Connect the button to the connectors, and then install the speaker grille in place.
- Open the hood and find the common fuse box.
- Unscrew the two mounting screws of the block and lift it up.
- Screw the PTF relay to a convenient place under the hood.
PTF relay installation
- On the bottom side of the common block, find the pads with numbers Ш7 and Ш8. Take a harness with 4 wires from the fog light connection kit and connect one side to the indicated pads and the other to the relay. In this case, the connection diagram for fog lights on a VAZ 2114 will look like this: leg “85” of the relay - to connector 17 of the Ш7 block; relay leg “30” - to connector 8 of block Ш8; relay leg “86” - to connector 1 of block Ш8; relay leg “87” - to vehicle ground.
- Connect the headlights with a common wire, and connect one of the headlights to the “87” relay leg.
- Connect the fog lights to ground.
This will complete the entire process of installing fog lights.
Lighting
Since the staff bumper does not have seats, they must be made by yourself. To do this you may need:
- Drill with a drill;
- Electric puzzle;
- File;
- Measuring instruments (tape measure, ruler, etc.);
- Marker;
Removing the front bumper of a VAZ 2114
, installation of PTF in
the bumper
, which does not have space for them. Continuation
On our channel you will always find a solution to your problems that you have when repairing your steel
Installation of fog lights is carried out with the bumper removed. Marking is first done on a bumper that has been cleaned of dirt. The optimal installation location is at the level of the lower air intake, but at some distance from it. It is advisable that the PTF be located strictly under the headlights.
First determine the distance at which the fog lights will be removed from the air intake. Then we'll figure out what size holes to cut. Decorative “glasses” will help with this. They consist of two halves. external (decorative) and internal (fixes the external part and the headlights themselves).
The outer half of the glasses has tabs on the inside to fit into the hole in the bumper. To determine the size of the hole, the dimensions of this mounting protrusion are measured. After we place the markings with the appropriate dimensions on the bumper.
Once the markings are complete, we will continue cutting the holes with an electric jigsaw. After this, the edges of the holes must be adjusted using a file
It is important to make sure that the outer part of the glass fits tightly into the hole
In these holes we fix the fog lights with bolted connections. All that remains is to fix the “glasses” headlights.
After installing the fog lights, we install the bumper on the car. This completes the first stage.
Methods for installing PTF on VAZ 2113, 2114, 2115
Installation of fog lights can be done in several ways. Which one to choose, each car owner decides for himself, based on his capabilities and preferences. Let's look at the most common installation options:
- Buying a front bumper with PTF.
In this case, the headlights are sold already mounted in the front bumper. As a rule, a part can be purchased without any problems at a car tuning studio and immediately installed and connected. The disadvantages of this option include high financial costs. Buying a bumper with PTF installed is the most expensive option for installing fog lights on a car. - Buying a bumper with holes for PTF.
With this installation method, you should purchase a bumper with holes for the lights and the headlights themselves with all the necessary elements (wires, relays, power button, etc.). When purchasing a bumper with holes for fog lights, you will need to purchase the lights themselves and all the necessary components for connection - Self-installation of PTF is the most common installation method, since it requires minimal financial investment.
The car owner only needs to purchase headlights with the necessary installation kit and facing elements. The most common option for installing PTF is to purchase and then install a set of fog lights yourself.
PTF location diagram on a car
Before connecting the fog lights, it is important to install the devices correctly on the front of the car. This is done in accordance with certain rules, which clearly stipulate the location of the light source. On modern cars, the installation locations for fog lights are marked from the factory.
Basically, such lighting elements are installed on more expensive car configurations. If the headlights were not installed from the factory, then the places for their installation are closed with plugs
On modern cars, the installation locations for fog lights are marked from the factory. Basically, such lighting elements are installed on more expensive car configurations. If the headlights were not installed from the factory, then the places for their installation are closed with plugs.
Fog lights on the front of the vehicle must be installed in accordance with established regulations
Is it possible to install xenon in PTF
Many car owners seek to install xenon in fog lights, arguing their actions by increasing lighting efficiency. Is this really true? Let's figure it out. First of all, when installing xenon in standard PTF housings, focusing is disrupted, which is due to a different operating principle in contrast to conventional lamps. Since standard fog lights are designed to operate with certain lamps, they simply cannot cope with xenon. The result of such changes will be too much reflection in the reflector, the rays are refracted, the light becomes blurred. A well-known situation arises - the blinding of drivers of oncoming vehicles, which increases the risk of an accident. Installing xenon in PTF is far from the most successful solution and the effectiveness of such light is questionable, so it should be abandoned.
When installing xenon light in standard fog lights, focusing is disrupted, which leads to dazzling oncoming drivers
Which ones are better?
Typically, standard optics have halogen elements; replacing them with the same ones, but more powerful, makes no sense. It is better to install LED lamps in fog lights; a good option is to replace the fog lamp with xenon (author of the video - Learning to drive a car. All the secrets for beginners.).
LEDs can be installed in PTF without restrictions, unlike xenon. Replacing a light bulb in a fog lamp does not require special equipment or specific knowledge, so you can replace it yourself. It is better to buy products from trusted brands, since cheap Chinese samples are often of poor quality and quickly fail.
When purchasing LEDs, you need to select a lamp with a base similar to the halogen counterpart. An important parameter for fog lights is brightness, measured in Lumens (Lm). Fog lights with xenon must have a brightness of at least 1000 lm.
Headlight installation
How to connect fog lights? The installation and connection procedure is described in detail below. Let’s make a reservation right away - if necessary, you can install xenon lamps in the fogs. Xenon in PTF will burn much brighter when compared with traditional incandescent lamps, but its cost will be an order of magnitude higher. Since the bumper on the VAZ 2114 does not have appropriate places for installing fog optics, the car owner will have to make them on his own.
All work on installing optics is carried out on the dismantled bumper. If you don’t know how to remove this body element, then you just need to unscrew the fasteners that secure it. The bumper itself needs to be cleaned; it is advisable to install it at the level of the lower air intake, under the headlight optics. Installation of lights must be done in specially designated places on the bumper - the so-called glasses.
These glasses must be marked in accordance with the dimensions of the optics themselves, after which the corresponding holes must be made in the bumper. The holes are cut using a jigsaw, and it is advisable to sand the sharp edges on them with sandpaper or a file. The PTF should fit into the hole as tightly as possible, so they must be securely secured with clamps. When the installation of the optics is completed, the bumper can be put back on the car.
What are fog lights for?
Before telling you about the features of installing these elements, a few words about the importance they are for the car. The main function of fog lights is to provide light. The quality and range of illumination of the roadway depend on this characteristic. If the fog lights are well configured, they are capable of illuminating up to 10 meters of asphalt in front of them, which is quite enough for safe driving at a speed of 50-60 kilometers per hour. Moreover, it doesn’t matter what weather you’re driving in - with a cloudless sky or with thick fog - this optics always copes with its function. So how do you install it in a car?
Installation and connection of front and rear PTFs on VAZ 2113, 2114, 2115
Before you begin installing fog lights, you will need to select a certain list of tools and additional elements. You can purchase a ready-made connection kit or select the necessary spare parts separately. When everything is prepared, you can mark on the front bumper a place for installing future headlights. The VAZ 2115 comes with standard holes from the factory, but in the case of the VAZ 2113 and VAZ 2114 you will need to work with a tool (a jigsaw or a drill). If you don’t want to damage the bumper, you can install the lighting fixtures on special brackets.
To install foglights in the front bumper, you need to make holes using a jigsaw or drill with drill bits, having previously completed the markings
Installation materials
As a rule, the kit for installing PTF on VAZ 2113, 2114, 2115 includes the following elements:
- headlights with bulbs;
- set of wires;
- electromagnetic relay;
- PTF power button;
- ties and clips for fixing wires;
- PTF connection diagram VAZ 2113, 2114, 2115.
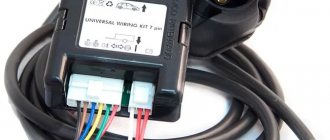
The kit for connecting fog lights should include wires with terminals and connectors, a relay, a button
The installation of the lighting sources in question must be carried out using a button and an electromagnetic relay. The fact is that fog lights consume quite a lot of current and connecting directly to the ignition switch will lead to burning and subsequently burnout of the contacts. All this can contribute to damage to the wire insulation and the occurrence of a short circuit, which may result in failure of the electrical wiring.
Step-by-step installation and connection of PTF
To install fog lights, the following procedure must be followed:
- Installation of the headlight switch button in the cabin. You can choose any location for the element, as long as the driver can easily operate the key. Quite often, the part is installed instead of plugs on the dashboard.
The PTF activation key is usually located instead of one of the plugs located on the dashboard
The relay is fixed near the mounting block, for which it is necessary to unscrew the two fastening nuts
A wiring harness with four contacts, which is included in the kit, is laid to the mounting block
Diagram for switching on fog lights: 1 - fog lights; 2 — relay for turning on fog lights; 3 — mounting block; 4 — fog lamp switch with a control lamp (on the left) and a backlight lamp (on the right); 5 — external lighting switch (fragment); A - to power supplies; B - to the instrument lighting regulator
The ground is attached to the headlights, the positive wires are connected to pins 2 and 3 of block No. 8
As for the rear PTFs on VAZ 2113, 2114, 2115, on these modifications of the car such a light source is installed from the factory, i.e. another light bulb is used in the rear light. Control is also carried out from the passenger compartment using a button, but without fixing, since a slightly different relay design (electronic) is used. It’s worth knowing about this and not trying to install a latching key.
Video: installing PTF on a VAZ 2114
Checking the performance of PTF on VAZ 2113, 2114, 2115
After the lighting devices are installed and connected, you need to check how correctly everything works. To do this, just turn on the headlights and press the key that supplies voltage to the PTF relay, after which the headlamp lamps should light up. When the headlights are turned off, the PTF lamps should also go out, regardless of the position of the fog light button. After checking the functionality of the light source, you will need to adjust the light output so that oncoming drivers are not dazzled.
After installation and connection, we check the operation of the PTF: when the lights are turned on and the fog lights are pressed, the lights should light up, when the lights are turned off, the lights should go out
Fog optics are essential lighting equipment for any car. Such devices greatly facilitate travel in poor visibility conditions. If a certain car model does not have PTF installed from the factory, you can carry out the installation yourself. This does not require special tools or special skills and knowledge.
Buying what you need
You can, in principle, buy a ready-made set along with wires, but many believe that if you buy everything separately, the number of installation options increases, and it will all cost less. So, we buy:
- Set of headlights (2 pieces);
- Plastic pads;
- Headlight frames;
- A key and a yellow indicator for it;
- Relay;
- Wires. It is better to purchase ones from an electrical equipment store, so that there are two copper conductors with double insulation (ShVVP-2 is suitable). A cross section of 0.5 mm will also be normal, but if you want to install lamps of higher power, take 0.75 mm;
- Terminal for installation to ground;
- Wide as well as narrow terminals, called mother/father. When purchasing them, it is advisable not to take them complete with wires. Installation will be more convenient if these terminals are crimped with pliers already on the connections of the installed wires.
None You can, of course, vary it, but we are talking about the convenience of the location of the buttons. Regarding the power of the lamps, 55 W is enough, no more is needed. Also keep in mind that very cheap fog lights will not last long.
Installation and connection of front and rear PTFs on VAZ 2113, 2114, 2115
Before you begin installing fog lights, you will need to select a certain list of tools and additional elements. You can purchase a ready-made connection kit or select the necessary spare parts separately. When everything is prepared, you can mark on the front bumper a place for installing future headlights. The VAZ 2115 comes with standard holes from the factory, but in the case of the VAZ 2113 and VAZ 2114 you will need to work with a tool (a jigsaw or a drill). If you don’t want to damage the bumper, you can install the lighting fixtures on special brackets.
To install foglights in the front bumper, you need to make holes using a jigsaw or drill with drill bits, having previously completed the markings
You will need:
- file;
- drill and drill bits;
- electric jigsaw;
- roulette;
- marker.
Installation materials
As a rule, the kit for installing PTF on VAZ 2113, 2114, 2115 includes the following elements:
- headlights with bulbs;
- set of wires;
- electromagnetic relay;
- PTF power button;
- ties and clips for fixing wires;
- PTF connection diagram VAZ 2113, 2114, 2115.
The kit for connecting fog lights should include wires with terminals and connectors, a relay, a button
The installation of the lighting sources in question must be carried out using a button and an electromagnetic relay. The fact is that fog lights consume quite a lot of current and connecting directly to the ignition switch will lead to burning and subsequently burnout of the contacts. All this can contribute to damage to the wire insulation and the occurrence of a short circuit, which may result in failure of the electrical wiring.
Step-by-step installation and connection of PTF
To install fog lights, the following procedure must be followed:
- Installation of the headlight switch button in the cabin. You can choose any location for the element, as long as the driver can easily operate the key. Quite often, the part is installed instead of plugs on the dashboard.
- The grille with the dynamic head is removed from the front panel. Behind it there are two blocks designed to turn on the headlights, indicate the operation of the PTF and illuminate the button.
- Having placed the button in a convenient place, connectors are connected to it. After this, the grate can be put back in place.
- The relay is installed under the hood on the partition of the engine compartment near the mounting block. To remove it, you need to unscrew 2 nuts, lift it and find 2 pads (numbers 7 and 8).
- A block with a harness of four wires with contacts included in the kit is laid to the relay block.
- The connection of the wires that come from the PTF relay is carried out according to the diagram in the following order: the wire from the 30th contact of the relay is connected to block No. 8 of the mounting block at the 8th terminal, the 87th contact of the relay goes to the 1st terminal of the connector, 86 is “ground”, and 85 is connected with the 17th terminal of block No. 7.
- The positive wires are pulled to the PTF, the mass is mainly secured to the nut of the headlights. The “+” voltage is supplied to the fog lights from the 2nd and 3rd contacts of block No. 8.
- After all connections, the connectors are installed in the mounting block and secured.
As for the rear PTFs on VAZ 2113, 2114, 2115, on these modifications of the car such a light source is installed from the factory, i.e. another light bulb is used in the rear light. Control is also carried out from the passenger compartment using a button, but without fixing, since a slightly different relay design (electronic) is used. It’s worth knowing about this and not trying to install a latching key.
Video: installing PTF on a VAZ 2114
Checking the performance of PTF on VAZ 2113, 2114, 2115
After the lighting devices are installed and connected, you need to check how correctly everything works. To do this, just turn on the headlights and press the key that supplies voltage to the PTF relay, after which the headlamp lamps should light up. When the headlights are turned off, the PTF lamps should also go out, regardless of the position of the fog light button. After checking the functionality of the light source, you will need to adjust the light output so that oncoming drivers are not dazzled.
After installation and connection, we check the operation of the PTF: when the lights are turned on and the fog lights are pressed, the lights should light up, when the lights are turned off, the lights should go out
Fog optics are essential lighting equipment for any car. Such devices greatly facilitate travel in poor visibility conditions. If a certain car model does not have PTF installed from the factory, you can carry out the installation yourself. This does not require special tools or special skills and knowledge.
Types of fuel pumps
Serial production of the “ten” began in 1995, that is, at a time when domestic cars were still equipped with carburetor systems. Mechanical fuel pumps were installed in them to pump fuel. This pump operates directly from the car engine.
For proper operation of the carburetor, high pressure is not required, and therefore the pump has a relatively simple design, similar to water pumping systems. It is installed directly under the hood of the car, which certainly makes it easier to service or replace.
With the advent of injectors, the design of the fuel pump was also modified; it became electric. The principle of its operation has also changed. If the operation of a mechanical pump requires the starter to start rotating the crankshaft, then in the injection system the fuel pump is first energized, which, using a built-in electric motor, creates the required pressure in the line, and only after that the engine starts.
This type of fuel pump is installed directly into the fuel tank.
Thus, there are two types of fuel pumps: mechanical and electrical.