Print this article Font size 16
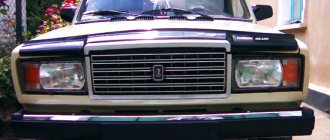
Fog lights or simply PTF are an important element of the lighting system for a car. Alas, not all manufacturers equip their cars with these devices. AvtoVAZ with its model 2114 is no exception. PTFs for the fourteenth are available only for an additional fee and in the most expensive configuration.
Not everyone sees the point in buying the most complete version just to get PTF. An excellent solution is to install foglights yourself.
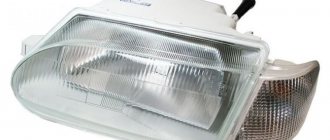
Beautiful and effective
What are fog lamps for?
The main task of the PTF is to illuminate the space in front of the car. Correctly adjusted “fog lights” can illuminate a section of road 10–15 meters long. This distance is quite enough for safe movement by car in poor visibility conditions. The switching on and off of such lighting devices must be fully controlled by the driver.
Adjustment of fog lights is carried out during their installation. The procedure does not take much time, but requires care and precision. You can install the rear and front PTFs yourself.
How to install and connect PTF?
Installation and connection are carried out in 3 stages:
- We install the PTF in the bumper.
- We connect the wiring to the mounting block via a relay.
- Install a button in the panel.
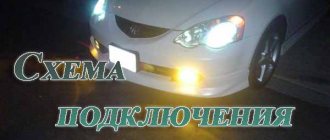
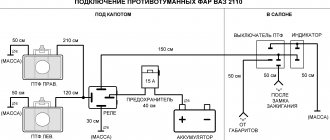
Connection diagram
Well, I think everything is clear here! However, the diagram is not indicated in full: the mass of the PTFs themselves on the body, which must be done without fail, is not indicated. It needs to be secured in a safe place, on metal of course! Before fastening, be sure to clean the metal from dirt and tighten the mass well so that there is no loss of tension. Otherwise, the PTF will burn dimly and unevenly.
Bumper installation
As stated above, there are two options - either install a new bumper with ready-made cutouts for the PTF, or cut it yourself with a jigsaw. To do this, remove the element, mark the mounting holes, and cut it.
Next, we install the “glasses” - they cover the cutout on the outside of the bumper, they consist of two parts:
- Decorative - external.
- Internal - attaches glasses to the bumper using side latches and holds the PTF. (How to remove the bumper?)
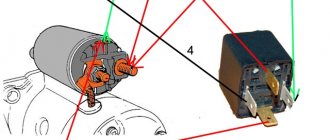
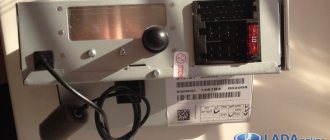
Connecting wiring to the unit via a relay
Relay with wire set
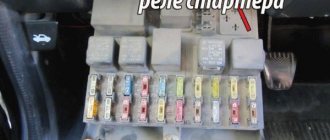
- First of all, open the hood, find the required block and unscrew its two fastenings to the body on the sides, remove the cover.
- From the bottom of the mounting block, unfasten the two outer wire blocks marked “7” and “8”.
- Take the installation kit: put the wires from the kit on the relay.
- We add their other ends to the block of wires “7” and “8” according to the diagram.
- We stick the pads back into the mounting block and fasten it back to its original place
- Next, we attach the relay to the car body in any place you like: for example, next to the same block.
- We run long wires from the mounting block blocks (which we have already installed) to the fog lights and connect them. We also attach the PTF mass to the car body.
Installation diagram of fog lights
The connection of fog lights is carried out according to certain rules. They, first of all, relate to the placement of PTF on the car. The locations for installing headlights are strictly defined.
Layout of daytime running lights
Manufacturers of modern car models pre-mark the PTF installation locations on the bumpers. As a rule, such lighting elements are most often available in the luxury version of the car. If the headlights themselves are missing, then their installation sites are closed with special plugs.
Distance at which fog lights can be placed
Installation methods
There are several options to equip your car with a fog light system. The choice depends on your personal preferences and capabilities.
| Way | Peculiarities |
| Buying a bumper with built-in PTF | Such bumpers are bought at a tuning studio, where everything will be connected and connected for you. The disadvantage of this option is the high cost |
| Buying a bumper from a VAZ 2115 and installing it yourself | To do this, you will have to buy a bumper from an older model, which has holes for fog lights. All that remains is to find a suitable set of PTFs and install them |
| Purchase of PTF and facing elements - glasses | Today this method is in greatest demand because it allows you to do the installation yourself for little money. |
The standard PTF kit includes several elements:
- Headlights;
- Light bulbs;
- Switching relay;
- Set of wires;
- Connection diagram;
- Button to turn on/off PTF.
When choosing a set, pay attention to the fact that the headlights match the shape of the glasses, that is, the facing elements.
Standard kit
Today, for VAZ 2114 owners who want to install fog lights, it is recommended to choose rectangular kits from the Kirzhach company. It is used for factory installation of PTF on expensive versions of the model.
Xenon in PTF
Many car owners are thinking about installing xenon lamps in their fog lights. Is it good? Not really.
The thing is that when installing xenon in the PTF, focusing is disrupted. The operating principle of xenon is somewhat different compared to conventional Kirzhach type lamps.
Standard PTFs are designed for certain types of lamps, so they cannot cope with xenon. As a result, excessive reflection is observed in the reflector, rays are refracted, and the light is blurred. Where does this lead? To blind oncoming drivers.
The xenon option is not a practical or successful solution. Therefore, we recommend that you avoid it.
Another option is a combination of xenon and yellow fog lights. You will need H1 xenon bulbs, which are mounted in a bottle cap and only then placed in the headlight. This way the light beam has smoother boundaries, does not blind oncoming traffic, and better illuminates the roads in bad weather. Only after installing this combination lighting, be sure to make sure that your headlights really do not blind oncoming cars.
If oncoming cars stubbornly continue to shine their high beams on you, try adjusting the light beam. If this does not help, it is better to abandon xenon.
Required parts and tools
If you decide to install fog lights on a VAZ 2114 yourself, in addition to the kit of the element itself, you need to have a suitable tool for the job on hand:
- Drill and drill bits;
- File;
- Electric jigsaw;
- Tape measure and marker.
Don't forget that additional wiring will be required, so you will need:
- Set of wires;
- Electromagnetic relay;
- PTF power button;
- Ties and clips for fixing wires.
Perhaps everything will come as a set when purchasing fog lights, but it is best to purchase according to the list and not be distracted during the work by unnecessary trips to the auto store.
Useful : 7 reasons why foglights do not light up
The fog lights must be connected via a button and a relay, since the system has high battery consumption. If you neglect this advice, you may later encounter problems with rapid current consumption while parked. A kit for connecting fog lights can be found in car stores, the price is about 500 rubles. And light elements from a good company Bosch will cost about 1000 rubles.
Why do you need PTF on the VAZ 2114?
Fog rarely extends to the ground, so a small layer of clear air remains between it and the earth's surface. Fog lights form a beam of light that is narrow in the vertical plane (but wide in the horizontal plane), which is directed parallel to the road surface. Thus, the PTF VAZ 2114 illuminates the fog from below and the road is well illuminated. A wide beam of light improves visibility of the roadside and side markings, which helps you avoid leaving the roadway. There is a common misconception that effective PTFs can only be made with yellow steles. In reality, both yellow and white headlights illuminate the road equally well. These colors are distinguished by the maximum light energy in the spectrum, in contrast to red, green or other light radiation. It should be remembered that even the best “fog lights” are not a panacea. In heavy fog, with correctly adjusted PTFs, visibility does not exceed 10 meters, but this is quite enough, considering the speed of movement. In some cases, cars are equipped with red rear PTFs, which improve visibility of the car during fog.
Useful video
You can glean additional interesting information from the video below:
If you have already changed the bulbs in the VAZ 2114 foglights, the process will only take a few minutes. On some models, the PTFs are combined with head optics, so to replace the lamp you need to disassemble the main headlights.
- Luminous flux: 1800 / 1800 lm
- Power: 20 / 20 W
- Warranty period: 1 year
- Luminous flux: 1800 lm
- Power: 18 W
- Warranty period: 1 year
- Luminous flux: 1600 lm
- Power: 20W
- Warranty period: 1 year
- Luminous flux: 80 lm
- Power: 0.8W
- Warranty period: 1 year
- Luminous flux: 800 lm
- Power: 5W
- Warranty period: 2 years
- Luminous flux: 25 lm
- Power: 0.4W
- Warranty period: 1 year
- Luminous flux: 150 lm
- Power: 1.3W
- Warranty period: 3 years
- Luminous flux: 150 lm
- Power: 1.3W
- Warranty period: 3 years
- Luminous flux: 120 lm
- Power: 0.85W
- Warranty period: 1 year
- Luminous flux: 1000 lm
- Power: 7 W
- Warranty period: 2 years
- Luminous flux: 660 lm
- Power: 7 W
- Warranty period: 1 year
- Luminous flux: 800 lm
- Power: 21 W
- Warranty period: 1 year
- Luminous flux: 260 lm
- Power: 4.3 W
- Warranty period: 1 year
- Luminous flux: 60 / 800 lm
- Power: 0.5/5W
- Warranty period: 2 years
- Luminous flux: 80 / 400 lm
- Power: 0.6 / 3.6 W
- Warranty period: 1 year
- Luminous flux: 150 lm
- Power: 1.3W
- Warranty period: 3 years
How to replace a lamp
Before replacing the light bulb, you need to buy a new one with the same parameters. It is better to choose reliable brands from well-known manufacturers. Before replacing, it is better to lift the car on a lift or jack, or place it over a hole.
- Remove the negative terminal from the battery.
- We find the fog lamp power supply.
- Slide the rubber protection along the headlight.
- Disconnect the connector and block.
- We move the spring clips away from the headlight reflector (we remove the loops of the clips from the hooks).
- We take out a light bulb with a wire.
- We connect and install a new lamp.
- We assemble the headlight.
- Checking the operation of the new light bulb.
The old light bulb is removed along with the wire. The new bulb should have exactly the same wire as the old one.
Checking the functionality of the PTF
After the work has been carried out to connect the fog lights on the VAZ 2114, it is worth checking their functionality. If everything is done correctly, then when you turn on the side lights and press the button, voltage will begin to flow to the relay, after which the lights should light up. If you turn off the headlights, the fog lights should also go off, regardless of the position of the button. If everything is done correctly, then the next step is to adjust the light beam so as not to blind oncoming drivers. Having done this by eye, the light from the fog lights should be 10-15 meters ahead of the car, but no more. It is best to contact a service station with special equipment to adjust the headlights, or read more detailed instructions on how to do it yourself. Useful: How to adjust headlights and PTF on a VAZ 2114? Correct adjustment is the key to safety on the road, not only for you, but also for other road users. By installing fog lights, car enthusiasts want to get not only direct functionality, but also improve the appearance of the car. Since public roads require driving with the optics always on, fog lights can take over this function. Thus, you can install high-quality lamps in them and spend less on constantly replacing burnt-out light elements in the headlights. As described earlier, at the most unexpected moment, PTF can help you out when visibility deteriorates when driving along the highway during fog.