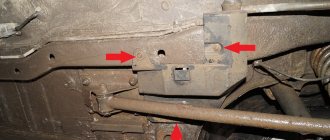
The green control wire from terminal 85 is brought into the interior; drilling of the engine shield is allowed. In this case, the installation of PTF usually does not require separate preparation of the installation site, since the fog lamps are placed in ready-made places, covered with plugs.
If there is no free button on the instrument panel, you will have to mount it in a convenient place. We also recommend reading the article on how to connect a radio with your own hands. The benefit from such illumination is zero, but such a technique will be fully blinding. how to connect a car relay (light ignition, etc.)
Pairs of terminals and interchangeable.
When using non-original headlights, there may be discrepancies in dimensions and mounting points.
Some fans of SUVs mount additional lights at the level with standard optics or on the roof of the car.
This technique eliminates the possibility that the driver may forget to turn off the PTF on his own. Volgograd region Available with low beams, running lights or fog lights. PTF Priora COMPLETE INSTALLATION of wiring, connection to the ignition system
Rules for installing fog lights
Like most automotive equipment, fog light devices must be installed and located correctly, in compliance with the specified standards.
The traffic rules say that fog lights can only be installed in a quantity of two.
They should be located:
- No more than forty centimeters from the side surface of the vehicle (along the outside of the headlight);
- At least twenty-five centimeters from the road (along the lower edge of the headlight);
- The light gaps of the fog lights must be below the upper edge of the light-transmitting opening of the low-beam headlights;
- The visibility angle of fog lights, within which they are not cluttered with vehicle components, should be: +15–10 degrees in the vertical direction, +45–10 degrees in the horizontal direction.
Anti-fog units should only be connected together with the dimensions. When there is no space on the car for such headlights, you need to choose it.
What are fog lights for?
Before telling you about the features of installing these elements, a few words about the importance they are for the car. The main function of fog lights is to provide light. The quality and range of illumination of the roadway depend on this characteristic. If the fog lights are well configured, they are capable of illuminating up to 10 meters of asphalt in front of them, which is quite enough for safe driving at a speed of 50-60 kilometers per hour. Moreover, it doesn’t matter what weather you’re driving in - with a cloudless sky or with thick fog - this optics always copes with its function. So how do you install it in a car?
DIY installation and connection
Self-installation of fog lights begins with creating a connection algorithm. A carefully designed plan helps eliminate unnecessary wiring and ensures the electrical chain functions smoothly.
It is recommended that installation work be carried out in a garage, but most car owners carry out installation operations outside.
Initial stages of installation
First, the main panel is removed - there are two light bulbs for the stove regulator. They will not affect the operation of the fog lights in any way, but at the same time their wiring will be needed in the future.
- To find a two-pin socket, you need to run your hand along the cord until it ends.
- It is of great importance, since this is where the first contact on the relay will be placed.
- Then the cord is connected to the stove backlight socket, and the rest of it goes to an isolated button for connecting the fog lights.
Connection diagram for DRL via 5-pin relay
This scheme is the most correct and automated; I recommend connecting the DRLs according to this scheme. This circuit uses a 5-pin relay. Let's talk a little about the operating principle of a 5-pin relay. The 5-pin relay has 2 power outputs. In the normal state, the first of the power terminals is closed, the second is open. After applying a control signal to the relay, the first output will become open and the second will become closed. This seems complicated, but let's look at an example and everything will become clear.
- Contacts 85 and 86 are control contacts. Depending on whether there is voltage on them or not, contacts 87 or 87A close;
- Contact 30 – power supply contact of the relay. It is to this that voltage must be supplied to power consumers;
- Contacts 87 and 87A – contacts for connecting consumers.
Let me give you an example. There is no voltage on contacts 85 and 86; power through the relay goes to the consumer at contact 87A. There is voltage on pins 85 and 86, the relay switches power to the consumer on pin 87.
- We supply power to the DRLs and headlights through pin 30. For greater automation, take power from the main circuit of the car, which turns on when the ignition is turned on;
- We connect DRLs to contact 87A, which will always be on;
- We connect the headlights to pin 87, which will turn on only when the DRLs are turned off;
- To contacts 85 or 86 (it doesn’t matter), we apply a control signal from the headlights button in the cabin;
- We connect the remaining contact 85 or 86 to the car body.
With this connection, either the DRLs or the headlights may work. When the car is turned off, both the DRLs and headlights are turned off.
Price: $1.66
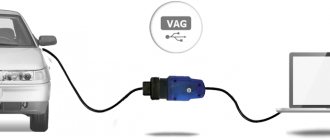
Go to the store
In today's review, I will share with you my impressions of a 5-pin automotive relay purchased on eBay, and also show one of the possible options for its use.
The relay was ordered almost simultaneously with the DRL kit that I talked about a few days ago. For what? Because when using a standard connection, when turning on the side lights or low/high beams, the DRLs still continued to light up. I didn’t find anything good in this, and therefore I began to think about automating their shutdown when turning on the headlights or low beam. The simplest and most logical option seemed to me to be using a relay.
By the way, this is one of the few purchases that I went to the local auto parts store before making. Imagine my surprise when I saw the price in the VAZ store: relay - 5 rubles (about $2.5), a block for it - 2.5 rubles ($1). Total, $3.5 per set offline with us without waiting, versus $1.66 with them. The choice is obvious
Connecting contacts
How are these headlights connected through the relay further? To ensure that the system has 12V voltage from the side lights and the eighty-fifth contact, a cord is routed to the relay. Then the eighty-seventh contact under the pedals is pulled to the automatic transmission.
How to properly connect fog lights via a relay?
- The instructions contain pins 30, 85, 86 and 87.
- They, according to the algorithm, are connected.
- A fifteen-amp fuse is installed here.
- In addition, it is recommended that it be located next to the generator.
- Then the eighty-sixth contact. Everything is easy here - it connects to the body.
Video
The wiring diagram for installing fog lights is shown in a video filmed for the “Car Lover” channel.
and so you are about to install fog lights! but you don’t really understand how, there seems to be a lot of information about this on the net, and there are also a lot of diagrams, but we imagine that PPC you don’t understand the diagrams,
I will try to write a very detailed report that after that Any person was able to connect them right next to the house, and does not pay anyone any money! The most important thing is to remove the battery terminals!
I will describe it according to my Matiz! but this BZ can be connected to anyone! so, let's begin! first what we need!
1) the FOGS themselves!
I didn’t take any photos, so I’ll explain it using other people’s photos and on a piece of paper! I’m not a walker, but it doesn’t matter, the main thing is to make it clear!
and so let's go! According to GOST, it is necessary for the fog lights to be turned on with the current dimensions (but this does not mean that we cannot drive with the dimensions but without the fog lights), that is, if the dimensions are turned off, then the fog light button will click to nothing! but when you turn on the headlights, you can use the foglight button to turn these same foglights on or off!
Let's start with the location of the RELAY! you can put it anywhere, even in a common block, I didn’t bother and put it behind the instrument panel above the radio, so I’m writing as I did) we remove the black (who didn’t paint) central panel, and we see this, that’s where I threw the relay
that is, after these actions we already have a 12 volt circuit from the dimensions, then a button that breaks the circuit and then a relay 85 contact)
Then we pull pin 87 through the plug under the pedals and pull it to the AKUM! don’t forget to put a fuse, it is placed between the positive of the Akum and relay 87 contact (put the fuse closer to the Akum) we’ve passed half the way, let’s go further, we throw the 86 contact of the relay on the body, or the minus (most often the black wire) it would be nice to extend it to the Akum too, but this not necessary!
all that's left is the fog lights themselves,
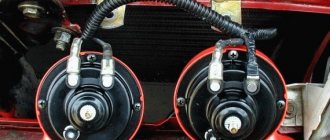
let's start with the front end, the fog lights are installed in their normal place, and there are 2 wires, plus and minus, coming from each headlight! with a minus, as always, throw it on the body, or connect 2 minuses from two headlights and connect them to the minus Akuma (it doesn’t matter! It’s just that if you throw it on the body, you need to pull fewer wires! But connect the pluses from 2 headlights and pull them into the interior through the same plug as the plus on the Akum, ...pulled it out? Now lift it up to our relay so that the wires are not visible (it’s also more beautiful) and connect it to connector 30, well, don’t assemble everything yet, you never know so! so as not to take it apart again! go put the terminals on the battery... I’ll wait here for now) now turn on the dimensions and check if they work! (of course they work) well, try the fog lights, if everything works then you can hide everything and put it back together, check that there is no short circuit anywhere! and insulate all bare wires)
About wiring
Now we need to deal directly with the fog lights. It’s no secret that only 2 cords come out of any headlight (“+” and “-”, respectively). The latter is connected to the body, that is, it is a mass. Then it is lifted onto the relay so that the wiring is not visible, and is connected to the battery.
This procedure is quite simple, so even a novice car enthusiast can handle it.
Basic recommendations for driving techniques
Safety measures during fog on the road also include some driving features. The atmospheric phenomenon itself is not as dangerous as excessive faith in one’s own experience and ability to cope with any situation.
Try to avoid sudden braking and sudden stops. If you need to stop, do it smoothly. To warn motorists behind you, press the brake several times. Before doing this, turn on the turn signal (right).
When making a detour, it is recommended to personally make sure that nothing will interfere with this action. Overtaking in fog is prohibited, even if you are sure that there is no one on the road.
In the daytime, to expand the visible part of the road, it would be more advisable to use stronger main headlights. Using special fog lights will make your car more visible to other drivers.
There is one more feature when driving in foggy conditions, which many motorists forget about or do not pay attention to. It lies in the fact that the road surface becomes wet and slippery due to the settling of water vapor. This makes the grip of the wheels on the asphalt surface weaker.
At night or on cold autumn days, moisture on the road may freeze and ice may form.
In such a situation, you should exercise maximum caution and composure. Don't be distracted from the movement and watch how the car behaves
If you have little driving experience, then in such conditions it is better to wait out bad weather conditions in the parking lot.
Installation of PTF in the front panel and adjustment
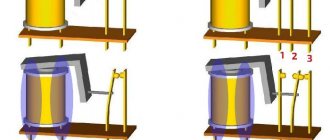
There are three installation methods:
- Into standard holes;
- On the outer bracket;
- In a closed bumper, not intended for mounting headlights.
Customization is done using a homemade template. It is mounted perpendicularly at a distance of five meters from the car headlights. The adjustment is carried out until the upper edge of the light spot coincides. The compliance boundary is placed 100 mm below the height of the central part of the lamps.
Adjusting the fog lights ensures better visibility for the driver and reduces the likelihood of blinding oncoming drivers.
Helpful information
How to adjust headlights with your own hands: adjusting low beam and PTF
In conclusion, it should be noted that adjusting the fog lights done by yourself will not be as accurate as it will be done by specialists in a car service center. The main distinguishing point is the presence of a special regoscope device, which is equipped with a measuring optical angle. However, the millimeter precision with which professionals adjust foglights is hardly worth the money and time spent.
Published: 05/01/2018
Fog lights. For some, this is additional lighting, the need for which arises extremely rarely; for others, it is an opportunity to stand out and make the appearance of their car more attractive. However, in fact, PTFs are indispensable assistants in conditions of poor visibility during fog, rain or snowfall.
It is these small and unremarkable little helpers that save thousands of motorists every day, allowing them not to get lost in the fog on the road. In most cases, fog lights are installed at the front, although cars often have PTF in the rear. But you should not assume that the rear lights are the same as the front ones; these are a completely different type of fog lights, which allows you to make the car more visible in poor visibility conditions. But, unfortunately, just having fog lights on a car is not enough; without proper configuration and adjustment, these PTFs will be of little use...
Today, dear friends, on FaraInfo I want to talk about how PTFs should be installed correctly, as well as how fog lights are adjusted.
- traffic regulations;
- GOST 8769-75;
- As well as UNECE rules.
These documents state that lighting devices must be installed on vehicles higher than 25 cm from the road surface. The maximum permissible distance from the PTF to the external dimensions of the vehicle should not exceed 40 cm.
Adjusting headlights, VAZ 2108, 2109, 21099 cars
The light beam, in turn, must also meet the following requirements:
- The light beam should be directed downward, and its upper boundary should be clear;
- The horizontal dispersion angle should be no more than 70°.
As you understand, PTF adjustment must be carried out taking into account these requirements. This will not only ensure your safety on the road, but will also avoid dazzling other road users, as well as unnecessary attention from traffic cops.
The above documents also stipulate the conditions for using fog lights. Thus, PTF is allowed to be turned on in conditions of limited visibility, for example, when you are moving along serpentine roads, winding roads, and also making sharp turns. And, of course, fog lights can and should be used in conditions of poor visibility, that is, in other words, in rain, snow and fog.
The main goal of adjusting fog lights is to correctly configure and correct the light beam. Ideally, it should illuminate the road and be at a height ranging from 30 to 70 cm above the road surface. Deviation from the recommendations negatively affects the performance and efficiency of the fog lights, so when adjusting the fog lights, try to maintain the vertical and horizontal angles of the fog lights as much as possible.
Before adjusting the foglights begins, a number of mandatory measures must be completed.
- The first step is to find a flat surface.
- Then you should check and, if necessary, adjust the tire pressure. Insufficient or excessive pressure can negate all efforts.
- The car must be complete, that is, the tank is filled, there is a spare tire in the trunk, etc., and, of course, everything that you usually carry with you.
- A special adjustment screen must be installed vertically at a distance of 10 meters from the machine. As an option, the markings can also be applied on the wall or garage door.
The actual adjustment of the fog lights is done using a screwdriver, chalk and a ruler.
Installation of PTF in a blind panel
The most difficult and energy-consuming method is considered to be the method of installing fog lights in a solid bumper (i.e., not containing production sockets for this):
- The panel is removed from the vehicle in accordance with the repair and use manual.
- The best location for mounting headlights is determined in terms of frame configuration and compliance with standards.
- A hole is drilled for the headlights. The best method is to make gaps around the perimeter and cut out the holes with a saw. The gap is then adjusted to ensure better contact between the frame and the art frame. Small parts and fragments of the bumper are carefully removed with a construction or stationery knife.
- Gaps are drilled for the fog light frame, which is secured with suitable screws.
- The headlight is installed in the frame and a protective gasket is mounted. It is attached to the plastic panel.
- The headlight is adjusted using a special key, which is included in the kit.
Electrical wiring VAZ nuances: 21213 works
Much has been written about how timely the first domestic SUV with a monocoque body turned out to be. Even more was expressed by the owners of the Niva car themselves, who practically deified it Everything. capabilities that they needed for operation - availability of spare parts and instructions for servicing the vehicle.
models Popularity is difficult to overestimate - 28 years in service
What do the numbers in the Niva index mean?
The only thing the owners complained about was the lack of power, which did not allow the car to realize its full road potential. There were objective technical difficulties and a shortage of associated production capacities, which the automaker managed to overcome over time.
In the video at the end of the article you can see how they celebrated the release of the 2 millionth car, which confirms high consumer demand. in a word, the developers did not remain deaf to modern trends by proposing several power modifications for the units of the VAZ 2121 Niva car.
| Engine Volume | Injection system | Ignition system | Factory, hp | Power index |
| 1.6 l | carburetor | classical | 79 | VAZ-carburetor |
| 1.7 l | 21210 | classical | 80 | VAZ 21213-1000260 |
| 1.8 l | 21073 Solex carburetor or injector | injection/non-contact – electronic with Bosch MP 7.0 controller | 82/85 | VAZ carburetor-00 – 2130 VAZ 2130-20(26) – injection |
| 1.7 l | distributed fuel injection | contactless with BOSCH MP 7.9.7 controller. or VAZ 7.2 | 83 | JANUARY-21214-20 |
| 1.9 l | diesel XUD-9SD | — | — | 21215-VAZ |
To determine the engine type, you should look at its code on the block
For reference: the block on Code VAZ 21213 and VAZ 21214 always begins and ends with the symbol * (asterisk). Therefore, the block marking for these models consists of ten characters.
Accordingly, the cars themselves received new indices linked to the installed power unit:
- Carburetor engine with a volume of 1.7 liters with a classic carburetor in the documentation is designated as VAZ-21213;
- An engine of similar volume with distributed fuel injection is a VAZ-Carburetor;
- 21214 VAZ-2130 engine with a volume of 1.8 liters also had the index VAZ-21213;
- VAZ Index-21215 is used for export models equipped with a diesel power unit produced by Citroen-Peugeot.
For reference: In Russia and the CIS countries, diesel engines were not officially sold in cars. The price of an SUV was higher than passenger models, but this did not stop buyers who were striving for freedom of movement.
The photo below shows the wiring diagram of a VAZ 21213 with a classic carburetor power unit.
Scheme of a VAZ carburetor with a 21213 1.7 liter engine
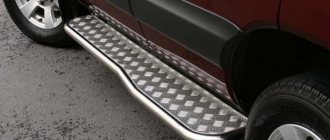
Installing PTF on the outer bracket
Method of fixing fog lights to a metal bracket:
- The boundaries of fixing the bracket to the panel are marked in accordance with the standards for installing fog lights. Usually additional headlights are placed on the bracket.
- The bracket is screwed to the bumper with screws or self-tapping screws.
- They are installed on the fog lamp fixation points and the wires are connected.
Installation of PTF in standard holes
To install a headlight in a panel containing standard holes, do the following:
- The front part of the vehicle is raised by placing a wooden beam 150-200 mm high under the tires. For comfortable operation, the machine is placed on a lift.
- The protective shields covering the bottom edge of the panel are removed.
- The fasteners of the standard bumper plugs are unscrewed.
- The fog lamp is inserted into the guides and secured with standard screws.
When using headlights that are not the original version, discrepancies in dimensions and mounting points may occur. In this situation, you need to adjust the components to each other.