Fault diagnosis
It should be noted that the Hyundai Solaris is extremely lucky in that the developers thought of equipping the timing chain with a timing chain rather than a belt.
Cars of equivalent class and power with a belt require replacement of this element at least 60,000 (km). The chain is much stronger than the belt; the manufacturer Hyundai Solaris does not regulate the recommended mileage for changing the chain. Experts note that in Solaris, timing belt replacement (meaning chains) is most often carried out at around 85,000 - 100,000 (km). The prerequisites for inspecting the technical condition of the chain and replacing it (if necessary) are the following:
- Car won't start after stalling
- A distinct knocking sound is heard from the engine
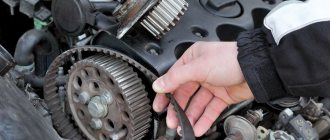
Experienced drivers can immediately identify a broken chain by tapping in the hood. Related material: How to replace spark plugs on a Grant with an 8 and 16 cl engine
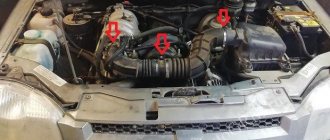
Engine on Solaris
Many car enthusiasts are interested in whether the valves on the Hyundai Solaris 1.6 and/or 1.4 are bent. It is impossible to answer this question unambiguously. The listed problems associated with the engine accompany the car throughout its operation. In addition to this, the engine on the Solaris is “disposable”, and if the valve is bent and/or the piston is jammed in the cylinder head, then restoration will require replacing the entire block, since there is no boring for the repair size.
Hyundai of this model is equipped with engines that are equipped with chain gas distribution mechanisms. The volume of power units is 1.4 and 1.6 liters.
Required spare parts
The kit for replacing the timing chain on a Hyundai Solaris consists of:
- Timing chain - article 243212B200 at a price of 2980 rubles. RF;
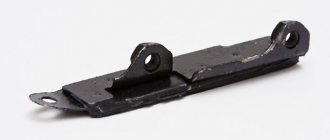
- timing gear drive guide - article number 244312B200 at a price of 750 rubles. RF;
- tensioner shoe - article 244202B200 at a price of 920 rubles. RF;
- tensioner - article number 2441025001 at a price of 2350 rubles. RF.
When replacing the chain, it is recommended to change the crankshaft oil seal - article number 214212B020, priced at 170 rubles. RF.
It is recommended to purchase coolant and engine oil that the car enthusiast constantly uses.
What will be needed for repairs?
If the Solaris chain is replaced not at a service center, but independently, then we immediately prepare:
- New chain
- New crankshaft oil seal
- Tube of heat-resistant sealant
- A set of wrenches (both open-end and freewheels) a set of screwdrivers
- Engine stand
- Container for draining engine oil; container for draining coolant
- Special device for fixing the pulley on the crankshaft
Material on the topic: Stove radiator - copper or aluminum? Expert opinion
Replacing the timing chain
Replacing a chain is a complex job that requires knowledge, tools, equipment, a room with a lift or inspection pit. If such work has never been performed, it is recommended to contact a service center. An error when replacing a chain can lead to damage to engine components, as well as costly repairs.
Experienced car owners can do this work with their own hands. For this they will need:
- a set of wrenches of different sizes;
- socket heads, collars, ratchets for them;
- set of screwdrivers, flat, Phillips;
- pliers;
- hydraulic jack, lifting capacity from 500 kg;
- stands.
Before starting work, you need to buy a kit for replacing the timing chain, crankshaft oil seal, engine oil, filter, coolant, and sealant. It is recommended to replace these parts when replacing the timing drive.
Difference between drives
What is better on Solaris - a chain or a belt? This question plays an important role for almost every car enthusiast. Moreover, some even rely on this fact when it comes to choosing a vehicle. The difference lies in the following points:
- Unlike a belt drive, the chain on the Hyundai Solaris is protected from a variety of external factors.
- A chain drive works almost four times more than a belt drive. Among other things, the belt stretches over time.
- When the oil pressure in the system decreases, the hydraulic tensioner cannot operate at its maximum capacity.
- The belt is much quieter and more elastic. It does not require lubricating fluid. Replacing it can be done without completely disassembling the power unit.
Modern cars are equipped with different gas distribution drives. Which to choose? The driver makes this decision independently. In recent years, not only on Hyundai, but also on other cars, belts have become more reliable, and therefore chains are gradually fading into the background.
Step-by-step instruction
This replacement process requires certain knowledge and experience. If you are faced with the need to change a chain for the first time, then it is better not to do it yourself, but to have your car repaired at a service station. For those car owners who want to replace the element on their own, we suggest using this material.
Loading …
What to cook?
You will need:
- key heads;
- spanners;
- flat and Phillips screwdrivers;
- pliers.
Set of socket wrenches Wrenches Flat and Phillips screwdrivers Pliers
Instructions
- First, disconnect the battery and remove the cylinder head cover. You will also need to dismantle the internal combustion engine protection, and then set the piston of the first cylinder to the TDC position.
- Drain the engine fluid from the internal combustion engine.
- Place a reliable support under the motor, then unscrew the screws that secure the right support of the unit. Then you need to unscrew the corresponding screws to remove the right motor mount mount.
- Using a key, you should turn the tensioner roller to loosen the belt. Then remove the accessory drive belt from the shafts.
- After this, it is necessary to dismantle the fastening screw of the power steering pump, move the device to the side and unscrew the fastening screw of the tensioner. This is done by turning the pin clockwise as it has a reverse thread. Remove the tension device.
- Next, you should unscrew the fastening screws of the lower bracket of the right support and remove it. After this, remove the screw securing the belt roller and remove the roller itself.
- Then you need to drain all the antifreeze that is in the system. The draining procedure may take more than 20 minutes. Next, holding the antifreeze pump pulley, remove the four screws securing it. Remove the pump shaft, and then unscrew and remove the screws securing it to the motor cylinder head. The pump along with the rubber seal can be removed.
- Unscrew the screw securing the crank pulley and remove the pulley itself. Then you need to disconnect the block with wires from the generator. Unscrew the nut, and then remove the generator itself.
- Now you should unscrew all the screws of the timing device. Remove the cover, and then remove the tension pins and the tensioner of the mechanism chain itself. Turn the timing pulley clockwise.
- After this, the chain itself can be removed. Install the chain following the reverse order of work. When installing, make sure that the installation bolt on the crank pulley is located at the top. All contacting elements of the tensioner must be cleaned of old sealant residues. These components should then be coated with new sealant.
- Install the timing chain tensioner. Make sure that the marks on the camshaft gears and on the chain match. Carry out all further steps in reverse order. You can find out more about changing the component in the video.
1. Turn the tensioner roller 2. Remove the drive belt from the shaft 3. Remove the drive belt 4. Remove the tension mechanism 5. Remove the timing chain protective cover 6. Remove the timing chain Replacement
intervals for Hyundai Solaris are not regulated by the manufacturer.
The main malfunction of the chain is its stretching, which leads to a shift in valve timing and noise. Eliminated by replacing with a new one. Replacement work is quite labor-intensive.
It is necessary to carefully make a diagnosis; a diagnostician who has an oscilloscope in his arsenal can help you with this; he will take an oscillogram from your engine and compare it with the reference one. It will show exactly the valve timing angles. After this, he will give you recommendations for replacing the timing chain.
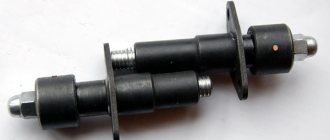
24410-25001 article no. Chain tensioner.
Required tools and accessories:
- Oil container
- Set of heads
- Set of open-end wrenches
- Rags
- Hammer
- Screwdrivers
- Passatizhi
- Jack
It is recommended to carry out work when the engine has cooled down. They can be combined with checking and adjusting the thermal clearances of the valves. Open the hood and remove the negative terminal from the battery. We unscrew the protection and drain the oil from the engine.
Drain the antifreeze from the cooling system into a container. Unscrew the Hyundai Solaris valve cover and remove it.
We support the Hyundai Solaris engine under a jack through a plank. We unscrew the engine mount bracket from the timing side and dismantle it. Remove the generator drive belt by using a key to release the tensioner.
It is necessary to move the power steering pump to the side by unscrewing the pump mounts.
Unscrew the belt tensioner (bolt with reverse thread). We remove it from the block. Using a socket wrench, unscrew the 4 bolts of the right engine mount bracket and remove it.
Using a wrench, unscrew the support roller bolt and remove it.
The liquid pump pulley is held on by four bolts; to keep it from turning, you need to unscrew them and remove the pulley. Unscrew the bolts securing the water pump to the engine block (5 pieces). Remove it by prying it off with a slotted screwdriver.
Using a socket wrench, unscrew the belt pulley bolt (if you have a manual transmission, ask your partner to engage fifth gear and press the brake pedal; if you have an automatic transmission, use a special holding tool). We remove the pulley from the end of the crankshaft by prying it with a mounting tool from different sides.
Remove the bracket from the motor by unscrewing the two bolts. The timing cover is held on the block by fourteen bolts, which must be unscrewed, after which we remove the timing cover.
It is necessary to set the top dead center of the piston of the first cylinder, guided by the marks on the shafts.
Fix the shoe tensioner with a pin, pressing the shoe with a screwdriver. Unscrew the two tensioner bolts and remove it. We remove the timing chain from the camshafts and the crankshaft sprocket. We take it out of the engine compartment.
We inspect for damage and wear on the teeth of the camshaft sprocket and crankshaft.
We clean all adjacent surfaces on the cover and block. We clean the surface of the tension device and its seat on the block. It is recommended to replace the crankshaft oil seal in the timing cover with a new one.
We install the timing chain on the sprockets, aligning them according to the marks (on the new chain, for convenience, the marks are marked with paint). We install the tensioner by applying sealant to the back.
We tighten 2 bolts. We remove the locking pin - the chain will tighten. We check the timing marks of the Hyundai Solaris. The locating pin must be in the up position.
Apply sealant to the joint surfaces of the lid and the block with a small roller. Let's join them.
We tighten the bolts. Subsequent assembly is carried out in reverse order.
As you can see, this procedure is not difficult. You can tighten the new chain by strictly following the instructions. Every car enthusiast should know that it is imperative to store the tensioner in the trunk, since such a breakdown can leave him and the Hyundai Solaris far from home, and the prospect of spending the night in the middle of the highway does not make anyone happy.
It is also worth understanding that timely replacement of this unit is the key to ensuring that it does not break. However, the manufacturer assures that this can only happen after 250 thousand kilometers. Therefore, replacing such a part will not threaten the car owner for a long time.
The performance of a car directly depends on the balanced operation of the engine. And the gas distribution system plays a huge role in the engine. Both a belt and a chain can be used as a drive.
It all depends on the make of the car. The Hyundai Solaris uses a chain drive. A chain differs favorably from a belt in that it breaks extremely rarely.
Much more often it stretches, but this does not bode well. A stretched chain can fly off the sprockets, and this situation will not be much different from a broken belt. In this case, the valves will meet the pistons.
It will bring nothing good to either one or the other. After this, the car will have to be overhauled.
Broken chain drive: consequences
The timing chain on a Hyundai Solaris rarely breaks, but it is impossible to completely eliminate this kind of problem. If a break occurs while the engine is running, the consequences will be dire. The valve bushings will fail, the valves themselves will be bent, and damage will affect most elements of the cylinder-piston group. In other words, you will have to do a major overhaul of the engine.
Replacing the timing belt will not cause problems. You will have to allocate only an hour of free time for her. As for replacing the timing chain, this procedure is quite complicated. It is done this way:
- Dismantle the battery.
- Remove the cylinder head, as well as the engine protection.
- Move the piston in the first cylinder to the upper extreme position.
- Pour the oil out of the engine.
- Place the support under the pallet, then unscrew the nuts of the right support bracket. Next, remove the nut of the stud holding the right motor mount. Remove the bracket.
- Move the hydraulic power steering pump.
- Remove the tensioner bracket holding the right engine support.
- Remove the belt roller.
- Drain the antifreeze.
- Dismantle the cooling system pump pulley, and therefore the pump.
- Unscrew the crankshaft pulley bolt, and then move the pulley to the side.
- Disconnect all wires from the generator.
- Remove the generator and timing cover.
- Remove the tensioners and then the chain.
That's all! There should be no problems with assembly; it is done in the reverse order.
Was it useful to you?
This article:
When is it time to change?
To prevent this from happening, it is necessary to monitor the chain in order to detect defects in time. But what symptoms will indicate that it’s time to inquire about the condition of the circuit:
- the car does not want to start;
- when the engine is running, extraneous noise is heard;
- fuel began to be consumed somewhat more actively.
If you find something like this, it means it’s time to pay attention to the condition of the chain drive. The manufacturer does not regulate the frequency of checking the chain, but it is better to do this after 25,000 km. But the service interval of the chain drive is regulated, and it is 140-150,000 km.
Of course, the chain can wear out even earlier. The reason for this may be extreme driving, poor operating conditions of the car, etc.
The chain can be replaced at a service center, or you can do it yourself. The good thing about replacing the chain yourself is that you can save money. Also in this case, the car enthusiast gets the experience he needs so much.
But, it must be said that this work is quite labor-intensive, and perhaps you should entrust it to professionals. Here's what tools you need to prepare to carry out your own repairs:
- set of necessary heads;
- keys;
- jack;
- pliers;
- a set of screwdrivers with different tips;
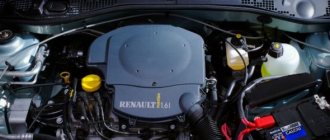
Hyundai Solaris cars are equipped with two types of engines: G4FA and G4FC. The volume of the first is 1.4 liters, the second - 1.6 liters. They are designed the same, do not have any design differences and belong to the “Gamma” class.
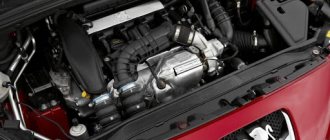
Hyundai Solaris engine
Unlike other types of engines, on the Gamma the gas distribution mechanism is equipped with a chain rather than a belt. For Solaris owners, this is a significant advantage, since the drive belt must be replaced every 60 thousand kilometers. Replacing the chain, in turn, is not regulated by the Solaris manufacturer. As a rule, it changes in the event of a major engine overhaul or in the event of a break.
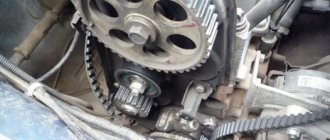
Timing device in Hyundai Solaris
The timing mechanism is an engine system responsible for accurately distributing the air-fuel mixture among the chambers, performing compression strokes and removing exhaust gases after combustion. Essentially, it synchronizes the operation of all translational and rotational movements in the engine. And so that the engine of your Solaris does not die for a long time, it is important to monitor the condition of the Hyundai timing mechanism. Since there is no visual access to it, you should simply adhere to the recommended service interval.
Many motorists believe that their Hyundai Solaris has a timing belt installed as a drive, which is incorrect. The Korean concern has practically stopped producing belt-driven cars. Although you can find motors with a belt mechanism, this is still a rarity, and to a greater extent, the owners of Hyundais call them out of habit.
Advantages of a timing chain:
- The Hyundai Solaris timing belt is absolutely isolated from the influence of external adverse conditions, such as moisture, dirt, etc., and the chain does not need to be replaced.
- On average, the mileage on a working chain is 5 times longer than the service life of the belt.
- The only thing that can break it in Solaris is an engine that jams while driving. During normal engine operation, its rupture is excluded, only some stretching is possible, so it usually does not require replacement.
- The chain is more protected from excessive motor overloads, unlike the belt.
- Solaris phase shifters in the chain version of the engine are more reliable and simpler in design.
Work order
When all the spare parts have been collected and the necessary tools have been prepared, you can begin the replacement process:
- Place the car on a lift or inspection pit.
- To avoid damage to electrical appliances, it is necessary to disconnect the positive terminal of the battery before starting work.
Unscrew the cylinder head cover, remove the gasket and remaining sealant. Before installation, it is recommended to replace the gasket and apply new sealant to the mating surfaces.
- Remove the engine protection, if present.
- Rotate the crankshaft pulley clockwise using the head and knob to set the TDC of the first cylinder.
- Drain the coolant; the procedure takes about 15 minutes.
- Drain the engine oil.
- Support the engine from below with a hydraulic jack.
- Unscrew the fastening of the right engine mount to the cylinder block.
- Jack up the engine to remove the right mount.
- Place a reliable stop under the internal combustion engine and secure the wheels to prevent the vehicle from rolling away.
Using a spanner, it is necessary to loosen the poly V-belt tensioner, secure it with a thin rod, and remove the belt from the auxiliary pulleys.
- Unscrew the power steering pump mount and move it to the side.
- Unscrew the tensioner mounting screw.
Important! The tensioner fastener has a left-hand thread; it must be unscrewed clockwise.
- Remove the poly V-belt tensioner.
- Unscrew all the fixing screws of the engine support bracket on the right side.
- After dismantling the bracket, you need to remove the bolt securing the idler roller of the poly V-belt and dismantle it.
- Remove the four bolts securing the coolant pump pulley.
- Unscrew the screws securing the coolant pump to the cylinder block.
- Remove the coolant circulation pump.
- Remove the coolant pump gasket and clean the surface of any traces of old sealant. Before applying a new one, the surface must be degreased.
- Unscrew the bolts securing the crankshaft pulley and remove it.
- Disconnect the generator wiring harness.
- Unscrew the fixing nut and remove the generator.
- Unscrew all the fixing screws of the timing cover and remove the cover.
- Place marks on the chain that coincide with the marks on the crankshaft and camshaft gears.
- Unscrew the drive tensioner and remove other mechanisms.
- Remove the chain.
- Transfer the marks to the new spare part.
- Install a new chain, checking that all marks match.
- Remove traces of old sealant and apply new one.
- Install a new drive chain tensioner.
- Screw on the shoe.
- Pull out the hydraulic tensioner clamp.
- Check the tension and alignment of the marks on all gears.
- Screw on all parts of the gas distribution mechanism and damper.
- Close the timing drive cover.
- Tighten the bolts securing the cover.
- Assemble the remaining parts of the internal combustion engine, following the reverse procedure.
After assembling the engine, it is necessary to fill in engine oil, replace the filter and add antifreeze. Place the positive terminal on the battery and start the engine. If all work is carried out correctly, there will be no problems starting the internal combustion engine.
As for consumables, in addition to the chain itself, you will have to buy new tensioners, dampers and seals. Do not forget that work can only be done when the engine has cooled down. So let's begin.
1. Open the hood. Disconnect the left terminal from the battery.
We remove the engine protection. We set the piston of the first cylinder to the dead center position. 2.
3. Unscrew the left support of the unit. We place a stop under the engine, then unscrew and dismantle the right support of the propulsion system. Remove the cover from the timing system.
4. Using a wrench, loosen the tensioning device and remove the generator drive. 5. Now move the power steering hydraulic pump to the side. To do this, you will first have to unscrew the fasteners. 6. Unscrew the bolt that secures the power steering pump. We remove the pump, and then the tensioner.. 7.
Unscrew the fastening of the right engine mount bracket. Remove the bracket. 8. After this, all liquid contained there must be drained from the system. This cannot be done quickly, and this action will take at least 15 minutes. Now we dismantle the antifreeze pump pulley. Then remove the pump itself along with the seal. 9. Dismantle the crankshaft pulley, having previously unscrewed all the necessary bolts. 10. Remove the generator by first unscrewing the block.
11. Remove the timing chain tension pins, and then the chain tensioner. 12. Turn the camshaft pulley clockwise and remove the chain.
13. When installing a new chain, follow the reverse procedure. The set screw located on the crankshaft should be at the top.
14. All elements of the tensioner should be cleaned of dirt and traces of old sealant. When installing the timing cover, also remember to remove the old sealant.
Having coated the seat with sealant, you can put the cover back in place only after a few minutes. 15. When installing the tensioner, make sure that the marks on the camshaft sprockets and the chain match.
16. We check the operation of the engine after repair. If extraneous noise is detected, the work will have to be repeated.
Replacing the Attachment Belt
The Hyundai Solaris air conditioning belt is clearly visible under the hood. You can easily see its condition. If it begins to fall apart, it will show scoring or uneven wear. In this case, the drive belt must be replaced.
Scheme of bypassing the drive belt for Hyundai Solaris attachments
Rubber belts tend to age after a certain period of time. Even if it has not exceeded its regulated service life, but a lot of time has passed, the belt should be replaced. Make sure that no antifreeze or oil gets on it. These are aggressive liquids that corrode rubber.
A worn tension roller can also be replaced during a visual inspection. A wear from the belt appears on it, which can be easily felt with your hands.
In fact, the tensioner is a sore spot in the Hyundai Solaris 1.4. It breaks down very quickly. So it is better to reduce the regulated period of 150,000 km to 50,000 km.
A worn roller also manifests itself as a knocking sound when starting the engine when cold. As it warms up, extraneous sounds disappear. If the tensioner is very worn, the knocking and squeaking noise will be constant.
As analogues, you can use Miles belts and rollers. These are mid-price spare parts with good quality.
It is better to change the roller along with the entire tension mechanism.
Preparatory work
To replace the belt you will need the following tools:
- extension;
- 12 mm wrench;
- 14 mm wrench;
- jack.
The process of replacing the belt without removing the roller:
- Open the hood.
- Loosen the top mount of the generator with a 12 mm wrench.
- Loosen the lower mount of the generator with a 14 mm wrench.
- Unscrew the top fastener completely.
- Insert the key onto the tension roller and pull it toward the interior.
- When the tension is released, remove the belt from the pulleys.
- Place and tension the new belt.
The process of replacing the belt along with the rollers:
- Open the hood.
- Unscrew the top roller.
- Remove the belt.
- Turn the steering wheel to the right.
- Through the opening near the right wheel, using a 14 mm wrench, unscrew the lower tensioner bolt.
- Remove the belt.
- Install new rollers.
- Tension the belt by placing the smooth side over the smooth part of the pulley and the toothed side over the pulley. At the last stage, pull the belt with one hand and put it on the tensioner with the other.
- Move the generator to its normal place, throwing the belt over the generator pulley.
- Tighten the bolts.
- Make sure the pulley teeth match the belt runners.
- Start the engine and check the operation of the belt.
For inexperienced drivers, the fifth step will require you to jack up the car and remove the right wheel. Then it will be much easier to get to the tensioner bolt.
In order to replace the deflection roller, you will have to remove the plastic casing behind the wheel. This is done using a 10mm wrench. In cars with crankcase protection, you will need to unscrew the two bolts of the metal plate and slide it down.