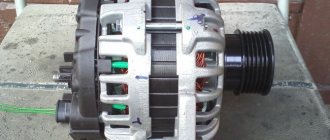
Depending on the configuration, Lada Priora cars are equipped with an airbag system (hereinafter referred to as SNAP). This configuration is designed to ensure the safety of the driver and front passenger (in cases where both front seats are equipped) by deploying airbags in the event of frontal collisions of the vehicle.
The passenger airbag of a Priora car, and its triggering moment, depends on a certain force of the collision and occurs regardless of whether the drivers or passengers are wearing seat belts or not.
LADA Priora cars are equipped with 2 types of systems:
- Single-channel (airbag for driver only).
- Four-channel (airbags for driver and passenger).
Safety system
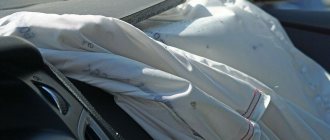
The Lada Priora has a built-in safety system that is activated in the event of a collision. This system is represented by an inflatable soft pillow that expands at the time of an accident. The Priora has 4 airbags: one for each passenger, including the driver. They operate only in the event of a sharp collision at a speed of over 20 km/h, so they never open accidentally.
The driver's airbag is located directly in the Priora's steering wheel, which can cause some difficulties when trying to remove or replace the steering wheel or its elements. If you are going to install a new steering wheel, then it is worth finding out a little about the features of the location of the cushion.
The design itself is quite simple and consists of the following elements:
- gas generator;
- pillows;
- control module.
In the event of a collision, a special sensor sends a signal to the module, which, in turn, turns on the gas generator. In about a second, the device fills an empty bag with nitrogen, which unfolds towards the driver.
If you bought a used Priora, check for the airbag: press just below the center of the steering wheel. A soft-touch center means the cushion is in place.
How do Prior airbags work?
The essence of the action of the gas-generating element located in the pillow is as follows:
- The gas generator itself will produce gas directly inside the module: it will fill the airbag.
- Here, a substance of pyrotechnic origin will be ignited with the help of a fuse, which is built into the body of this gas generator itself.
There are two types of gas generators:
- pyrotechnic;
- hybrid.
The first will consist of a body that will be filled with a solid pyrotechnic substance and the igniter itself. As for the second, it will consist of a casing material containing compressed gas of inert origin, as well as all the components already listed above.
The gas generator will operate according to the following algorithm:
- When struck, an electrical signal will be generated.
- The electrical resistance will heat up and ignite the pyrotechnic substance.
- The rest of the mass ignites.
Removing and installing the steering wheel on a Lada Granta car
Let's consider removing the steering wheel with an airbag, since without an airbag, removing the steering wheel is not particularly difficult and is performed in the same way as on models 2108-2110.
To complete the job, you will need a special airbag remover and a new steering wheel nut.
If you don’t have a puller, you can make one from an old slotted screwdriver with a blade width of 5 mm; to do this, you need to make a small groove in the middle of the blade.
1. Remove the terminal from the negative terminal of the battery.
On a vehicle equipped with an airbag, to prevent the airbag from deploying, wait at least five minutes after disconnecting the battery before continuing to operate.
The driver's airbag is mounted on the steering wheel with two plastic hooks 2 and 4, Figure 1, and two positioning hooks 8.
The hooks of the pillow fit into the holes in the bracket for fixation 2 and are fixed with spring clips. The airbag latches fit into recesses 3 on the steering wheel.
We set the steering wheel to the “straight” position and, by removing the key from the ignition switch, fix this position.
Use a thin flat screwdriver to pierce the hole marked on the steering wheel.
We also pierce a hole on the other side of the steering wheel.
Using two screwdrivers, press out the spring clamps through the holes (in the picture with the airbag removed), pulling the airbag towards you, we remove the hooks of the airbag from engagement with the clamps on the steering wheel.
We pull the pillow towards ourselves, overcoming the resistance of the clamps, and remove it from the recesses of the steering wheel.
Move the airbag away from the steering wheel
Disconnect the horn wire ends
Use a screwdriver to pry the clamp out of the wire block
Disconnect the wire block from the airbag connector
Removing the airbag
The removed airbag should be stored in a place protected from moisture and excessive heat, with its cover facing up.
Installing the airbag is done in the reverse order.
We connect the block of wires to the airbag connector, insert the lock into the block.
We connect the wire lugs to the terminals of the signal switch.
We install the cushion on the steering wheel so that the cushion clamps fit into the recess of the steering wheel, and the hooks of the cushion fit into the corresponding holes in the steering wheel.
Press the cushion until the hooks of the cushion snap into place with the steering wheel latches.
In a factory or car service center, plastic wedges are used to remove airbags (Figure 10).
And devices for removing pillows are used (Figure 11).
Place the removed airbag module with the actuator down and away from the workplace.
Set the front wheels of the car to the straight-ahead position.
Using a 24mm socket, unscrew the steering wheel mounting nut.
We mark the position of the steering wheel relative to the shaft, for which we use a core to put a mark on the shaft opposite the triangle mark on the steering wheel
We tighten the steering wheel fastening nut several turns in order to avoid injury when the steering wheel is suddenly released.
While rocking, pull the steering wheel towards you and remove it from the shaft splines
Unscrew the steering wheel fastening nut and block the drum device from turning
To do this, remove the blocking plate from the holder on the steering wheel
We insert the blocking plate through the hole in the steering wheel hub into the slot of the drum device until it stops
Photo report on removing the steering wheel yourself
First of all, read the material on removing the driver's airbag on a Priora. Then, when you have dealt with this, you can proceed further. Disconnect the power wires to the sound signal.
Then we put the head on 24 and rip off the nut, but don’t unscrew it completely yet. Before you start knocking it off the shaft, you need to mark the position of the steering wheel relative to the shaft - you can make marks on the steering wheel and casing.
When the nut is loosened, leave it on the shaft for now. Then we take and knock down the steering wheel from the reverse side, tapping it with medium force - on both sides.
When it comes off the splines, you can finally unscrew the nut and remove it from the shaft.
Carefully thread the horn power wires, as well as the airbag power wires, through a special hole.
And now the steering wheel is finally freed and you can remove it completely from the Priora.
If there is a need for replacement, then we perform it in the reverse order. Of course, the installation is carried out according to the marks that were originally set. The fastening nut must be tightened with a torque of 31 to 41 Nm. But you can take the average value and tighten it with a force of 40 Nm.
How to remove the driver's airbag
Removing the driver's airbag is required in exceptional cases, and some of them are listed below:
- removing the steering wheel
- replacing an airbag after it has deployed
- replacing electric power steering
If for any reason you need to remove the driver's airbag on a Priora, you will need the following tool for this repair.
- 5 mm hexagon
- Thin screwdriver with flat blade
Procedure for replacing the driver's airbag on a Priora
Depending on the vehicle configuration, the Priora was equipped with either one or two airbags. This article will look at an example with a driver's AIRBAG.
Attention! Before performing any manipulations with the airbag, it is necessary to turn off the power to the car by disconnecting the battery terminal, and then wait at least 10 minutes. This is necessary so that the AirBag activator capacitor is completely discharged
Now you can start repairing. First of all, on the back of the steering wheel, you need to unscrew two 5 mm hexagon screws on both sides:
After which you can carefully lift the pillow up and move it slightly to the side.
Now we turn it over so that you can conveniently disconnect the power wires. Then, using a thin screwdriver, carefully pry up the pad retainer on both sides.
And we move the block away from the pillow, carefully lifting it up, as shown in the photo below.
Carefully, without sudden movements, remove the Priora pillow and put it aside. If necessary, we install a new one in its original place. If it was triggered, you will have to “reset” its control unit, or buy a new one. And only after that you can put the AirBag module in its place.
You should also be careful after installation. Reconnect the battery terminal
When you first turn on the ignition, you must do this in such a way that there is no person in front of the airbag (that is, you). This is necessary to avoid injury if it is triggered.
Video review on removing and installing the driver's airbag on the Lada Priora
To present this topic in the most clear and accessible way, you should familiarize yourself with the video review below, embedded from my channel.
priora-remont.ru
How to remove the steering wheel on a Lada Priora with an airbag yourself
The above installation features with a built-in airbag force you to be especially careful when understanding the process of how to remove the steering wheel on a Priora. Experts advise that to carry out such work you must have the following tools:
- socket head for a 24 mm wrench;
- ratchet or crank;
- thin flat-blade screwdriver;
- extension;
- 5mm hexagon socket.
Removing seat belts with pretensioner
Unscrew the two screws securing the trim 1, Figure 15, of the rear door threshold, remove the trim.
Remove the trims and caps from the seat belt bolt heads.
Unscrew bolt 4, Figure 16, securing the belt branch 3 on the floor threshold.
Remove the lower trim 2 of the central pillar.
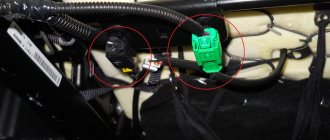
Disconnect block 1, Figure 17, from inertial coil gas generator 2.
Unscrew bolt 1, Figure 18, securing the seat belt bracket 2 on the central pillar.
Unscrew bolt 3, Figure 17, securing reel 2 and remove the front seat belt with the reel assembly.
Unscrew the bolt securing the front seat belt buckle to the seat bracket and remove the buckle.
Installing seat belts with pretensioner
Install seat belts in the reverse order of removal.
After opening the locks, seat belts must return from their working position to their original position freely without jamming.
Before installing the seat belts, remove the transport washers. The tightening torque of the seat belt bolts is from 18 to 32 Nm.
After completing work on removing/installing the components of the SNBP, connect the ground wire terminal to the battery.
When connecting the ground wire terminal to the battery, the ignition must be turned off. In this case, no one should be inside the car.
Check the functionality of the SNPB
For safety reasons, the first time you turn on the ignition on a vehicle with a replaced driver airbag module, proceed as follows:
— open the driver’s door;
— without sitting on the seat, with your right hand, placing it under the steering wheel, turn on the ignition, while the head of the specialist performing this operation should not be between the steering wheel and the driver’s seat.
After turning on the ignition, if there are no faults, the diagnostic indicator (orange symbol) should turn on for 3-4 seconds and turn off.
Turn off the ignition.
When removing/installing the steering wheel by pressing the switches located in the horizontal spokes of the steering wheel, make sure there is a sound signal.
Removing the Airbag from the Smart steering wheel
Removing the airbag in Smart cars is carried out only by removing the steering wheel. Before proceeding with disassembly, you must disconnect the battery to prevent the Airbag from triggering.
Steering wheel of a Smart car with an airbag hidden under the front panel
- Under the steering column cover on the bottom side there is a single bolt that needs to be unscrewed.
- The steering wheel comes out with a little effort. Before you finally remove it, you need to disconnect two wires - they are connected to the AirBag and ESP sensors.
- The removed steering wheel is placed on a flat surface “face down” to remove the plastic casing. It is secured with fixing clips.
- After removing the panel, the attachment points for the rear and front panels are revealed. To dismantle the front panel, you will have to unhook three clips and bend the fixing elements.
- Under the front plastic panel of the steering wheel there are contacts for the “horn”.
- The airbag is removed after unscrewing two bolts from the back.
- In addition to the Airbag itself, inside the steering wheel there is a cartridge with wires, two of which are connected to the airbag, two to the ESP. It is advisable to disconnect the yellow Airbag connector.
Removing the MNPBP
Remove the glove box cover. Unscrew nuts 5, Figure 15, securing module 1 to bracket 3.
Through the opening of the glove box, alternately acting on the clamps 4 of the MNPBP facing cover, feeding from below, remove the MNPBP from the instrument panel.
Without putting tension on the wiring harness to the MNPBP, use a flat screwdriver to remove the latch from the L-shaped block attached to connector 6 of the MNPBP, then, without applying additional lateral forces, disconnect the L-shaped block from the module and remove the MNPBP module.
Place the non-activated NABP module on a flat surface with the facing cover facing up.
If you dismantle the triggered air conditioning module, check the serviceability of the wiring harness to the air conditioning module. If damage to the block to the air pressure control module, a break or short circuit of the wires to the air pressure control module is detected, replace the harness.
Installation of MNPBP
Before installing the MNPBP, visually verify that there are no mechanical damages and that there is a label with a bar code and identifying number on the module.
When installing a new NABP module, tear off part of the label with a barcode from the module and paste it into the “Special Notes” section of the service book, indicating the installation date and mileage of the vehicle, and the reason for replacement.
While in the car, bring the air conditioning air conditioning module to the installation location in the instrument panel, without applying lateral forces, insert the L-shaped block of the instrument panel wiring harness into connector 6 of the air conditioning air conditioning module until a characteristic locking click is obtained.
Insert the retainer into the L-shaped block until it clicks.
Before installing the clamp in the L-shaped block, the airbag module is in the transport position, the contacts of the igniter connector are bypassed.
Install the air pressure control module into the instrument panel and secure the air pressure control valve cover into the instrument panel. Screw and tighten nuts 5 securing the MNPBP to bracket 3. The tightening torque of the nuts securing the MNPBP is from 8 to 16 Nm (from 0.8 to 1.6 kgf.m).
Self-removal of the airbag for Priora
It is best to entrust the removal of the airbag to a specialist. However, there are some unforeseen situations that force you to act independently. In such cases, the following recommendations must be followed.
Usually the airbag is dismantled when the steering wheel is removed. Sometimes this is done when replacing the contact ring of the airbag itself and the sound signal.
The tool needed for the job will be a five-inch hex wrench.
The procedure for removing the pillow itself should follow the following sequence:
- The steering wheel is set to a position where the car is moving in a straight line. This must be recorded, after which the key is removed from the ignition switch.
- The fastening screw of such an airbag is unscrewed using the prepared tool. The same thing happens on the other side.
- We move the module itself, in which this airbag is located, away from the steering wheel.
- We remove the fasteners that hold the block with the wires.
- We disconnect them.
- We remove the pillow from the Prior.
- During external interventions, we store this dismantled part with the cover facing up, making sure to protect it from excess moisture and heat.
- We carry out all assembly work in reverse order.
Step-by-step instruction
1. On the inside of the steering wheel, unscrew the two airbag mounting screws.
The screws are located on the right and left of the inside of the steering wheel.
2. Pry up the airbag and disconnect the power connector from it.
In order to disconnect the power connector, you need to use a flat-head screwdriver to pry it up and remove the latch. After releasing the latch, remove the connector upwards.
3. Disconnect the power connector from the horn buttons. We squeeze the ears and disconnect the connector.
4. Place the steering wheel so that the wheels point straight and make a mark on the steering wheel relative to the steering column casing. This must be done in order to set the steering wheel to its previous position.
The mark can be made with a washable marker.
5. Unscrew the nut securing the steering wheel to the shaft using a twenty-four socket. Do not unscrew the nut completely.
After unscrewing the nut a little, we knock the steering wheel off the splines. This can be done by striking movements of the palms of the hands on both sides of the steering wheel.
After the steering wheel has come off the splines, unscrew the nut completely and remove the steering wheel.
6. When removing the steering wheel, thread the airbag and horn power wires through the hole.
7. Now a few words about reverse installation.
We thread the power supply wires for the pillow and the signal.
We put the steering wheel on the splines and do not forget to align the marks that you made.
8. Screw in and tighten the steering wheel mounting nut.
Tightening torque from 30-50 Nm.
9. Connect the signal power connector.
10. Take the airbag and connect the power connector. After connecting, close the latch.
11. Place the pillow in place and secure it with two screws on the back side.
Video lesson
Difficulties in replacement
Many users often have questions when replacing an old steering wheel with a new one. Here are the answers to the most common ones.
Question 1: Are mounts suitable for different models?
Answer: The mounts are identical, so the Priora 2 SE steering wheel is recommended for use on older models as well.
Question 2: I removed the steering wheel, but now I can’t put the new one back, it doesn’t work manually, what should I do?
Answer: If the part has been dismantled, then it can also be installed back. The steering wheel is installed by pressing your hands towards the shaft, without using tools like a hammer, but everything may not work out on the first try. There is no need to make sharp pushes of the steering wheel; a simple smooth press will be enough.
Question 3: Are additional components needed for the mechanism besides the steering wheel?
Answer: Yes, you still need to purchase a steering cable of the same model. Its installation is carried out similarly to the old version.
Question 4: The steering wheel is stuck after installation, what should I do?
Answer: Most likely, the steering cable is installed incorrectly. Disassemble the structure and reassemble it, adjusting the position of the cable in advance.
Steering wheel assembly
After the old steering wheel has been removed, we install a new model. Of course, you can limit yourself to general provisions: carry out the assembly in the reverse order. But there are several nuances that should not be missed.
We arm ourselves with the same tools and begin assembly.
- We install the cable. Install it the same way as the old one, but do not push it all the way, otherwise the steering wheel will stick.
- We install a new steering wheel. There should be a wire sticking out from the middle of the steering wheel from the control module and a safety latch that needs to be pulled out. Just pull the latch towards you and it will come out of the slot.
- We connect the wire to the pillow, then to the cable.
- We snap the new cushion into the steering wheel.
- At the same time, we return all the fastenings to their places. The last thing to install is the casing.
If everything is installed correctly, the mechanism will not jam and will work fully properly for a very long time. The entire replacement process will take you about 40 minutes if you look at the instructions.
Cases when replacement of the SNPB is mandatory
Most system components are disposable and must be replaced in the following cases:
- triggered as a result of an accident or other incident;
- in cases of damage to the components of the airbag system;
- after ten years from the date of production of the airbag modules and pre-tensioning device (the production date is marked on the module body).
Precautions and preparations
"Attention! Incorrect installation or dismantling of airbag components can lead to premature deployment of airbags and disruptions in the operation of the system as a whole. The results of mistakes made may be: damage to the life or health of the driver and passengers."
Important Recommendations:
- When removing or installing a module containing an undeployed airbag, do not point its facing part towards the face or exposed parts of the body. If defects and damage are detected, do not attempt to carry out independent repairs or other mechanical manipulations;
- Do not allow the product to fall or hit;
- Do not allow contact with the product by persons who do not have special knowledge in the field of repair and operation of the SNCB.
Remember that the passenger airbag on the Priora is a disposable product, that is, after deployment it must be replaced.
Is it possible to repair a removed airbag?
The possibility of restoring deployed airbags is one of the pressing issues of concern to many drivers who have been involved in an accident. The conclusions, unfortunately, are disappointing: it is impossible to repair such a thing. In the event of an airbag deployment, the cover, airbag and cartridge are completely replaced. However, such work often results in round sums, especially when it comes to foreign cars. In such a situation, there is a way out - restoring the Airbag.
Recovery
There are two ways to restore an Airbag. One of them is considered correct and involves replacing the squib and the pillow itself. All cladding is restored extremely carefully and carefully. Although this method is expensive, it is much cheaper than a complete replacement. However, only a professional who can correctly configure the control unit can carry out restoration - if the data fails, the airbag can fire at any time for no apparent reason.
Replacing an airbag squib is an economical way to restore an Airbag
However, such unpleasant consequences are eliminated by purchasing and installing a new SRS Airbag system unit. Such a device enters a collision into the computer’s memory, which will avoid errors when installing a new pillow.
The second restoration method is considered incorrect and involves complete disassembly of the entire block and filling the free cavity with polyurethane foam. Such a disgrace is covered with cladding from above. Of course, this option is purely cosmetic and does not guarantee any protection or safety in the event of another collision. Its only advantage is its low cost.
The cavity of the steering wheel free from the airbag is filled with foam
What to do if the airbag deploys?
Car enthusiasts are often lost and don’t know what to do when opening an airbag. On many cars (Lada Granta and Priora, Ford Focus 2, Lada Priora, Opel Astra and others), you will have to perform the following manipulations:
- Install new airbags, replacing those that have already deployed;
- Correct the “brains” of the control system, that is, the unit that is responsible for the SRS. Instead of the error, a dump of the new machine is installed (as if there was no accident);
- Install a special snag (plug).
The problem is that each manufacturer has classified information, which forces car enthusiasts to buy a new control unit for the airbag. In addition, airbags are often tied to the VIN number or model of the vehicle.
If you go to a service station, the cost of restoration work will hit your wallet.
Experienced car enthusiasts copy a security system dump and write it to a remote memory device.
Data is stored until sold. If the car is involved in an accident, it is easier for a specialist to restore the system.
In this situation, a microcircuit and a programmer are purchased, after which the device is flashed. The average cost for such work is from 5-7 thousand rubles.
Life hack: Steering wheel on a Priora - size, price, malfunctions
In a Priora car, the steering wheel comes in two types: a 4-spoke pre-restyling one and a three-spoke restyled one. In addition, you can install a multifunction steering wheel from Vesta on the Priora. The steering wheel of a Lada Priora car is rarely removed - for work in the cabin to soundproof the panel, replace the electric booster, and when the steering wheel itself is changed. You can remove it in 7 simple steps described below in this article! The price for the Priora 2 steering wheel is different from the first version, a little more expensive. The diameter is the same. In order to make the steering wheel thicker, a braid is placed on it, and to enhance it, it is covered with leather.
Everything in your favorite car should be good: dynamics, sound, comfort. Everything can be customized, that is, you can change the components in your own way. As an example, in the old Priora the usual four-spoke multi-steering wheel can be replaced with a new, three-spoke one.
The steering wheel on the Priora was adopted from other AvtoVAZ cars, the same style and simplicity. The Priora 2 steering wheel added modernity to the car interior - the design of the steering wheel that owners of foreign cars have long been accustomed to seeing in front of them has become available to lovers of domestic cars. Pleasant in feel, modern - it’s not in vain that they are trying to put it in pre-restyling Priors. The Priora was not equipped with a multi-steering wheel, but even in the new format it looks quite presentable, better than before.
VAZ 2170 | REPLACING THE PASSENGER AIR BAG
REPLACING THE PASSENGER AIR BAG
ATTENTION. Do not work with pyrotechnic systems (airbags and seat belt pretensioners) near heat sources or open flames: there is a risk of triggering
NOTE. On these vehicles, the electronic unit can be locked during repairs using the XR25 by issuing command G80* (ISO switch in position S8, code D49).
If this function is activated, all ignition lines are suppressed, the airbag warning light on the instrument panel lights up and bargraph 14 left of the XR25 is illuminated (new electronic units are delivered in this state).
After repair, a check must be carried out using the XR25.
If everything is normal, unlock the electronic unit by issuing command G81*.
REMOVAL
To remove the passenger airbag, the instrument panel must be removed (see “Removing and installing the instrument panel”, Chapter 83).
After this, the airbag is removed (four nuts).
ATTENTION. When the passenger airbag is deployed, the fastening elements are deformed and destroyed, so it is necessary to replace the dashboard each time
ATTENTION. Before disposing of a defunct airbag, it must be rendered harmless according to the procedure (see
Section “Decontamination procedure”: decontamination of a part removed from the vehicle)._
INSTALLATION
ATTENTION. NECESSARILY. Observe the safety precautions provided for installing or replacing a passenger airbag.
Any deviation from these recommendations may result in system malfunction or even danger for vehicle occupants._
Observe the safety precautions provided for installing or replacing a passenger airbag. Any deviation from these recommendations may result in system malfunction or even danger for vehicle occupants._
ATTENTION
Reassemble in the reverse order, being sure to observe the tightening torque of the four pillow mounting bolts (6 N m).
• Always replace the “No tampering” sticker with the blue after-sales sticker sold in kit no. 77 01 205 356.
• When assembling, do not forget in the compartment for
pillows of foreign objects (bolts, latches, etc.)._
ATTENTION
Before connecting the passenger airbag connector and replacing the instrument panel, you must check the system wiring.
Connect the igniter simulator (E1е. 1288) to the passenger airbag connector.
Connect the 30-pin XRBAG device adapter to the 30-pin orange connector of the electronics wiring.
Apply power to the XRBAG device (from the battery), connect the 2-pin white measurement connector to the adapter wiring (C): the device should show from 1.8 to 4.6 ohms.
If the measurement results are normal:
• Disconnect the igniter simulator.
• Connect the wiring to the passenger airbag igniter (close to the instrument panel) and reconnect the white 2-pin test connector of the XRBAG tester to the adapter wiring (C): the tester should read 1.8 to 4.6 ohms.
If the measurement results are normal:
• Reinstall the dashboard.
• Check with the XR25 that no system faults are being recorded.
• Unlock the electronic unit by issuing the G81* command.
• Check that the airbag warning light comes on for 3 seconds when the ignition is turned on, then goes off and remains off.
If the warning light does not work, how to
described above, or measured values
differ from those indicated above,
Refer to the “Diagnostics” chapter.
automn.ru
Removal sequence
First you need to unscrew two screws on the back of the Priora steering wheel, which are located on both sides. To do this, you will need a 5 mm hexagon, while on both sides it is necessary to compress the spring clamps, preventing the pillow from falling out. It is important to remember that before starting work, you must remove the battery terminals to prevent the airbag from deploying.
After this, carefully remove the cushion from the front of the steering wheel. To do this, you need to carefully pry the clamp together with the wires and move it to the side, and also disconnect the power wires leading to the sound signal.
Please note that disassembling the airbag module is strictly prohibited.
Next, a pre-prepared 24-millimeter socket will come in handy, with the help of which the shaft nut is torn off; however, there is no need to unscrew it completely yet. At this stage, you need to somehow mark the position of the steering wheel, which will be needed for subsequent assembly to its original position. For this purpose, you can make appropriate marks on the casing or, in fact, on the steering wheel.
Once the nut has been loosened, you can begin to directly remove the steering wheel. To do this, you first need to gently tap it from the back with careful movements on both sides, but you should not use excessive force, because the steering wheel is still on the shaft. By progressively pushing the steering wheel, it is necessary to ensure that it is completely dislodged from the splines, and when this can be achieved, you can further unscrew the previously loosened nut.
After this, you can actually start removing the steering wheel. You need to act as before, carefully, threading the power wires for the horn and airbags through special holes. Upon completion of this procedure, you can finally remove the Lada Priora steering wheel.
After carrying out the planned actions, assembling the Lada Priora steering wheel with airbags is carried out in the reverse order. At the same time, do not forget about the marks made during disassembly, which will allow you to install the steering wheel in its original position. Remember that when carrying out the above manipulations, before removing the pillow, you should be outside the zone of its deployment.
Subsequently, after the integrity of the steering wheel and airbag has been restored, when you first remove the lock and turn on the engine, it is recommended to be outside the car and turn on the ignition by extending your hand over the steering column. This way you can protect yourself from unexpected operations and injury.
To summarize, it can be noted that in general, the process of removing the steering wheel of a Lada Priora car with an airbag, subject to all the above recommendations, does not pose any particular problems, especially for experienced car enthusiasts, and can be done independently, without contacting service centers of manufacturers or dealers, as well as at a service station. The main thing is to follow the procedure step by step and take precautions.
The main reasons for the malfunction of the steering column cable
In electrical engineering, a loop is understood as a bundle of conductors in general insulation. Otherwise known as ribbon cable. Such devices are well known to computer scientists.
A multi-core ribbon cable is well suited for transmitting signals from a device rotating along the axis of the steering column. In this case, the cable is wound on a special mini-coil. Initially, the loops transmitted signals directly from mini-switches mounted on the steering wheel, as well as to the airbag. Subsequently, an electronic device was installed on the steering wheel, which encrypts signals for transmission. This made it possible to increase reliability and reduce the number of failures.
However, technical problems associated with the failure of the loops remained. The main reasons for the unreliability of steering column cables:
1. Natural wear and tear
. Mechanical stress accumulates when bending the cable. Over time, this leads to a break in the conductors.
2. High current when airbags deploy
. From this point of view, airbag deception is especially dangerous. Typically this is a 2.2 ohm resistor. It does not instantly burn out like a pillow squib. A large current flows for a long time, which overheats the loop.
3. Corrosion
. Even a small amount of moisture that gets into the space under the steering wheel can cause corrosion of thin conductors at the soldering point of the cable.
4. Traffic accident
. Increased mechanical loads during an accident can lead to damage to the cable.