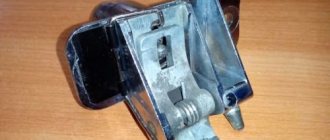
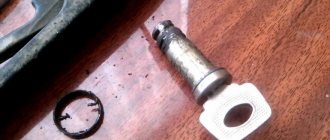
I have long wanted to make the trunk open with a button. And I decided to do it when I saw a universal activator for the trunk. Its advantage is that it is cable-based.
In general, the following were purchased: -activator -wires -fuse block -relay -window lifter rollers from VAZ 2107 (I bought two different ones, I didn’t know which one was better) - button from 2110
Assembling the circuit (I used the one I found on Drive) was not difficult, dragging the wires into the interior was the same, but stretching the wires to the trunk was much more difficult.
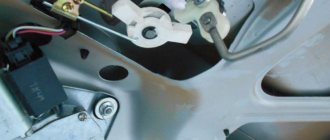
I read on the website that the roller for the cable is drilled out and screwed in place, I successfully screwed it up, the hole went away, but the roller with the bar fit very well. I only drilled a hole on the plate to 6 mm.
There were also problems with installing the solenoid. the bracket that was included hesitated to bend and adjust.
In the end, I connected everything, checked it, everything works. I went home happy, and at the first big pothole, my trunk opened, cursed, I got out, and closed it. a hundred meters later, the situation repeated itself...
As a result, I drove slowly, thinking that tomorrow I will redo it. The next day, I loosened the cable, I thought it was just that, or maybe a combination of them... I checked it, drove it around, and it didn’t open. and again, having already gone home, there was a shake, and it opened again.
In general, I found a way out - rubber buffers, which on the trunk lid (I don’t know what they’re called) were screwed in until they go. and that's it! everything is fine now.
Guys, help me with advice. Alarm Starline A 91, can you use it to open the trunk? If so, what wire should be connected to the button? What buttons should I press on the remote control then?
Main components of the electric trunk lock drive
It is best to connect the electric lock drive to a conventional mechanism in order to be able to automatically and mechanically open the luggage compartment of the car. Electric drives for VAZ cars exist in two types: on an electric motor and on magnetic plates. Due to its high performance characteristics, the first type is more in demand and popular among owners of domestic cars. But a drive made on magnetic plates is easier to install.
The electric drive consists of the following elements:
The advantages of this design are obvious: increased protection of the luggage compartment, which will become a real obstacle to an attacker; the trunk lock of the VAZ 2114 will work stably and in most cases without failure.
Installing an electric lock can be done in various ways. However, for it to function correctly, an alarm system must be installed on the car.
The body design of most domestic cars has some weakness - while the car is moving with an oncoming air flow, all the dirt, dust, and sand actively pollute the “stern”. In this case, the lock itself becomes clogged with small particles, which in the future results in a lot of problems with its functioning. So how to make a trunk from a VAZ 2114 button correctly?
Criteria for choosing an electric lock
When buying an electric trunk lid, you need to take the choice seriously. Our market offers customers many different devices in different price categories, but it is better to immediately exclude cheap options. Such a unit will not be able to work for a long time, because the low price, as a rule, is due to the same quality of production of the device. Therefore, immediately exclude Chinese options - in this case it is better to give preference to Russian or imported devices.
Installation instructions for the electric trunk lock
If you are lucky with the standard lock, it locks and holds the tailgate well, then there is no need to change it.
In this case, you must have with you:
- window lifter roller;
- door activator;
- steel cable;
- wires with terminals;
- relay with four contacts;
- 10 A fuse.
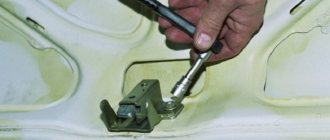
To automate the opening of the trunk, it is necessary to ensure that the lock latch is pulled. For this purpose, a special roller is installed on the wiper gear housing. The steel cable is pulled through the roller and secured with conventional clamps. Experienced riders often use a bicycle cable because it is durable and flexible. Using it you can quite easily connect the door activator to the lock tongue.
Kit selection
Installation will not be possible if you do not have at your disposal a set of equipment necessary for installation. Buying it is not difficult, but you need to think about which specific option is best for you.
In total, 2 solutions to the current situation are being considered. Namely.
- Factory set. Purchased from trusted and reputable manufacturers. The kit contains almost everything you need, so you don’t have to assemble different elements. But the price is naturally higher;
- Amateur kit. Here we are talking about independently preparing all the necessary components. The motorist is faced with the question of where exactly to get them and how to choose a set so that everything fits. It is difficult to do this without relevant experience and certain knowledge. But you can save a lot of money financially.
I don’t know what exactly you will choose, but I want to give one piece of advice. Buy an electric drive equipped with an inertia mechanism. This will allow you to turn off the drive when an obstacle appears in the path of the luggage compartment lid. Roughly speaking, the drive will not pinch your hand or head when you poke around in the trunk.
So the inertial mechanism is a very useful thing.
If we talk about assembling a homemade kit, then it is important to collect several basic elements. These include:
see also
- power window module 2 pieces;
- 2 mechanisms for lifting glass;
- wires;
- diodes;
- electromagnetic relay;
- five-pin relays;
- four-pin relays;
- Relay connection block;
- springs for the lid lock;
- power tools;
- wiring;
- nuts, bolts;
- Bulgarian, etc.
As you can see, the set is quite impressive. Therefore, consider whether it is worth trying to assemble the kit yourself. Sometimes it is much easier and even more economical to purchase a ready-made factory kit with a guarantee and all the associated benefits. Price does not always play a key role.
Opening the trunk with a button with your own hands.
Hi all. Well, we finally got around to the trunk to open the trunk with a button. I’ve just been thinking about implementing this idea for a long time, but somehow there wasn’t enough time. Everything is done, it just takes a little time. We will do this using the example of a VAZ 2107 car. So, what do we need:
-Activator -Fuse block (I will drive the plus from the battery) -Fuse -Wire, I took with a reserve of 7m, -Button for opening the trunk of a VAZ 2110, -Terminals “Mother” -5-pin relay (you can have 4, later I’ll explain why I took exactly 5) -Well, you’ll also need electrical tape or heat-shrink tubing
I’ll explain why I took a 5-pin relay, it’s simple, because I opened the alarm book, namely the connection diagram, and it described how to connect a relay of this type, so I decided to take it so as not to look for connection diagrams on the Internet.
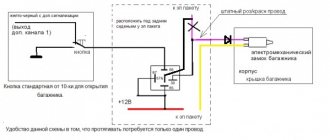
Here is my connection diagram:
I will say that this circuit is assembled to retract the activator, it can also be made to push it out, you just need to swap the blue and green wires. Elements of the circuit:
Trunk opening button, VAZ 2110, 3-wire
5-pin relay, 75.3777
After some leisurely work, the wiring is all ready, I took it with a reserve)
Let's get started, the installation process is quite quick, you can easily finish it in a day)
I decided to put the relay under the hood so as not to pull the positive wire too far, and I also have to look for a place under the panel for the relay :)
Through the main hole of all the wires I insert two wires, namely the wire to the button for opening the trunk, and the second directly to the activator itself, the positive wire:
I placed the relay in this place and attached the washer barrel to the mount:
I decided to make a conscientious terminal, so it was decided to buy a positive terminal:
I hid the wiring around the cabin under the carpet, you mean, it runs next to the standard wiring, and at the same time I ran the wires under the rear speakers so as not to disassemble 10 times:
Double wires are music, and the red one is our plus for the activator. In the trunk everything is simple, we carry it out together with the standard wires:
There is already a decent amount of wires collected, it’s worth stopping at this place. Unfortunately, I didn’t find the “mother” terminal like on the activator, so I decided to do it this way for now, then I’ll find the terminal and redo it:
The activator is made to retract. And on the minus I cut off the terminal and made another one:
Now about the location of the button. I didn’t think long and chose a place to the left of the seat, close at hand and not conspicuous.
The installation is too simple, I drilled a hole, put on the terminals and inserted it, we hooked the minus right there to the cover mounting bolt. We also run the wires under the carpet.
And now the most difficult part, for me it turned out like this, it was the relationship between the activator and the lock that slowed down my work, because I couldn’t drill the lock for a long time, I don’t know how everyone is, but I gave up on this matter and had to farm, because I don’t want to change it’s a native castle, who knows what quality you’ll find, but here it’s strong and hardened.
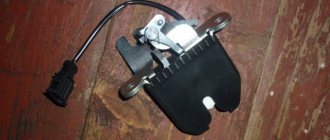
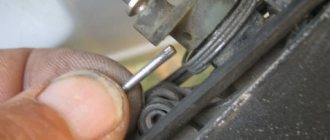
Get to the point! I removed the lock, but attempts to drill it ended unsuccessfully, so I decided to go the other way, drilled a hole on the side of the lock, and wrapped the tongue itself with a cable from a bicycle, everything is held tightly + the cylinder mechanism is still pressed:
The cable does not fall off, I checked it many times, when the lock is in place, the cable cannot even be removed by hand.
To prevent the cable from going back, I wrapped it with electrical tape and secured it at the ends:
Made from improvised material. The activator itself is located like this
There were no problems connecting to the activator. Each set comes with this clip:
Therefore, using this clamp we connect the activator and the lock:
Everything is holding firmly, I hope it will work for a long time
And finally, a video of the work:
Something like this :) Maybe in the future I’ll buy a lock and drill it, thereby removing the cable). Thank you all for your attention, good luck on the roads)
Useful video
You can visually familiarize yourself with the possibilities of making a trunk from a button in the video below:
At this point, all work can be considered completed. Ideally, it will take a couple of hours to provide the luggage compartment of your car with automated opening, which is provided on most foreign cars today.
Do-it-yourself tuning of the VAZ 2115 interior, internal tuning of the VAZ 2114, tips for modifying the interior of the VAZ 2113, VAZ 2115, VAZ 2114. Electric drive for the luggage compartment lock Refinement of the interior, tuning the interior of the VAZ 2114, VAZ 2115, VAZ 2113, Lada Samara 2
How to make a trunk from a VAZ 2114 button
I have long wanted to make the trunk open with a button.
And I decided to do it when I saw a universal activator for the trunk. Its advantage is that it is cable-based. In general, the following were purchased: -activator -wires -fuse block -relay -window lifter rollers from VAZ 2107 (I bought two different ones, I didn’t know which one was better) - button from 2110
Assembling the circuit (I used the one I found on Drive) was not difficult, dragging the wires into the interior was the same, but stretching the wires to the trunk was much more difficult.
I read on the website that the roller for the cable is drilled out and screwed in place, I successfully screwed it up, the hole went away, but the roller with the bar fit very well. I only drilled a hole on the plate to 6 mm.
There were also problems with installing the solenoid. the bracket that was included hesitated to bend and adjust.
In the end, I connected everything, checked it, everything works. I went home happy, and at the first big pothole, my trunk opened, cursed, I got out, and closed it. a hundred meters later, the situation repeated itself...
As a result, I drove slowly, thinking that tomorrow I will redo it. The next day, I loosened the cable, I thought it was just that, or maybe a combination of them... I checked it, drove it around, and it didn’t open. and again, having already gone home, there was a shake, and it opened again.
In general, I found a way out - rubber buffers, which on the trunk lid (I don’t know what they’re called) were screwed in until they go. and that's it! everything is fine now.
Guys, help me with advice. Alarm Starline A 91, can you use it to open the trunk? If so, what wire should be connected to the button? What buttons should I press on the remote control then?
Owners of Lada Kalina, Priora or XRAY station wagon or hatchback cars know that the trunk lid gets very dirty in dirty weather. In this case, a modification would be useful that would allow the tailgate to lift up on its own without hands, which would keep them clean.
You will need: two springs of the required stiffness (for example, from an umbrella or VAZ 2101 or 2108 valves).
It is necessary to remove the upper mounts of the fifth door shock absorber and insert one or two springs onto the rod. If necessary, washers are installed on top and bottom of the spring to protect the shock absorber or paintwork from damage. Perform the same operation on the other side.
The spring stiffness should be enough to throw the trunk lid to a height at which the gas struts will pick it up and lift it further up. It is worth considering that after such modification you will have to apply a little force to close the trunk.
For a Lada Kalina or Priora station wagon, umbrella springs with 8-10 turns are suitable.
Owners of hatchbacks (Priora, Kalina or XRAY) can use shorter and stiffer valve springs from the VAZ 2101 or 2108. For the Granta liftback, we had to additionally install a pair of Fenox A910001 gas trunk shock absorbers.
Do you need to automatically raise the trunk lid? Will you be upgrading the design this way? Let us remind you that for owners of sedans there is a similar modification (for Grants or Prioras). By the way, if the fifth door wiper does not clean well, then the reason may not be in the brush, but in the leash.
Making a trunk with a button in a VAZ 2114 is much easier than it seems to many car owners. All work is carried out with a minimum amount of time and physical effort. Without resorting to the expensive services of a professional, you can quickly improve the protection of the luggage compartment of your car yourself. Having completed the work once using simple algorithms and diagrams, the owner of a VAZ 2114 will be able to calmly and easily open the luggage compartment of the car by pressing just one button located in the cabin or on the alarm remote control.
How to open the trunk with a button
Installing a trunk release button in the interior of any budget car is much simpler than it might seem at first glance.
The whole task is to slightly modify the lock, namely to supplement its mechanism with a special electric drive (activator).
When you press the button, it will operate on the principle of a retractor/extrusion device, opening the lock.
The springs will lift the trunk lid, providing quick and convenient access to the luggage compartment of the car. If the alarm key fob has a separate button for opening the trunk , then it will also perform its functions.
You can do everything yourself, without contacting specialized offices, and without significant material investments.
All you need to buy is:
- electric drive of the trunk lid lock (activator);
- universal four-pin relay;
- fuse block (will be placed on the positive wire for safety reasons);
- the fuse itself (suitable for 10 amperes);
- wire (practice shows that 5 meters is enough, but it’s better to take it with a reserve);
- set of female terminals;
- a standard trunk release button from the “ten” (this is the most reliable and inexpensive option);
- heat shrink tube or electrical tape, plastic clamps.
You can buy a VAZ 2110 trunk opening button, an activator and everything else without any problems at the nearest car market. The cost of the entire set does not exceed 700-800 rubles.
Preventing door jams
The main reason for the breakdown: long-term operation, but the service life of the part is reduced if the driver does not carry out preventive maintenance. Basic moments:
- Cleaning of internal parts, treatment with special substances.
- Power loop lubrication.
- Removing adhered dirt. The procedure is carried out at least twice a year: in spring and autumn. Active ingredients for treatment: Liqui Moly Schnell-Reiniger cleaner, Liqui Moly Wartungs-Spray weiss dirt-repellent white lubricant.
- Lubrication of hinges, internal parts, rubber seals, door stops.
The procedure is especially relevant before the winter season, when the treatment prevents the mechanism from freezing when moisture enters. Spring prevention minimizes damage to the door mechanism from ultraviolet radiation.
