In general, after almost 6 years, I finally decided to install an electric lock on the trunk, or rather an activator that will open the lock instead of a button.
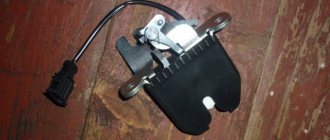
Kalina has a standard installation of the activator in the trunk, there is even a place and wires with a terminal
but this system is designed to unlock the lock, and not to open it, instead of turning the key in the lock, although there are no places for rods in the lock, apparently another lock is required, but I don’t care, because I just need to disable the mechanical button and open the lock itself
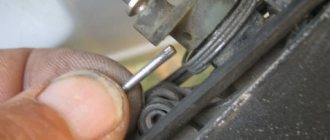
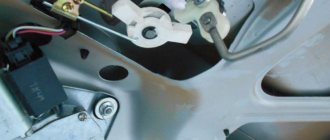
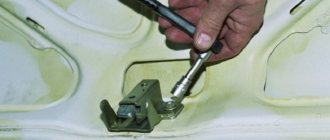
I figured out the position so that I could screw it on properly and have enough traction, I drilled a couple of holes, screwed it on, the block is connected to the wires normally, I tried it and it seemed to work, I slammed the lid and it didn’t open (I had to open it from the inside)
postponed the improvements until the next evening
the next evening I continued to straighten the rod a little, thereby lengthening it and increasing the stroke of the activator and voila, it opens with a bang, I tested it many times, it works without failures)
There’s just one catch: it’s ok to open the key fob, but if you unlock the doors from the button on the driver’s door, the trunk will also open, because According to the developers, the activator should only unlock the trunk lock instead of the key. and the owner opens the trunk himself...
The simplest thing is not to unlock the doors from the button on the door, but since I decided to be clever, I’ll leave this as the last option)
At first I thought of doing magic with the button on the door, but there are only 2 channels: “open” and “close” to the control unit, and the control unit gives signals to the door locks and to the trunk activator.
I went to the control unit, thought I could do some magic with it, took it apart, and there was a circuit board there that couldn’t be done)
Ideally, I would reflash it so that it doesn’t give a signal to the trunk when the button on the door is pressed, but I don’t know how to flash such things(
Then I found a wire going from the control unit to the activator, so I’m thinking about getting tricky with it...
Lyrical digression: xs like on other cars, but on mine it’s very bad that the wires somewhere start in one color and end in another, minus for the VAZ ones(
I have some idea, maybe someone can help me:
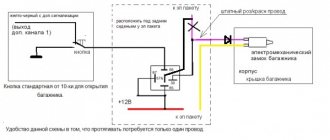
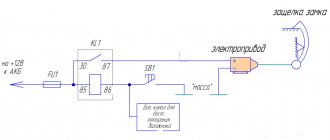
Roughly speaking, here is the standard system:
But here’s a thought: maybe there are some types of reverse relays in nature, where when a signal goes through one circuit, the other circuit breaks?
Features of opening the trunk of the Lada Kalina
Owners of the Lada Kalina car are almost unanimously surprised: with all the bias towards Europe, the trunk lock of the Kalina hatchback in the basic configuration for some reason can only be opened with a key. For many, the situation immediately became quite common: the driver gets into the car, starts the engine, and then remembers that he needs to put something from the passenger compartment into the trunk. Further actions are similar to a joke.
You need to turn off the engine, remove the key from the ignition, get out of the car, and so on. If you imagine all this in an environment of time shortage, one can only feel sorry for the owner. In addition, if someone happened to approach the trunk of a car with something heavy in their hands, the procedure for opening it with a key turned into something difficult. Another problem could have arisen: in regions where real frosts occur in winter, the lock cylinder would at times freeze tightly.
What’s interesting is that any car owner sees a separate button on the Kalina key, which for this brand of car replaces the standard key fob. She's supposed to open the trunk. If you press and hold such a button for a couple of seconds, you can hear a click - this is a signal that everything is in order with the electrical package control unit.
Then another interesting detail became clear: the craftsmen who climbed under the trunk trim to understand the internal structure realized that there was still a place for the lock activator and even a standard electrical connector for wires. And then the same craftsmen began to solve the problem of how to modify Kalina to increase the comfort of use. The complete trunk lock drive is not available for sale as a single set, so the parts will have to be obtained separately.
Lada Kalina Sedan › Logbook › Trunk activator
In general, it happened
, what I wanted for a long time) But it took me a long time to get there.
Reasons why I wanted this:
1) I got tired of turning off the car, taking out the key and going to the trunk 2) last winter, during a temperature change, the larva froze 3 times)) okay, at least at that time there was no need for anything in the trunk) 3) well, so, just a cool thing)) + convenient from the remote control
And then one fine day I remembered this idea and decided to implement it as quickly as possible. In this entry we will talk about the trunk activator.
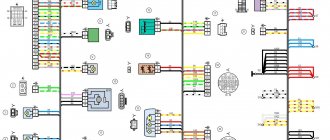
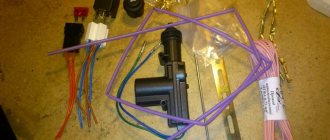
To begin with, I removed the plastic cover, examined the lock mechanism, I have an old model, that is, everything is ok) then I studied the Kalinaclub forum, looked at various implementation options. I found out everything I needed, bought the activator itself, the button, wires, terminals and off I went. I asked for help with the wiring, disassembled the plastic sills on the driver’s side, unscrewed the belt fastening and removed the middle plastic. Then I got to the power accessories unit under the rear seat. We rang the wires, found the ones we needed, connected them at the block, and ran one wire from the block to the button. and more to add. exit from the signal. In general, all the actions coincided with such a scheme.
Installation of the activator: preparatory work
Since there is space for a trunk lock activator in Kalina, it makes sense to use it. Absolutely any activator will do. Of course, for those who are interested in the quality and long service life of the entire device, it is better not to stop at extremely cheap options. Experienced car owners still advise choosing domestic Kalina electric lock drives, regardless of body type. They are somewhat more expensive than similar products made in China or Taiwan, but still more reliable. Main parameters of the activator:
- 12 volts;
- two-pin;
- lock-unlock functions.
In order for the system to open doors by pressing a button to work fully, one activator will not be enough. You will also need such a thing as a rotary washer. According to many car owners, the easiest way is to grind it yourself. You will need a steel plate and a machine. There are quite enough drawings with dimensions that will show what kind of rotary washer for the Kalina activator should be on various auto forums.
It is possible that after the washer is manufactured, it will have to be modified when installing the activator. The activator installation technique itself will require some tricks. For example, the first step is to remove the trunk trim. It is secured with pistons, which immediately became unusable for most car owners. Conclusion: pre-purchase of “hedgehogs” for subsequent installation of the trunk trim in place is mandatory.
Another nuance lies in the types of locks on the Lada Kalina. Firstly, locks on cars produced before 2010 and after differ in their design. Accordingly, the types of activators will differ slightly. This issue is resolved upon purchase. Secondly, most of those who independently installed the lock activator for Kalina station wagon either modified the lock itself or replaced it with another one. It remains to figure out why this is needed and how it is done.
The bottom line is that the trunk lock is equipped with two “tongues”. After modifying the lock to open it with a button on the key, the existing problems were partially solved, but a new one arose. If, when opening the trunk with the key button, someone did not support the trunk lid in time, it would lower, as a result the trunk would close again. And only on one “tongue”. And this meant that the key fob certainly became useless. Now it was possible to open the trunk again only with the key. This is where two options for solving the problem appeared.
Self-installation
First of all, it is necessary to secure the electric drive to the trunk lid and provide it with a mechanical connection to the lock itself. To do this, you will have to make two cuts on the lock, and bend the resulting free “tongue”. Thus, we gained access directly to that part of the lock, by pulling which the trunk lid will open. Now we attach the long metal stick from the kit so that the lock can close when the system is operating. It is quite possible that you will have to cut off extra centimeters of this pin.
Now our device is installed properly and all that remains is to connect the electrics. To do this, we will use the diagram below.
Important! When working with electrical equipment, remove the battery!
In most cars, electrics operate on 12V positive voltage. However, if you doubt that everything is the same for you, it is better to check with the car dealer and not use this diagram for connection. It is very important to make the correct connection of the wires, since the proper operation of your car as a whole depends on it. At best, some options will simply not work correctly; at worst, a short circuit will occur. And it is not always possible to restore the electrics and electronics of the car after it. And this work will cost a lot of money. In addition to the above, lay wires where standard wiring is already laid. In difficult places, for example, when you have to pull the wire from the passenger compartment to the trunk, it is necessary to use protective corrugated tubes.
Electrical work
To begin with, according to the diagram, we connect all the elements located in the trunk. Now you need to tighten the wires to the driver's door. It all depends on the car model. For some it will be convenient to pull the electrics through the door sills from below, for others the option of protective strips from above is suitable. Immediately secure the wires with cable ties. If the length is not enough, take an additional wire, solder the joint with a soldering iron and rewind it with tape. Let's continue connecting. We connect the negative wire to the electric drive, and then connect the second negative wire to the main control relay. The third, also known as the last wire, needs to be connected to the alarm. To do this, you need to find the control unit; most likely, it is located under the dashboard. In it you will find free contacts for connection.
Methods for installing the trunk lock activator
The first option is to saw off one “tongue” from Kalina’s lock. Particularly gifted craftsmen do this without any removal of the lock, right on the spot, using an angle grinder. You have to work very carefully. If you don’t have a grinder, the same steps can be done with a hacksaw. It just takes much longer, and one can only guess about the physical effort required for such a process. If you are not confident in the intricacies of your own work, it is better to remove the lock for modification. In this case, it will be easier to work with both a grinder and a hacksaw.
The second option is to replace the lock. Many car owners installed a trunk lock for their Lada Priora instead of the original one. This option is perfect for those Kalina owners who do not have the desire and/or ability to cut anything. All other steps for installing the Kalina station wagon trunk lock activator are extremely simple.
- A rotary washer is installed on the plastic activator pusher, then the entire system is secured with a locking ring.
- The complete activator is placed in a standard place.
- The activator wires are connected to the corresponding connectors. Naturally, all electrical work is carried out only with the battery disconnected. The point is not what can “knock” an electric current: 12 volts of direct current for a person is just nonsense. But capricious electronics, if something suddenly “shorts”, may suffer. In the best case, problems with functionality will begin, in the worst case, something will completely fail.
- The next stage is installing and adjusting the rods.
- A check is in progress. First, the lock itself, regardless of whether the original one was modified or another one was installed (from Priora). All detected problems are corrected. The activator is being tested.
If everything worked perfectly, then it is quite possible to install the trunk trim in place, if only there were “hedgehogs”. Car owners are advised, since they had to remove the trunk trim, to also check which parts are making noise, knocking or vibrating. If such small problems are discovered, they can be solved by installing plugs from pieces of foam rubber of the required size. This will not only solve the problem with the lock, but also increase comfort when driving the car.
Communities › VAZ: Repair and Modification › Blog › Arrangement of the trunk of the Kalina sedan
Since purchasing the car, the “unkempt” trunk has been haunting me - things needed for the car were rolling around on the carpet, getting a spare tire is also a small problem (Kalina owners know), the stock lighting is very weak, the light lining of the trunk was very dirty... In general, I decided to work on the design of the trunk ...
First of all, a plywood trunk floor was ordered, lined with carpet and with a convenient cutout for the spare tire
The side trims of the trunk were washed and painted black. The trunk floor fit perfectly and the trunk began to transform
Next, I started making the sides of the trunk. I cut out a layout from cardboard, gradually adjusting it to the shape.
According to the layout, I cut out 2 side panels and windows in them from plywood (10mm)
It will be held on two sides
Well, then the actual installation. It is attached to the trunk trim fasteners (owners of the Viburnum sedan know) and inside with one corner to the trunk floor. In addition, the sidewalls turned out to be slightly “off-kilter” and hold up perfectly.
The connection is not complicated + (via a fuse) and - taken from the cigarette lighter
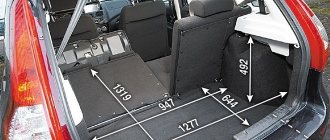
I put everything I needed into the resulting compartments: a fire extinguisher, a first aid kit, a cable, spare belts, tools and a lot of other things (there was even some space left). Of course, the volume of the trunk has decreased (at worst, you can remove them - 6 screws), but I am very pleased with the work done: - the trunk became neat - there were compartments for necessary things - made normal lighting
Luggage compartment lock
You can, if desired, modify the trunk lock of the Kalina hatchback in exactly the same way as was considered in the case of the Kalina station wagon. One of the main nuances, oddly enough, is not in the electrics or body design features, but in the fastening of the trunk trim. The point is that the Kalina hatchback is supported not only by pistons, but also by plastic corners.
That is why, when removing the trunk trim of a Kalina hatchback, you must pull the trim from the top: while the “hedgehogs” are easy to replace, the stationary plastic holders are only easy to break. And more about plastic. The bottom line is that the Kalina hatchback has a plastic trim on the trunk lid. According to the observations of many car owners, these are two problems at once. The first is that plastic is not entirely suitable for this part.
Constant efforts to open the fifth door, combined with a small number of stiffeners, gradually lead to the appearance of cracks in the plastic. Then everything follows domino rules. Perhaps the plastic will soon “fly”, and then you will have to think about repairs. Or, which is no easier, the plastic cover may remain in place, but will begin to “walk” along the metal part. And these are scratches on the coating and subsequent corrosion.
There are also aesthetes among Kalina hatchback owners who simply do not like the look of the trunk lid opening button. In general, all of the above reasons often lead hatchback owners to the same decision: an opening button on the fifth door is not needed. To solve all the problems at once, you can not only modify the Kalina trunk lock, but also remove the button from the fifth door, and, on the contrary, install a button in the car interior.
Lada Kalina Station wagon "First" › Logbook › Connection diagram for the electric drive of the trunk lock
Yesterday I decided to tighten up the hardware for the upcoming work on connecting the electric drive for the trunk door lock and outline the scope of work. Previously, I found the locations in the car: - connector for connecting the electric drive in the trunk door - glass control unit (BUS) and the wire connected to it from the electric drive connector (red-pink), through which a 12V control signal is supplied from the standard alarm - placement of the alarm module with an outgoing gray wire for connecting an additional control channel for opening the trunk from the key fob.
On the Internet I found many examples and accessible diagrams of connection diagrams from a simple one - a button, to a more intricate one - a button / standard (factory) alarm / additional (non-standard) alarm.
Since I don’t have a key with a remote control and don’t want to buy it, there is no point in using the control signal from the standard alarm. Connection diagram if I had a key with a remote control:
This means there will definitely be a button in the cabin to open the trunk and you need to connect and configure an additional channel on the installed alarm. Now the question arises, what signal does the alarm give? Positive or negative? Fortunately, I found a diagram from which I can safely draw a negative conclusion!
Then my general connection diagram should look like this:
As can be seen from the diagram using a 4-pin relay, I connect pin 30 to the red-pink wire, before that I will separate it from the BSU (maybe I’ll make male-female terminals in case the connection is quickly restored). It is necessary to apply mains voltage to contacts 87 and 85; I will build a 10A fuse in the circuit in front of them. A wire from the button from pin 1 goes to pin 86; it will carry a negative signal (ground).
From the operation of this relay, we find that when a minus is applied to contact 86 of the coil winding, it closes to contact 85. An electric magnetic field is formed that closes contact 87 to contact 30. The circuit should work and the electric drive will release the lock.
Now about the button in the cabin. Contacts 3 and 1 are constantly closed, which means that the signal from the alarm unit will by default pass through the button to the electric drive circuit if you press the key fob button.
When you press the button in the cabin, contacts 3 and 1 open, and 1 and 2 close. The mass is supplied to the electric drive circuit.
If I had a key with a remote control, I would use a 5-pin relay in the circuit. Here an additional contact 87a appears, which is constantly closed to contact 30. This way you can maintain the connection of the standard circuit and break it when using a signal from a button in the cabin or from the alarm key fob. That is, when a signal is applied to the relay coil, contacts 87a and 30 will open, and contacts 87 and 30 will close. Management will be carried out as in the previous scheme.
If the writing is not boring and someone has thoughts or advice, write)
And may the electrical gurus forgive me. I'm just a novice at this
Source
Installation of the locking device drive
Removing the fifth door opening button is the easiest thing. It is more difficult to seal the remaining hole. This can be done using a special putty. One of the tricks is to process the hole cavity so that the surface becomes as rough as possible. This will create optimal adhesion to the putty. Next comes sanding, priming and painting. The work can be done independently without special training and practical skills. After that, you don't have to worry about aesthetics.
Of course, all dismantling work can be carried out only after the installation of the electric drive is completed, as well as the installation of the trunk opening button in the cabin. The trunk lock drive and how to install it are all relatively clear. Both the location and the connector of the wires in Kalina are determined in advance for this.
Renault Symbol automatic 98 horsepower › Logbook › Broken trunk lock wire. I fix it myself
One sunny spring day I arrived at the store, clicked “close” on the key fob and... the car flashed the emergency lights without any sound of the locks closing...
I thought it was some kind of glitch and it would go away. but no. Having bought some nonsense in the store, I try to open the trunk... it’s locked - all the doors are open - but the trunk is not there.
What didn't I think of. and the trunk lock burned out, and the central locking broke... and so on and so forth.
I called the service: they said that it costs 500 rubles to open the trunk, and then separately search and fix the problem. At that moment, the toad had a strong grip and strangled me... I decided to open it myself: reclining the back of the back sofa, pulling everything out of the trunk, I completely climbed in there. It's funny - it turns out you can fit in there quite well))))
I unscrewed one nut and the trunk opened.
I started to find out what was going on. The first thing that caught my eye was a blown fuse for the central locking ==> it means there is a short somewhere.
I plugged in the fuse for the wipers, disconnected the terminal from the trunk lock - the central locking works.
I connected the terminal back, poked the central locking button several times: the instrument and interior lighting dimmed. and click! The fuse blows again.
Climbing around the trunk, I found the break point - under the very rear shelf near the rubber band.
Unfortunately, there is a very thin two-core wire going to the trunk lock, which simply frayed when opening and closing. More precisely, one core was frayed. Most often this happens in winter - the wire becomes dull and breaks.
The wire broke off in the most inconvenient place - right under the shelf. The wire protruding from the interior is not long enough for twisting. I had to make an insert. Using a household electrical cable, connect the wire from the trunk to the wire from the central locking system.
1. 0.3 meters of two-core copper electrical cable with a cross-section of 1 mm.2. 6 heat shrink tubes: 4 thin and 2 thick.
1. bit off the broken end of the wire in the trunk2. removed the rear parcel shelf trim 3. pulled the broken wire4 into the cabin. I stripped the ends of each wire on the wire from the lock and on the wire from TsZ.5. I stripped the wire strands for insertion, on both sides.6 a thick tube is put on the wire for insertion, and a thin tube is put on each wire individually.7. I twisted the wires and put a thin heat-shrink tube in place of each twist. and heated the pipe with a lighter.8. when both wires are sealed into a tube, a thick tube is pulled over them and heated again.9. I inserted the extended wire into the trunk and again repeated the twisting of the cores of the spacer cable with the wire from the lock.
source
Advantages and options for upgrading car locks
Any option for modifying your own car has its pros and cons. It was already discussed at the beginning why exactly it is worth modifying the trunk lock of the Kalina hatchback and station wagon. Now about the possible options. Installing the trunk lock activator alone solves one problem - the issue of using the key. The downside is that when the ignition is on, pressing the trunk open button will not help Kalina hatchback and station wagon: the engine will definitely have to be turned off.
True, you no longer have to remove the key from the ignition. That is why the issue of installing a trunk release button for Kalina hatchback and station wagon remains relevant. This modification option has its drawback: you will have to run the electrical wire through almost the entire car. Most car owners are willing to put up with such inconveniences, since they are one-time use.
The Kalina hatchback trunk lock drive and the issue of modification are a matter exclusively for the car owner. It is possible that it is impossible to independently modify the trunk lock of the Kalina hatchback, and there is nowhere to turn. In some regions, purchasing a lock for a Lada Priora car can be difficult. According to many motorists, this disadvantage can somehow be put up with.
For particularly skillful car owners, options for controlling door opening/closing mechanisms, including the fifth door, are available. For example, the simplest option is one in which all the doors of the car are unlocked simultaneously. And the most complex option, which is not achievable for everyone, since it requires a somewhat non-standard approach, is that the driver, passenger and fifth doors are controlled separately.
Naturally, the options for modifying the Kalina hatchback and station wagon lock differ in cost, execution technique, and time required for a full range of work. The decision which option to choose is always up to the owner.
In order to successfully replace the trunk lock in a domestic car Lada Kalina in a sedan, station wagon and even a hatchback, you will need to stock up on some tools and accessories. The algorithm of actions is simple, so such work is available to owners subject to responsible preparation.
Next, we will consider in detail the nuances of the replacement process.
Let's sum it up
Replacing the trunk lock is quite labor-intensive and will require a lot of time to implement. If the owner of LADA Kalina encounters difficulties, we advise you to contact specialists when performing the installation procedure.
To replace the trunk lock of Kalina, you need to arm yourself with some materials. You can carry out the work yourself, doing everything according to a certain algorithm. Below you will find detailed information about the replacement.
How to dismantle the lock to replace the cylinder?
You can gain access to the lock mechanism by removing the plastic upholstery inside the luggage compartment. This protective component is fixed by means of two bolts, which are located in the places where the special handle is installed. They are also called latch caps. They are pryed off with an ordinary screwdriver.
Structurally, the trunk lock in the Lada Kalina is made of two parts, regardless of the body type, hatchback, station wagon or sedan. They are presented in the form of a cylinder and the unlocking mechanism itself. If it is necessary to replace the trunk lock, then the dismantling of these components is carried out in a separate order.
When you only need to replace the larva, this can be done in a few simple steps. Here you will need a screwdriver and a socket.
- By unscrewing the bolts, we release the necessary part of the body.
- Next, remove the retainer using a screwdriver. It is attached directly to the body of the larva itself.
- It is recommended to remove it very carefully, while holding the spring.
- Installation of a new element is carried out strictly according to the reverse manipulation algorithm.
If there is a need to replace the lock itself, the operation becomes a little more complicated due to the need for additional actions.
- First, the door lock is unscrewed using a screwdriver. This is not difficult since the element is held in place with only two screws.
- Now we pull the trunk lock outward, and it freely comes out of the landing niche.
As you can see, removing the trunk lock is not difficult.
How to remove the lock and replace the cylinder
To gain access to the trunk lock of the Kalina sedan, it is necessary to dismantle the internal plastic trim. It is held on by two bolts, which makes it easy to remove. They are located in the places where the handle is installed, in the so-called latching pistons. You can pry them off using an ordinary screwdriver.
The design of the trunk lock of the Kalina hatchback consists of two parts. This is the larva and the mechanism itself responsible for blocking the door. Elements must be disconnected individually. Below you will find information about such deletion.
If you need to replace the larva, everything can be done in a couple of movements. All you need is a deep socket and a flathead screwdriver. Then you should unscrew the bolts and release the desired part of the housing. When the work is done, you need to use a plastic screwdriver to remove the clamp, which is attached to the body of the larva. Next, it is carefully removed, holding the spring. Then the replacement is made, but in the reverse order.
How is the activator installed?
The only way to get inside the trunk of a Lada Kalina is this manipulation - turn the key and press the button. This action is not always associated with convenience. For example, in bad weather or when your hands are full, this is not easy to do. This circumstance prompts owners to consider purchasing and installing an activator. Installing this useful element is quite simple. Here you will need a self-tapping screw, which will secure the device we are considering. To check the functionality of the activator, you should connect it with the standard connector from the on-board network.
After the current supply to the activator is stopped, the door is locked with the first latch, but remains not completely closed. To get back inside the luggage compartment you will need to use the key.
Installing a push-button lock is not a very difficult task. To implement it, you will need to assemble a circuit, which requires wiring. Here you will need to “attract” the programmable channel present in the alarm.
How to install the activator
The only way for the viburnum to get into the trunk is to turn the key and press the button. Naturally, doing this is not always convenient. Weather, busy hands and other troubles contribute. At this stage, many car enthusiasts begin to think about the trunk activator. It is quite possible to do this, you just need to try a little.
The Kalina station wagon trunk lock activator is easy to install. It is enough to take a self-drilling screw and secure it on one side with it and on the other with a wire holder. To check the device, you need to connect it to the standard connector.
The only problem in all this work may be the back door being picked up at the wrong time. After the current stops supplying the activator, it closes with the first latch, but the trunk is not completely closed. In order to get into the so-called fifth door, you will have to use the key again.
A lock with a button is not difficult. But during work it is necessary to assemble the circuit and stretch the wires. In this case, one programmable alarm channel (additional) should be used.
There are two main connection options. First: the button goes to +12 on the activator, bypassing the relay. The advantage of this connection is its simplicity and the absence of unnecessary elements, the disadvantage is the need to run additional wires.
Installing the activator using the second method is more labor-intensive. You will have to use additional elements, namely diodes. In addition, there is a need to search for “mass”. The main advantage is the use of a minimum number of wires.
Many experts prefer the first option due to its simplicity. The wire can be copper PV-3 with a square cross-section. It must be pulled along the left side and thresholds. The switching can be crimping and electrical tape on top.
A standard pink-red wire is used to control the activator. It must be connected to the relay, wrapped and hidden under the BUS mounting frame. All operations are carried out with the negative battery terminal removed. This is how the electric trunk lock drive is mounted.
Electric drive: easy installation
The manipulation algorithm is very simple. Here you will need to make the rotary plate together with the rod yourself. The wiring is laid directly to the lock and connected to a special control unit. When the car is “disarmed”, the electric drive of the luggage lock is activated following the unlocking of the button responsible for opening the rear door of the Lada Kalina.
The whole essence of the action comes down to connecting the electric lock to two cable lines. You can buy the product at a specialized retail outlet. The end of the luggage compartment will need to be hidden in order to prevent the risk of moisture getting into it. If this is neglected, then with the penetration of water a short circuit will be observed in the designated area.
Much attention should be paid to the area near the door hinges, because broken wires are a common occurrence here. To prevent this, it is recommended to regularly monitor this section of the highway.
Before starting the procedure for installing the electric drive in a Lada Kalina car, you will need to remove the plastic trim. Here you need to be careful not to damage the specified protective element.
The choice of a lock for LADA Kalina should mean that there is no subsequent need for modifications before installation. This means drilling additional holes.
An important point in the installation procedure is the laying of electrical lines. For these purposes, you will need about 3.5 m of appropriate cable. You can use standard wiring suitable for the rear door. The power source can be a cigarette lighter socket. It is also important to install the fuse correctly.
We do all switching in LADA Kalina in accordance with the diagram.
Important! The main line in this version may include a wire that goes to the courtesy lamp for lighting the space inside the trunk.
Removing the door trim yourself
The casing is attached not only to screws, but also to plastic pistons. The number of screws holding the part in question is four:
Numbers here indicate all fastening elements. But to get to them, you need to remove the screw cap “3”, as well as the inner door handle. The pawl handle also needs to be unscrewed.
If these actions are completed successfully, the casing begins to be dismantled, moving it away from the metal. Dismantling is carried out starting from any of the corners, but care must be taken: the pistons holding the plastic are fragile.
If the package includes power windows, you will need to disconnect the connector connected to the button block. Also, another similar connector is present in most trim levels - where there is a central lock. Both connectors must be disconnected.
New Lada: Lada Granta identification numbers – Automotive Magazine
All the steps described here involve electronics in any case.
Therefore, at the stage before dismantling the trim, you need to open the hood, take the “10” key and unscrew the negative terminal. We are talking about the battery terminal, which can be connected last (when the last screw is screwed in). Anyone who breaks this rule will look for blown fuses. Draw a conclusion.
Now let's change the lock
The Lada Kalina will allow you to completely replace the trunk lock without any problems. A friendly car, what can I say.
First follow the previous instructions. To replace the lock, you need to remove the cylinder. You already know how this is done.
Now a couple more steps:
- use a large Phillips screwdriver to unscrew the locking mechanism;
- You need to unscrew 2 mounting bolts;
- pull the knot towards you;
- it should give in and be easily removed;
- do not forget to disconnect the plug with power wires from the system.
Is it worth picking the trunk lock of a Lada Kalina station wagon or another body type? No. This is an extra hassle. A worn or broken lock is difficult to repair. Usually impossible.
It’s easier, faster, and also cheaper to buy a new unit. And replace it on the car.
Replacing the ignition switch yourself
Unfortunately, the Lada Kalina cannot please you with its reliability and durability; many systems, including the ignition switch, fail within a couple of years, so in order to save on repairs at expensive car repair shops, it is better to find out how to do it yourself. So, having come to the conclusion that the lock needs to be changed, we buy a new lock, which costs around a thousand rubles. In the kit we will receive three cylinders (on the doors and trunk) and 2 keys. You also need to purchase four shear bolts, since the old ones will no longer be suitable after dismantling.
In addition to the product itself, we will need the following tools:
- chisel;
- two screwdrivers, a flat one for removing the clamps and a cross for the bolts;
- 10mm wrench or 10mm ratchet;
- key to 8.
Let's get started
1. First you will need to disconnect the battery cable from the negative.
2. Armed with a cross-head screwdriver, unscrew the fasteners on the steering column. To make it more convenient for you, we immediately warn you: there are two bolts on the right and left sides (3), two at the bottom in the middle (2), and two at the very bottom (1). There is also a self-tapping screw located directly under the steering wheel (4).
3. We take out the clamps holding the steering column switches. We dismantle the switches.
4. Now we need the help of a chisel. It is necessary to apply blows of medium power and unscrew the bolts. Bolts, as a rule, become very sticky after several years of use, so you will have to work hard. As soon as you notice that the bolts begin to move out of place, you can pick up pliers and continue to work only with their help.
5. We need to get to the lock connectors, of which there are only two (main power and immobilizer antenna). The connectors are hidden under the console casing. To gain access to the connectors, you need to slightly pull the wiring harness away from the lock and pull them out.
6. Unplug the connectors, and then remove the ignition system switch.
Now we replace the old lock with a new one and reassemble it in the reverse order. But don’t forget that you need to do a little more magic on the doors and trunk, changing the lock cylinders.
