Most motorists, when problems arise with electrical equipment, prefer to contact specialists. And only when manipulating the battery do we try to do everything ourselves, forgetting that this is also an electrical device, and with currents that pose a danger to humans. Considering that when working with a battery we are faced with an aggressive liquid, it would be useful to know the rules for dismantling and reinstalling the battery on a car, taking into account safety requirements that most drivers do not adhere to.
Design and types of batteries
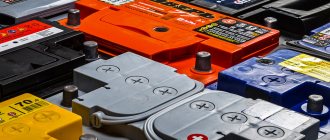
The rapid development of technology has also affected the field of car batteries. Gone are the days when only serviceable antimony batteries were available. Today, if a battery needs to be replaced, drivers have plenty to choose from:
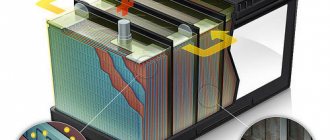
- Lead-acid power supplies. The classic type of battery, consisting of a housing in which lead electrodes are installed and electrochemical fluid is filled. The electrolyte reacts with the electrodes when current is supplied to the terminals from an external power source and when a load is connected. The average service life of this type of battery is about 5 years.
- AGM batteries are an improved version of lead-acid batteries. The main difference is the presence of fiberglass wrapping of the electrodes, which prevents them from falling off. They are manufactured using maintenance-free technology and are installed mainly in electric vehicles.
- Gel batteries use a jelly-like electrolyte instead of a liquid electrolyte, which has an order of magnitude less fluidity. This allows you to operate the battery in an inclined position, up to vertical, without the risk of electrolytic fluid leaking.
- Traction batteries differ from the listed analogues in their greater power (currents up to 1000 A and voltage up to 96 V), which allows them to be used as a long-term power source for vehicles.
Battery care
Proper care and operation will extend the life of the battery.
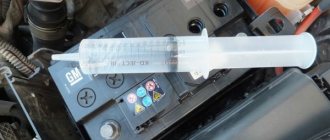
To maintain the battery, you need to wipe its case with a dry, clean cloth to remove moisture and remove dirt and dust from the ventilation holes. If the battery is serviceable, then regularly measure the electrolyte level and its density. Monitor the condition of the contacts, clean the terminals and treat them with a special anti-corrosion compound. The installation sequence is very important when installing a battery. The main thing is to remember that you must connect the plus first, and then the minus. If everything is done correctly and the on-board computer is configured, then you can count on trouble-free operation of the car. We also recommend that you familiarize yourself with the design of the transformer.
Preparing to install the battery in the car
To install the battery in the engine compartment, it is not at all necessary to go to a service station or service center - this operation is considered one of the simplest when servicing a passenger car. But since we are talking about an electrical device filled with a sulfuric acid solution, it is necessary to work with the battery while adhering to basic safety rules.
Here is a list of recommendations on how to properly install a battery in a car:
- First of all, you need to take care of protecting your eyes and hands: you need to wear safety glasses to protect your vision from contact with electrolyte. For the same purpose, as well as to protect against electric shock (and this is considerable for batteries), it is necessary to use latex gloves.
- Before proceeding with the removal/installation of the battery, make sure that all electrical appliances are turned off, and then remove the key from the ignition switch (if this is not done, when removing/attaching the battery terminals, a voltage surge is possible, which can have a negative impact on the working devices).
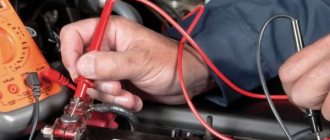
- If you are not installing a new battery, clean its terminals from oxides and dirt, first using a metal brush (or sandpaper) and then a baking soda solution. The latter is prepared by adding a tablespoon of soda to 500 ml of water. After cleaning the terminals, wipe them dry with a rag.
- In order to prevent oxidation of the battery terminals in the future, they should be treated with a special lubricant that will protect the contact group from the penetration of oxygen. Without it, corrosion processes are impossible.
- Check the integrity of the wires and terminals that fit onto the battery terminals. If there are cracks, insulation breaks or other defects, such wiring must be replaced.
- Only after completing all these points can you begin to install the battery in its original place. Please note that it weighs a lot, so you should handle the power source with the utmost care.
Depending on the car model, the battery can be mounted differently, this also needs to be taken into account. Usually these are clamping strips, with upper or lower fixation of the battery case.
Which terminal to remove first?
To understand which terminal needs to be removed first, you need to remember your school physics course. The “ground” is connected to the negative terminal of the battery, which is the metal elements of the car - the body, frame, engine, etc. All energy consumers in the car are connected to the positive terminal - the starter, lighting, headlights, audio system, etc.
When any terminal is removed, the circuit opens, so formally the order of removal is not important. However, if the removal procedure is incorrect, there is a risk of a short circuit. In this case, not only the elements of the car can be damaged, but also the person performing the manipulation.
If you remove the positive terminal first, and then accidentally touch the positive contact of the battery and the metal part of the car (ground) with a metal object, for example a wrench, then a strong short circuit will occur. If you remove the negative terminal first, the mass will be de-energized, so further removal of the “plus” will not lead to a short circuit even with careless actions.
Therefore, the sequence of actions when removing the battery is as follows.
- First, the standard battery mount is unscrewed.
- The nut securing the negative contact is loosened.
- The negative terminal is removed.
- Then the nut securing the positive contact is loosened.
- The negative terminal is removed.
- The battery is removed from the stand.
Battery terminal connection order
It would seem that what is so difficult about installing the battery in its regular place and connecting the wires? Indeed, the operation is simple, but only if you know how to properly connect the battery to the car, in what sequence you need to connect the battery terminals.
When dismantling the battery, remove the wire from the negative electrode first; when installing, the order changes: first we put the terminal on the terminal of the positive electrode.
How to determine the positive terminal? On batteries of the latest generations they are marked in red, but if there is no such sign, there will definitely be a “+” sign on the terminal itself or next to the case. In addition, the positive and negative terminals often have different diameters, and this is done specifically to prevent accidental polarity reversal.
So, we installed the battery in its regular place, fixed it, made sure that it does not move anywhere, and we know which terminal is put on the battery first. All we have to do is loosen the nut and put the terminal on the terminal terminal, making sure that it goes all the way and without applying excessive force - otherwise we may damage the contact group. We tighten the terminal, and also without fanaticism - the electrode is made of soft metal that can crack. In this case, the contact must be reliable, the terminal must not rotate.
After this, we proceed to connecting the negative terminal using the same algorithm. If you see that one or both wires are not reaching the battery terminals, you are most likely trying to connect them in the wrong order. Check again that the battery is installed correctly and the polarity of the wires.
Battery connection
When installing the battery, you need to check the condition of the wires leading to it, clean the clamps from corrosion and lubricate the clamping screws. To properly connect the battery in a car, you first need to make sure that no one is in the car, since the connection may activate the airbags. All actions must be performed in the reverse order to what was done during removal. The sequence of connecting the battery terminals should be as follows:
- The first thing you need to do is put the red wire on the plus terminal of the battery.
- Connect the negative black wire next.
- Tighten the nuts with a 10 mm wrench.
- Secure the battery, put on the pressure plate, tighten the bolts.
We recommend: Carrying out CTC of an acid battery at home
When you first turn on the ignition after installing the battery, you must be outside the car. After installing the battery, you should check the operation of the lighting devices. To do this, it is necessary, without starting the engine, to check that the low and high beam headlights are on, the operation of the windshield wipers, and the hazard warning lights. If you connect the battery correctly, then everything in the car should work properly. To configure the on-board computer after connecting the power, you need to take the following steps:
- Warm up the engine at idle speed.
- Increase the speed to 2-2.5 thousand and hold for two to three minutes.
- Take a test ride, using sharp acceleration, driving at low and high speeds.
The test ride must be at least 10 kilometers.
To properly connect the battery to a VOLVO car, you need to follow some rules:
- The ignition must be turned off at least 5 minutes before disconnecting the battery, so as not to lose information from the control modules.
- You need to connect the battery in the second position of the ignition key, because this will avoid errors when turning on the modules.
If the car has a remote start system, then when the power is turned off, the access password will be reset to factory settings.
The order of connecting the battery terminals after charging
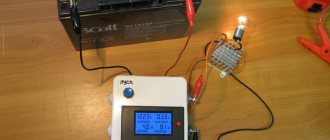
Regardless of what type of battery is installed in the car, whether it is serviced or not, power supplies must be recharged periodically. Even if you did not drain the battery, forgetting to turn off one of the electricity consumers, which is not so rare, you need to understand that the generator never fully charges the battery, so over time the charge level gradually drops. And to avoid negative consequences, preventative charging should be carried out at least once a year.
As for the charging itself, this can be done not only using a charger. Some motorists, if they have a second car, practice lighting a cigarette, not only to start the engine of their car, but also to charge the battery. The main thing is to find a willing donor. The procedure itself is not that complicated, but you will need a set of special wires of sufficient length.
So, we disconnect the standard wires from your battery, and instead of them we connect the wires for lighting - the plus from the donor battery to the positive contact of yours, the minus, respectively, to the minus. We start the engine of the donor car, wait 20 minutes - this time may be enough to charge the dead battery enough for one start. However, it is much easier to just light a cigarette: do not remove the standard wires from your battery, and do not start the engine on the donor car. After connecting the wires, try to start the power unit. If the attempt is successful, you can disconnect the wires (negative first).
But it is better, of course, to use a charger. In most cases, the battery will have to be removed to do this. The procedure itself should be carried out according to the instructions, guided by the readings of the charger, equipped with sensors for measuring current and voltage. After charging is complete, disconnect the charger from the network, remove the wires and connect the standard terminals to the battery in the correct sequence (positive cable first).
Why remove the battery from the car?
First, let's figure out in what situations it may be necessary to remove and install the battery on a car. The reasons for this may be the following:
- replacing a worn out battery;
- scheduled battery charging using a charger. In this case, you can do without shutting down;
- When carrying out work on a vehicle, it is necessary to disconnect the on-board network. In this case, it is also not necessary to remove it;
- When servicing or repairing the machine, the battery blocks access to other components.
When replacing a car battery, you cannot do without removing the old battery and then installing a new one. Therefore, the removal and installation of the battery on the car is described in detail below. When you perform scheduled battery charging, removing the battery is very advisable. If there are problems with its complete removal, then simply disconnect the terminals. When charging a battery connected to a vehicle, there may be an undesirable effect on the vehicle's on-board systems. This is especially true for expensive electronics. The process of charging the battery without removing it from the car is described in detail in the article at the link provided.
If you need to de-energize the car for repair work, you can remove the terminals from the battery. But if the battery prevents you from getting to other components of the car, then you will have to remove and then install the battery.
Battery location
Before installing a new battery in your car, find out where the battery is: in the engine compartment or luggage compartment. Sometimes the battery is located under the seat in the cabin. It all depends on the brand of car, but most often the battery is located next to the power unit, closer to the radiator trim, on the right or left.
What happens if you connect the wires incorrectly?
This situation is called a polarity reversal, and the level of consequences of such an error can vary.
The most negative option is if you connected the wires in the wrong order while the engine is running. Any outcome is possible here: from a blown fuse to failure of the on-board electronics (first of all, the diode bridge of the generator burns out, but all consumers turned on at that moment can suffer - from the radio to the ECU).
The faster you react, the less damage there will be. If you observe active sparking during connection, try to immediately disconnect this terminal.
If you leave everything as is, the wires begin to get very hot and melt, which can cause a fire.
How to put on terminals correctly
Most questions arise about connecting wires to terminals.
But before this procedure, you should definitely inspect them for the presence of defects, dirt, and oxides. Contamination of the terminals is one of the reasons for the deterioration of engine starting, and drivers often blame the battery itself. So we clean the terminals from dirt, and if there are traces of oxidation, we use medium sandpaper to remove them. We apply the same procedure to wire clamps. It is better to treat the screws holding the clamps with lubricant to make them easier to unscrew.
Now let’s look at the order in which the terminals need to be connected when installing the battery in the car:
- First we put the red wire on the terminal with a plus sign at the end;
- the second is a black wire, connect it to the terminal with a minus sign;
- tighten the clamping bolts, but without fanaticism;
- tighten the fastening of the pressure plate - you may have to move the battery in several directions to get into the grooves.
If an alarm is installed on the machine, a characteristic click will be heard when the negative contact is closed. To check the operation of other devices, you need to turn on the ignition.
Experienced drivers, after each connection of the battery, start the power unit, let it warm up for several minutes at idle, then increase it to 2500 rpm and let it run in this mode for about 2 minutes. And only after that they make a test drive to make sure that all the main consumers of electricity are working.
Removing the battery on modern cars resets some settings and errors accumulated by the electronic control unit. There are models for which such discharges cannot be ignored.
What to do to prevent the terminals from sticking
To ensure that the connectors do not stick due to oxidation, and the car does not suddenly fail, it is necessary to carry out the following mandatory work:
- inspect contacts once a month;
- wipe the surface of the battery dry;
- Every month in the summer, monitor the electrolyte level in the serviced batteries;
- if white deposits are found on the contacts, check the battery tightness;
- before the start of cold weather, you need to check how hot the contacts are when starting the engine; with slight heating, you need to check the contacts and carry out additional processing.
The most effective way to remove deposits on terminals is mechanical cleaning.
IMPORTANT! Whatever means are used to protect the terminals, they must be cleaned mechanically every six months. Especially before the season changes.
To do this, you need to remove the terminals, moisten them with an alcohol-containing liquid or a solvent diluted with water, and wipe them dry. A soda solution (a tablespoon of baking soda per glass of water) will help remove any remaining acid.
A soda solution is used to remove acid residues.
IMPORTANT! You cannot use WD products to clean the terminals, which contain, in addition to oil, conductive substances that are harmful to electrical contacts.
Do not use acetone because it corrodes metal. Sandpaper or a wire brush is suitable for cleaning. The result of the work should be a shiny surface, even if not perfectly smooth.
To keep your contacts shiny, you need to protect them from aggressive substances. The use of lithol, grease and other lubricants will help protect the clamps. Before using the lubricant, you need to remove any remaining material.
Silicone lubricant has proven itself to be excellent, retaining and repelling aggressive media. The disadvantage of the lubricant is its fluidity, it flows out quickly, and it is necessary to inject it regularly. The sprays have proven themselves to be excellent not only in quality, but also in ease of use.
Sprays have proven themselves to be excellent
The idea that graphite lubricant is suitable for contact processing is misleading. The lubricant contains conductive substances.
IMPORTANT! Graphite grease should not be used to treat terminals.
How to tighten terminals correctly?
When tightening the terminals, do not use excessive force. A terminal that is too tightly tightened can lead to the appearance of microcracks around the current leads, through which the electrolyte will subsequently evaporate. This means that the terminals will face inevitable oxidation.
At the same time, simply throwing terminals onto the current terminals, as motorists sometimes do, is also not enough. In this case, the contact between the current lead and the terminal will be unreliable. This will lead to heating of poorly contacted elements. And when driving on an uneven road, a poorly tightened terminal can jump off and short to ground.
Therefore, the terminals should be tightened using only moderate amounts of force to ensure secure but not excessive tightening.
Dilapidated wires or structural elements.
If the car's wiring has been modified, there are twists, additional wires and other non-standard structural elements, dismantling the battery can be seriously difficult. Sometimes installing a battery is completely impossible without first replacing certain parts with new ones.
Note: At the customer's request, work to replace the battery can be carried out despite the difficulties indicated by the courier. In this case, the client takes full responsibility for any consequences (destruction, breakage, damage, etc.) by default.
Procedure for removing the battery
Modern cars contain many electronic devices. If the battery is disconnected, the on-board computer system may malfunction. To avoid this, you can connect a portable charger before removing the battery, which will provide power to the on-board network. The sequence of actions should be like this:
Now you can begin installing the new battery. Before connecting the battery to the car, you need to remove debris from the shelf and clean the contacts that have oxidized during battery operation.
Battery and running engine
The car battery can only be removed with the engine turned off. It is prohibited to dismantle the battery while the engine is running. And it is important to take this into account when we are talking about modern cars equipped with on-board computers.
Basic moments:
- When the engine is turned on, a charge is constantly supplied from the generator. When dismantling, the positive terminal hits the body, resulting in a short circuit. This can harm not only the generator, but also the entire wiring and on-board network.
- If the battery is disconnected without permission, a voltage surge occurs. Increased voltage affects the performance of the relay regulator, alarm system, and other components.
- The power source is turned off when the ignition is turned off.
- Dismantling is carried out in accordance with the requirements and standards that are recorded in the technical documentation.
Recycling an old car battery
Failed units are not installed in the car. They must be disposed of because toxic and harmful materials were used for their preparation.
Full or partial disposal is carried out by special organizations. They operate according to a proven scheme:
- Draining and neutralization of spent electrolyte.
- Crushing the body on special machines.
- Removing debris and metal residues from the lead-acid mixture.
- Lead separation and purification.
- Re-preparation of purified lead products.