When operating an internal combustion engine, the removal of heat generated during fuel combustion is of no small importance. For this purpose, special measures are taken, to the point that the car has a separate system designed specifically to ensure the required temperature conditions of the engine. The use of heat and the removal of its excess can be carried out using various methods, including the use of coolant. Without touching on the numerous other aspects of the operation of the individual components involved in the implementation of this, it is worth paying attention to the coolant pump, or as it is also called, the water pump, which, in fact, is a key element of the entire process.
Coolant circulation pump
It is best to consider the operation of such a product using the example of VAZ 2106, 2107 cars. But first of all, to understand the role that the coolant pump plays in heat removal, we must at least remember in general what this whole process is. It is shown schematically in the figure below, which allows you to evaluate the directions of movement of water during its circulation.
In this figure, to make the process more understandable, the stove is not shown. However, even without this element, the picture allows you to evaluate what exactly
Due to the circulation of the liquid, heat is removed from the engine cylinders. It is for its continuous movement that the pump is designed. If circulation is disrupted, heat dissipation deteriorates, the motor overheats, and if the set temperature is significantly exceeded, it can lead to jamming of the pistons.
What's the result?
As you can see, if you have certain skills, the process of replacing the clutch disc is not difficult. The most time-consuming operation is gaining access to the clutch itself, especially on front-wheel drive vehicles.
As for replacing the disc itself and how to correctly install the clutch disc, as well as the frequent question of which side to place the driven clutch disc, you need to take into account that the disc is placed towards the basket with the part where the damper springs protrude.
Manual transmission gears (speeds) do not engage after replacing the clutch: main reasons, settings and adjustments. Diagnosis of problems, useful tips.
How to replace the clutch on a DSG/S-Tronic robotic gearbox. Signs of the need for replacement, removal and installation of the DSG clutch, calibration and adaptation.
Coolant pump VAZ 2106, device, principle of operation
On VAZ 2106, 2107 cars, the pump that pumps antifreeze or water through the engine jacket is located on the side of it. The drive to ensure its operation is not electric, but is carried out from the engine crankshaft using pulleys and a belt. Structurally, the pump is a closed volume, inside of which there is a shaft with an impeller. Using hoses at its inlet, through a pipe, cold water is supplied from the radiator.
Rotation of the impeller is ensured through a pulley and a belt drive thanks to the torque coming from the crankshaft of the internal combustion engine. The rotating impeller creates pressure, due to which water enters the engine jacket, as well as other components that ensure the removal and use of excess heat.
It should be noted that the operation of the remaining components of the system is not considered here, and issues related to the circulation of antifreeze also remain uncovered.
How to modify and modernize the stove with your own hands?
You can improve the operation of the heating system on the “seven” in the following ways:
- redo side window ventilation;
- modernize the damper;
- modify the foot airflow system to increase its efficiency;
- improve the operation of the rear cabin heating system;
- modify the thermostat;
- improve the functioning of the steam exhaust line;
- install an additional water pump.
User Egor Panther spoke about options for upgrading the heating system in VAZ 2107 cars.
Improved side ventilation
The side ventilation system needs to be modified after purchasing an additional fan. The device is mounted in the left line, which will allow forced air flow to the deflector.
The tuning procedure looks like this:
- At the first stage, the deflector device is dismantled from the main line. To perform this task you need to use a screwdriver. The deflector in the cabin is pryed up and removed; it must be pulled forward. Similar actions are performed on the other side of the stove.
- Dismantling the device is carried out carefully so as not to leave any traces of damage on the center console.
- If the deflector is removed, it is necessary to remove the holding device from the dashboard. This element is mounted in the center console using special antennae. The essence of this modernization is that a classic computer fan is installed to force air flow into the heating system.
- To install the ventilation device, the element must first be fitted to the deflector body. After applying it to the plastic with a marker or pencil, you need to apply markings. Using a utility knife, a cut is made in the plastic on the deflector.
- If the dimensions are marked accurately, the ventilation device will be tightly installed in the housing. This is important, since such installation will prevent the part from loosening while driving.
- After completing the installation of the fan, you need to make sure that its blades rotate normally and nothing interferes with them. If problems arise, the device is adjusted. If necessary, the blades can be trimmed a little.
- To ensure efficient air flow and no backdraft, the entire structure must be sealed. Therefore, using sealant or the remains of plastic that appeared after cutting the deflector, the cracks are clogged.
- If all steps are completed, the ventilation device is installed in the main line area, and then mounted on the body of the deflector element.
- After completing all the installation steps, you need to work with the electrical component. It is recommended to connect the fan electrical circuit to the conductor where the current appears when the ignition is activated. This option is more convenient. It is possible to connect the device to the heating unit control cable.
Damper modernization
Modification of the VAZ 2107 stove, which consists of upgrading the lower damper of the system, is the easiest option to implement. If all actions are performed correctly, the device will not open or close randomly when the car drives over bumps. This will ensure efficient and equal airflow on both glasses.
Additional coolant pump
However, such a mechanical drive, thanks to which the VAZ 2106, 2107 pump pumps water, has a serious drawback. The use of such a drive results in the pump running while the engine is running. If, when you turn it off, the motor is overheated, then overheating can only intensify in the future.
To avoid this phenomenon, an additional electrically driven pump is used. Thanks to its use, antifreeze circulation is ensured after the engine is turned off. Its operation continues until the temperature in the system reaches a certain value. Depending on the design, when the auxiliary pump is turned on, the general electrically driven fan may also turn on.
During the operation of the car, this happens quite often, especially in the summer. This additional device only works when the engine is turned off and protects it from overheating, which prolongs its “life”.
Electric fan
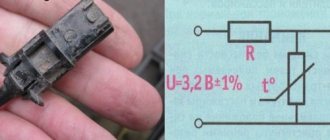
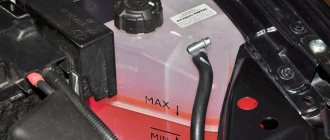
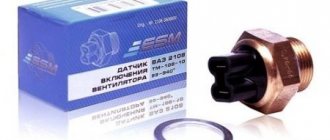
We are talking about the fan that is installed on the cooling radiator. It works quite rarely. It turns on only when the temperature at the radiator outlet is exceeded. A sensor is installed in this place, or, to be more precise, a thermal switch. It consists of a bimetal plate, which at a certain temperature is deformed, changing its geometry. In this case, the contacts connected to this plate mechanically are closed.
It is worth noting that the cooling system of the VAZ-2107, malfunctions of which can be eliminated fairly quickly, is still not very perfect. The sensor, according to the manufacturer, is capable of switching large currents and has an impressive service life. But it is better to have a degree of protection - switching on should be done using an electromagnetic relay, which is controlled by a sensor. This way you can increase the resource many times. In addition, it is necessary to have a button in the cabin connected parallel to the sensor. With its help, you can force the fan to turn on.
Pump maintenance
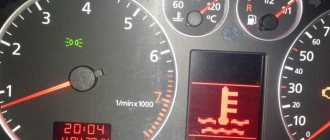
As a rule, signs of pump failure on a VAZ 2106, 2107 will be increased noise, antifreeze leakage and jamming. Such products cannot be repaired, and if they fail, the coolant pump must be replaced. In addition to the appearance of extraneous noise, a sign of a malfunction can also be an increase in the temperature of the motor; the arrow indicating its value on the front panel moves to the red sector.
Removing the coolant pump itself is not particularly difficult and can be done on your own. To do this you need:
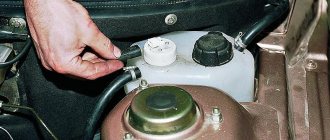
- drain the coolant;
- remove the generator belt and unscrew the adjusting bar;
- holding the pump pulley with a screwdriver, unscrew the three mounting bolts;
- Next, unscrew the four nuts securing the pump;
- remove the pump from the studs (in case of difficulty, tap the pump with a rubber hammer on all sides);
- We install the new pump in the reverse order, not forgetting to install a new gasket between the pump and the engine housing.
The pump, installed on the VAZ 2106, 2107, and other car models, has a mechanical drive and circulates antifreeze or water when the engine is running. Given the importance of maintaining the desired engine temperature, modern cars sometimes use an additional electric pump to force the engine to cool, thanks to the circulation of coolant when the engine is turned off.
What else is worth reading
Overhaul of the VAZ 2106 engine
Rear axle gearbox VAZ 2106
Fuel pump malfunctions
Operating principle of the fuel pump
Cooling system
Tools
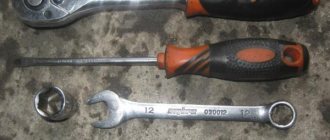
For repair you will need:
- Keys at 10, 13, 17;
- metal brush;
- sealant;
- container for draining coolant.
As for which pump to choose, there are 3 proven brands:
- Luzar (item 2101-1307011);
- Pekar;
- TZA.
At the same time, TZA is preferable, but they are rarely found on sale. They also advise choosing pumps with a metal impeller, explaining that plastic ones can fall apart or dissolve in low-quality antifreeze, but I have never seen this.
Video
The Avto Fix Info channel spoke in detail about the procedure for replacing the radiator device on the stove of the domestic “Seven”.
It's winter, it's time to install a 220 volt heater on the engine. In principle, there is nothing complicated in this procedure, the only problem is the availability of a warm room for the work. In this article we will talk about how to install engine heating on a VAZ 2107.
How to install engine heating on a VAZ 2107
First of all, it is worth clarifying that the engine heater is installed at the lowest point of the cylinder block. In the classic version, this is a spar to which the beam is screwed. Most manufacturers complete their products with all kinds of brackets, for example, the Alliance heater has a plate that allows you to attach the housing next to the engine to the spar.
Any heater has an indicator arrow, which indicates the point of entry of the coolant into its body. This pipe must be connected to the cylinder block jacket. From here, water will flow into it, after which it will go into the very top pipe, which goes from the radiator to the pump.

