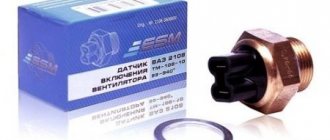
DTOZH design and principle of operation
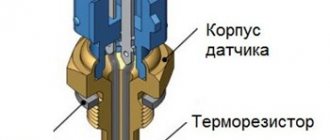
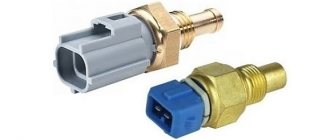
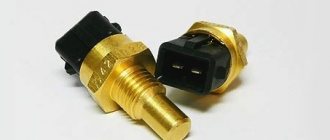
This sensor has a simple design without any complex electronic elements. A thermistor acts as an actuator.
It is the thermistor that regulates the quality and quantity of the fuel mixture during engine starting. That is, when starting in the cold season, the engine needs more fuel; this is built into the electronic engine control unit (ECU). Based on the DTO readings, the ECU passes the required amount of fuel through the injectors for normal engine operation in low temperature conditions.
The operation of the sensor can be noticed by increased engine speeds after start-up, which return to normal as they warm up to operating temperature. The thermistor is sharpened into a metal sensor housing with a thread and has two terminals for the ECU connector.
Also, based on the DTO readings, the ECU adjusts the ignition timing (IAF). The sensor receives power via one of the marks from the ECU with a voltage of 5V, while the second mark is connected to ground.
Since the sensor is in direct contact with the coolant, it estimates the engine temperature directly from the coolant temperature.
Reasons for premature failure of DTOZH, DNTV
- Third-party mechanical damage;
- Manufacturing defect;
- Crack on the base, body;
- Circuit short circuit;
- Loose terminals;
- Moisture getting inside measuring instruments;
- Burnout of the fuse melting element of the fuse box;
- Incorrect operation of the system firmware of the ECU electronic control unit (error P1298, P5493).
Symptoms of malfunction
The sensor exhibits the following malfunction symptoms:
- The car's dynamics disappeared;
- The temperature readings are no longer displayed on the dashboard;
- The car is idling unsteadily;
- Jerks appeared when driving at constant speeds;
- There are no increased speeds when starting the engine;
- The cooling fan does not work;
Based on these signs, it can be assumed that the DTOZH is out of order or is giving incorrect readings.
DTOZH for the pointer on the instrument panel
The operating principle of this sensor is to change the resistance when the internal element heats up. Passing through the indicator on the instrument panel, the current flows through a single wire to the device. And here the principle of induction in coils comes into play. Simply put, the higher the resistance, the more the needle on the indicator rises, due to the circulating currents in the coil located inside the indicator.
Possible malfunctions of the Priora coolant temperature display system
Most motorists, having discovered that the engine temperature gauge needle does not rise, believe that it is necessary to change the sensor. However, you should first make sure that this is the case. After all, there are several reasons for this state of the panel:
- Failure of the pointer on the instrument board.
- Break in the wiring.
- Direct failure of the sensor.
Therefore, it is better to conduct a small check on your own.
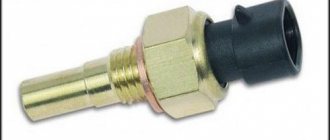
Location and serviceability check of DTOZH
This device is located directly above the Priora flywheel housing. The sensor is embedded in the engine block near the thermostat. It is connected to a single wire with a female connector. The test method for this device is very simple. And it has been used by drivers for a very long time. You need to do this:
- Turn on the ignition.
- Disconnect the connector from the sensor.
- Connect the wire to the block body.
If the DTOZH itself is faulty, the indicator arrow will rise to its highest position. But if no changes occur on the instrument panel, then the reason must be looked for elsewhere. Maybe the circuit is broken, the pointer is broken, or the whole combination.
How to replace the Priora coolant temperature sensor
This is a fairly simple operation. It is available to any driver.
Important! Many believe that this requires draining the coolant. But this is not necessary if you act quickly and skillfully. Otherwise, it’s better to drain it anyway. So. Just in case, drain the antifreeze. To do this, unscrew the cap in the radiator. It is located near the generator, below. And a plug-bolt in the engine block. First place the container under the bottom.
To access the right place, it is better to dismantle the air filter. Then the work area will be completely accessible. Prepare a new temperature sensor.
Using a 21 key, unscrew the old one and quickly screw the new one into place. Pour in antifreeze, making sure that no air pockets form. Replace the filter and start the engine. Wait for the fan to operate. At this time, watch the arrow. When you turn on the ignition, it should rise by 2-3 millimeters. And then, according to the degree of heating, smoothly enter the working zone of 92-98 degrees. If this is what happened, then the operation to replace the coolant temperature sensor for the Priora instrument panel can be considered successfully completed.
Useful video on this topic.
- How to replace the ECU coolant sensor on a LADA Priora car
- What is the outer CV joint of the Chery-Amulet car?
- How to change the CV joint boot on a Daewoo Nexia car
- How to change the CV joint boot on a Lanos
Checking the DTOZH
The temperature sensor is the simplest device, so the principle of checking it is also quite simple.
To check the sensor you will need a multimeter and a thermometer.
The sensor must be checked by measuring the resistance on it as a result of measuring the temperature of the liquid. DTOZH increases its resistance as the liquid temperature decreases.
In order to check it, you need to connect a multimeter set to resistance readings to the ends of the sensor and lower it into a glass of boiling water. The ohmmeter reading should match the temperature reading. That is, using the table, we look for the water temperature and what resistance the sensor should have at that temperature.
Next, we perform the same procedure with cold water and look at the ohmmeter readings. Based on the measurements, we issue a verdict on the sensor.
Below is a table of DTOZH resistance depending on the coolant temperature.
Table of sensor resistance depending on temperature.
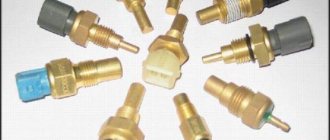
Types of engine temperature sensors: what type is used on Priora
It is important to understand that there are two types of engine temperature sensors. They differ in the principle of operation, and you need to know the operating features in order not to make a mistake when choosing such an element for your car. The following types of DTOZH are distinguished:
- With a negative temperature coefficient
(NTC - negative temperature coefficient) - it works as follows: when the temperature rises, the resistance decreases, and vice versa. - With a positive coefficient
(PTC - positive temperature coefficient) - it has the opposite principle of operation. When the temperature increases, the resistance increases.
The most common types are negative temperature devices. It is these sensors that are used on Priora cars.
When the engine is cold, the maximum resistance of the Priora DTOZH thermistor reaches 100.7 kOhm (this value will be at a temperature of -40 degrees). When the engine warms up, the temperature increases, which means the resistance drops. At a high temperature of +130 degrees, the thermistor resistance is about 70 Ohms. These readings are the operating range. When the engine is cold, the voltage drop in the circuit will be large (drops to 18%). As it warms up, it will increase (up to 90%).
This is interesting! If the engine is cold, then the voltage in the circuit will be about 3.4V, and when it warms up, the value decreases to a minimum (0.15V). It is important to know what type of sensor is used on the car in order to diagnose it and check for serviceability or correct operation.
Replacing the sensor yourself
Replacement is not a complicated process, but it has its own characteristics that must be observed when working.
Necessary tool
- Key to "19"
- Ratchet
- Head at "13"
- Screwdriver “+” or “-”
Replacement with coolant drain
Attention :
The coolant temperature sensor must be replaced with a cold engine.
- Remove the negative terminal from the battery. In order to protect yourself and the car from a short circuit.
- Remove the mass air flow sensor (MAF) chip.
- Unscrewing the clamps on the intake receiver corrugation, remove the air filter housing along with the mass air flow sensor.
- We remove the DTOZH chip.
- Next, you need to drain the coolant.
- Using a 13 key, unscrew the coolant drain plug in the cylinder block and drain the coolant into a 10 liter container.
- Using a key set to “19”, unscrew the DTOZH from the thermostat housing.
- We install a new DTOZH.
- We assemble everything in reverse order.
- After filling the coolant, do not forget to check its level.
Replacement without draining coolant
- To replace the coolant sensor without draining the coolant, you must prepare a new sensor to quickly replace it.
- We approach the DTOZH and begin to unscrew it, having previously prepared a new sensor and placing a cloth under the thermostat so as not to fill the gearbox with antifreeze.
- We unscrew the sensor and sharply remove it, and plug the hole in the thermostat with a finger.
- Next, we take a new sensor and also try to insert it into the hole in the thermostat as quickly as possible and screw the new sensor into place.
- Then we assemble everything in reverse order.
Don't forget to check the coolant level and add it if necessary.
The DTOZH has been replaced as you can see, there is nothing complicated about it.
How the cooling system works on Priora
The system we are considering in the popular Lada Priora works by circulating fluid, as expected, through the radiator. The temperature decreases solely due to airflow. What types of blowing are there:
- The look is natural. As the name implies, in this case the natural air flow cools the radiator while driving.
- Kind of forced. When excessive heating occurs, the built-in fan is activated.
How does a fan work in the cooling system of a modern car:
- Through the positive contact, current flows to the so-called winding of the installed fan.
- The contact marked “-” is directed to the relay, which in turn is controlled by the ECU.
- The ECU, based on a signal from the coolant temperature sensor, turns on a device such as a relay to ground.
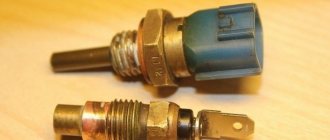
Attention! The domestically produced car Lada Priora does not have 1 coolant temperature sensor, there are 2 of them. And these are completely different devices. The 1st sensor sends a signal to the main computer, the 2nd sensor is responsible for the movement of the arrow on the dashboard.
Cars with ECU: features
In ordinary modern carburetor cars, the operating temperature is lower than in “injection” cars. For the latter it is 102-105 degrees. It is known that with such heating, the most ordinary water will naturally begin to boil. Therefore, you only need to use antifreeze or, as an option, antifreeze, the boiling point of which is at around 115 degrees.
Lada Vesta galvanized body or not
Vesta fuel consumption
MMS Lada Vesta
How to replace sensors yourself
Preparatory stage:
- Open-end wrench set to “22”;
- Additional lighting as needed;
- New DTOZH;
- Rags;
- Multimeter.
Step-by-step instructions for replacing the coolant temperature sensor:
- We install the machine within the perimeter of the repair area;
- We provide priority safety measures: squeeze the parking brake, wedge the rear row of wheels with wheel chocks;
- Open the hood, turn off the engine;
- We remove the terminals from the battery to avoid short circuits during repair work;
- We disconnect the limit switches from the DTOZH, unscrew it from its regular place;
- We carry out preventive maintenance of the thermostat, inspect the integrity of the housing, the absence of defects;
- We screw in the new measuring device and put on the power terminals.
We start the engine and check the accuracy of the temperature display. Checking the antifreeze level. We replenish the missing amount as needed. For a model with a pre-installed air conditioner, it is necessary to additionally remove the air filter housing along with the air element itself.
This is interesting: Tuning a Nissan Almera classic with your own hands: body, optics, interior