The phase sensor for Kalina with 8 valves is considered one of the many devices that ensures the operation of the propulsion system. It is also called the camshaft sensor. It is not installed in the engine carburetor - it is located on the cylinder head at the left end. In Lada Kalina, the device is installed to the right of the valve cover, near the filler neck. Since it breaks like other parts, you need to know more about the signs of failure, the causes of breakdowns and how to replace the part yourself.
Signs of breakdown
The camshaft sensor on the Lada Kalina determines the position of the gas distribution mechanism in a short period of time. This is necessary to issue a command to the engine control unit and for fuel to enter the system. The valve sensor determines how the first cylinder is positioned and synchronizes the ignition. You can understand that it is faulty by the following points:
- unstable operation of the motor,
- restarting the engine after stopping,
- increased fuel consumption,
- reduction in engine power,
- inactive acceleration dynamics.
It can be argued that the phase position sensor is broken and the phase sensor needs to be replaced if:
- the transmission is locked at one speed,
- indicators on the panel indicate system errors,
- The car moves jerkily and periodically stalls.
A malfunction is also indicated by the car accelerating to 80 kilometers per hour and the lack of engine starting after stopping.
Important! If error 0340, 0342 appears, then you don’t have to look for other symptoms of a malfunction. The fault lies with the measuring device located in the engine area. Even after the user has already changed it, there is a risk of lost connections.
Finding the cause of error P0340
Using a diagnostic scanner, you need to make sure that there is an error. After this, you can begin to search for the culprit of its appearance:
- Check the DPRV wiring (between the connector and the sensor) for damage, short circuit or corrosion.
- Check the sensor connector for mechanical damage or corrosion.
- Check the wiring from the connector to the ECU for damage, short circuit or corrosion.
- Eliminate the causes of other errors that are stored in the ECU memory, which may be related to the operation of the DPRV.
- Use a scanner or oscilloscope to check the voltage of the DPRV for compliance with performance indicators (individually for each car).
- If the DPRV voltage readings are incorrect, the sensor must be replaced.
- If the voltage reading is within the normal range, the engine control module may be faulty. It may need to be replaced or reprogrammed.
Common mistakes when diagnosing P0340
Before replacing the DPRV, it is very important to carefully check the wiring and connectors of the sensor to eliminate these causes of malfunction. Very often this is not done, and replacing the sensor does not help solve the problem.
Another common mistake is that the diagnostician does not take into account the problem with the presence of misfires or a malfunction of the crankshaft position sensor (CPS). These factors can cause the P0340 code to appear.
Replacing the sensor
To personally change the sensor on a Lada Kalina, you need to take: the 10th key, a new consumable, a rag, a Phillips screwdriver and an additional light source. Then follow the instructions:
- Open the hood.
- Find the controller to the right of the filler neck.
- Using a screwdriver, unclip the conductor block.
- Use the tenth key to unscrew the fasteners.
- Remove the controller and carry out troubleshooting to seat the consumable.
- Clear space for a new consumable, insert a new device.
- Put on the block with wires.
The controller replacement is complete. All that remains is to start the engine and check how the new equipment works. If you follow the regulations for installing a new consumable, then on average it will last 90,000 kilometers. All manipulations will require 1 hour. It is better not to try to make the procedure faster to avoid breaking the plastic clamps.
As a result, the phase sensor on the Lada Kalina is a necessary part for normal engine operation. It rarely breaks, but you need to know the signs and causes of the breakdown, and also remember the step-by-step instructions for fixing it.
Smart choice
The Lada Kalina 8 valve has certain differences from the 16 valve engine. However, automotive specialists sometimes install a mechanism with 8 valves to 16, and the engine works correctly.
- form;
- connector size.
To avoid situations of inconsistency, purchase a mechanism according to the characteristics of the engine
No need to pay attention to the manufacturer's markings. The spare part number according to the VAZ catalog (Granta, Largus, Kalina, Priora) will always be the same:
- engine with eight valves - 21110370604000;
- 16-valve – 21120370604000.
Definition of failure
The device is located close to the cylinder head, on the power unit. It is easy to understand the first signs of poor functioning of the mechanism, especially for an experienced car enthusiast.
Here are the main criteria for recognizing a breakdown:
- a light comes on and goes out, designed to constantly monitor the engine while turning the ignition key in the car;
- “Check engine” lights up on the dashboard after the starter makes three to four revolutions and the engine comes into action. The sensor will be triggered if the electronic control unit does not receive the necessary information and has to use data from the DPKV;
- engine dynamics become worse - the vehicle slowly picks up speed (this is easy to notice when driving downhill). In this case, there are three reasons for the problem. The first - the camshaft sensor is broken, the second - the mass air flow sensor is broken, the third - the compression is reduced;
- high fuel consumption - this “symptom” is not very accurate and has a number of possible causes. You shouldn’t take it as a separate criterion for a problem, but you can use it as one of several.
Replacing the phase sensor on a Lada Kalina with your own hands
First of all, a little about the tools that will be needed to perform this type of repair. Fortunately, here you can get by with just a 10mm wrench. But it is best to use a socket with a crank, or even more conveniently, a ratchet. It will just be quite inconvenient to do this with a regular key.
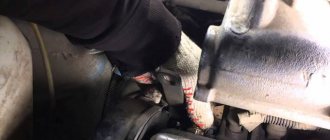
First, it’s worth showing clearly where all this is located:
So, first you will need to disconnect the power plug, after first squeezing the plastic latch and lifting it up a little:
Then use a ratchet to unscrew the bolt securing the Kalina phase sensor:
And now you can freely remove it by pulling it towards the windshield:
And this is what this part looks like when removed from the car:
After this, we replace the camshaft sensor and put the new one in its original place. There are absolutely no difficulties during the work process.
Its retail price ranges from 250 to 300 rubles, depending on where you buy it. Of course, this part fails quite rarely on Kalina, but still, these instructions will not hurt anyone.
The phase sensor pulses the circuit to ground when the camshaft pin passes near its end
Turn off the ignition and disconnect the engine management system wiring harness block from the sensor
The wires “A”, “B”, “C” are marked on the plug body.
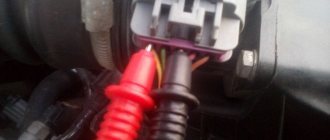
To check the sensor's power circuit, connect the tester to terminals “A” and “B”.
When the ignition is turned on and for 10 seconds after it is turned off, the voltage should be equal to the on-board network voltage.
If not, then check the serviceability of the circuits, most likely there is a break or short to ground between terminal “B” of the wiring harness plug and contact No. 45 of the controller, as well as between terminal “A” of the plug and the grounding point.
If the circuits are working properly and there is no voltage, the controller is faulty.
We connect the tester probes to terminals “C” and “A” of the wiring harness block.
When the ignition is on (and in the absence of a phase sensor signal), the controller, through its internal resistor, must output on-board voltage to terminal “C” of the wiring harness block.
Otherwise, we check the serviceability of the circuit (open and short to ground) between terminal “79” of the controller and terminal “C” of the wiring harness block.
To check the phase sensor, dismantle it and connect the wiring harness block to the sensor.
From the side where the wires enter the block, we insert two pieces of wire into its sockets corresponding to terminals “A” and “C” so that contact appears between them and the tips of the wires.
We connect the tester probes to the pieces of wire. Having turned on the ignition, we bring a steel rod several times to the end of the sensor.
In this case, for a working sensor, the device should record abruptly changing voltage values.
The Kalina phase sensor is located on the left side of the cylinder head; this device is responsible for determining the camshaft angle and further transmitting information to the vehicle’s electronic system.
Without it, it will be completely impossible to power the car, and, most likely, it will simply remain blocked on the road.
After the signal is received, the sensor controls the ignition and is responsible for supplying fuel to each of the cylinders. This is how the vehicle is powered.
The role of electromagnetic valves in the operation of the timing system
The power unit of the Peugeot 308 has two phase valves and the 307 has one phase regulator, which is installed in a toothed pulley. Structurally, the pulley has two main parts: an impeller equipped with a blade and a cylinder with a chamber. When the established conditions are reached, the electronic control system sends a signal to the phase solenoid valve. When opened, the valve provides oil supply under a certain pressure through the central channel located on the camshaft. Oil enters through holes in the central part of the impeller and the mechanism that lifts the plunger.
Due to the pressure under which the oil is supplied, the plunger moves upward and the impeller is released. Due to this, the impeller and the phase control device rotate in the direction of delaying the operation of the intake valves. After removing the voltage from the solenoid valve, the blade and impeller return to their original position, and the plunger locks the entire system in a state of minimal lag.
The valve is responsible for ensuring the flow of oil to the phase control device. After turning off the control potential on the electromagnetic device, the phase regulator moves the camshaft to a state with the least lag, thereby ensuring maximum torque at low speeds.
On Peugeot 307 and 308, phase regulators mounted on camshafts function normally if the following parameters are met:
- at crankshaft speeds above 1500 rpm;
- when the pressure in the intake pipe reaches over 500 mbar;
- at antifreeze temperatures above 30 degrees.
The ECU is involved in changing the valve timing, which reads the location of the crankshaft and camshaft, the temperature indicators of the antifreeze, as well as the speed of the vehicle. The ranges for adjusting the rotation angles and camshaft at idle speed vary from +5 to -5, and with a sharp increase in speed, from 0 to 30 degrees.
Vote, did you like the article?
How to check the functionality of the sensor?
It is quite possible to check the performance of the phase sensor on Kalina on your own, without the involvement of service station employees. The whole process takes a maximum of a few minutes, but for people who are not knowledgeable in such matters, it is advisable to initially thoroughly study the structure of their own vehicle.
For these purposes, you only need a tester, which must be connected to terminals “A” and “B”. Next, you need to start the car engine for a while and observe how the voltage behaves after it is extinguished: within about 10 seconds it should be identical to the on-board voltage.
If this is not observed, the car most likely has an open circuit or short circuit.
If the circuits in the Lada Kalina are working properly, but voltage still does not flow, the controller is most likely faulty. It will also be quite simple to check this: you need to connect the tester terminals to terminals “A” and “C”.
If the ignition is turned on, on-board voltage should be output. Otherwise, you should continue to look for a network break. In addition, you can check the performance of the phase sensor by completely dismantling it.
The wiring harness block is connected to the device, and pieces of wire are installed in the sockets of terminals “A” and “C”, after closing which a contact should be formed.
Next, you can attach the wires to the tester and observe exactly how the voltage will change: for a working sensor it will have an abrupt character. If this is not observed, the device will definitely have to be changed.
Recommendations for starter maintenance
Adhere to the technical inspection schedules established by the manufacturer - every 15,000 km. Buy original parts and components at official points of sale.
Use the services of certified workshops for diagnostics and repairs. Remember that unprofessional intervention in the operation of the car is more likely to harm than help.
Don't skimp on consumables. Check the catalog numbers with the actual data specified in the instruction manual.
Keep the control unit active while starting the engine for no longer than 15 seconds, then 30 seconds. break. After starting the engine, release the key from the ignition switch as soon as possible. Excessive retention eats up the teeth on the drive shaft and flywheel.
Diagnostics on an eight-valve engine
Please note that sensors for 8 and 16 valve engines are not interchangeable. Therefore, when purchasing, pay attention to this nuance. To diagnose phase sensors, you must perform the following manipulations:
- Connect a 13.5 Volt constant voltage source to contact “E”.
- There should be a voltage of 0.9 V at pin “B”.
- After bringing a metal object to the active part of the device, the voltage will decrease to 0.4 V.
- If you remove the metal device, the voltage will return to 0.9 V.
Let's sum it up
It will take no more than 1 hour to complete the entire complex of manipulations. No need to rush! Plastic clamps break easily, so we avoid strong tugging on their frames.
Note that when a camshaft sensor fails, this is an extremely rare occurrence, but in such an unpleasant circumstance, the owner of a Lada Kalina 8 valve must show all his experience and maximum care, and then the replacement will be successful.
Sources
- https://nadouchest.ru/datchik-faz-kalina-8-kl-priznaki-neispravnosti/
- https://zapchasti.expert/datchiki/datchik-raspredvala/datchik-raspredvala-lada-kalina.html
- https://osensorax.ru/posiciya/datchik-faz-kalina-8-klapanov
- https://vaz.today/vybor-ustranenie-nepoladok-i-zamena-datchika-faz-na-kaline
- https://avtozam.com/vaz/lada-kalina/datchiki-raspredvala-i-kolenvala/
- https://FB.ru/article/357432/datchik-faz-kalina-zamena-datchika-faz
- https://Vaz-Lada-Granta.com/kalina/motor-i-korobka/datchik-raspredvala.html
Purpose and functional load
Sensors on Kalina 8 valves are designed to constantly monitor the angular part of the timing belt in the position of the power unit from the crankshaft. The control mechanism receives the necessary information and then processes it. As a result, fuel is injected and the ignition is controlled.
The product is based on the Hall principle - measuring movement (direction), changing charge carriers. Then, during the period of time when the magnetic field is crossed by the semiconductor, the information received is recorded. The field is generated by a magnet located in the device. The shaft wheel has a metal tooth that runs near the device. At this time, a pulse appears, transmitted to the electronic control unit.
The ECU helps receive pulses arriving at different time intervals, analyzes them, recognizes the location of the VIT piston in space, and then issues commands for injection and ignition of the fuel mixture.
The mechanism begins to work from a spark hitting the spark plugs when the exhaust gases are compressed and released. These systems depend on the functions that the crankshaft sensor performs.
Do-it-yourself troubleshooting
An operational problem should prompt a system check. You can do it yourself in a relatively short time. If you are a novice driver or do not understand the intricacies, the best solution would be to contact a professional service center. There, the specialists will help eliminate all problems and breakdowns of the mechanism.
The crankshaft and camshaft sensors are diagnosed using a special tester. The cables are connected to the required terminal (A, B) in the appropriate order. The car starts, you should wait until it stops. It is important to carefully monitor changes in voltage.
In the first ten seconds, the voltage value should be equal to the on-board type value. In this case, the chain is not broken. If this does not happen, then it is closed or broken.
Sometimes there is no voltage when the circuit is intact. Such malfunctions often occur due to the fault of the controller. This is easy to check by connecting terminals A and C to the tester. As a result, there should be on-board voltage when the ignition is on. If this does not happen, then you need to look for a break further.
