A device for filming the road from a car window is an invaluable device that allows you to solve problems with violations in the road transport process thanks to the presence of captured video. Properly selected equipment can serve without failure for several years, but in some cases it happens that the equipment refuses to perform its functions, turning off for no reason or not responding to attempts to turn it on. Usually the DVR does not turn on if it is not charged or is disconnected from the charger, but in some situations there can be many reasons for the device to fail.
What reasons can lead to the device turning off?
The most common causes of device failure are usually associated with the following components of the recorder:
- Battery;
- Charging cord;
- Car charging socket;
- Removable media.
Based on the presented elements of the component equipment, problems appear that lead to the fact that the device stops turning on. Of all the reasons leading to the device turning off, the following can be distinguished:
- The battery is low;
- The battery has failed;
- The charging cord is broken;
- The cable is not recognized by the equipment;
- The car's cigarette lighter is loose and does not hold the charge tightly;
- The memory card is formatted with incorrect parameters and affects the performance of the product;
- The firmware has not been removed from the flash drive, which leads to constant updating of the existing version of the program.
The main problems that most often occur are problems with the battery, which are expressed in the fact that even when the charger is turned on, the device does not work and does not accumulate energy to the battery. The reason for this phenomenon is a 100% discharge of the battery, which cannot be corrected by regular charging.
In order to create a so-called boost for the battery, universal charging is used, producing an initial degree of accumulation of the required amount of energy for the further recharging process through the DVR.
If the recorder does not turn on after a long period of charging, then the reason lies in a faulty power supply, which has simply failed and does not accumulate sufficient charge. In this case, you need to buy a new power supply in a specialized store, taking into account all the rules for the initial operation of the battery, which will extend the life of the product.
The video explains the reasons why the DVR does not turn on:
Defective cord and charging socket
The reason that the product does not function even if the USB cord to the cigarette lighter is replaced may be a poor-quality cable. Chinese USB cords often only have contacts for charging, and the terminals for transmitting information are simply soldered together and do not function.
Most DVRs operate on original cables that have terminals for parallel and signal transmission, so you need to buy a cable designed for a specific model. Due to frequent use, the charging device cord can break near the plug, and in this case it is better to replace the cable with a new one.
Sometimes the registrar begins to perform the work independently without instructions from the owner. This happens when the charging socket becomes loose and the contact does not reach the device well, which causes the unexpected delivery of incorrect signals. To figure out how to turn on the DVR with such problems, you need to replace the charger. No other solution options simply exist in this case.
When do you need DVR repair?
So, the typical reasons for the malfunction of car recorders.
Why does the device give an error, does not play the recording or beeps? After an attempt to start video recording, the device is reset and re-attempted to activate. The reason may be hidden in the memory card adapter (MicroSD). As the experience of people trying to solve this problem by formatting a flash drive has shown, the optimal solution is to replace the faulty memory drive with a new one. The cause of the problem may also be hidden in mechanical damage to the card, so it is better to purchase a new adapter.
A similar problem that can be solved by replacing the memory card is the inability of the recorder to start video recording. If, after connecting the device, the device does not exit standby mode, then the problem most likely lies in a faulty flash drive. Replacing the MicroSD should solve the problem.
When the device does not respond to attempts to connect the device to the on-board network, repair of the DVRs is necessary. After the plug is inserted into the cigarette lighter, the device turns on briefly and then immediately turns off. When you turn it on, a menu may appear, but the buttons will not respond to pressing.
What to do if the recorder stops turning on? You may not be using the original wire for connection.
The fact is that, even if the cable matches the USB socket connector, the wiring may not match the original, i.e. The recorder can only work fully with the original cable.
Therefore, when purchasing a cable, you should keep in mind that it may not fit your DVR.
What does a frozen device mean? A similar situation can arise either immediately after turning on the device, or after several hours of its operation. As it turns out, this problem is relevant for DVRs with high resolution (for example, 1080p full hd), although a similar situation can also occur in simpler models. Pay attention to your device's memory card. High-speed recorders are usually not compatible with cheap memory drives. Perhaps because of them, cyclic recording does not work. If you are using a full hd class recorder, then it is advisable to insert into the device a memory card, which the manufacturer indicated in the service book that came with the kit when purchasing the device.
Also interesting:
- Which Xiaomi serial DVR has more advantages
- Is the Karkam Q7 DVR worth the money?
- What makes Junsun DVR so popular?
Problems with memory and flash card are indicated by a red light. If the red light on the recorder is on and the video does not come out, then you need to purchase a Class 10 MicroSD.
The following malfunction is more common to Chinese devices. The recorder may suddenly, without the driver's command, stop or turn off. If it is also equipped with a navigator, then it can change the route without a command. Drivers try to solve a similar problem with DVRs by rebooting the gadget, but such help does not work for long. Often, by replacing a low-quality charger, the problem is solved immediately. This applies to the part of the adapter that is inserted into the cigarette lighter.
If, after trying to charge the gadget, the keys do not respond to commands, incl. and on Reset, the reason probably lies in recharging the battery. This problem is relevant for both expensive DVRs and cheap ones. To ensure normal current flow and troubleshooting, check the connector wiring.
Devices operating at low temperatures during the cold season “accelerate” more slowly. In this case, the monitor may flicker and the recording may not play back. This is due to hypothermia of the gadget. If the device remained in the cold and did not turn on, then you need to turn on the car’s heaters and wait until it warms up.
DVR button assignments
Depending on the brand and model, the DVR may have a different number of buttons (on average there are 5-7).
Let's consider the purpose of all possible control elements of a modern recorder:
1. POWER button (ON/OFF) - turns the device on/off. A long press on this key allows you to turn the DVR on and off.
On many models, this button has another function: a short press during operation turns on/off the LED backlight on the front panel.
The DVR power button is usually located on the top of the case;
2. REC/OK - button to enable video recording. It is also used to confirm the selection of a particular function/task in various operating modes of the device.
So, in the main menu mode, pressing this button confirms the selected action; in photo or video recording mode, pressing the Rec button on the DVR performs the shutter function;
3. MENU/MODE - button for selecting video and photo shooting modes. Pressing this button launches the main menu of the recorder and settings in various operating modes of the device.
The MODE button on the DVR is used to switch between different shooting modes and viewing photos and videos. In shooting mode, pressing the MENU button will bring up the context menu toolbar;
4. The Up/Zoom plus button performs different functions in different operating modes of the recorder. Used as a key to move the cursor up in the operating mode in the main menu.
In video recording, photo shooting or standby mode, pressing/holding this button allows you to zoom closer to the subject (zoom+).
In the mode of viewing captured and saved files, this button switches to the previous recording.
5. The Down/Zoom minus button also performs different functions in different operating modes of the device. Used as a downward cursor key in operating mode in the main menu.
- In video recording, photo shooting or standby mode, pressing/holding this button allows you to reduce the zoom ratio, i.e. move the subject away (zoom -).
- In the mode of viewing captured and saved files, this button moves to the next recording.
6. The HOLD button in video recording mode allows you to protect the current file from deletion, even if recording is carried out cyclically;
7. Photo button - quickly switch to camera mode. In video viewing mode, this key is often used to delete files.
8. Reset - a button that, when pressed, will cause a hardware reboot of the device. Pressing the Reset button allows you to reset all user settings of the DVR to factory settings.
Attention! If the DVR freezes and stops responding to commands and performing requested operations, you should first completely turn off the device by pressing the POWER (ON/OFF) button, and then turn on the device again. If this manipulation does not help fix the problem, you can completely reboot the system
To do this, press and hold the RESET button for 5 seconds.
If this manipulation does not help resolve the problem, you can completely reboot the system. To do this, press and hold the RESET button for 5 seconds.
To do this, use a paper clip, pen, or any other thin, hard object.
Answers to frequently asked questions
It should be understood that any DVR is a miniature computer, with all the “sores” inherent in a computer.
Most likely, there was a failure in the system and the DVR froze. To fix the problem, try turning off and turning on the device again. If this does not help, perform a hardware reset using the RESET button. How to do this is described in the paragraph above.
What is the Sos button for in the DVR?
Intuitively, it may seem that this button is intended to transmit an emergency signal to the rescue service. In fact, everything is much simpler: on some models of recorders, the emergency mode button is called SOS. A file recorded in this mode is protected from automatic erasure during cyclic rewriting.
Why is the blue button flashing on the DVR?
A flashing blue indicator on some recorder models indicates that video is currently being recorded.
Why won't the DVR turn on?
There may be several reasons: the battery is low, the battery is installed incorrectly, condensation has formed inside the device. Make sure the battery is installed correctly and charge it. Leave the device in a warm, dry room for about an hour to allow the moisture to evaporate.
What should I do if the device does not re-record the video in a circle?
Above we have listed the answer options to the question why the DVR does not erase old recordings. Now, we will explain what to do in each case. Let's follow the same chronology:
Most often, cyclic recording on a DVR does not work due to a small flash drive, why not install a larger disk? In our opinion, the ideal size is 16-32 GB. Think for yourself, modern recorders write in HD or FULL HD resolution, that is, they make very “heavy” digital files. If the loop video interval is set to 10-20 minutes (that is, the device rewrites frames every time after a given period of time), and the flash drive capacity is only 2-4 GB, the resulting digital “piece” simply does not fit on the drive. In other words, the removable disk becomes full before the DVR initiates overwriting. What to do in this situation?
- In the gadget settings, reduce the cycle interval (so that it re-records the video more often);
- You can lower the quality of your footage to reduce the amount of video you create, but we still don't recommend doing this. Your safety and guarantee of defending your case in the event of an unforeseen situation depend on the clarity of the resulting image. What will you do with a video in which you can’t make out car numbers, road signs, or people’s faces?
- Buy a new flash drive with a larger capacity.
A file system conflict will most often be indicated by a complete failure of the DVR to make video. The file system determines the method and order of recording, storing and naming data on a digital medium. The most popular today are “FAT32” and “NTFS”. If the DVR supports one, and the flash drive another, a conflict will arise and the device will stop rewriting or even saving data. What to do? Format the drive in the file system of the DVR (the instructions for use will help you install the latter).
- Formatting a flash drive should be done on a computer or laptop;
- Insert the device into the PC and check if there are any important documents on it. They are rewritten to the computer (formatting will completely clear the drive);
- Go to “My Computer”, right-click on the removable disk “Format”;
- In the window that appears, select the desired file system;
- Click "Start" and "OK";
- Ready.
Let's continue to look at what to do if the DVR does not automatically delete old recordings. Next up is a problem with the sensitive sensor. This is an option that, due to impacts and strong shocks, protects a piece of video from being overwritten. In some sophisticated DVRs, this sensor is so delicate that it reacts to every bump (of which there are more than enough on Russian roads). So it turns out that the flash drive is filled with videos that capture the quality of one of the two “main problems” of our Motherland. Do you remember which one is first? But let's get back to our sheep. What to do with the sensor? That's right, turn it off completely or, if the settings allow, reduce the sensitivity. By the way, most often the function is called “Shock sensor” or “G-sensor”.
You can also protect some videos from loop recording manually. It is quite possible that you yourself managed to save so many records that the flash drive became clogged. That is why the DVR does not re-record the video in a circle. What to do in this situation? Transfer the memory card to the computer and study the “important” frames. Unnecessary ones, of course, should be removed in order to make room for circular shooting.
If you suspect that there are viruses on your memory card, you need to get rid of them. To do this, format the disk, as in the instructions above. But without changing the file system.
Now we will explain why the DVR does not record in a circle if two system folders are created on the flash drive. They appear automatically as soon as the drive is placed in the head unit, and are most often referred to as a file system such as “DCIM” or “100MEDIA”. The DVR creates one system folder for itself and overwrites the video in it. However, if you insert a flash drive into another gadget, even for a short time, it can create a second one. Later, you return the drive to the recorder. Over time, he fills in the second folder (seeing it as a system folder, although not created by him). The trick is that it no longer overwrites this second folder, therefore, it remains full, taking up space on the flash drive. What to do?
- It is advisable not to use the flash drive from the DVR for other purposes;
- Insert the disc into your computer and delete both system folders. Better yet, format the memory card. After which everything should work as it should. The gadget will begin to re-record the video into the newly created folder.
So, the main types of DVR breakdowns and methods for eliminating them.
In this article we will not be able to list all possible breakdowns and, especially, all the ways to repair them that are available to the average user, but nevertheless.
The DVR stopped turning on.
Well, that is, it doesn’t turn on at all. Not a single light comes on, and the hard drive does not make noise. In general, silence and despair.
First of all, we check the power supply of your recorder; it may be the culprit that the CCTV recorder does not start. In this case, it is easier to replace the power supply than to repair it.
Although if the filter capacitors are “covered,” it’s not difficult to fix, and the power supply will start producing 12 volts again.
The culprits can be easily identified by the swollen tops. A soldering iron, flux and solder with a handful of working capacitors will solve this issue. On such repairs you can save from 600 to 900 rubles.
Also, the culprit for not turning on the DVR (from the English digital video recorder) may be faulty elements on the main board. For example, a fuse or a PWM voltage controller may blow out, or God knows what else. In this case, you cannot do without knowledge of circuitry and the security recorder will have to be sent to our service center.
The DVR does not see the hard drive.
Every owner of a video surveillance system will sooner or later discover the alarm message “No Hdd”. To make sure that this is not a software failure of the DVR, place your palm on its cover. A working hard drive emits vibrations that are easily detected on the cover of the DVR; if you do not feel the vibration, the HDD is dead with a 99% probability.
Sometimes it happens that rebooting the DVR temporarily brings the disk back to life, but believe me, this is not for long. By the way, hard drives can't be repaired; if anyone says otherwise, they're a liar.
It happens that the DVR does not find the disk due to a poor-quality 12 volt power supply. A power supply that has worked for many years may sag and not produce the necessary power to start the hard drive, while the recorder itself may work completely normally. Replace the power supply to be sure.
Pictured: WD Purple is an excellent hard drive for video surveillance systems.
Why does the hard drive in the DVR break down?
A hard drive located in a DVR or a computer are absolutely identical devices, but with tasks of different intensity. The former experience a colossal load due to constant cyclic rewrites, as a result of which bad (damaged) sectors appear, the disk literally wears out at a breakneck speed. The latter, which are located in the computer, work mainly as a data storage; information is occasionally deleted or added to them, and if this happens, it is in completely different volumes, so the hdd in the computer can last from 4 to 10 years.
To reduce the wear rate of the disk in the DVR, it is necessary to purchase specialized disks for the video surveillance system; such a disk is designed to work with large streams of video data 24/7 with frequent rewriting.
Overheating of the DVR using the example of Gmini HD90
If it overheats in the sun, repairing the Gmini HD90 DVR yourself should begin with inspecting the circuit board. The problem most often lies in the photoresistors. At high temperatures, fuses are not able to protect them. In order to inspect the DVR, you need to remove the cover of the model. Next, you will need to carefully remove the camera and unscrew the printed circuit board. If its contacts have darkened, then it will have to be completely replaced. The part marking is indicated on the reverse side.
Checking the connectors
The power cable for DVRs is connected through a connector. Sometimes the connection is broken and the device stops working. Do-it-yourself repair of DVRs in this case should begin by checking the connectors. To do this, you will have to spin the model. The printed circuit board should not be touched. The connector is located in the housing near the connector. In order to inspect it, you will have to move the protective plate to the side. After this, the base of the connector must be pryed off. This can be done using a screwdriver. If the part shows mechanical damage, it means it will have to be replaced. Buying connectors in a store is not difficult. However, you should know the exact modification.
Correct wiring of the power cable plug with a micro-USB connector made in China
As already mentioned, non-standard wiring of the plug leads to malfunction of the device. If it is not possible to get the original wire, simply change the wiring on a new detachable plug with your own hands. The standard diagram looks like this:
The wiring diagram shows which contacts are connected to each other and where the voltage is supplied
- VBUS – plus;
- GND – minus;
- ID or NC – total weight;
- D+ and D – contacts for signal transmission.
On most Chinese cables, some pins are not used at all, GND is a minus, and NC (or ID) is a plus. Those connectors that are sold in cellular communication stores do not charge Chinese DVRs, since the NC contact is closed with VBUS. Therefore, you need to purchase a detachable miniUSB plug; it must have a fourth contact (NC or ID). We change the circuit using a soldering iron, and the DVR will work without failures.
To improve the operation of the DVR, change the pinout on the power cable plug
The CCTV camera is not working.
There may be several visible reasons why the CCTV camera does not show:
- There is no power to the camera. Cover the light sensor with your hand, if the infrared illumination lights up, then everything is fine, but if the backlight does not light up, check whether the power source is working. It is also worth looking at the connections of the power connectors on the outdoor camera; over time they could have oxidized, resulting in loss of contact.
- The BNC connector has oxidized. Like the bnc power plug, the connector is susceptible to oxidation in a humid outdoor environment, and it makes no sense where it is located in a junction box or in another secluded place. If the picture on the camera periodically disappears, then first of all you need to check the contact.
- Poorly crimped RJ45 connector. Incorrect crimping of the connector, for example, when the twisted pair wires did not reach the end, can subsequently lead to random loss and appearance of the signal on the IP camera.
Hardware problems include the following:
1)The analog camera has left compatibility mode. Analog cameras today can work in hybrid mode with various analog formats (CVBS, AHD, HD-TVI, HD-CVI). For example, we have an AHD recorder that works only with AHD cameras; we connected a multi-format camera to it and switched it to AHD mode using a switch. One fine day we discover that the camera does not show, and in the DVR window, for example, an “N” icon appears, which means that the camera is currently operating in CVBS mode, which the recorder does not support. (Not all devices show what format the connected camera is working in, so you may not immediately see the error.)
As a rule, the camera switches to a different format when the voltage surges or drops. To return the camera to the desired mode, you need to disconnect the power from it for a short time, reapply the power and select the desired mode on the joystick with a long press. Format switches may vary in appearance and design.
2) IP camera freezes or signal loss.
Budget IP cameras can freeze from time to time, this can be treated by disconnecting from the power source and then turning it on, in other words, you need to restart the device.
Loss of image on an IP camera can occur due to a violation of the IP signal transmission technology; as is known, under ideal conditions, a good twisted pair cable can be used to transmit a camera at a distance of up to 100 meters without auxiliary devices. In fact, normal operation of the device is guaranteed at a distance of no more than 90 meters, and in the case of a bad cable, 60 - 70 meters.
The malfunction is due to the selection of the wrong charger
If you purchase a third-party charger with higher current consumption parameters (usually DVRs require 1 Ampere), there is a risk of burning the battery or even the gadget itself. Don’t be surprised later why your DVR not only won’t charge, but even refuses to turn on at all. When purchasing a separate charger, first find out in the recorder's operating instructions what parameters it should have.
How to repair a recorder
To start repairing your DVR, you need to follow these steps.
First, the gadget should be dismantled. Disassembling DVRs always begins with turning off the ignition. To prevent a short circuit from occurring, you need to disconnect the terminals from the battery.
All wires are turned off, incl. and power cable.
Next, we disassemble all the mounting points. They understand the situation according to the situation, since they differ from each other for different models.
Below we will discuss how to disassemble the gadget itself. To remove it you will need a small Phillips head screwdriver. Many people also use a special master key, which is used to disassemble smartphones.
If you disassemble the soldering iron yourself, you must not forget about grounding it. To do it correctly, you need to solder the negative end of the wire to the body, and the positive end to the body of the soldering iron.
To make it easier to replace the connector, use a soldering iron. It is needed for maximum heating of fasteners and for their easy removal. Using the same method, a new connector is soldered in its place.
While the gadget is disassembled, carefully inspect the board. If broken contacts are noticeable, they will need to be soldered in place, having first found out what function they perform. If this is not done, the device simply will not turn on.
It is known that the recorder takes video recordings in cycles, i.e. fragments. Typically, the driver sets a recording for a specific time, as a result of which the recordings are fractional and there is no risk of data loss in emergency situations. If the cyclicity is broken, the device will freeze and stop performing its functions if the memory card quickly fills up. The causes of the malfunction may include an outdated version of the gadget model. Reflash the system yourself, which will help restore the operation of the recorder.
Next we will look at how to flash a DVR. If it has not been subject to other failures, then the firmware version may be outdated. In order to update it, you need to go to the official website of the auto recorder manufacturer and download the updated version of your gadget. It will not take long to download the file; the whole process will take from 3 to 5 minutes.
Before transferring the file to the video card of the recorder, it must be formatted. If the flashing was done correctly, then after turning on the device will ask your consent to download the new version. Usually, after this, loop recording and all lost functions of the DVR are restored.
Problems with internal cameras
Doesn't provide an image, not even a background one, doesn't respond to requests.
The cause may be burnt-out control boards, a physical break, or damaged power cables. The problem is solved by replacing damaged parts. The camera boots with the internal menu displayed on the monitor, but there is no image. CCD matrix burnout. If this part forms a monoblock with a sensor board, then replacement is not difficult.
It loads, listens to controls, but there is no image, and the menu does not appear. In most cases, this is a breakdown along the video output transmission circuits. The reason could be interference and large voltage surges from the operation of powerful equipment (electric welding, etc.). The board needs to be replaced.
The image arrives, the menu loads and passes the test, the PTZ device is not controlled. Burnout of the control board on port 485, usually due to interference in an ungrounded twisted pair. The control board needs to be replaced.
Unstable operation, expressed in periodic shutdowns and reboots, in the presence of a PTZ drive, does not obey the control. There may be a hardware malfunction - overheating of the microcircuits. Software malfunction - a failure in the firmware or a mismatch of versions with the control program.
It is recommended to reinstall the camera to another location (perhaps it is mounted above a heating device or air conditioner), flashing the firmware and switching to the current version
ATTENTION: take firmware only from the manufacturer’s website
After running the test it freezes and then gives an error. When starting the camera, many models perform an autotest of the device; the composition of the testing program depends on the specific model and manufacturer. As a rule, the device passport contains a plate of error codes and suggested actions to eliminate them. But errors can also be caused by external reasons.
In PTZ cameras this can be:
- wear of the rotating device gear;
- contamination of the rotation control sensor;
- failure in the logical block program.
Mechanical parts should be replaced and camera firmware updated.
What to do
If there are periodic freezes and software glitches in the operation of the DVR, the simplest solution is to reboot the device. The universal RESET button eliminates errors. If restarting does not help, you need to find out the reason for the device failure, because... any factors, both external and internal, can lead to equipment failure.
Common causes of recorder malfunctions:
- Penetration of dust particles or water into the housing.
- Short circuit.
- Exposure to insects and pests.
- Power surge.
- Loosening of the connector.
- Mechanical damage to surveillance cameras.
- Damage to the power supply and internal storage devices.
- Broken wires and cables.
- Speaker failure.
- Software failure or outdated firmware version.
The main reason is the improper operation of the device. For example, an incorrect connection to a voltage of 12 volts, as a result of which the adapter burned out. The board is subject to diagnostics and further repair at a service center.
How to flash
To flash the DVR if it stops turning on, you need to go to the manufacturer’s official page and download the updated version of the software. If there is no website, find any other resource by entering the word “Firmware” and the name of the model in the search bar. The program, in the form of a popular ZIP file archiver, is downloaded to the computer, scanned by an antivirus, and then the files are extracted.
The DVR must be removed from the bracket, the battery removed and connected to the computer.
When loading files onto the device's memory card, first remove and format it. The entire downloaded resource is transferred and the installation starts. The process takes from a few minutes to 1 hour and depends on the model. To complete the update:
- disconnect the recorder from the computer;
- turn it off via the power button;
- wait for the update process to complete;
- turn on the device.
After flashing, if everything is done correctly, cyclic recording is set up and all functions of working devices are restored.
Chinese models take longer to flash. Difficulties arise with finding the SD memory card. To fix the problem, format it not in the FAT 32 system, but in FAT. The files are copied to the root card and the write protection is removed. It is worth considering that if the software does not match the recorder model, the device will work with errors.
When updating the software and traffic police database in 3-in-1 recorders, which include a radar detector and a GPS navigator, the process is similar to simple devices. If, during downloading, the antivirus program interferes with the operation or unpacking of files, it is disabled. The memory card must be formatted after flashing.
How to disassemble
The structure of a simple surveillance gadget looks like this:
- frame;
- microcircuit or board;
- power unit;
- screen;
- speakers;
- camera peephole;
- fasteners.
Before disassembling the 1080p Full HD DVR, first dismantle it:
- turn off the ignition;
- disconnect the terminals from the battery to prevent a short circuit;
- disconnect the power cord connected to the gadget;
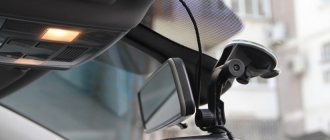
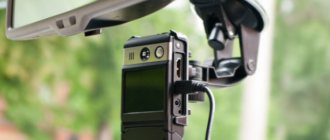
- detached from the bracket or removed from the windshield.
Removing the mirror with the DVR depends on its fixation. The interior mirror can be attached to the ceiling with bolts or screws, as well as to the windshield using glue or suction cups. In the first case, unscrew the bolts and remove the plug. If the device is installed with a bracket glued to the surface, the clamps are moved away or turned to the side, otherwise it is necessary to remove the glass with the mounting platform. This operation is difficult to perform on your own, so it is better to go to a salon.
Disassembling the DVR is done like this. There are 4 screws along the edges of the case, and 2 latches in the center. The screws are unscrewed, the latches are bent using a sharp object. On expensive models, instead of latches, there are more reliable screw fasteners. Rubber seals are installed in the holes for fasteners for elasticity, which are separated and set aside. There is a speaker at the back. Therefore, the recorder cover is removed carefully, without sudden movements, so as not to damage the components.
The board is securely secured with clamps. A speaker and battery are soldered to the chip. They are carefully removed with a knife or screwdriver. The screws that hold the board in place are smaller in size compared to the housing elements. In order not to confuse them or lose them, it is better to put them aside separately.
The battery is attached to the wall of the product using 2-sided tape or glue, so it can be easily removed.
A flexible cable connects the camera and the board; there are slots between the conductors. In models with a rotating screen, the cable allows you to rotate the recorder at any angle. The monitor is in a plastic case, secured with screws that can simply be unscrewed if necessary, and glass is placed on top to protect it from shocks and scratches.
To disassemble the interior rear view mirror, you will need presses and mediators. The product is broken down like this:
- find the junction of the body and the mirror;
- insert the clamp and gently press with little force until a gap forms;
- a mediator is carried along the perimeter and the body is divided into 2 parts;
- The mirror is removed, all the necessary elements for repair are located under it.
Problems with cable networks
Cable networks are the main cause of malfunctions in video surveillance.
Effect of radio interference
From across the entire radio spectrum, high-frequency waves can have the greatest impact. Electromagnetic disturbances in signal transmission lines can be caused by nearby powerful radio and television transmitters, radars, microwave emitting equipment and other emitting equipment.
Such interference appears in the form of image distortion, stripes and lines on the screen.
Effect of lightning
Lead to massive burnout of ungrounded equipment. Standard systems for protecting buildings and structures - lightning rods - are not designed to protect data lines and electronic devices.
Often, when installing an outdoor video camera, the tallest structure that is exposed to the greatest risk of lightning is used as a support.
Shielded cables and devices must be grounded. In accordance with technical requirements, the grounding of all network elements must take place at one point.
Stray currents in grounding
During installation work, especially in multi-channel systems, grounding rules are often ignored. Sometimes this is technically impossible to do, especially when using cheap cameras where the BNC connector is not isolated from the body.
The body of such a device itself is grounded by the corresponding contact of the flying plug, which has a grounding terminal. In fact, instead of a grounding bus, a power supply zero is used. Accordingly, several such points are formed in the video surveillance system.
For long-distance communication lines, stray ground currents lead to a potential difference of several hundred volts between transmitting and receiving equipment.
Dips and overvoltages in power networks
They are caused not only by the low quality of electrical networks, but also by periodic daily fluctuations. The peaks of fluctuations occur in the morning and evening, the highest level of overvoltage occurs at night.
Phase imbalance and neutral overload are a less common cause of overvoltage in networks associated with errors in electrical wiring installation.
Periodic and single impulse noise:
- turning on and off lighting and climate control equipment that consumes a large amount of electricity;
- turning on and off devices and devices with a high level of inductance: starters, transformers, operation of electric welding equipment, etc. etc.
- accidents and short circuits in low-voltage circuits with subsequent tripping of an RCD;
- influence of inductive interference from the operation of urban electric transport.
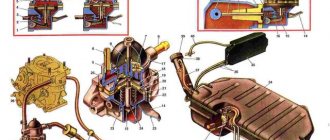
Replacing the circuit board of the DVR
On the circuit board of the DVR there are many elements for controlling the system. When they fail, the device does not work. Do-it-yourself repair of DVRs in this case can be done by removing the cover. To remove the circuit board, you will need a screwdriver. At this stage, it is important not to damage the amplifier, which is located to the side of it. After disconnecting the circuit board, you should check all sockets and clean them.
The battery "died"
Most recorders, in order to compensate for battery wear, receive power from the cigarette lighter (or USB) in parallel. If you constantly use only one battery, its service life, alas, will quickly expire.
As a rule, the problem manifests itself as follows: the DVR battery does not hold a charge and discharges many times faster than it charges.
In this case, all that remains is to buy a new one, since the gadget will not work properly on a “dead” battery (for example, it will not be able to record the situation when the engine is turned off). It’s easy to check the functionality of the power supply: remove it and connect the device to the cigarette lighter. If the shooting continues uninterruptedly, unfortunately, it is the DVR battery that is not charging.
A new power supply is not cheap, often almost half the cost of the device. Some craftsmen manage to connect a removable battery from a mobile phone, but, in our opinion, this is a dubious option. It’s not a fact that it will work and the device will charge as it should.
Recommendations
Finally, here are some tips to follow when repairing your DVR:
- Do not use a very cheap and feature-rich DVR. They usually break down quickly.
- Try to prevent the recorder from being damaged or dropped.
- From time to time, clean your gadget from dust and dirt, paying special attention to the charging connectors.
- During the cold season, do not leave your gadget in the car; it is better to take it home with you. Due to temperature changes, condensation forms in the recorder, affecting the functionality of the device.
- When replacing the power supply, pay attention to the voltage; usually the recorders operate on 12 Volts. Repair of the rear view mirror recorder is best done in special service centers.
By following these tips, you can avoid serious damage to your gadget.
How to charge the battery directly yourself
Today there are universal chargers on sale that can be connected directly to the battery terminals. In the case of DVRs, we only need to give the battery a small starting charge. Place the contacts of the charger on the terminals and wait a few minutes. After this, you can continue charging in the standard way via a cable with a miniUSB connector.
Using a universal charger you can provide power to the battery
Video on how to fix a typical breakdown (the cover comes off)
DIY battery power controller repair video
If your DVR stops responding to control buttons, does not turn on, or resets the recording mode, it is not necessary to immediately contact the service center. Some problems can be completely eliminated with your own hands. If the breakdown is serious, requiring disassembly of the device and replacement of some parts, then it is better to contact specialists and take advantage of the warranty.
- Author: Alexander Orda
Rate this article: (5 votes, average: 4.2 out of 5)
Frequent malfunctions
The reliability of recorders depends on the brand and manufacturer. Chinese video surveillance devices are cheaper, but break down more often. Therefore, when purchasing equipment, special attention is paid to the possibility of warranty service from the official dealer of the manufacturer, provided that the cause of the breakdown is not external mechanical influence.
The following typical faults occur:
- The DVR constantly beeps, starts recording, as indicated by a special icon on the screen, resets the recording, then the process repeats, the device is reactivated. The reason why this happens may be due to the microSD card adapter. Reformatting the flash drive often does not help, so the drive is replaced.
- When connected to the cigarette lighter, the device turns on, but cyclic recording does not work. The product is constantly in standby mode. This type of breakdown is rare. The problem is solved by replacing the adapter.
- If the DVR is connected to the on-board power supply or cigarette lighter, the monitor may turn on, but then turns off spontaneously. Sometimes a menu consisting of 2-3 lines appears, the control buttons do not respond, and going through the settings items does not produce results. The reason is the micro USB connector on the power cable. To connect, you must use only the original cable included with the video surveillance system. Otherwise, when purchasing a cable with a charger in cellular stores or shops, the wiring in the plug will not work.
- The gadget does not turn on and the red light is on. Sometimes the device activates and works for a long time, but then freezes. This is typical for devices with a Full HD resolution of 1920x1080 px. After formatting the flash card, the situation repeats. This can be corrected by removing the battery or pressing the RESET button. For continuous operation, the device is combined with the required class of memory card. This parameter can be found in the technical specifications described in the instructions for using the device. For high resolution Full HD, grade 10 is recommended.
- The device turns on and off spontaneously, automatically stopping recording without a user command. At the same time, car GPS navigators can change the route and stick to it. Such malfunctions are often found in inexpensive Chinese models. The reason lies in the use of a charger with a low-quality micro-USB plug. Solved by replacing the charger.
- After the equipment is completely discharged, a working charging system fails, the gadget does not turn on, does not charge and does not respond to control buttons, including the RESET button. The problem applies to any model, regardless of price and popularity of the brand. To eliminate the cause, check the connector wiring, remove the battery and connect it directly to the electrical network so that voltage is supplied to the battery contacts.
- Slow startup of the device, accompanied by flashing display. In low temperature conditions, the battery loses capacity, the voltage drops below the threshold value, and the charging controller blocks the charging process. When overheated in the sun, the battery swells, covers, protective films and fastening elements warp. If it becomes swollen, it is replaced; warping is prevented by covering the gadget with a white cloth or foil. If there are no signs of damage to the integrity of the battery, apply a voltage of 3.7-4.2 V to the “+” and “-” terminals for 1-2 minutes.
DVR or NVR stopped turning on
In this article we will look at the reasons why a security video recorder does not want to work normally. Symptoms can be different, from a hard drive not working in it to a banal failure to turn on.
But first, let’s separate the concept of repairing a car DVR and a security DVR or NVR recorder.
A car DVR is a device that combines an information recording device, a video camera and a monitor. All he needs to do is insert an SD card, connect it to the car's electrical network and record video data. We also repair them.
Malfunctions caused by the memory card
Memory cards with a low class are not always suitable for HD DVR recorders, since their recording speed and picture quality are very high, and slow-working removable media do not have time to write data. This leads to the DVR turning off or permanently freezing. For HD mechanisms, it is better to use information storage devices of at least class 10, which will be able to read and write data simultaneously.
It happens that the recorder does not turn on due to a flash drive formatted in FAT 32. HD DVR products cannot work stably if a microstorage type FAT 32 is inserted into them; they can only record in FAT format without failures.
Also, the recorder refuses to turn on normally if there is a virus on the media that disrupts the installed software.
The equipment stops working if the program update was performed poorly or the already installed firmware on the flash drive was not removed. The device will automatically turn on, thinking that it needs to re-flash the firmware and, accordingly, refuse to function.
All video recording devices have a reset button, which also helps restore the device to operation in the event of an unauthorized shutdown. To do this, take a thin, sharp object and insert it into the hole, holding it in this position for 10 seconds. During this time, the settings will be reset and the product will return to its original mode.
Reason two: the battery is swollen
I want to warn you that no one will escape such a fate. The thing is that from constant charging, the DVR battery warms up. From the high temperatures that are inevitable in the summer, the battery heats up again, this is really detrimental to it. After all, she is constantly charging. In general, from such work, charge - charge and charge again, just after two years it breaks down and it’s not for nothing that it “swells up”.
This is precisely the reason for many oddities in work, I will list them again:
- Spontaneous switching on - switching off
- Shutdown when engine starts
- Shutdown when charging or when connected to charging
- While driving
Why does this happen? Yes, it’s simple: many DVRs cannot work, without a buffer, which is our battery. And with us it is 90-95% dead, if it is swollen. So it doesn’t have enough power for normal operation, because starting a recording “eats” a lot of energy from the battery - and I emphasize once again, if it is “dead” - so you need to turn it off and on.
Another indirect reason for battery failure is the constant reset of settings to “default”. That is, you set the time, date and other parameters, and every time after a shutdown they are reset again - then the battery needs to be replaced in 95% of cases.
Summarizing
Considering all of the above, you should not neglect the rules for using the DVR. If necessary, you can always examine the model yourself. However, before repairing the device, you should assess the extent of the damage and make an informed decision. Sometimes it is better to immediately take the DVR to a service center and consult with a specialist.
Every year more and more cars are equipped with DVRs. These devices continuously record on the road and can identify the culprit of an accident or identify a violator of traffic rules. Like any other equipment, they periodically fail. If it breaks down, you can try to repair the device yourself, and in some cases, do-it-yourself repair is not at all difficult.
Advantages of attaching objects with suction cups
The main area of application for objects that have a suction cup for attaching them to a smooth tile or glass surface is the bathroom or kitchen. If previously, almost the only accessory that could be stuck to the wall using a suction cup was a hook, today the list of such items is quite extensive and is constantly growing. On sale you can find the following products with suction cups:
- hooks;
- soap dishes;
- glasses for toothbrushes;
- shower head holders;
- toilet paper holders;
- towel holders;
- decorative items;
- shelves for bathroom accessories and cosmetics.
Most often, suction cups are used in the bathroom.
The growing popularity of products with this type of fastening is due to a number of advantages that the suction cup provides:
- a soap dish, hook or any other object can be quickly, within a few seconds, attached to the desired location on the ceramic lining;
- In order for the device to be securely held on the tiles, the use of mechanical and electrical tools and drilling of walls for installation of various brackets and clamps is not required;
- if necessary, the product can be easily dismantled without leaving traces and transferred to another location;
- small price.
Problems with the cable in the Karkam Q3 DVR
If you believe consumer reviews, then this DVR has problems with the cable quite often. This component is very capricious and sensitive to negative temperatures. When it breaks, the connection with the camera is immediately lost, but the device’s memory remains accessible through a personal computer. Do-it-yourself repair of the Karkam DVR if the cable breaks should begin by removing the cover. To get to this part, you will have to remove the printed circuit board.
After this, you will need to disconnect the camera itself. The cable of this DVR is attached through a special connector. In order to free it, you will have to use a knife. In this case, it is important not to damage the wire that comes from the battery. The next step is to carefully remove the cable. If it shows signs of damage, it will need to be replaced. After installing a new component, you simply need to re-bend the connector and secure the part tightly.
Instructions for setting up a rear view camera
According to the instructions, the main task when setting up is to adjust the parking lines that the camera should show first.
Take a standard block of wood. It is desirable that the length of the product is 2 meters and its width is 2-3 cm. The blank is placed at a distance of about 1 meter from the central part of the rear bumper
It is important that the edges of the wooden beam extend beyond the sides of the vehicle at approximately the same distance. Then the driver gets into the cabin and enters the service menu for camera settings
In some cars, you will have to perform additional actions, for example, activating and disabling the side lights. The make of the vehicle is selected. After turning on the device, the steering wheel is twisted: first all the way to the right, and then to the left. The “Next” button is pressed and an automatic rectangular outline will appear on the device screen. The buttons are used to move the bar image to the center of the screen. Then the selected action should be confirmed.
If you don’t have a wooden block, you can do this:
- You will have to use three points, which are measured from the top edge of the rear bumper. Each of the elements has a step of 10 cm, respectively, the first point is 10 cm, the second is 20 cm, the third is 30 cm.
- From each point you need to set the camera visibility range in 30 cm increments.
- As a result, the first point has a range of 30 cm, the second - 60 cm, and the third - 90 cm. Taking this scale into account, you can correctly calculate the distance to the obstacle.
What should you consider when choosing a device for its effective operation?
In order for the DVR to work smoothly and efficiently, when choosing a device, you should pay attention to its technical parameters and the classification of possible breakdowns of each model. So, DVRs can be built-in or stationary.
To repair the built-in mechanism, it is better to seek help from professionals. Also, recording devices differ in the type of mounting.
It is recommended to purchase a device whose fastening mechanism is made of durable material.
The reliability of the DVR operation and its quality depend on the manufacturer's brand. It is known that the most common types of breakdowns of devices from Chinese manufacturers are rapid consumption of battery power and rattling of the lid. You should buy equipment from official dealers who provide a warranty on the device and repair DVRs if the cause of its breakdown is not the result of external physical influence.
The video shows a minor repair of the DVR:
What types of DVR breakdowns are there?
Repair of vehicle DVRs mainly includes the following areas:
- Inspect the system connector (charging socket). If it is impossible to charge the device or if charging is interrupted while the car is moving, the reason is a loose connector;
- Troubleshoot audio problems. If the video recording device does not record or play back sound, then it is necessary to diagnose the device. Typically, the problem is a broken speaker, which should be checked first;
- Troubleshooting cable problems. If the device falls or makes sudden movements, the cables that connect the screen to the main board break, causing the image to disappear.
Malfunctions of the recording device included in the video surveillance system can be caused by the following reasons:
- Broken cable lines;
- Mechanical damage to surveillance cameras;
- Power supply failure;
- Lack of video signal;
- The operating system of the recording device has failed.
Also, if the DVR breaks down, then perhaps errors were made during installation and connection of the device or the device was not operated correctly. It is recommended that equipment installation be trusted only to specialized companies.
How to fix the DVR connector yourself?
The most common recorder breakdowns that you can fix yourself are mechanical damage to connectors and connectors. In most cases, the mini USB connector simply becomes disconnected due to cold soldering or even falls apart. When fixing this problem yourself, first of all, you should find out how many pins the connector has. As a rule, a standard USB connector has four pins, two of which supply 5V power (+ and -), and the rest transmit information. The mini USB 5 pin connector has an additional contact that connects to the common cable.
If the device is equipped with a mini USB 10 pin connector, then repairing the DVRs yourself will be more difficult, since the distance between the contacts is quite small. Therefore, if such a connector breaks, it is recommended to replace it with a five-pin one; moreover, it is much easier to find such an element. However, please remember that if you replace the USB connector in this way, some functions of the recorder may be blocked.
Repair of DVRs, including replacing the connector with your own hands, is carried out according to the following algorithm:
- The device is being disassembled. To do this, you can use a Phillips screwdriver or a universal master key for mobile phones;
- Next, you need to ground the soldering iron: one wire (minus) is soldered to the common body, the second (plus) to the body of the soldering iron;
- If you replace the connector, you need to heat the fastening petals of the mechanism to unsolder its leads, and then solder the new element;
- If the mechanism is intact, but disconnected from the board, then you should find out which wires are broken and solder them.
When repairing DVRs yourself causes difficulties, it is better to turn to professionals. If you have a warranty card, you do not need to look for where to repair the device, since all work will be performed by service employees.