The installed equipment for receiving radio waves must be correctly connected to the head unit. The sensitivity of the radio receiver and the quality of playback depend on the correct installation. When driving, vibration occurs in the car antenna plug in the mounting socket.
If the installation is loose, interruptions in signal reception occur, which lead to failures in radio reception or the appearance of noise or interference.
Outdoor
To install an external antenna, fix it through a hole or with a magnet. The cable from the magnetically supported equipment is routed into the interior through the door seals. Because of this, the insulation of the cord is frayed, which leads to interference. In addition, a deformed seal allows water to enter the vehicle interior.
To install the antenna on the roof, you need to drill a mounting hole and a channel for introducing the wiring harness into the cabin. The connecting cable must be shielded with a design resistance of 75 Ohms. To place the equipment on the roof, you will need to remove some of the pads located on the racks, and then move the one-piece molded headliner a little. The element is removed carefully, since the deformation will be visible on the flat surface of the panel.
After drilling holes, it is necessary to apply a protective mastic, which will reduce the risk of corrosion. The antenna housing is mounted on the roof through a rubber gasket, additionally lubricated with sealant for external use.
This method reduces the amount of water entering the car interior.
The signal cable is attached to the active element through a set of plates made of copper and fluoroplastic.
Set of spare antennas for BOSCH car antennas
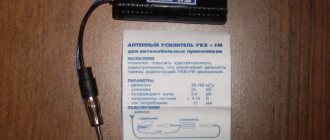
Set of spare antennas for BOSCH car antennas. Self-adhesive flexible antenna for windshield antenna. Standard receiving elements of the BOSCH antenna are 50 cm long. The whisker manufacturing technology is similar to that of Robert Bosch Gmbh.
Completeness:
- Flexible mustache 50 cm long: 2 pcs.
- Mustache clamp: 4 pcs.
- Antenna clamp: 1 pc.
- Box: 1 piece
- Wet wipe: 1 pc.
Payment to Sberbank VISA card
The most convenient and profitable payment method for you. Payment can be made through the Sberbank Online system, through a payment terminal (Sberbank ATM), provided that you have a card from this bank. If you are not a client of this bank and you do not have a card, then you can top up your balance at any bank branch through an operator; they will accept cash payment and top up your balance. Commission from 0 to 1%
Step-by-step instructions for installation inside the cabin
Installation depends on the configuration of the selected model, but the general principles are practically no different. All features will be additionally indicated by the manufacturer.
- Degrease the antenna installation area with an alcohol wipe or other product.
- We place the triangle included with the device at the installation site, which facilitates correct positioning of the antenna.
- In the phases of the triangle, install the mounting disk and remove the triangle.
- Glue orientation strips that will help you correctly position the receiving parts of the antenna.
- The signal receiving antennae are installed on the pin of the mounting disk by gradually peeling off the film and fixing it in accordance with the reference stripes, after which they can be immediately removed.
- To lay the cable, remove the side trim of the car.
- We secure the wires using zip ties to the car's standard wiring or to the glass washer hose.
- For the convenience of further installation, it is necessary to dismantle the glove compartment of the car.
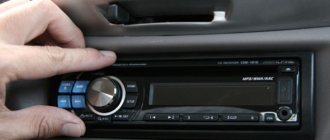
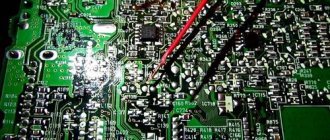
- We remove the radio from the socket to gain access to the connectors and wires.
- The blue power wire from the ISO connector connects to the power wire of the antenna amplifier.
- We connect the wire responsible for sending the signal to the corresponding connector on the rear panel of the head unit.
- The quality of work performed and signal reception are checked.
- All wires are neatly placed in the landing window of the radio.
- The radio is installed in place and fixed.
- The glove compartment and the removed lining are mounted back.
Choosing a location
Active antennas have a compact design and are attached using a special adhesive mounting pad or double-sided tape. Therefore, you can choose any installation location inside the cabin. Most often, preference is given to the windshield near the front passenger seat. This is due to its location near the radio and convenient installation of cables into the car's trim.
Placing on the roof has an advantage in signal reception, but is more difficult. Oxidation of metal parts and deterioration in reception quality are also possible.
The antenna instructions say otherwise
The instructions for this Bosch active antenna say differently. According to the instructions, the antennae and the antenna body itself must be installed from the edge of the car body at least 6 centimeters. But I did it almost closely, and I didn’t notice any deterioration, everything works great. I wish you good luck too!
Installing or replacing the player requires connecting various cables that ensure the operation of the car multimedia system. When installing audio equipment yourself, the user needs to know how to connect the antenna to the radio. Erroneous actions lead to incorrect operation of the radio, as well as failure of electronic components or fuses.
Before connecting the antenna to the car radio, you need to find out the type and design features of the equipment used. Products for receiving radio signals or other waves may have a built-in amplifier that connects to the vehicle’s on-board network. A special filter is installed in the design of standard equipment to remove background noise and improve the quality of received signals. The device is located under the interior trim and has additional power from the vehicle battery.
On vehicles that have standard equipment or preparation for placing an acoustic system, the choice of antenna is made by the manufacturer. The vehicle owner may remove the existing product or not use it to receive radio signals. Additional equipment is installed when using the head unit with a television receiver or navigation module. Additionally, modification or replacement of the existing antenna will be required when placing special CB radio stations, which are used by drivers of heavy trucks.
Antenna amplifier power supply
Modern models are connected via the receiver connector directly to the car radio. With this connection, a radio signal is supplied from the active antenna. In the reverse order, the required voltage of 12 volts is supplied to the amplifier through the other pair.
On models where such a connection is not provided, the antenna amplifier must be connected to the power supply independently in two versions:
- Power connection via fuse box.
- Independent connection to power via the car radio.
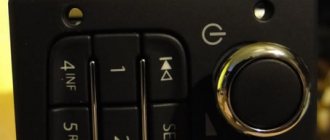
Bosch Autofun Pro active antenna review: best reception!
This high-sensitivity car interior antenna is mounted on the inside of the car window and provides excellent signal reception in the AM/FM range. In this article, we will understand the components of the antenna and its installation.
Equipment
The delivery set includes the main antenna module, which will be discussed later, a plastic casing consisting of three parts, a set of restrictive and fixing stickers, a set of screws and clamps, a radio receiving element, a wet wipe and a special grounding gel.
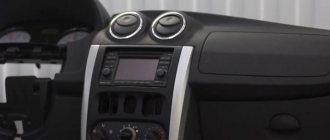
Design and installation
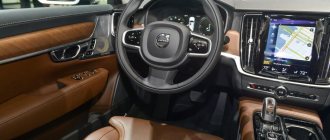
The design of the antenna allows it to be installed at the top of the inside of the windshield or in its corner. The choice depends on the user's preferences and the possibility of installation, which may, for example, be hampered by the rear view mirror.
Where to put the device
When it comes to installing and connecting a car antenna, the choice of location for its installation is of great importance. The traditional place for an active device is the upper right corner of the windshield or behind the rearview mirror. The passive can be located on the car body, usually mounted on the roof.
Active antennas are usually mounted on the roof of a car - this improves the quality of the received signal.
To ensure that the connection does not take much time, it is recommended to immediately prepare the necessary tools and materials;
- cleaners;
- soft, lint-free cloths for cleaning surfaces;
- glue or double-sided tape;
- a drill with a drill diameter identical to the diameter of the wire from the antenna;
- bolt, nut and locknut for grounding.
Any antenna, regardless of type and design, must be mounted on a clean surface. Before installation, it is necessary not only to remove dust or dirt from the glass or body, but also to degrease the surface (white spirit is ideal for this). When purchasing factory-made devices, a special cleaner is also included in the kit.
The kit includes not only equipment, but also a special cleaner for the car surface.
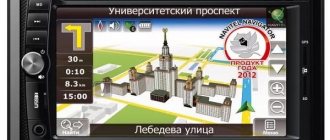
GPS antenna
The GPS antenna is connected to the car radio with navigator in the same way as another receiving device. First you need to remove the multimedia system to get to the back wall and the antenna socket. Then the dashboard trims are removed to route the receiver cable.
If screw terminals located on the back wall of the device are used for connection, then you should strip the ends of the wires, connect the wires, insert them and tighten the fastening screws securely. When using a snap connector, be sure to firmly insert it into the appropriate slot until it clicks into place. After connection, all removed parts are put back in place.
If the GPS antenna device is connected correctly, the navigation system should immediately determine the location. Otherwise, you should check that the GPS receiver for the car radio is installed correctly. It should not be blocked by metal objects that will make it difficult to receive a signal from the satellite.
About cars, repairs, tuning - accessible, free, honest
Site search
RSS subscription
Categories
Recent comments
- Sergey on File with extension .h264, how to open an h264 file or convert to avi
- Svetlana on How to restore laminate flooring after exposure to acid or electrolyte
- Nikolay on File with .h264 extension, how to open an h264 file or convert to avi
- Valery on the post The timing belt is slipping. Causes and solutions
- Anonymous on the post All sorts of things
Connection to radio
The installed equipment for receiving radio waves must be correctly connected to the head unit. The sensitivity of the radio receiver and the quality of playback depend on the correct installation. When driving, vibration occurs in the car antenna plug in the mounting socket.
If the installation is loose, interruptions in signal reception occur, which lead to failures in radio reception or the appearance of noise or interference.
Outdoor
To install an external antenna, fix it through a hole or with a magnet. The cable from the magnetically supported equipment is routed into the interior through the door seals. Because of this, the insulation of the cord is frayed, which leads to interference. In addition, a deformed seal allows water to enter the vehicle interior.
To install the antenna on the roof, you need to drill a mounting hole and a channel for introducing the wiring harness into the cabin. The connecting cable must be shielded with a design resistance of 75 Ohms. To place the equipment on the roof, you will need to remove some of the pads located on the racks, and then move the one-piece molded headliner a little. The element is removed carefully, since the deformation will be visible on the flat surface of the panel.
After drilling holes, it is necessary to apply a protective mastic, which will reduce the risk of corrosion. The antenna housing is mounted on the roof through a rubber gasket, additionally lubricated with sealant for external use.
This method reduces the amount of water entering the car interior.
The signal cable is attached to the active element through a set of plates made of copper and fluoroplastic.
Settings
After connecting the antenna to the radio, you only need to search for the frequencies of radio stations or television channels that are recorded in the memory of the head unit. The tuning must be done only when using radio stations operating in the CB range. The receiving equipment is mounted on the roof of the car or cab using a magnet or nut, ensuring efficient signal reception. Placing the antenna on the wing or inside the bumper reduces the signal reception distance by 1.5-2 times.
Connection to radio
The installed equipment for receiving radio waves must be correctly connected to the head unit. The sensitivity of the radio receiver and the quality of playback depend on the correct installation. When driving, vibration occurs in the car antenna plug in the mounting socket.
If the installation is loose, interruptions in signal reception occur, which lead to failures in radio reception or the appearance of noise or interference.
Outdoor
To install an external antenna, fix it through a hole or with a magnet. The cable from the magnetically supported equipment is routed into the interior through the door seals. Because of this, the insulation of the cord is frayed, which leads to interference. In addition, a deformed seal allows water to enter the vehicle interior.
To install the antenna on the roof, you need to drill a mounting hole and a channel for introducing the wiring harness into the cabin. The connecting cable must be shielded with a design resistance of 75 Ohms. To place the equipment on the roof, you will need to remove some of the pads located on the racks, and then move the one-piece molded headliner a little. The element is removed carefully, since the deformation will be visible on the flat surface of the panel.
After drilling holes, it is necessary to apply a protective mastic, which will reduce the risk of corrosion. The antenna housing is mounted on the roof through a rubber gasket, additionally lubricated with sealant for external use.
This method reduces the amount of water entering the car interior.
The signal cable is attached to the active element through a set of plates made of copper and fluoroplastic.
Some cars have holes for mounting the pin of a conventional passive antenna on the roof or fender, closed with a plastic or rubber plug.
Machines that require installation of acoustic equipment have standard harnesses.
On some cars, you will have to install an additional cable connecting the antenna output to the radio. The cord is pulled under the interior decoration elements and under the carpet laid on the floor. After this, you need to install the antenna, which is secured with a standard nut.
Car antenna Triad
This antenna model is produced in Russia by NPF Triada. Meeting international standards, Triad antennas are fully adapted to signal reception in Russian conditions.
The fact is that imported antennas are often not designed to operate (receive) MV 1-3, and, accordingly, the reception of these channels leaves much to be desired.
The Triad brand is represented on the market with 5 types of car antennas. Let's focus on the interior car antenna Triad - 610 Standart. This model easily becomes on par with the types of car antennas: Pioneer, Prologi.
Properties of the Triad car antenna that interest the consumer:
- built-in amplifier with correction to optimize reception of MF and UHF;
- to reduce interference from the car's ignition system, a double filter is built in to power the antenna;
- two additional operating modes: “city” - to reduce the level of industrial interference within the city, and “turbo” - to strengthen the signal, very useful for drivers on long trips outside the city.
The Triad - 610 Standart antenna is equipped with a TV+Radio coupler, which allows you to enjoy not only high-quality reception of TV signals, but also transmit a radio signal to the car radio. Some Triad models are equipped with additional external receiving elements.
Keep in mind
The type of antenna you choose depends on the nature of your travel. If the car is used within urban and suburban areas, it is better to choose a passive whip antenna of medium length, which works well in conditions of reliable reception. When traveling long distances or working in settlements remote from large cities, choose an active antenna. It has a built-in signal amplifier. Typically, such antennas are designed for interior design to prevent moisture from entering the antenna amplifier. However, when entering a city or crossing power lines, such an antenna may become “clogged” with external interference.
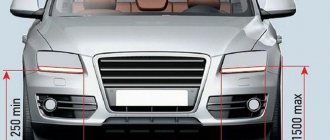
Reception, reception, as you can hear: we independently connect and configure the CB radio station in the car
Despite the weather disasters, summer still came into its own this year, and many easy-going motor tourists rushed to long routes - some to the south, and some to the more curious and remote corners of vast Russia. At the height of the travel season, car owners traditionally have an increased interest in CB radio stations operating on the “truck drivers channel”, which can be useful on long journeys. For those who want to purchase and install a walkie-talkie on their own - our instructions!
Connecting the radio to power
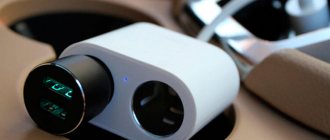
The following guide to installing a CB radio in a car concerns not those who use radio communications daily and professionally, but those who need it for occasional use, mainly on long trips. In this case, most drivers will prefer not to mount the radio permanently in the car, spoiling the interior and provoking parking thieves, but will want to attach it temporarily in a suitable place: between the seats, between the seat and the side pillar, or in a tray for small items under the dashboard, as is done, for example, in the photo of the Chevrolet Lachetti:
We've installed a walkie-talkie - connect power to it! There is an opinion that the radio station in the car must be connected with a separate wiring from the battery, but this solution is more suitable for daily use. In our case of occasional use, this is completely unnecessary - it is much more convenient to take power from the cigarette lighter connector. This is the simplest, fastest, and at the same time, we especially emphasize, a completely correct connection. Not a hacky compromise, as some people think, but meeting all the requirements - both in terms of the power unit and in terms of the direct operation of the radio station on the air.
This connection is absolutely safe for electrical wiring and can be completed in half an hour. And most importantly, it is optimal in the case of a new car and harmful warranty providers who are just looking for a reason to refuse a warranty for far-fetched reasons.
For a radio station with an output power of 4-5 watts, the maximum current consumption does not exceed 2-3 amperes, and for a radio station with a power of 8-10 watts - less than 5 amperes, which is at least two to three times less than the current of the fuse protecting the cigarette lighter connector.
To connect the radio to the cigarette lighter, we extend the two power wires coming out of the radio - black and red - by soldering or twisting to a length of 1-2 meters (depending on the intended installation location of the device). At the end of the attached wire we solder (the center is plus, the side contacts are minus) a standard male connector into the cigarette lighter, which is sold in every car store.
How radio antennas are distinguished by type of amplification
Depending on the type of amplification, antennas can be active or passive. The difference in their work is expressed as follows:
- passive antennas catch an existing signal;
- active ones not only receive the signal, but also enhance its quality.
It is worth noting that active antennas are preferable when traveling outside the city, as they allow you to listen to the radio, watch TV or use a navigator without any restrictions.
Operating ranges of antennas for cars
The stores offer a large variety of models of all types of antennas. In order not to make a mistake and buy a truly reliable car antenna, you need to choose devices with the following operating ranges:
- radio broadcasting (FM and AM frequencies from 70 to 108 MHz);
- television (DVB-T frequencies not exceeding 900 MHz);
- navigation (GPS frequencies about 400 MHz);
- radio communications (CB frequencies about 27 MHz).
There is an opinion that an external car antenna receives signals better than the internal one. However, internal antennas are much cheaper, hence their not the best quality. But when used within the city, they are quite capable of providing the driver with adequate signal quality.
What you need to know to choose the right connector
When choosing an antenna, you should pay attention to its connector. Most likely, the antenna connector will fit all car radio models without any problems, but it’s better to be on the safe side. At the time of purchase, you can ask the seller to connect the antenna to your car radio and check if he can do it.
It is important to make sure before purchasing a car antenna that its connector will fit into the socket of your radio.
It is necessary that the connector of the new antenna be fixed in some way. Reliable fixation will avoid disconnection during sudden shocks and vibrations while driving.