Choosing a location
Active antennas have a compact design and are installed using special self-adhesive or double tape.
This allows you to choose the assembly location in the passenger compartment at any time. Glass is most often preferred, favored next to the front passenger seat. This is due to its proximity to the radio and the convenient assembly of wires in automotive decorative strips. The roof assembly has an advantage in signal reception, but it is more complex. Metal parts and poor reception may also occur.
When choosing where to install your antenna, follow these guidelines:
- Cables cannot run near sources of interference.
- They should be carefully hidden under the car's upholstery to avoid discomfort while driving and cracks caused by negligence.
How to determine if the signal is weak
Antenna amplifier for car radio
This is not difficult to do. It will be enough to familiarize yourself with the signs of a weak radio or TV signal, which are given below:
- The sound is distorted when watching or listening. Frequent interference;
- The list of accepted stations is sharply reduced;
- Image synchronization is lost;
- The signal disappears completely;
- Small white dots are visible on the screen instead of a picture, only noise is heard.
Advantages and disadvantages
DIY external car radio antenna can be installed under each car body. Such mechanisms do not have problems with installation height to receive an FM signal. Another advantage of a home device is better signal reception quality compared to factory mechanisms. If necessary, the user can turn it into a GPS antenna.
Disadvantages may include the fact that a home antenna may be questioned by a national trucking inspection. Wires from the receiving mechanism can ruin the interior of the living room. In some cases, drilling into the body may be necessary to install this device.
How long should the connected antenna be for reliable reception?
When I talk about quality, I mean the sensitivity of the radio receiver. What is sensitivity? Sensitivity is actually the minimum signal measured in volts that is induced from the transmitter on the antenna. A signal at which the receiver is capable of producing high-quality signal reproduction with nominal characteristics. The longer the antenna, the higher the emf. on the antenna, the correspondingly lower the sensitivity of the receiver should be. But even here there is a reasonable limit when, as the length of the antenna increases, the signal will no longer be reproduced with better quality. There is also the matter of what kind of waves you are going to catch.
The antenna must be a multiple of the wave amplitude. This is especially true for walkie-talkies, since the amplitude there is large, which means the antennas will be large.
So, the first condition is when everything is reproduced with nominal characteristics, as they say - it’s better and not necessary. The second factor is when the interference induced on the antenna will be amplified equally with the useful signal. In this case, it does not matter what length your antenna is, along with an increase in the length of the antenna and an increase in the useful signal, the E.M.F. will also increase proportionally. and unwanted signal - interference. It is important here that the receiver is selective, that is, it catches the “useful” signal.
Antenna amplifier power supply
Modern models are connected using the receiver connector directly to the car radio. In this regard, the radio signal is directed from the active antenna. The second pair is used to drive the required 12V voltage to the amplifier.
On models that do not provide this connection, the antenna amplifier must be connected to the power adapter itself in two ways:
- Power connection via fuse box.
- Independent connection to power over car radio.
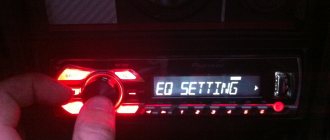
Settings
After connecting a new device, you need to check its functionality. This is easier to do in amplifiers with separate power supply. It is enough to enter the area of uncertain reception. Next, the additional power supply of the amplifier is turned off. If at this moment the reception disappears or there is interference, it means that the amplifier is giving a positive effect, or rather, it is working.
The efficiency of the amplifier is difficult to assess. This is usually done by subjective methods, that is, “by eye.” Antenna devices, despite their simplicity, are extremely complex elements from a calculation point of view. Sometimes reception with ordinary household scissors or just a piece of wire is more effective than with a “sophisticated” antenna with a cool amplifier.
You can achieve better reception by rerouting the signal cable, changing the installation location of the amplifier, even moving it a couple of centimeters to the right or left.
In most cases, if the amplifier is connected correctly, then no additional configuration is required.
Step-by-step instructions for installation inside the cabin
Installation depends on the configuration of the selected model, but the general principles are almost the same. All features will be further specified by the manufacturer.
- Distract the antenna assembly area with perfume or other cleaning agent.
- At the installation site, place the triangle from the device kit, which facilitates the correct installation of the antenna.
- Place the mounting disc into the triangle and remove the triangle.
- Adhesive orientation strips to help you install the antenna receiving parts correctly.
- On the installation screen, the received signals, the received signals are installed gradually by sticking the film and fixing according to the specified strips, and then you can immediately remove them immediately.
- To guide the cables, remove the side car strip.
- Attach the cable wires to a standard automotive wiring harness or hose washer on the windshield.
- Remove the clipboard in the car to make the manual easier.
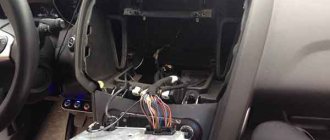
- Remove the car radio from the slot to access the connectors and wires.
- The blue power cord from the ISO connector is connected to the air amplifier power cord.
- Connect the cable responsible for receiving the signal to the appropriate socket on the back of the radio.
- Check the quality of operation and signal reception.
- All wires are neatly inserted into the radio.
- The central block was established and protected.
- The clipboard and remote trims are mounted on the rear panel.
What kind of service is this?
The quality of signal reception largely depends on the choice of the type of car antenna, its installation location, and compliance with connection rules. Antennas are classified:
- radio, television antennas, communication antennas;
- passive and active;
- external and internal.
Some car models (now extremely rare) use retractable antennas. In most cases, car enthusiasts purchase a standard kit for installing an antenna: the antenna module itself, fasteners, a high-frequency shielded signal cable, and a connector. To properly install the antenna, you need to choose the right installation location, connect the high-frequency cable in strict accordance with the instructions, and make a reliable connection to the signal receiver.
Qualified installation of antenna on a car
ensures its trouble-free operation and flawless operation of the receivers. The work is carried out in a place convenient for the client, where he calls the specialist by phone. This service involves performing a number of operations:
- Preparing the product and vehicle for installation of the device.
- Install the antenna in strict accordance with the instructions.
- Laying the cable and connecting the product to the receiver and, if necessary, to the on-board network.
- Checking the device's functionality.
The process of installing a car antenna depends on its type: internal or external, as well as the design features of the vehicle. Our technicians have the necessary skills in installing and switching both types of devices from domestic and foreign manufacturers.
Installation and connection of the internal active antenna
Products of this kind are popular among car enthusiasts and are characterized by fairly high sensitivity. When installing indoor active antennas, the technician performs the following steps:
- Inspects the product and the vehicle and agrees with the customer on the location of installation on the windshield.
- Marks and prepares the surface for antenna installation.
- Sticks the device and lays the cable to the receiver.
- Connects the device and checks its operation.
How to connect a car radio in a car with your own hands? (photo - video instructions)
Afternoon. In this modern article, I will tell you how to connect car radios and order common mistakes when connecting a car radio. As usual on our site, this article contains detailed photographic and video instructions.
Attention! Application to the so-called short circuit can cause deactivation of wires, burns and in extreme cases. Please, when connecting the car radio, take care, insulate all wires and do not forget about the fuses....Caution!
If a short circuit occurs during connection, this can lead to melted wires, burns, and in extreme cases, a fire. Please, when connecting the car radio, be careful, insulate all wires and do not forget the fuse...
To connect the radio we need:
- A car knife or a special tool for stripping wires.
- Insulating tape.
- Fuse (10a-15a) and its socket.
- Multimeter or light bulb indicator.
- Corona battery
- Audio equipment - special connectors, an antenna and regular speakers - are installed in the car's wiring. Audio is an option on many models, and many owners forego it in the name of a cheap car when purchasing, but this should not be done as radio installers charge much more money.
The simplest option is that the car has audio preparation.
With a factory audio system configuration, installing a boombox is as simple as purchasing an adapter between the wiring harness connectors and the boombox.
Adapters are available for free at most stores, but if you want to save money, you can order them on eBay.
The adapters look like this:
In this case, you need to replace the connector with a new radio (or maybe you’ll be lucky and they will fit).
The second most difficult option is that the car does not have audio preparation, but a radio tape recorder was previously installed (for example, a cassette).
The connection diagram for the car radio is as follows:
Most likely, after cutting off the old car stereo connector (it is better to do this with the battery clamp removed). You will have several wires and you will need to figure out where they are coming from, usually you will need to find the DC positive, ignition positive, ground and speakers.
- Using a paper knife, strip the wires and arrange them so that there is no short circuit.
How it's done?
— Attach the clamp to the battery.
- Connect one test light (or multimeter) wire to the body (ground) and touch each of the insulated wires with the second wire in the series. When the lamp lights up or the multimeter shows voltage, you have found a direct positive.
- It's better to connect it to an RC outlet (usually it's yellow and says BAT + 12v) and insulate it with heat shrink tape or electrical tape. This terminal should have a 10-15 amp fuse.
— We are looking for the positive from the ignition switch, to do this we open the lock to the “ignition on” position and similarly look for the correct wire with a multimeter or a lamp. The found wire must be connected to the red wire of the radio connector (usually ACC + is written on this wire), which is not yet insulated!
Please note (sometimes this wire is connected to a permanent positive, but in this case the radio will drain the battery because it will not have a standby mode).
- To do this, disconnect the test lamp from the car body and connect it to the last turn you just made, and connect the second wire of the test light (multimeter) to the other wires in series. As soon as the light comes on (or the multimeter shows voltage), you have found ground. Connect it to the black wire of the headphone jack (usually labeled gnd, ground).
— Isolate it and the plus from the ignition switch.
All you can do is connect a stereo system. If everything is done correctly, it will turn on.... But you need to connect speakers and an antenna to the stereo system.
10 wires left. One of them is the antenna cable, the second is the antenna power supply and 8 wires from the speakers.
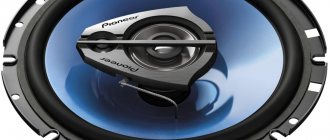
Connecting speakers.
Speaker cables usually come in pairs, but their markings are not always correct. So, we need a crocodile battery.
We connect it to a pair of wires for 1-2 seconds and listen to which speaker clicks. Then we look into the speaker itself and connect the battery again. If the speaker goes forward, then the polarity is correct and screw + to + and - to - as shown in the diagram. If it goes in, it means the polarity is wrong and you connected it backwards.
It is important to control the polarity, otherwise the sound in your car will be very quiet. quality!
Check and connect all speakers sequentially, front left. Rear left, rear right, front right.
Connecting an antenna is usually easy.
Don't be alarmed, there's a lot less text here since there's no need to define the wire assignments. Labor costs are higher because we will be laying these lines!
The third most difficult option is to install a car radio in a car without audio preparation for the first time.
The connection diagram does not change:
Pull out the DC plus from the battery, make sure through the fuse 10-15 amperes, wire 2.5-4 square!
- There is an option to take a permanent positive from the lighter, but as practice has shown, the lighter is usually powered by a wire with an area of 1.5 square meters and has a 10-amp fuse. In my car this fuse blew when I plugged in the tire inflator and the stereo came on!
Look under the panel (for example, on the fuse box or ignition switch) for the wire on which the plus appears when the ignition is turned on, and accordingly, from there, pull the wire to the plus of the boombox, which is responsible for turning it on. You can connect this wire to a permanent plus, but the radio will drain the battery!
- Lay the ground wire and attach it securely to the vehicle body (for example, to attach a panel to the vehicle body).
- Install the speakers and wires in their proper places, pay attention to the polarity!
- Attach the antenna and control cable.
- The car radio installation is complete, you have just saved 1.5-3 million rubles.
Most car radios are designed to be powered by 12V. Most trucks use a standard voltage of 24V, so if you connect a 12V car radio to a 24V outlet, it will inevitably break down.
The most complex option is that the car radio is installed in a car with non-standard wiring (trucks and vintage cars).
Therefore, the car radio should be connected to one battery (the one with a negative terminal to the car body), and its positive terminal should be routed to the radio inside the car. There is such a solution, but it has a significant drawback - after 1-2 weeks of inactivity, the battery is greatly discharged and it will be impossible to start the engine without recharging it!
To prevent this from happening, you should use a special voltage converter. It looks like:
Typically, the radio's memory is abandoned and the device is connected according to the following scheme:
Thanks to this, the boombox will not use the memory function, but will not drain the battery, and most importantly, there is no need to drag an unusual cable from the battery into the cabin.
The converters themselves are sold in online stores; as an option, consider purchasing on Aliexpress.
In the case of vintage cars, a non-standard supply voltage (6 V) or + on the car body is possible. Connecting a car radio in such cars is decided individually each time and there are no general recommendations.
If the supplied cable is not long enough, an additional cable will be required. The cable must be shielded and have a resistance of 75 Ohms.
Amplifier selection criteria
You can choose a suitable antenna amplifier for your car radio by taking into account various recommendations. They are as follows:
- To begin with, pay attention to the fact that the device must be located in close proximity to the antenna.
- The operating band must cover the required frequency range. Due to this, you will be able to listen to all available radio stations.
- The amplitude-frequency response should be as uniform as possible.
- The gain is selected in the range of 15-25 dB.
- Stability of operation must be ensured when the supply voltage varies.
- The dynamic range is selected taking into account the need to protect the device from overload.
- The noise figure is much less than the signal-to-noise ratio.
- It is recommended to give preference to devices from popular brands. They last much longer and have more attractive properties.
Step-by-step installation instructions on the roof
At the installation site, you need to drill two holes with a diameter of 5 mm, one for mounting the antenna and the other for the auxiliary antenna.
- The metal at the installation site is scraped off from the inside of the booth.
- To prevent corrosion, the installation site is sealed with putty on the inside and sealant on the outside.
- For installation, it is necessary to make an insulator (gasket) from copper and fluoroplastic washers to which the cable is soldered.
- The connection between the insulator and the cable must be sealed.
- Install the antenna on the roof and tighten the insulator nut from inside the car.
- Route the antenna cable to the car radio under the car trim.
- Connect your car antenna to your car stereo and check the signal quality. Watch the video instructions on how to install a car antenna.
- First of all, a car antenna must be able to receive a radio signal at a considerable distance from transmitting stations. If the car owner works only within the city, active (internal) antennas guarantee a good signal. They are small in size and easy to assemble. In addition, they are reliably protected from various vagaries of weather. How to properly connect daytime running lights, connect running lights to side lights. The disadvantage of this type of device is its low sensitivity, which does not provide good enough signal quality far from the city.
Kinds
Before connecting the antenna to the car radio, you need to find out the type and design features of the equipment used. Products for receiving radio signals or other waves may have a built-in amplifier that connects to the vehicle’s on-board network. A special filter is installed in the design of standard equipment to remove background noise and improve the quality of received signals. The device is located under the interior trim and has additional power from the vehicle battery.
On vehicles that have standard equipment or preparation for placing an acoustic system, the choice of antenna is made by the manufacturer. The vehicle owner may remove the existing product or not use it to receive radio signals. Additional equipment is installed when using the head unit with a television receiver or navigation module. Additionally, modification or replacement of the existing antenna will be required when placing special CB radio stations, which are used by drivers of heavy trucks.
How to connect an antenna in a car
Will be needed
- - side cutters;
- - Scotch.
- instructions
- drill;
Car antennas can be: permanently mounted on the roof, fender or bumper; telescopic; magnetic; electric; active with built-in amplifier. Depending on the selected antenna model and its installation and connection.
When installing the antenna on the roof, remove or unfold the headliner. Remove the side stand.
Drill a hole for the antenna from the outside of the roof. Seal the hole with waterproof sealant and secure the antenna by running the wire inside.
Run the cable along the roof, under the trim, and then along the pillar. Take him through the bulkhead to the radio.
We're filming the radio. Insert the antenna plug into the special connector on the rear panel of the radio.
If the antenna is active, connect power. Two wires and a plug come out of the active antenna. Connect the black wire to ground. Connect the other wire to the one coming from the antenna - blue or blue with a white stripe. In the car audio system's instruction manual it is labeled as an active antenna cable.
Having connected all the wires, we install the boombox. Check your radio. If everything is connected correctly, secure the boombox.
Before connecting the car antenna, wash the glass thoroughly. Warm up the car, as the tape will not stick to a cold windshield.
Wipe the surface dry and degrease. For this purpose, alcohol wipes are usually included with the antenna.
Remove the right shelf.
We glue the “tablet” antenna to the glass on the right. There are also “tendons” that we lay out and glue on the left and bottom.
All car antennas are active, so there are three wires coming out of them. Route them down the pole, securing them to the main wiring harness with electrical tape or clamps.
Connect the black wire to ground (case). The second one with a plug is connected to the car radio socket, and the third one is connected to the socket.
When choosing an antenna for a car radio, you must select the installation location in advance. Active antennas are designed for installation inside a vehicle. Therefore, they are often attached to or next to a window opening. In addition, the indoor model can be installed on the windshield or on the rear parcel shelf. When installing it on glass, make sure that it does not block your view. Method of connecting the LED to the battery: 1.5 and 3. In addition, it is desirable that the device does not interfere with a nearby passenger.
Connection to radio
The installed equipment for receiving radio waves must be correctly connected to the head unit. The sensitivity of the radio receiver and the quality of playback depend on the correct installation. When driving, vibration occurs in the car antenna plug in the mounting socket.
If the installation is loose, interruptions in signal reception occur, which lead to failures in radio reception or the appearance of noise or interference.
Outdoor
To install an external antenna, fix it through a hole or with a magnet. The cable from the magnetically supported equipment is routed into the interior through the door seals. Because of this, the insulation of the cord is frayed, which leads to interference. In addition, a deformed seal allows water to enter the vehicle interior.
To install the antenna on the roof, you need to drill a mounting hole and a channel for introducing the wiring harness into the cabin. The connecting cable must be shielded with a design resistance of 75 Ohms. To place the equipment on the roof, you will need to remove some of the pads located on the racks, and then move the one-piece molded headliner a little. The element is removed carefully, since the deformation will be visible on the flat surface of the panel.
Where to install the antenna?
The external radio antenna must be installed in the highest part of the vehicle. How to connect a subwoofer to a standard Hyundai Solaris stereo system. This is necessary to ensure the quality and stability of radio signal reception. A common option for installing a radio antenna of this type is on the roof of a car. However, it can also be attached to the fender of a car. It is not recommended to install the device on the bumper, once. In this way, the posts are glued along the top edge of the glass.
The housing for the interior radio antenna can be installed on the passenger side in the upper corner of the windshield.
Size and types of car radios
Universal radios have a standard size, it can be 1 – DIN (height 5 cm, width 18 cm) and 2 DIN. (height 10 cm, width 18 cm.) If you change the radio from large to small (from 1 – DIN, to 2 – DIN), you will need to buy a special pocket that will cover the missing din. In terms of connection, these radios all have the same connector, its name is ISO or it is also called a Euro connector.
Standard radios are installed on cars from the factory and have a non-standard size; in this case, there are two options for installing the radio. The first is the simplest, you purchase the same standard radio and install it, it fits in size and connects to the standard connectors. But the cost of these radio tape recorders is often inadequate. And if you find a budget option, then with 100% probability it will be from China, which is not particularly famous for its sound quality and reliability.
The second option is to install a “Universal” radio in place of the standard one, but for this you will need an adapter frame, which is an adapter from the standard sizes of the radio to the universal ones, i.e. 1 or 2-DIN. the frame plays a decorative role, covering extra holes.
If your 2 din radio has an LCD display, then you can connect a rear view camera to it, and we discussed in detail how to do this in the article “connecting a rear view camera”
Hint for TOYOTA owners. In most cars of this brand, the standard radio has a size of 10 by 20 cm. In this case, you can look for “Spacers for Toyota radios”, they are 1 cm in size and you can easily install a standard-sized radio, i.e. 2 – DIN, to install 1 – DIN you will still need to buy an additional pocket.
adapter, plug, for car radio, car antenna, cable
No car audio system with radio is complete without an antenna. There are different types of antennas (external and internal, active and passive).
Types and purpose
We decided to install an active internal antenna on the windshield of the car. This type of antenna is easy to install, requires no maintenance, does not wear out, and does not create aerodynamic drag. Another advantage of such an antenna is that it does not attract the attention of car thieves, since it is not easy to remove from the car. With all its positive qualities, however, it should be noted that its sensitivity varies depending on the orientation of the car relative to the radio transmitter.
According to the installation method, such an antenna is disposable. On its body and stands (“beaters”) there is a sticky layer that ensures the antenna elements are attached to the glass. Once these elements are removed, they cannot be reattached to the glass.
In addition to the antenna itself, the kit includes detailed installation instructions, as well as materials, tools and templates to make installation easy and reduce work and time. There are two types of antenna housing and “beater” for mounting on the windshield. In the first case, the antenna housing is mounted in the middle, at the top of the glass (behind the rear view mirror), and both antenna pins are glued to both sides of the mirror along the top edge of the glass. In the latter case, the antenna housing is mounted in the upper right corner of the windshield, and the “beaters” are glued along the upper and side edges of the windshield.
The book describes the second option for installing the antenna. The antenna must be installed in the upper corner of the windshield and on the side edges of the antenna.
... and degrease with a cloth dampened with a cleaning agent, then wipe with a dry cloth.
The glass surface is now prepared for gluing the housing and antenna mast mounting plate. To glue the plate, we will use the thick paper template included in the kit. The template has slots that allow the plate to be inserted in only one position.
How to choose
Insert the pin and tabs into the slots in the template.
Remove the protective sticker from the smooth side of the plate and press the template plate onto the glass so that the two corners of the template touch the corresponding sides of the edges of the glass.
Remove the template from the plate.
How to connect
To ensure that the antenna “whiskers” adhere to the glass at the same level as its edges, the antenna mounting kit includes a set of spacer templates (pieces of white adhesive tape).
- The templates are glued to the glass perpendicular to its edge.
- The antenna pole is a piece of wire to which a contact ear is soldered on one side. The cable and contact lug are laid on a transparent plastic tape with a layer of adhesive. The adhesive layer is covered with a white protective film, which must be removed before gluing the mustache. After removing the foil, place the contact tip on the housing mounting plate shaft.
- Along the edges of the spacers, carefully glue the “whiskers” to the glass (for clarity, the protective film is not removed).
- After gluing the “whisk” to the antenna, smooth it out with the special spatula included in the kit. To accommodate the antenna cables, remove the right sun visor.
- While pulling the rod toward you, thread the grounding loop through the hole in the rod and pull it out.
Remove the front roof pillar cover. Pull the cables through the roof sheathing and out from under the roof sheathing. Install the antenna housing onto the mounting plate.
Installing an active bosch car antenna
During assembly, the pin of the mounting plate on which the contact protrusions of the antenna “whiskers” are placed must fit into the hole in the antenna housing. When the case is correctly connected to the board, you should hear characteristic clicks of the plastic latches.
- To secure the antenna housing to the mounting plate, screw the screw into place.
- It is not recommended to tighten the screw, otherwise it may cause the plastic components to crack.
- Place the antenna cable through the gap between the front window frame and the dashboard cover.
Set up the cable to the clipboard and place it through the plastic dashboard bracket. After laying the cable, make sure that there are no loops or weak points along the entire length. Make sure that the cable does not touch sharp edges of the body and is not subject to too much stress. Install the front pole trim pieces on the roof.
Amplifier selection criteria
You can choose a suitable antenna amplifier for your car radio by taking into account various recommendations. They are as follows:
- To begin with, pay attention to the fact that the device must be located in close proximity to the antenna.
- The operating band must cover the required frequency range. Due to this, you will be able to listen to all available radio stations.
- The amplitude-frequency response should be as uniform as possible.
- The gain is selected in the range of 15-25 dB.
- Stability of operation must be ensured when the supply voltage varies.
- The dynamic range is selected taking into account the need to protect the device from overload.
- The noise figure is much less than the signal-to-noise ratio.
- It is recommended to give preference to devices from popular brands. They last much longer and have more attractive properties.
The FM frequency, when installed with a suitable amplifier, will be virtually interference-free. However, in some cases there is a possibility that such an element will cause noise at a high signal level.