Fog lights are an invariable attribute of a modern car. Unfortunately, AvtoVAZ equips models with pre-installed PTF only in luxury versions. Owners of basic modifications are forced to upgrade the car themselves and order paid services from a service station.
What is the reason for installing fog lights?
- road safety in fog, snowfall, and reduced visibility;
- aesthetic appearance: the car looks completely different, a certain element of tuning, modernization.
Do you need fog lights for Vesta?
In this case, there can be no other answer than an affirmative one - of course, we need it! There are 2 main reasons for this:
- Safety – the presence of fog lights increases road safety, especially in fog, rain or snow, due to their lower location. And it’s easier to drive at night with the fog lights on, thanks to the additional lighting source.
- Exterior – from the side, the Lada Vesta, equipped with fog lights, looks more expressive and respectable.
With foglights, the front of Vesta looks much more interesting.
It is not surprising that perhaps the first tuning option for a Russian sedan that appears in the owner’s thoughts is the installation of fog lights. However, not everyone knows that installing them is not easy.
Why don't you have fog lights?
On modern domestic cars, such additional equipment is installed exclusively in luxury configurations or as an additional option. If our Vesta did not have foglights when we purchased it, then we will need to do the installation ourselves.
It is important to remember one immutable truth - even installing such a small thing as a pair of headlights automatically leads to loss of warranty. There can only be one way out, try to perform the so-called re-equipment to a configuration an order of magnitude higher than the existing one
You will need a standard kit from AvtoVAZ, which includes:
There can only be one way out, try to perform the so-called re-equipment to a configuration an order of magnitude higher than the existing one. You will need a standard kit from AvtoVAZ, which includes:
- Two headlights (261500097R);
- Front wiring kit in harness (8450006983);
- Left fastening element (8450006277);
- Right fastening element (8450006276);
- Switch kit (8450006924);
- Body electronics unit (231A08052R);
- Instrument panel wiring harness kit (8450030715).
PTF installation cost
It would be good to first think about how much such a procedure would cost, because on Vesta an installation of this kind is a rather complicated and time-consuming task.
The cost of pleasure, at the time of writing, is approximately 50,000 rubles. If you have somewhere to add 15-20 thousand, then you can safely go to the dealer and install it on site. If something happens, you can always fix any damage under warranty. Has the desire to save money taken over? We do everything with our own hands.
How to activate the turn signal function on Vesta
Options for tuning the interior of the Lada Vesta: recommendations from upgrade specialists
If you wish, you can activate the cornering light function, which many of Vesta’s competitors in the price segment do not have, for example, Solaris. The backlight function can be done on non-native 55-watt lenses using the Ddt4all software and the ELM327 adapter:
- through the OBD2 connector, located next to the hood release handle, you need to connect to the EMM unit;
- in the Ddt4all program, change the value of Nbx_Cornering_CF in the WRITE field from 0 to 1;
- turn on Expert mode and click Send.
Such tuning is done for show and is akin to choosing chrome in the trim or “angel eyes” in place of standard lamps.
Instructions - installing PTF on Lada Vesta
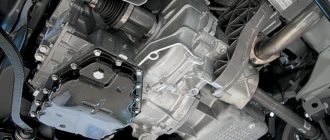
Changing the automatic transmission oil: recommendations from experts
Installing fog lights on the Lada Vesta is difficult. This is due to the design of the electronic equipment of the Lada model. The fog lights on the Lada Vesta are controlled from the steering column switches, and they do not have a fixed position with the fog lights on. In addition to this, problems are created by the absence of a special electronic fuse box of the EMM type in all but the top-end trim levels of the Lada 2180. The signal about the start of PTF operation in the original design comes here. Owners of cheap modifications of the Lada Vesta have to look for other connection schemes. Despite the difficulties, installing PTF yourself is possible. To do this, you will need to purchase the headlights themselves, brackets for mounting them, a power button, a contact snout, a set of wires with corrugation, connectors and adapters, and a 16 Am fuse.
First remove the bumper
Connecting the PTF Vesta begins with disconnecting the battery and removing the bumper, which is simultaneously attached to the body, fender liners and lockers with a large number of bolts and screws. Unscrew one by one:
— 4 bolts in the lower part of the body;
— 4 self-tapping screws from the fender liner;
— 2 screws from each locker;
— 6 bolts on top of the body and 2 more under the license plates.
At this time, it is necessary to hold the bumper by the beam to avoid damage if it falls. The Lada Vesta has a massive bumper, so the help of a second person will not hurt. The detached part needs to be pulled slightly towards you and removed from the side brackets.
Preparing the seats and mounting the headlights
We have already said earlier that instead of fog lights, the fret manufacturer installs plastic plugs in which holes must be cut. This can be done with a bimetallic crown, or an ordinary stationery knife. The second method will take a little longer and require additional care. If it seems that it won’t be possible to cut smoothly, you can buy a new lining for the PTF.
Next, you should install and secure the pre-purchased brackets with self-tapping screws, and then place the fog lights themselves inside them.
At the same stage, the power button is installed. It can be placed wherever it is convenient for the driver, but usually a place is selected on the center console, next to the button used to open the luggage compartment. The hole for the button can be drilled or cut.
The most important point is connecting the fog lights
We lay the output to the button through the corrugated box between the side members, starting from the right headlight. It is more convenient to run the wires inside the cabin itself next to the passage into the pedal assembly.
The light bulb is connected in the same way as in the Lada Priora, Viburnum or Grant. Electricity is taken from the battery and connected to the contact relay through a fuse. The relay can be installed in the engine compartment or inside the cabin of the 2180. We extend the plus contact from the size fuse or from the cigarette lighter.
Selection of headlights and necessary materials
PTF Valeo
The highest quality option is the original PTF produced by Valeo (article: FCR220029), costing up to 3000 rubles. for a set of 2 pieces. You can buy fog lights from Dlaa, which will cost half as much. If you decide to install xenon, then you can’t give unambiguous advice - rely on your own experience.
Important!
It is better not to take dubious cheap headlights - there are cases when they simply melted.
The next thing you can’t do without is the brackets on which the headlights will be mounted. For two pieces you need to pay about 700 rubles.
Next on the list is a kit for connecting PTF to Vesta. This includes the following:
- button on/off fog lights;
- contact relay;
- wires with plastic corrugation, all necessary connectors and adapters for connection;
- fuse 16 amp.
PTF connection kit
This kit costs about 600 rubles.
Additionally, PTF lining is purchased (800 rubles for 2 pieces), if there is no desire to cut through the original one.
Thus, the price of fog lights for a Lada Vesta with all the components for their installation will be approximately 5,000 rubles. It is not difficult to purchase all this in online stores.
Installation of PTF in Vesta
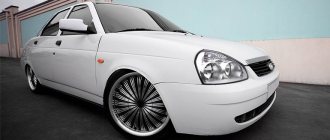
Lada Vesta green. lada vesta sv cross angkor color
Initially, the front bumper of the Lada Vesta is removed.
First you need to remove the front bumper, then remove the plugs that are in place of the foglights and cut holes in them. To do this, you can use a stationery knife (you need to work very carefully) or a 76 mm crown.
After this, holes are drilled in the plugs.
The fog lights themselves are fixed to the plugs using ordinary self-tapping screws.
It is also necessary to embed the PTF activation button into the Vesta dashboard. This is done either on the center console or to the left of the steering column, next to the trunk release button.
An example of the location of the button to the left of the steering column.
We install PTF ourselves
Let's look at the installation process. From the list of factory items you should purchase: fog lights, a power button, inserts for attaching the lights to the bumper, a 4-pin relay, a 16-amp fuse, a wire, a plastic corrugation (at least 5 m long). First you need to dismantle the bumper and cut through the plugs where the headlights are installed. The cuts are made either with a 76-diameter crown or with a knife. We attach the fog lamp bracket with self-tapping screws. In the lower left part under the steering wheel of the Lada Vesta (near the button that opens the trunk) we install a button for turning on the fog lights. It can also be placed directly on the instrument panel. You must first cut out a receiving hole for the button.
The wires leading to the right headlight should be hidden in a metal box. From the engine compartment to the passenger compartment we lay the wire through a special hole in the pedal assembly. In this case, a simplified scheme similar to the Lada Kalina, Priora, Grant is used.
Power to the relay is supplied from the battery (necessarily through a fuse). The positive contact for controlling the button is supplied from the mounting block. Take the plus coming from the dimensions or the cigarette lighter. The device for closing the circuit can be located both inside the cabin and under the hood. We connect all the elements of the circuit according to this diagram and check the operation of the PTF using the button.
Fog on the road is a frequent occurrence, so it is difficult to imagine a modern car without fog lights (FFL), which increase driving safety in poor visibility.
Lada Vesta is a modern sedan, and the need to equip it with this optics is also obvious, but fog lights are installed by the manufacturer only on top versions of the model, while in the basic configuration, the front bumper only has removable plugs with design places for independent equipment of the PTF car.
In addition, the standard daytime running lights (DRL) of the Lada Vesta, the use of which is mandatory in Russia, are not of the best design, and you can tune them by replacing the standard yellow lamps with white LED ones. The result of such low-cost optimization will please any car owner.
Let's look at the nuances of installing fog lights and tuning DRLs in more detail.
How to turn on the fog lights on Vesta
Depending on the configuration of the Vesta, the foglights will be controlled differently. In the top version of the car, you can activate their operation by turning the ring on the left steering column switch. When you turn one notch, the headlights start working, and when you turn two, the front and rear lights start to work.
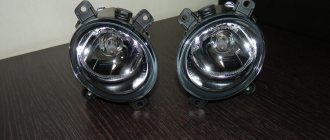
Fog lamp. Photo source: https://spares63.ru/catalog/optika_vaz/protivotumannye_fary_vaz/protivotumannye_fary_na_lada_vesta/protivotumannye_fary_na_lada_vesta_xray_original.html
In trim levels where there is no PTF in the database, owners have a choice of how to connect the PTF. The most common option is to connect via a button on the center console. For this purpose, the installation kits contain a block of buttons and a frame so that the owner himself can assemble and adjust the operation of the headlights. Another option for non-luxury versions is to buy a steering column switch assembly from the top-end Vesta.
Lada Vesta Furia Roja › Logbook › Replacing the factory PTF with PTF Osvar.
Let's start with the fact that there were few factory PTFs, and I wanted a little more light from the PTF. Reading various forums suggested three options: installing bi-lenses with xenon instead of PTF, installing PTF with H11 lamps, and installing Russian-made PTF with H1 lamps. Of course, I wanted the first option since it is very bright + long-range mode, but the price tag here was 6 thousand+ and perhaps a little communication with traffic police officers, which I didn’t really want. The second option was more affordable, but the dubious quality of the PTFs themselves and the high cost of H11 lamps, compared to N1 lamps, gave rise to some doubts. The third option is Russian Osvar PTFs for the H1 lamp base . High-quality body, iron reflector and glass lens. Of course, the third option won, so to speak, cheaply - angrily! And so let's start, ordered: Lada 8450006276 right fog light bracket Lada 8450006277 left fog light bracket Hella 4RA 933 332-101 relay, operating current Osvar 360237 43 -2pcs. fog lamp renault logan/sandero/dusterOsram 64150NBU-HCB incandescent lamp, high beam headlight; incandescent lamp
I ordered everything on emex
relay from hella
I ordered the relay from Hella, I don’t know why), apparently Bosch were expensive. I used the relay to unload the standard wiring, since the standard PTFs had H16 lamps with a power of 19 watts, I didn’t take any risks and took the power from the battery, standard PTF wiring only controlled.
PTF themselves from OSVAR
On the left is Osvar, on the right is Valeo (factory)
The PTFs look very high quality and well assembled; the PTFs already have lamps. But he still advised me to coat the glass with sealant; after 10 thousand runs, a little sand appeared in the right PTF when I washed it generously. There were already lamps in the PTF.
simple lamps and standard brightness
Brackets for PTF
I ordered the brackets specially, because I knew that they needed to be modified, and I didn’t want to disfigure the factory ones.
Bracket already with PTF
As it turned out, you need to modify it a little, filing the plastic a little and the PTF fits like a family!
There is nothing special to explain about connecting the wiring; relay contacts 85.86 are taken from the wiring going to the PTF power supply; contact 87 is taken from + to the battery through the fuse. Contact 30 goes to the PTF power supply
I also threw a mat under the battery, purchased earlier for 50 rubles
We also purchased brighter lamps in PTF, high and low.
In the PTF I installed the previously installed PHILIPS H1 X-TREME VISION +130 in the far range, and in the far range I installed the OSRAM H1 NIGHT BREAKER +110. I haven’t installed the neighbor one yet, but they are waiting their turn PHILIPS H7 X-TREME VISION +130
And so, we begin removing the bumper to install the PTF
photo from the InternetInstallation of fog lights PTF Lada Vesta
We unscrew all the bolts that are shown in the picture, unclip the bumper from the wings, carefully and slightly pull the bumper towards you and turn off the temperature sensor in the bumper. Next, we place the bumper on a flat surface and dismantle the standard PTFs, which are held on by 2 screws, and also installed the new PTFs on 2 screws
Full size, in many places IZH is stamped on the plastic. Full size, in the back there were different lamps from the factory. on the left was GE, on the right was Philips (the lights were the same)
For the experiment, only one PTF was installed and the new PTF was adjusted using the factory PTF
Full size, passenger side OSVAR, driver's side VALEO
We configure the PTF and see the difference
Full size difference in light on face
I made the adjustment the next day and installed the second PTF and also adjusted it.
And now night photos of the headlights:
Only PTF
Full size light more white
PTF + Middle
Full size headlight low beam lamps are still factory
PTF+Near+Far
Full size satisfied with the lighting
I am pleased with the result of the work done! The lighting just got better! I recommend! Thank you all for watching, like and repost!) Criticism is welcome!)
Fog lights are an invariable attribute of a modern car. Unfortunately, AvtoVAZ equips models with pre-installed PTF only in luxury versions. Owners of basic modifications are forced to upgrade the car themselves and order paid services from a service station.
What is the reason for installing fog lights?
- road safety in fog, snowfall, and reduced visibility;
- aesthetic appearance: the car looks completely different, a certain element of tuning, modernization.
Installation of the Lada Vesta headlight unit and replacement of low and high beam lamps
The Lada Vesta headlight unit has a complex architecture, but access to replacement lamps from under the hood is quite comfortable. To replace the lamps, no additional tools are needed; however, it is advisable to carry out the work using clean knitted gloves. This is explained by the fact that when you touch the bulb of any halogen lamp with your fingers, microscopic particles of fat remain on it.
At high temperatures, the fat begins to burn out, and the flask at the point of contact darkens and, due to uneven heating, bursts over time. Therefore, if we accidentally touch the flask with our fingers, it must be wiped with a soft cloth soaked in alcohol.
Layout of lamps in the Vesta headlight
The Vesta headlight unit is designed as follows. The plastic housing contains reflectors and lamp mounts. Under cover 1 there is a high beam lamp, under cover 2 there is a low beam lamp, the direction indicator is in socket 3, and the DRL and clearance lamp is in socket 4.
Which lamps are better for high beam Lada Vesta
As we have already found out, lamps with H1 and H7 sockets for high beam are suitable for the Vesta headlight. According to user reviews, these types of lamps and brands have become the most popular. For low beam lamps with H1 socket:
- Series of Korean MTF lamps. Very good quality at a reasonable price. The MTF Light MAGNESIUM H1 100W model is distinguished by a high resource (more than 550 hours), warm white light, and has a two-layer interference coating.
- MTF Light PALLADIUM H1 55W, good lamps from the same Korean company with a bright bluish light. They have one minor drawback - after 400-450 hours of operation they lose brightness.
- Osram H1 Cool Blue 4000K 64150 CB, for those who love xenon light. German quality, a little more expensive than Korean ones, but they work well. Under normal conditions, they work their 500 hours without loss of efficiency. Color temperature: 4000K.
- Osram H1 Night Breaker + 90% 64150 NBR, the manufacturer claims that the light cone extends 35 m further than analogues, has a bright white light and is popular with dozens of owners.
- Philips H1 Crystal Vision (4300K), another very popular model. Color temperature: 4300K, which makes their light similar to xenon, but the cone of light is more saturated, which makes the readability of signs and markings better.
- Philips H1 NightGuide DoubleLife, a new series, but is steadily in demand in 2017-2018 due to its three-color lighting technology - bright white, cool white and warm white colors are distributed across zones, increasing the readability of markings and preventing the glare of oncoming traffic.
Optimal lamps for low beam Vesta
The most popular low beam lamps with H7 socket are the following:
OSRAM H7 12V 55W PX26d
One of the leaders among users of second-generation Ford Focus halogen headlights. Excellent quality, German assembly and high lamp life are confirmed by reviews. According to the manufacturer, the lamp life is about five hundred hours, which is very good compared to competitors.
Philips H7 12V 55W PX26d LongeLife Ecovision
This is one of the brightest lamps in the rating. The resource is also good. At least the manufacturer claims a service life of 100,000 km. It’s hard to believe, but quartz glass and resistance to temperature changes put this lamp in second position.
Philips Vision H7
And again Phillips. This lamp promises a brighter and longer beam of light while keeping the price within the budget range. The flask is also made of quartz glass, the spiral is stress-resistant, protected from sunlight by a special coating.
Bosch H7 12V 55W PX26d ECO
New German PX26d lamp with increased luminous flux. This is one example of how a manufacturer should behave with a buyer. The PX26d does not promise a hundred-kilometer beam and the brightness of a borderline spotlight, but it gives good value for its money. Moreover, its service life, according to user reviews, is at least 70,000 km. Only then does the light become dimmer.
MTF Iridium H7
A good budget option with one drawback - the blurred border of the light spot. A filament with improved characteristics, which affected the brightness of the light beam. This figure is approximately 25-30% higher than other lamps in this price category. In addition, the lamp uses space zoning technology.
How to adjust PTF on Vesta
A new car usually doesn't need any adjustments, but over time something goes wrong and the light hits the road unevenly. To correct this situation, the designers have provided the ability to adjust the PTF light level using an adjusting screw, accessible through a hole in the bumper. You can do this yourself by following the procedure:
- Place the car with the light on opposite the wall at a distance of about 5 meters.
- Place an assistant in the front seat or place a load weighing 70 kg.
- You need to make markings on the wall or place a screen to adjust the light.
- Cover one of the fogs with a sheet of cardboard to properly adjust the second one.
- Turn the adjusting screw through the hole in the bumper and align the upper limit of the light with the horizontal marking line.
- The same operation with the second fog.
https://youtube.com/watch?v=OTYIG9Q4xUU%3F
If the adjustment is unsuccessful, you need to check the correct installation of the bumper, the housing of the fog lights and the light bulbs themselves and, if necessary, replace them.
What kind of lamps are installed on Vesta from the factory?
Halogen light sources have not yet sung their swan song. At least on VAZ cars, and on all imported public sector cars as well. With proper adjustment, good care and careful selection of lamps, standard headlights without any modifications can shine quite informatively and no worse than foreign cars
It is important that the engineers took care not only of the visually pleasing modern architecture of the head optics, but also of the possibilities for its configuration and maintenance. For example, in order to replace the low beam, high beam, clearance or daytime running lights lamps, you do not need to completely dismantle the headlight, as was the case with the tenth family or Kalina
Lamps of the following base standards and power ratings were installed on Vesta from the factory:
- low beam lamp with H7 base 55 W;
- for high beams, lamps with an H1 socket of the same power are used;
- side lights and daylight - W21/5W;
- PY21W lamps with an orange bulb are used for the direction indicator.
As for the brands of lamps, Osram Bilux, a Mayak lamp or General Electric, as well as Phillips could be installed from the Vesta factory as a source of low or high beam.
Headlamp device
A block headlight is a design development that allows you to combine lamps in a single housing, each of which would do its own job. The light bulbs on the Vesta in the headlight unit have their own fastening elements, as well as places for installation.
Headlamp unit. Photo source: https://deilo.ru/chelabinsk/transport/lada-vesta-fara-perednyaya-levaya-402370297079657.html
The headlight contains the following lamps:
- halogen low beam;
- halogen high beam lamps;
- turn signal lamps;
- daytime running lights and dimensions.
The convenience is that, if necessary, the owner can replace each light bulb with his own hands without removing the entire headlight, and there is also the opportunity to buy a complete headlight unit without purchasing individual elements.
What kind of high and low beam lamps are on the Vesta?
Lada Vesta bulbs for high and low beam meet international standards and are not inferior in quality to foreign analogues. AvtoVAZ uses the following lamps on Vesta:
- near – H7;
- distant – H1.
The consumption of both is 55 W. Despite the general power rating, they differ in base.
Lamp socket for headlight
Lada Vesta light bulbs have their own markings. Their designations are certified according to EEC:
- near – H7;
- distant – H1;
- turn signal – PY21W;
- daytime running lights (DRL) and dimensions – W21/5W, brand – Vanssi;
- PTF – H16.
These names are easy to find in automotive stores or service centers.
Do Vesta need fog lights?
To answer the question of whether fog lights are needed on a Lada Vesta car, let’s figure out what functions this part of the lighting performs. The luminous flux of PTF allows you to direct the lighting lower above the road surface than conventional headlights do. Because the peculiarity of any fog is not contact with the surface of the earth.
The light easily avoids fog and continues to brightly illuminate the road, while the running and driving lights focus directly on the natural phenomenon. In addition to the road, fog lights illuminate the shoulder and left road markings, which allows you to avoid driving into the oncoming lane during bad weather.
If fog rarely appears in the area where the car is driven, this is not a reason to decide not to install PTF. The roads are mostly winding, at times similar to a mountain serpentine, the combination of the turned on PTF and low beams allows you to continue driving even at night. The decision to install fog lights on the Lada Vesta in this case depends on the conditions of use of the car.
Standard connection diagram
Like on Lada Vesta Luxe
(the idea was submitted by rychagov42). You will need a steering column switch from Renault with fixed PTF activation (part number 8201167981 or QZ8201167988). Its circuit allows you to turn on the PTF when the dimensions are working. In order for the PTF to turn on only with low beam (as in the standard version of the Lada Vesta Luxe), you should solder the black wire to another terminal (see photo). Next, we connect the control wire from the relay to the 12th contact of the steering column switch (you need to pull the white part on the connector and snap it off). As a result, the PTF will work when the dimensions are working.
If you want to use the PTF indicator on the instrument panel, then the TsBKE will participate in the circuit.
The process of installing PTF on Vesta is also shown in the video:
All that remains is to adjust the PTF.
Have you encountered the installation of fog lights on Vesta? Which connection option did you choose and why? Let us remind you that the Lada.online website provides other instructions for tuning and modifying Vesta, for example, an easy way to install a DVR, eliminating chafing of the VUT hose, or tips for dealing with panel crickets.
Photo: Russianvodyara in-flight magazine and Lada Vesta group on VK
Keywords: fog lights Lada Vesta | bumper Lada Vesta | external lighting for Lada Vesta | Lada Vesta headlights
1 0 0 0 0 0
Share on social networks:
About the standard set of fog lights
The manufacturer installs a Valeo PTF on the Lada Vesta. They are made in Romania and are suitable for all car modifications: station wagon, sedan, SV cross. The quality of the part can be assessed as high. They illuminate the road well in bad weather and have an aesthetic appearance. The glass is dense and does not break at the slightest contact with it. Fog lights will work for a long time, provided they are used correctly. If you need to install a PTF on a Vesta fret, it is best to focus on original spare parts, although they are more expensive than their analogues. Chinese substitutes often cannot withstand the load, melt, and stop working. Considering that installing lights takes a significant amount of time and money, you should not skimp here.
How much does it cost for a dealer to install fog lights for a Lada Vesta?
The installation of fog lights on a Lada Vesta by an official representative of AvtoVAZ is considered as a partial upgrade of the car’s equipment to a top-end one. Typically, such a procedure costs no less than 60 thousand rubles.
This exorbitant amount is due to the complexity of installation using the “dealer” method and the need to use original parts from AvtoVAZ. The dashboard wires alone will cost about 20 thousand rubles.
Therefore, installing it yourself will allow you to save a lot of money. The only trouble is that in this case, the car’s warranty support may be voided.
Installation of PTF on Lada Vesta
This process includes the following steps;
- removing the bumper;
- preparation of the seat;
- installation of headlights;
- PTF connection.
It seems to be simple, but let’s look at all this in more detail.
Removing the bumper
The front bumper of the Lada Vesta is quite massive and can easily be damaged, so when dismantling, do not forget to be careful. First disconnect and remove the battery
Also, be sure to prepare the place where you will put the bumper - just lay a rag so that its surface is not damaged
First, disconnect and remove the battery. Also, be sure to prepare the place where you will put the bumper - just lay a rag so that its surface is not damaged.
The lower part is attached with four bolts to the body and four self-tapping screws to the fender liners. All this needs to be turned out.
On each side, unscrew the two screws securing it to the lockers.
Under the hood, remove the six bolts that secure the top to the body.
Removing the bumper
It remains to remove two bolts under the license plates. Here you already need to hold the bumper by the beam. Gently pull it towards you to disengage it from the side brackets.
Now you have access to the right place, and it's time to move on to the next step.
Preparing seats and attaching headlights
In place of the foglights there are factory plugs. Using a 76 mm crown, you need to cut holes in them. A stationery knife is also suitable for these purposes. If you purchased the trim for the fog lights on the Lada Vesta, then this step is skipped.
Cut holes in the bumper
It won’t take much time to figure out how to install the PTF brackets. They should simply be secured to the bumper using self-tapping screws.
It is also necessary to take care of the hole for the PTF button in the dashboard of the car. To do this, you can choose a place on the center console or next to the trunk release button.
Connecting fog lights
From the right PTF, the wiring is laid inside a metal box. The wiring enters the interior from the engine compartment through a special hole in the area of the pedal assembly.
The easiest way to connect fog lights is using a universal scheme, as when connecting equipment on previous cars in the Lada line. Load power is taken from the battery (M6 bolt) and supplied to the contact relay through a fuse.
Plus comes from the mounting block from the size fuse. Alternatively, you can use the plus of the cigarette lighter.
The relay itself is installed under the hood or directly in the cabin.
This method of connecting the PTF to the Lada Vesta is the most optimal in terms of savings and minimal intervention in the electronic part of the car.
We install PTF ourselves
Let's look at the installation process. From the list of factory items you should purchase: fog lights, a power button, inserts for attaching the lights to the bumper, a 4-pin relay, a 16-amp fuse, a wire, a plastic corrugation (at least 5 m long). First you need to dismantle the bumper and cut through the plugs where the headlights are installed. The cuts are made either with a 76-diameter crown or with a knife. We attach the fog lamp bracket with self-tapping screws. In the lower left part under the steering wheel of the Lada Vesta (near the button that opens the trunk) we install a button for turning on the fog lights. It can also be placed directly on the instrument panel. You must first cut out a receiving hole for the button.
The wires leading to the right headlight should be hidden in a metal box. From the engine compartment to the passenger compartment we lay the wire through a special hole in the pedal assembly. In this case, a simplified scheme similar to the Lada Kalina, Priora, Grant is used.
Power to the relay is supplied from the battery (necessarily through a fuse). The positive contact for controlling the button is supplied from the mounting block. Take the plus coming from the dimensions or the cigarette lighter. The device for closing the circuit can be located both inside the cabin and under the hood. We connect all the elements of the circuit according to this diagram and check the operation of the PTF using the button.
Fog lights, like the main optics of a car, play an important role in creating high-quality lighting. Fog lights are especially important in poor visibility conditions. For example, during rain, heavy fog or snowfall. As for the Lada Vesta, the situation here is such that fog lights are provided only in the “luxury” configuration. Therefore, installing PTF is relevant for this family of cars. If you are determined to install fog lights yourself, then this review is for you.
It must be said that installing PTF on Vesta yourself is somewhat more difficult than on other Lada cars. On the other hand, you will thus save quite a decent amount. So, for example, an official dealer can charge you up to 10 thousand rubles for installation, depending on the region. If you do not have such an amount, then it is better, of course, to carry out the installation yourself. Therefore, be patient and have enough time.