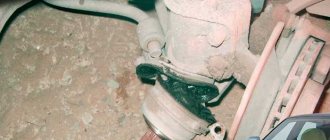
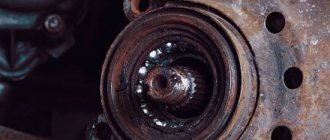
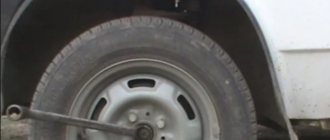
Step-by-step algorithm for replacing a CV joint
The process should be started if there is complete confidence in the failure of the specified unit. Replacing the outer CV joint step by step if you do it yourself.
- We loosen the tightening of the wheel fasteners and the hub nut (first remove the cotter pin) on one of the sides of the car.
- We hang up this side with a jack and install stops under the wheels of the stern, and a safety support under the body.
- We completely remove the wheel.
- Unscrew the two bolts holding the ball joint to the steering knuckle bracket and the hub nut.
- We turn the steering wheel of the Lada Kalina as far as possible to the side, move the axle and remove the axle shaft from the splined engagement of the hinge and the hub. If there are difficulties with the free exit of the axle shaft, then use a hammer, applying impact forces to the shaft through a drift.
- When the axle shaft is released, we begin to dismantle the outer joint boot in combination with the clamps. These items must be replaced.
- Now we move on to removing the CV joint. To do this you will need a special puller. If it is missing, then use the hammer again. It is forbidden to apply an impact load to the separator, so we apply gentle blows to the body in an outward direction. The joint will come off if the retaining ring compresses, allowing the cage to slide off the axle shaft.
- When it is necessary to dismantle the entire axle shaft, the algorithm of actions up to point No. 7 is similar, and then, using a mount, we remove the shaft of the designated CV joint from engagement with the side gear in the transmission differential. Before such manipulation, drain the oil from the box. We take out the axle shaft as an assembly, after which we perform the necessary disassembly steps, etc.
- Removing the internal hinge involves the identical procedure given in point No. 7. To make disassembly easier, we use a vice in which we place and fix the structure.
Replacing CV joints (constant velocity joints) on a Lada Granta VAZ 2190
- Pliers
- Large flat screwdriver
- Small hammer
- Soft metal drift
- Vice with soft metal jaws
- Jack
Parts and consumables:
- CV joint grease-4
- Wood spacer
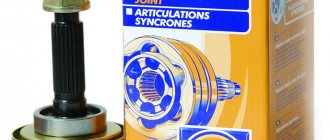
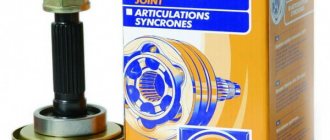
- Constant velocity joints
- Front wheel drive shaft valve
- Rags
- Gloves
Replacing a CV joint or repairing it is a fairly common occurrence, the harbingers of which are knocking, crunching and crackling noises when turning the car’s wheels.
Work order:
1. Remove the front wheel drive from the vehicle as described here or here.
2. Clamp the drive shaft in a vice with soft metal jaws.
3. Squeeze the bent antennae of the inner collar of the inner CV joint boot with pliers.
4. Squeeze the clamp lock of the inner CV joint boot with pliers.
5. Remove the clamp.
6. Similarly, remove the outer clamp of the CV joint boot.
7. Slide the dirt boot over the shaft and turn it inside out.
8. Using a drift, knock the inner CV joint off the front wheel drive shaft, applying force to the CV joint cage.
9. Please note: a plastic buffer is installed at the inner end of the front wheel drive shaft.
10. Check for grease in the new CV joint. The CV joint should contain 80 cm3. SHRUS-4 lubricants.
11. When installing the CV joint, place it on the front wheel drive shaft with gentle hammer blows through a wooden spacer along the outer end of the shank along its axis until the hinge is fixed on the shaft. When installing the CV joint, make sure that no dirt gets into it.
12. Install the boot on the CV joint housing.
13. Install the outer and inner CV joint boot mounting clamps in the reverse order of removal.
14. If it is necessary to replace the boots, remove the CV joint from the front wheel drive shaft and remove the air release valve assembled with the casing from the boot, sliding the valve along the shaft. Remove the boot from the front wheel drive shaft.
15. To replace the valve, unscrew its casing and, having removed the valve from the casing, remove the valve from the front wheel drive shaft.
16. Then remove the valve cover from the front wheel drive shaft.
17. Install the valve and new CV joint boot in the reverse order of removal.
18. Having installed the CV joint, secure the boot with clamps.
19. To replace the outer CV joint, remove its outer and inner boot clamps in the same way as you did for the inner CV joint.
20. Slide the boot along the front wheel drive shaft and turn it inside out.
21. Using a drift, knock out the outer CV joint from the front wheel drive shaft, applying force to the CV joint cage.
22. Install an external CV joint on a Lada Granta VAZ 2190 car in the same way as installing an internal CV joint. The difference is that the outer CV joint needs to be filled with half as much (40 cm3) CV joint-4 lubricant as the inner CV joint.
The article is missing:
- High-quality photos of repairs
- Photo of the instrument
- Photos of parts and consumables
In what cases is it necessary to replace the inner CV joint?
Replacing the internal CV joint on front-wheel drive VAZ vehicles is required if the following symptoms are present:
- Crunching and knocking noises when driving and accelerating in a straight line;
- Vibration and shock when changing gears;
- Significant play when testing by hand;
- If the “grenade” fails completely, the vehicle cannot move further. The main reason for the malfunction of the VAZ grenade is the entry of water and dirt through the hole in the torn boot. The second possible cause of failure is a sharp press on the gas with the wheels fully turned, although in this case you risk killing the external rather than the internal grenade.
In addition to the above, replacing the internal CV joint on VAZ-2110 and other models may be necessary if the quality of the previously installed joint is poor.
How to independently replace the internal grenade on VAZ cars
CV joint (constant velocity joint) is a mechanism that allows you to transmit torque between misaligned shafts. The device is actively used on front-wheel drive vehicles. On each shaft coming out of the gearbox there are two of them - internal and external. Repair is impossible; if the unit breaks down, it is replaced as an assembly.
- In what cases is it necessary to replace the inner CV joint?
- Replacing the inner CV joint with your own hands
- Boot replacement and repair
- CV joint repair
Assembly procedure step by step
We carry out the entire list of assembly operations in a Lada Kalina car in strictly reverse order. During the procedure, it is necessary to take into account some nuances.
- First, we put the boot on the axle shaft. If this is difficult, then its surface can be lubricated with the grease supplied with the new hinge kit.
- Now we fill the same grease into the CV joint bearing, and the remainder into the internal cavity of the boot.
- We install the hinge on the axle shaft. We also use a hammer, applying a shock load to the body. The retaining ring should be replaced.
- When the “grenade” “sits” in its place, we push the boot, after squeezing it with our hands to remove excess air. We install clamps.
- We do the same when replacing the internal hinge.
- Now we install the axle shaft into the transmission housing until the shaft engages with the side gear. Don’t forget to fill the unit with oil afterwards.
- We insert the outer joint into the steering knuckle until it fully engages with the splined race of the hub. Screw on the central nut (do not tighten it).
- We return the ball joint to its place.
- We hang the wheel and do not tighten its fasteners too much.
- We lower the car (we do not unload the jack completely). Tighten all fasteners to the required torques. We remove the jack and stops. Replacement of the outer CV joint is complete.
The owner of LADA Kalina will spend no more than 3 hours of his time to complete the full list of replacement actions. We check the correct installation of the hinges. To do this, we start driving the car with the wheels turned out as far as possible. We observe the absence of crunching and other characteristic sounds from the axle shaft. Now you know how to change a faulty CV joint.
Removing the right front wheel drive (inner CV joint) Lada Granta
- 17 mm straight box spanner
- Driver for socket attachment
- Extension for the end attachment on the wrench
- 8mm wrench attachment
- 10mm wrench attachment
- High nozzle on the wrench 13 mm
- 17mm wrench attachment
- 19mm wrench attachment
- 30mm wrench attachment
- Torx wrench attachment E12
- Large flat screwdriver or spatula
- Large hammer
- Kerner
- Funnel
- Hose
- Technological capacity
- Metal brush
- Jack or ditch lift
- Stand
- Adjustable stop
- Wheel key
Parts and consumables:
- Right front wheel drive (replacement if necessary)
- Boot of the outer drive joint (replacement if necessary)
- Boot of the internal drive joint (replacement if necessary)
- Inner joint shank retaining ring
- Wood block
- Grease
- Rags
Front wheel drives (CV joints) are often sold complete with boots and a retaining ring.
Carry out the work on an inspection ditch or overpass.
Carry out the work to replace the external and internal joints of the wheel drives, their dirt-proof covers, drive seals, as well as when dismantling the gearbox or power unit.
1. Remove the middle mudguard from the engine compartment.
2. Drain the oil from the gearbox.
3. Lift the front of the car from the right side and remove the wheel.
4. Unscrew the right front wheel hub bearing nut.
5. Remove the two screws securing the ball joint to the steering knuckle.
Turn the steering wheel to the extreme left position so that the steering rod output is at its maximum value. This will allow the outer joint housing shank to be removed from the wheel hub without disconnecting the tie rod end from the steering knuckle.
6. Using a 10 mm wrench or socket, unscrew the nut and two bolts securing the heat shield of the inner CV joint protective cover to the rear support bracket of the power unit and remove the shield.
7. Move the steering knuckle with the shock absorber strut to the side and remove the splined shank of the outer joint housing from the wheel hub.
8. Position the drive on the guy wire.
9. Install an adjustable stop under the transmission housing by placing a wooden block under the housing.
10. Using a 19 mm socket, unscrew the three bolts securing the rear support bracket of the power unit to the clutch housing.
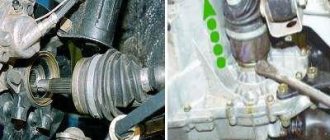
11. Press the rear powertrain mount bracket down, insert a spade or large screwdriver between the drive inner joint housing and the clutch housing, and push the joint housing shank out of the drive gear spline.
Do not damage the protective ring of the drive oil seal located on the inner joint housing.
12. Remove the right drive, being careful not to damage the oil seal.
When removing both drives, after dismantling the first one, it is necessary to insert a clamp, for example, a wooden or soft metal roller with a diameter of 20 mm and a length of 150 mm, into the hole of the drive gear. Otherwise, the differential drive gears may become misaligned and the drives may not be able to be installed.
13. Before installing the drive, use a screwdriver to pry up the retaining ring of the inner joint housing shank, which secures the drive in the gearbox.
14. Remove the retaining ring.
15. Install a new ring into the groove of the inner joint housing shank. Reuse of retaining rings is not permitted.
16. Before installing the drive, center the retaining ring in the groove of the shank using grease.
17. Insert the splined shank of the outer joint housing into the hole in the wheel hub, install the washer and tighten (do not tighten) the hub bearing nut.
18. Insert the shank of the inner joint housing through the hole in the drive oil seal and, turning the shaft, align the splines of the shank with the splines of the drive gear.
What is needed to install a new CV joint
The CV joint, despite its strength, has parts that can wear out over time or if used incorrectly. Often, CV joint replacement occurs due to damage to the boots - during driving, cracks and holes appear that become clogged with dirt, water and dust. This way you can drive hundreds, or even thousands of kilometers, which will finally finish off the mechanism. Boot problems are expressed in a crackling sound when turning the wheels (when turning to the right, the left wheel cracks, when turning to the left, the right wheel cracks). Sometimes the CV joint has to be replaced due to incorrect actions by the driver. Acceleration of the engine with slipping, starting on the wheels turned out, braking by the transmission - often the cause of the malfunction lies in this.
Play in the ball joint has a negative effect on the CV joint. It occurs when the support itself is already severely worn out. If this problem is not identified in time, it will have a very negative impact on the CV joint. Thus, driving at high speed can tear out the support pin, which can cause the grenade to break.
It is extremely rare that CV joint failures are caused by factory defects in the mechanism parts or initially incorrect installation. Coupled with a worn boot, the problem can reach unimaginable proportions. Many reviews on automotive forums mentioned the poor quality of some parts - both basic functional elements and additional little things, like clamps.
Regardless of the source of the problem, a grenade that is not working properly will require replacement. Machine manufacturers claim that when parts wear out, the entire mechanism must be replaced, even those elements that were not damaged by failure. Considering the high quality of materials, the repair will cost quite a lot. In this regard, the car owner tries to replace the CV joint with his own hands. What will the driver need?
- pit or lift;
- hammer, screwdriver, pliers, jack;
- a set of keys or heads;
- bench vice;
- new clamps, lubricant (CV joint-4, for example), hub nut with stopper.
The latter (consumables) are often provided with a new grenade. All of the above are suitable for replacing outer and inner CV joints.
DIY car repair and maintenance
Step-by-step plan for replacing CV joints (grenade)
So, the grenade (both internal and external) on front-wheel drive models of domestic “cars” (God forgive me) starting from the VAZ 2108 and ending with at least 2115 is the same (well, maybe from different manufacturers and different service life of the final ). The same principle applies to Priora, Kalina and Grant.
Greetings, dear visitors! I want to devote this article to replacing the external grenade. If you follow the sometimes unclear terminology (which I don’t always like) - replacing the constant velocity joint, i.e. CV joint. I try to write my articles in everyday language, in which people ask for information.
The photo above shows a damaged Lada 2114, already repaired. The front right side, which we are repairing, was collected in a heap by a frontal impact along with the entire front end (look at the gaps between the parts after the repair, in my opinion, the repair was done perfectly). Looking under the front right wheel I noticed that the drive was bent. I jacked up the car slightly (after making sure the car wouldn't roll), loosened the wheel bolts and immediately removed the cap and loosened the CV joint nut.
If you don't loosen it while the wheel is on the ground, it will be very difficult to unscrew it later. After which, I jacked up the car completely and removed the wheel and unscrewed the grenade nut. There is a washer under the nut (don't lose it, as the new CV joint doesn't come with one).
Next, you need to unscrew the ball. This can be done by unscrewing two 13mm bolts, or you can unscrew the bottom nut of the pin by 17mm and knock it down by pressing it down with a pry bar, while simultaneously tapping it with a hammer (not on the pin or ball), which is what I actually did. Additionally, release the brake caliper hose. This action is shown in two photographs below.
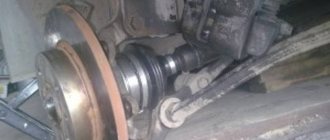
By moving the hub to the side (having previously pushed the grenade inward with the mounting tool and pulling the hub towards us), we release the outer grenade, which we would simply replace without pulling out the entire drive along with the inner CV joint,
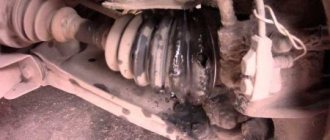
...if it weren't for the drive that was bent into a ram's horn. And you see the fate of the outer grenade in the photo - it crumbled.
So, let's replace the drive too. The photo below shows a CV joint from an Italian manufacturer called TRIALLI (Trialli) for 900 rubles. Quite a cheap product of very good quality.
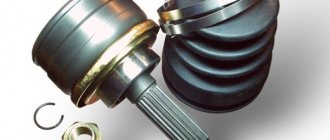
And the photo below illustrates the components of the CV joint:
- The grenade itself.
- Two clamps.
- Protective cover (boot).
- Retaining ring.
- A tube of special lubricant (calculated for the entire service life of the hinge, if the case remains intact all this time). There is another cheap but excellent CV joint - 4 for lubricating a grenade for 50 rubles in any auto store
- Hinge nut.
Since we were changing the drive, we had to knock off the support washer from it and replace it with the new drive, which should fit clearly into the lower groove (photo below). In theory, they should be installed on the new drive anyway. After that, put on the boot and lower it into its seat.
And install the retaining ring. If it is too stretched, first squeeze it and place it in the upper groove. The easiest way to do this is with cone-shaped pliers, inserting them inside the ring and stretching the ring to fit it into the groove. And then, using a special wrench or simple pliers, tighten the lower clamp, but do not tear it off.
Replacing the CV joint on the Lada Grant. Service life and causes of malfunctions of the “grenade”
In a car with front-wheel drive, it is not the driveshaft with the main gear and axle shafts that is responsible for transmitting torque from the gearbox to the wheels, but special parts - CV joints, they are also constant velocity joints, in common parlance - a “grenade”. They consist of a drive and a CV joint itself; there are 2 of them on each drive. – external (closer to the wheel) and internal (closer to the gearbox). The “Grenade” is very durable, and with constant maintenance the car can withstand 100,000 km. and more. However, it does not last forever, and one day it may fail. In this article we will talk about how to independently diagnose and replace an external CV joint using the example of the popular Russian car Lada Granta.
Causes of grenade malfunctions and its diagnosis
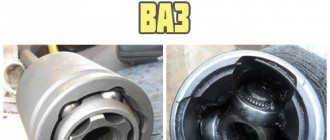
Usually the CV joint does not break right away. You will feel the car accelerate jerkily and hear a knocking sound from somewhere in the front suspension. Over time, symptoms worsen. Diagnostics is very simple: put the car on a jack and swing the CV joint of the suspended wheel. Do you feel any play? It's time to change the part.
There are 4 main reasons why CV joints fail prematurely:
1) The part itself is of low quality or defective;
2) The vehicle is operated off-road;
3) The boot has torn, and dust and abrasive particles have penetrated inside;
4) Aggressive driving style.
If you turn to specialists for help, you will have to fork out money. Replacement service costs an average of 1,500 rubles. for 1 CV joint.
You can save money by doing your own repairs: the cost of a spare part in auto shops starts from 1000 – 1500 rubles. for 1 “grenade”, complete with drive components cost about 3000 – 4000 rubles. There are a lot of manufacturers, but it is better to take the original from AvtoVAZ.
Tools and materials
- new CV joint (the grenade itself, without the drive) and lubricant for it;
- jack, hammer;
- wheel wrench, mounting, pipe of suitable diameter;
- a set of wrenches and sockets, a screwdriver;
- graphite lubricant.
CV joint Lada Granta | transmission gearbox clutch Lada Granta
1. Replacement of the outer CV joint for the Lada Granta
2. Video: “Replacing the boot of the outer and inner CV joint (grenade)
Replacement of outer CV joint for Lada Granta
Still, I decided to change the CV joint today. because then there will be no time. I made a photo report, as detailed as I could.
sit down and remove the wheel
While the car is still with the wheel, loosen the hub nut using a 30mm socket and use a metal pipe for reinforcement.
Next, unscrew the caliper assembly. Some will say that there is no need to do this, because you can change the grenade anyway, but it’s convenient for me so that he doesn’t interfere with me.
then unscrew the two bolts from the ball joint
then unscrew the loose hub nut completely, and using a mounting tool (a small pull) remove the hub from the ball and at the same time from the CV joint
remove the boot from the CV joint and remove all possible lubricant so that there is less dirt
and start trying to knock out the grenade with a hammer. And she gave in quite easily, not like last time, we beat her for almost 2 hours.
remove the old retaining ring.
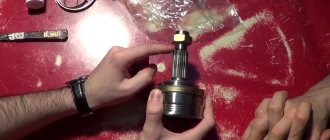
This is a comparison of CV joints from two manufacturers, on the right is BELMAG, and on the left is produced by AVTOVAZ. The difference is immediately visible, AVTOVAZ has a deeper CV joint calcination than BELMAG, which already gives AVTOVAZ a big plus. Let's hope that the new CV joint lasts at least 30 thousand km, and not like BELMAG only 3000 km went before it cracked. The cost of the AVTOVAZ CV joint is 1500 rubles, and the BELMAG CV joint is 1000 rubles, and the kit includes CV joint grease.
Fill the entire CV joint bearing with grease.
We put on a new boot, fill it with the remaining CV joint grease, and install a new snap ring. If the anther does not want to get dressed, then a screwdriver will help, as an option
We screw the old hub nut onto the CV joint.
hold the CV joint straight on the drive and hit the screwed nut with a hammer and hammer the CV joint into place.
But no! Let's take a larger hammer - 2 precise blows and the CV joint sits in its place.
Pull the boot and tighten the clamps on the boot.
When assembling the unit, we do everything in the reverse order, but do not forget to lubricate all the bolts with graphite grease so that nothing sticks.
