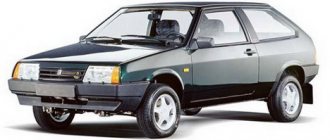
The engine power of a car like the VAZ 2114 may seem insufficient for many car enthusiasts. However, this can be fixed. Let's figure out how to convert an 8-valve engine to a 16-valve in a VAZ 2114
If you install a cylinder head with 16 valves, the car's power can exceed all expectations. The reason for this is that the engine cylinders with a similar block head can be filled with a special air-fuel mixture.
As a result, the power of the power unit increases significantly. It is important to note that this is an absolutely safe way to increase the “strength” of your car. So how to convert an 8 valve engine to a 16 valve VAZ 2114?
The question also arises about the difference in power of cars. For example, the power of a car whose engine has a volume of 1.5 liters and 77 horsepower can be significantly improved. If you replace the 8-valve head with a 16-valve one, it will increase to 90 “horses”!
This is quite a big difference, so you should figure out what needs to be done (and in what order) to improve your own car.
16 valve head
Installation of a 16 valve engine on a VAZ 2115
Hi all! Today I’ll tell you what you need to install a 16 valve engine in the family of injection Samaras on the brains 7.2 January without altering the wiring!
Let's begin!
(For those who are too lazy to read the story, all the information is below).
Before I put my 16kl. motor in the VAZ 2115, I read a huge number of articles and blogs on the drive. I listened to the opinion of local “experts” and settled on the decision - “We must install it.”
I bought a motor from a VAZ 2112 1.5 liter 16kl. As soon as I delivered it, I scattered it on the shelves. A considerable 4 months have passed and I have free time from studying. I washed all the dirty parts, painted the block, and bought as many parts as possible. I started assembling the head and block separately.
Since the block was 82.8, and I wanted to make the car as accurate as possible, I decided to make a Priora bottom. I bought piston 83.0 STK with grooves and a displacer, connecting rods from Priora. I left the original crankshaft, because the crankshaft from the 124/126 engine will make the piston stick out 3mm from the block. Ultimately, having machined the block, I immediately assembled it and tried to turn it. All was good!
Body and interior tag
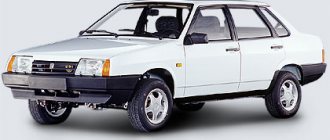
The cabin has five seats, the seats are arranged in two rows. But much has changed in the interior design of the Lada 2115. Electric windows appeared in the front doors, and in the luxury version - electric heated front seats.
Revolutionary changes have also occurred on the instrument panel. A system for monitoring the health of many vehicle systems has appeared (a simplified prototype of an on-board computer). The system allows you to monitor the performance of the vehicle's lighting devices, the oil level in the lubrication system, monitor brake pad wear, coolant level, monitor the toxicity of exhaust gases, and even monitor the presence of anti-freeze in the washer reservoir. The display system was imperfect, but the very fact that the car had such a device was already of great importance.
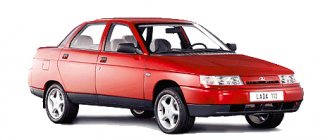
Main parameters of the machine
| Name. | Index. |
| Length. | 4330 mm. |
| Width. | 1650 mm. |
| Height. | 115 mm. |
| Wheelbase. | 2460 mm. |
| Front track width. | 1400mm. |
| Rear track width. | 1370 mm. |
| Ground clearance (clearance). | 170 mm. |
| Trunk capacity. | 445 l. |
| Recommended tire size. | 165/70 R13. |
It turns out that the length of the fifteenth is slightly (12.5 cm) longer than the ninety-ninth. But according to data unconfirmed by the manufacturer, the VAZ 2115 crash test lost to the 21099 model.
Let's figure out how to convert an 8 valve engine to a 16 valve engine in a VAZ 2114
The engine power of a car like the VAZ 2114 may seem insufficient for many car enthusiasts. However, this can be fixed. Let's figure out how to convert an 8-valve engine to a 16-valve in a VAZ 2114
If you install a cylinder head with 16 valves, the car's power can exceed all expectations. The reason for this is that the engine cylinders with a similar block head can be filled with a special air-fuel mixture.
As a result, the power of the power unit increases significantly. It is important to note that this is an absolutely safe way to increase the “strength” of your car. So how to convert an 8 valve engine to a 16 valve VAZ 2114?
The question also arises about the difference in power of cars. For example, the power of a car whose engine has a volume of 1.5 liters and 77 horsepower can be significantly improved. If you replace the 8-valve head with a 16-valve one, it will increase to 90 “horses”!
This is quite a big difference, so you should figure out what needs to be done (and in what order) to improve your own car.
What are the changes?
We are talking about a list of conditions on the basis of which a car cannot be registered with the traffic police. If previously the main requirements were the coincidence of the VIN numbers on the body and units, where such a number was stamped during registration of the car, and those indicated in the documents, today they are checked with the numbers of the engine, body, frame and cabin included in the documents.
This list of conditions is contained in Article 20 of the Federal Law on Vehicle Registration and literally prescribes the following in its official interpretation:
1. It is prohibited to perform registration actions: .... 4) in the event of a discrepancy between the registration data or the design of the vehicle and the information specified in the documents identifying the vehicle, with the exception of registration and other data of the vehicle subject to change (entered into the document identifying the vehicle) on the basis of the submitted documents;
Thus, the engine for 2022 is not a numbered unit, but when registering a car, the engine number must be checked against those indicated in the documents.
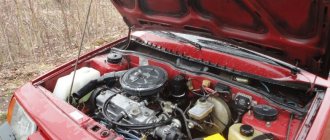
Features of engine disassembly
The first thing to do is to disassemble the engine as carefully as possible. This element of the car is the most valuable, so you need to disassemble the engine with extreme caution. It is best to carefully study the instructions and watch videos on the Internet about how craftsmen cope with this task, and only after that do the disassembly yourself.
Under the valve cover you can find many unpleasant defects, including the poor condition of the roller. The cylinder head may also not look its best, and the bushings may be so worn that many are surprised that they still work.
All this means that after the engine is disassembled, a lot of faults or worn parts can be found. It is best to replace each of them. This will increase the reliability of the car and will allow you not to worry that the increased power of the VAZ could become a fatal factor and lead to breakdown in the near future.
It is best to install bronze bushings. They are highly reliable and quite durable.
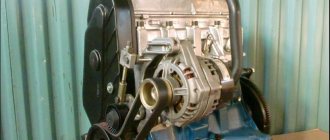
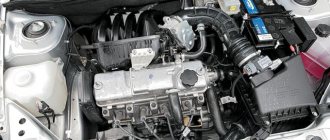
Conversion of an 8 valve engine into a 16 valve VAZ 2114
During the process of improving the engine, it is necessary to modify the bolts. They are used to secure the 16 valve head. To modernize a VAZ engine, there is no need to change the cylinder block, but the head still needs to be changed. In order for each bolt to fit securely into the head mounting hole, it should be adjusted not only in diameter, but also in length.
Important information. The holes that can be found in the gasket also need some work. They should perfectly match the size of the bolts. If this is not done, the level of engine reliability will decrease significantly.
After this you should change:
- and then the connecting rods.
This must be done while assembling the cylinders.
Now it’s time to refine and adjust the wiring.
It is important to see the difference in the structure of 16 valve pistons from 8 valve pistons. In addition, the location of the sensors also differs. This means that it may be necessary to extend the wiring.
After the engine is assembled, the wiring needs to be finalized. If the car owner would not like to incur extra financial expenses, then he needs to leave the ignition module, and then connect the module using high-voltage wires. This is the easiest way to save money, so don't ignore it.
Technical characteristics of the VAZ 11183 1.6 8kl engine
| Type | in-line |
| Number of cylinders | 4 |
| Number of valves | 8 |
| Exact volume | 1596 cm³ |
| Cylinder diameter | 82 mm |
| Piston stroke | 75.6 mm |
| Supply system | injector |
| Power | 80 hp |
| Torque | 120 Nm |
| Compression ratio | 9.6 – 9.8 |
| Fuel type | AI-92 |
| Environmental standards | EURO 2/3 |
| Type | in-line |
| Number of cylinders | 4 |
| Number of valves | 8 |
| Exact volume | 1596 cm³ |
| Cylinder diameter | 82 mm |
| Piston stroke | 75.6 mm |
| Supply system | injector |
| Power | 82 hp |
| Torque | 132 Nm |
| Compression ratio | 9.8 – 10 |
| Fuel type | AI-92 |
| Environmental standards | EURO 4 |
How to convert an 8 valve engine to a 16 valve Installation features
The bolts may be visually very different from each other, but do not be alarmed. Modified bolts must be used.
Such bolts have the following characteristics:
- The diameter is equal to an 8 valve bolt;
- The length is 16 valve.
To make it easier for these bolts to fit into the hole, they should be pre-drilled. If you install the modified bolts according to all the rules and as carefully as possible, then the reliability of the engine can only be envied.
When the car owner thinks that he is not able to perform this operation on his own, then it is better for him to seek help from qualified craftsmen with sufficient experience. They will definitely do everything right and as it should be.
An additional option to increase the power of the car is to tune the exhaust manifold. This is a great way to increase the power of your vehicle a little more.
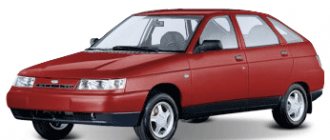
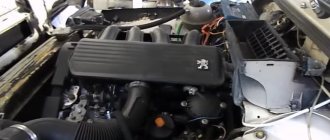
VAZ-2114 with a 16-valve engine from Priora
The engine from Priora with sixteen valves does not have any serious design differences from the “native” VAZ 2114 engine, so it should fit into place like a glove. In our article “VAZ 2114 with a 16-valve engine from Priora” we will tell you how to do this.
First you need to dismantle all the attachments - the receiver, ramp, injectors and exhaust manifold. Now we install the new 16-valve engine from Priora on the same mounts as the original one.
Next, we attach our 16-valve engine to the gearbox. If you have a box of tens, then the task will be very simple. It will only be necessary to install a different starter - this is the only different part. If you have a KATEK gear starter, then you will just need to change its head and coupling. If your VAZ 2114 car has a BATE type starter, then it will have to be replaced with a new one. The gearbox from the fourteenth model is quite suitable for the entire system; you will only need to take care in advance of replacing a number of gears and the GP.
But problems may arise with the clutch. The clutch of the fourteenth model has a housing slightly smaller than necessary. Therefore, the clutch from the tenth or twelfth model may not be suitable. There are several ways to solve this problem. You can change the flywheel and install a V8 clutch on the car, you can grind the crankcase to the desired size. The best way is to transfer the flywheel and crown from the “eight” to a turning shop so that they can be turned properly there. This will also give a weight advantage.
A good option would be to leave the factory starter in your VAZ 2114 car and install a clutch from the twelfth VIS model. There is only one problem with it - you have to replace the bearings often. You can also install a Valeo clutch.
In order not to have to worry about replacing the fuel line and laying it manually, you can take a ready-made version from the twelfth model. Its ramp is ideal for a VAZ 2114 with a 16-valve engine from Priora. Otherwise, you will have to not only re-lay the line, but also change the pump, which will add more hassle. If you install a ready-made ramp, do not forget about the nozzles, which should be longer than the original ones.
Before attaching a new ramp to the 16-valve engine from Priora, you need to install a receiver. Installing a receiver can take time and skill, and a ramp will only hinder the process. You can't do this without a jack. The sequence of actions in all this should be as follows - first we stretch the receiver, then the ramp with new nozzles, which should fit into the wells. After that, we attach the ramp, and then we finally install the receiver and secure it. Now you can put all the other attachments in place.
In addition to the actual installation of the 16-valve engine from Priora, we will need to change the wiring. The ignition coil remains factory, from the fourteenth model. But it is better to take the high-voltage wires from the twelfth and attach them to the coil. The space for the reel is quite small, so it is not so easy to install it. You can apply such a scheme. We take the valve cover from the twelfth and put it in place. We install the ignition coil where the ignition module should be. You just need to adjust the fasteners. In addition, we will need to make the wiring longer (about 40 centimeters) for the new injectors. Longer wiring is done for both the phase sensor and the oil pressure sensor. You don't have to touch the rest of the wiring, everything fits there.
Now about the exhaust system. Factory exhaust manifolds will not fit into VAZ 2114 cars with 16-valve engines from Priora, so we are replacing it with a new one. The “SPIDER 4-2-1” is good, it is longer and has a hole for the DC. We install the spider in combination with the corrugation and a new exhaust pipe. You can leave the original jar, altering it a little.
But you will have to tinker with the engine cooling system. For the twelfth and fourteenth models they are quite different. It is better to take a radiator from the twelfth model, but you can leave the old one. As for the thermostat, the best option here is to leave the “original” one. The problem arises with the fan - it may begin to touch the receiver. A good solution here is to install a Niva fan, which has two impellers on the outside. It fits into place well. True, you will have to purchase another intermediate relay to avoid overloading the fuse box. You will also have to change the hoses for the radiator (you can take the upper ones from Kalina, and the lower ones from the twelfth model). But to avoid all these problems, it is better to stick with the radiator from the twelfth model.
As for the generator, it fits perfectly on the factory fasteners; there is no need to change anything, including the belt. After all these alterations, the factory electronic control unit worked, albeit with glitches, but it worked! However, you will still have to reflash the car and also calibrate the injectors. If you want to keep the original engine cover, you will have to cut it off a little at the front. You can also purchase a brace with a fourth fastener for the engine - a very useful and inexpensive part.