Having a manual or automatic transmission installed, how to slip in place?
Will this cause harm to units and components? We will answer these questions and more in this section. It is no secret that this nonsense affects mainly young and impulsive drivers (street racers) who do not know a lot about technology and the cost of breakdowns. As they say, the main thing is to put your slippers on the floor
. In this way, guys try to stand out from the crowd in front of friends and colleagues, as well as attract the attention of girls. But what will follow such antics? In what condition will the car return home then? It’s good if it’s yours, not your father’s. Do you understand what I'm talking about. But there is another side to the coin...
What does the word Burnout mean?
The definition of burnout in the dictionary is a complete loss of energy and interest and an inability to function effectively, experienced as a result of excessive demands on resources or chronic overwork.
Interesting materials:
What manga do you recommend reading? What should the company wish upon dismissal? What is celebrated on August 2 in Ukraine? What is RTF format? What are plastics? What are the two ways? What to prepare for breakfast at the PP? What is included with the electronic auction documentation? What is used to protect against gamma radiation? What does Facebook own? What is equivalent to military service?
"Crank" on "automatic"
It's not that simple here
as it seems to some. It is possible to slip only if the road is slippery: ice, snow, or, in extreme cases, sand on the beach. You can't do this on asphalt. They say that some people manage to make a crank in the “neutral” mode on an automatic transmission, but one hardly believes in such fables.
Practical recommendations:
- Long jerks are strictly prohibited. Give the engine a rest;
- During a “smoke break,” do not turn off the engine;
- The car must be warmed up, otherwise there will be no oil in the automatic transmission. Then feel free to order a new box;
Let's simulate the situation:
stuck in a snowdrift and need to get out with an automatic transmission. To do this, engage the “R” gear, before doing this we squeeze the foot brake.
In this mode, we wait about 3 minutes until the oil is pumped up by the torque converter and gradually begin to release the brake, increasing the speed. High speeds will quickly damage the automatic transmission clutches. Minimal cooling may cause the liquid to boil.
Experienced drivers recommend using the foot brake as a clutch pedal in a manual transmission.
. Thus, you can try to get out of the skid. It is strictly forbidden to “jump” from one gear to another. Older cars with automatic transmissions have an air cooling system for the automatic transmission - a technology from the 80-90s. Today this technology is no longer used.
In a word, slipping is allowed, but within moderate limits.
Tips for Drag Racing fans:
- For this type of race, a rear-wheel drive car would be optimal;
- Some types of tires are specifically designed for anti-skid, so choose the appropriate type. Otherwise, be prepared to smell a burnt clutch disc. Do not confuse this with the smell of burnt rubber;
- When starting, keep the wheels level, as the rear may skid a little.
Be that as it may, the idea of slipping for no reason is a rather dangerous thing
, since, without experience, a novice driver can do things that will end in a major overhaul or partial replacement of the power unit. And this already smacks of good spending.
Therefore, if you really want to learn the art of drag racing, first take training courses at any driving school and only after that feel free to get behind the wheel of your car. Actually, they gave a full answer to the question: how to skid on the spot. Always make an informed decision.
Spectacular stunts on front-wheel drive, rear-wheel drive and all-wheel drive cars
Administrator Muz4in.Net 04/25/2012, 17:17 Tags
DO NOT USE ON PUBLIC ROADS. EXCLUSIVELY AT RANGE UNDER THE GUIDANCE OF A SPECIALIST.
How many times have they told the world: studying the physics of car movement, engaging in emergency preparedness and practicing sports driving techniques is useful, enjoyable and fun. But no! The driver doesn’t want to learn equipment and go to an extreme driving school, but instead asks him to tell you in a nutshell how to make girls squeal and his friends enthusiastically shake his hand. Receive it and sign it!
Russian rally champion 2004, head of the FreeDrive racing team Gennady Broslavsky showed us several spectacular stunts on a front-wheel drive, rear-wheel drive and all-wheel drive car and gave us simple instructions on how to perform them. Learn them - and the champagne will flow like a river, doors will open, carpets will be laid out! Popular Mechanics is not responsible for the consequences of unsuccessful attempts to perform a trick.
Rear drive:
Lotus Exige. Engine: in base. Engine capacity: 1796 cm3. Power: 192 hp Weight: 875 kg. Acceleration from 0 to 100 km/h: 5.0 s. Maximum speed: 241 km/h.
Four-wheel drive:
Mitsubishi Lancer Evolution VI. Engine: front. Engine capacity: 1997 cm3. Power: 280 hp Weight: 1300 kg. Acceleration from 0 to 100 km/h: 4.9 s. Maximum speed: 220 km/h.
Front-wheel drive:
Ford Fiesta. Engine: front. Engine capacity: 1596 cm3. Power: 100 hp Weight: 1115 kg. Acceleration from 0 to 100 km/h: 11.0 s. Maximum speed: 184 km/h.
What can break
Most production cars (even those with very powerful engines) are designed to drive forward, sometimes backward, but never sideways. Slipping on a machine that is not designed for this purpose can lead to serious damage. Moreover, you can feel the result after a couple of innocent turns with the handbrake.
Silent suspension blocks and rubber supports of MacPherson struts are not designed for sharply increasing lateral loads.
Ball joints and steering ends are designed to handle more smoothly varying forces, and wheel hub bearings are not designed for sideways driving at all.
The gearbox may not be able to withstand too sudden shifts - the synchronizers take time to operate.
When sliding and slipping, rubber literally burns (with spectacular white smoke) and melts before our eyes.
If you do not accurately estimate the distances to the nearest curbs and lampposts, you can go broke on body repairs.
U-turn with handbrake
Allows you to quickly turn around in very limited space. A handbrake turn is the first trick that novice reckless drivers learn to perform. It succeeds in almost 100% of cases, despite the possible sluggishness or lack of coordination in the driver’s actions.
Four-wheel drive.
On cars with all-wheel drive and rear-wheel drive, releasing the clutch when using the handbrake is vital for performing the trick and preserving the components of the car.
Front and all wheel drive.
Accelerate to 40–50 km/h in second gear. Release the gas and sharply turn the steering wheel to the side. Literally in a split second, squeeze the clutch and pull the handbrake to lock the rear wheels. Immediately release the handbrake, and when the car turns at an angle of more than 90 degrees, begin to return the steering wheel to its original “straight” position. If you manage to return the steering wheel to the neutral position in time, the car will turn exactly 180 degrees and, perhaps, even roll back in the same direction. The algorithm is suitable for a car with any type of drive.
Rear drive.
A rear-wheel drive car can be turned not only with the handbrake, but also with the gas, but this maneuver requires more skill.
Allows you to instantly start moving in the opposite direction. A police turn is considered completed if you continue to drive ahead in the same direction. On vehicles with any type of drive, a police turn is performed the same way.
In America, the police turnaround is called "Rockford", after the main character of the 1974 TV series Rockford Files. Detective Jim Rockford performed this maneuver in his Pontiac Firebird coupe in almost every episode.
Before you slide
Check tire pressure. Under high lateral loads in sliding, a poorly inflated tire can become dismounted. If a sliding car receives solid support in the form of a wheel rim, you will have to continue driving on the roof. The pressure should be approximately 2.5 atm.
Check the condition of the TIRES. You should not subject tires to extreme loads, the cord of which is already sticking out and the tread is worn out. The same applies to tires that have spent several cold winters in the garage and turned into dust.
Warm up your tires by making a series of sharp turns in different directions. Too sudden temperature changes, in particular sliding on cold tires, have a harmful effect on rubber.
Disable ESP.
This system is specially designed to prevent the vehicle from sliding. Attempting to perform stunts with ESP enabled may result in loss of control and vehicle damage.
Choose the right coverage. The car glides easily on wet asphalt, but remains controlled. Sliding on snow or ice is easy for both the driver and the car, but regaining traction is very difficult. But concrete, even when wet, has a greater coefficient of adhesion than dry asphalt: trying to slide on it can result in riding on the roof. Of course, the road must be smooth.
Front and all wheel drive.
Accelerate in reverse to a speed of 40 km/h. Depress the clutch and quickly turn the steering wheel until it stops. While the car is spinning, engage first or second gear (whichever is more convenient). During the switching time, the car should turn 90–1200. Rotate the steering wheel back to return it to the neutral position by 1800. Release the clutch and continue driving straight.
Rear drive.
A police U-turn is more difficult to perform on a mid-engine car than on a front-engine car, where the inertia of the heavy power unit helps the car rotate.
Front-wheel drive.
A front-wheel drive car rotates most readily in reverse - the wheels act like the rudder of a motor boat.
Four-wheel drive. The rigid suspension of a sports car allows it to have less
roll and slide more predictably.
On asphalt it makes cornering less fast, but very effective. In rallying on slippery surfaces, sideslip in a corner allows you to control deceleration by increasing or decreasing the drift angle.
Attention!
The insidiousness of a controlled skid is that it looks most impressive in a real turn on an ordinary road. We strongly recommend that you practice your skills in a closed area in advance.
Front and all wheel drive. Approach the turn with steady throttle. Turn the steering wheel and pull the handbrake. On a vehicle with four-wheel drive, depress the clutch while the handbrake is applied. Maintaining the gas, turn the steering wheel in the direction of the skid. On all-wheel drive, keep the rear wheels sliding with gas; on the front, correct the skid with the handbrake. To reduce the skidding angle, turn the steering wheel in the direction of the skid; To increase the skidding angle, turn the steering wheel in the direction of the turn.
Four-wheel drive.
In all-wheel drive, maintaining high engine speeds allows you to maintain sliding for as long as you like, while the car obediently accelerates in a given direction, despite slipping.
Front-wheel drive.
Modern cars with independent multi-link rear suspension are very stable and impressive when cornering. If the skid stops prematurely, reapplying the handbrake helps.
Rear drive.
Approach the turn with steady throttle. Turn the steering wheel sharply away from the corner (counter-bias) and immediately turn towards the corner by pressing harder on the gas. The rear wheels will skid. Immediately turn the steering wheel in the direction of the skid and release it slightly, but under no circumstances release the gas. As soon as the car begins to stabilize, do not wait until the end of the skid and return the steering wheel to the neutral position in advance. Rear-wheel drive does not forgive mistakes in skidding. An overdose or, conversely, a lack of gas, or a delay in steering can lead to cyclic skidding and uncontrolled rotation.
Art requires sacrifice! You can endlessly watch how others work, water flows and burns... Rubber. The squeal of the engine, tires and spectators merges into a festive chorus as the powerful car waltzes through clouds of white smoke.
In the USA, stunts using special cars for “nickels” are popular. In them, the steering wheel and gas are fixed in extreme positions and allow the car to rotate itself, while the stuntman can open the doors, climb out onto the roof, and climb from one window to another. Special tires are produced that, when burned, emit bright colored smoke.
Attention!
A car in a slide can spin endlessly. In this entertainment it is important to know when to stop. If a blown tire breaks and the car has a solid rim support, the exercise may end on the roof.
Rear drive.
A sports rear-wheel drive car is a classic tool for drifting and, in particular, “piglets”.
Four-wheel drive.
All-wheel drive cars with a sporty character can rotate not only in a small radius, but even around their own center of mass.
Rear and all wheel drive.
While standing still, turn the steering wheel at a slight angle, depress the clutch and engage first gear. Rev up the engine to high speed by pressing the gas several times. As you press the gas, sharply release the clutch. The wheels will slip and start spinning. Maintain high engine speed by pressing the gas rhythmically. Variable throttling helps regularly transfer the vehicle's weight to the front axle to improve steering response. Turn the steering wheel tighter if the vehicle's rotation radius increases, and loosen the steering wheel if the radius decreases.
Front-wheel drive.
While standing still, turn the steering wheel all the way, depress the clutch and engage reverse gear. Rev up the engine to high speed by repeatedly pressing the gas pedal. Variable throttling allows for better RPM control. Release the clutch quickly. The wheels should slip. As soon as the car starts moving, pull and hold the handbrake. On a front-wheel drive car, it is much more fun to do the “nickle” in reverse - after all, it is the drive wheels that must slide in a circle.
Rear-wheel drive vehicles
II. Engage first gear, then fully depress the clutch and gradually begin to increase engine speed. With a quick but smooth movement, begin to release the clutch pedal, while still pressing the gas.
Attention. To prevent the speed from going into the red zone, work with the gas pedal very carefully; you do not need to press it all the way to the floor. The ideal execution technique is shown in the following video. (1.00 minute video). Play with the gas pedal, alternately pressing it harder or weaker, while constantly maintaining high but safe engine speeds.
The average range of these revolutions should be between 3500 – 4500 rpm. On modern cars this range is closest to peak torque.
Once the clutch is fully released, place your left foot on the brake pedal. In order to press the brake pedal with the required force with your left foot, some practice is required. It’s very difficult to do this the first time (and sometimes the tenth).
The braking force must be more than sufficient so that the rear wheels of the car continue to rotate freely, while the car itself remains in place or continues to move very slowly forward.
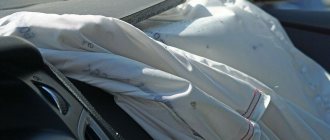
Attention! !! Attempts to do a burnout for the first time will naturally be initially unsuccessful over and over again, until you learn to feel the smallest nuances of the car. In this case, there is a possibility of overheating of the clutch itself, up to its failure. So try to monitor any unusual and foreign odors that appear in the car’s interior, as well as the behavior of the car itself when you turn on the gearbox and depress the clutch, precisely at the moment the pads meet the clutch disc.
Tip #1: Buy zip ties
They cost pennies, especially if you buy directly from China. And cross-country ability immediately increases significantly. In cases where the wheel grinds on ice covered with a thin layer of snow, or the car gets stuck on a snowy slope, zip ties really save the day.
You don’t feel sorry for them; you don’t even have to take them off when leaving. Set up pretty quickly. Instead of zip ties, you can use ordinary belts or ropes; if the yard and roads are not cleaned at all, then it is better to install chains. There are quite a few types of them, sometimes models with large lugs are very effective, but in principle even the cheapest models help save the owner of a car with an automatic transmission.
Sanding putty on the plane of the wing arch
So, let's start working on putty with our own hands. First of all, we will start with the wing arch and immediately figure out what we need for work.
This is a rigid block of small size so that its plane covers the working area of the putty. The work may require other bars, this will be discussed during the video.
We will also need several types of sandpaper to sand the putty. First of all, we will use P80 sandpaper with a coarser grain, which removes putty very well. It is needed to work with the top layer and we will work with it without strong pressure in order to knock down the putty a little.
Sandpaper P80 - we need it for sanding the first layers of putty and for the initial leveling of the material. Next, the sandpaper number used for sanding the putty is P120, 150, 180. 220, etc. — further grinding and preparation for primer, each subsequent number removes a smaller layer of material and gives less risk.
After sandpaper P80 we will use number P120 or P150. Generally speaking, it is recommended to work with this sandpaper, since P80 is quite difficult to work with, because it is very rough and removes a fairly large layer of putty. With large grains, you can overdo it and reach the metal, which will require re-application of putty.
In addition, you need to remember that every paper leaves a risk, or in simple words, it’s just a scratch. And this risk, a scratch, must be removed with subsequent finer-grain sandpaper.
The 100 micron rule means that each subsequent number of sandpaper differs by no more than 100 gradation units, but it is better for us to take a difference of 50 units or less. For example, the range of sandpaper numbers for sanding putty is P40/60/80/120/150/180/220/280/320.
Because the next sandpaper should erase the previous mark. You must always remember that finer sandpaper will come next and you don’t need to remove a lot of putty! Basically, you just need to reduce the risk and leave some margin for working with small grains.
On average, 2-3 types of sandpaper are used for work...
How to properly sand planes and how to avoid possible mistakes was discussed in detail in the previous video (part #8). If anyone hasn’t watched it, I advise you to read it in order to better understand the next stages of work.
This video (part #9) will also talk about this, but not in such detail as to avoid repetition. Author of the video: Vlad ShchCh:
So, we've sorted out the theory and now let's get down to practice...
We take a block with sandpaper and begin to process the surfaces. Let's start working from the gas tank hatch, where there is a layer of putty applied on a flat surface. Master Vlad polishes the surface using the so-called herringbone pattern, without putting much effort.
We do not sand this area completely with our own hands; in the video we can see that a small edge remains at the edge. We leave it so that we can then smooth it out with the next number of sandpaper.
Next, we move on to the arch itself, not forgetting that each plane is interconnected with another plane. You need to be careful when processing each and correctly display all planes.
You should not press the block very hard, since a small layer of putty is applied to the end of the arch and you can easily reach the metal. Then we move on to the next plane, also without making much effort with our hands.
Always pay more attention to the radius of the arch, since the appearance of the entire arch will depend on its type. In this case, the edge itself can be used to display the plane of the arch radius. At the same time, when processing the arch along the radius, try not to “climb” onto the upper plane, as visible scratches will remain on it.
Constantly control your work with your hand, which helps to “find” existing irregularities.
When processing the upper plane, the width of the block does not fit everywhere on the surface and in these places it is necessary to work only with the end of the block. Since there are still small irregularities here, you need to take sandpaper for sanding the P150 putty in order to finally process the plane.
The video shows (see above) that there is a edging above this plane, and you need to work carefully so as not to damage it.
Sanding the putty of the wing “boot” plane
Next, we will continue polishing the wing on the “boot”, the master clearly shows which part of the wing bears this name - this is the lower part of the wing, turning into the threshold.
This part is quite complex, since it also has a radius part, a plane and transitional hard-to-reach places. Therefore, to process this area we will need another block.
The master showed a new block in the video...
The block has a different shape and, most importantly, it is quite soft and has radius curves on it, which is necessary for processing in such difficult places on the wing. Thanks to this shape of the bar, it is possible to process rounded parts of the metal.
We initially “stick” P80 sandpaper onto the block itself to remove the rough parts of the putty and get to work. Do not forget that you need to sand with some reserve for processing with the next number of “skins”.
We sand the straight plane in a herringbone pattern, since if you grind in a straight line, you can leave a sample on the putty.
In our case, there is no need to remove a lot of putty, since there are still places where it will still need to be applied additionally. If anyone watched the previous videos, they will remember that in this place there was a seam from welding work and the place was quite difficult.
The video shows that small “bumps” appeared along the edges of the plane, which means that a hole has formed in the center. Therefore, here you will need to apply a small additional layer of putty.
While we are finishing the rest of the arch, we work very carefully, without making much effort, especially at the ends.
Also, in places where metal protrudes, this “shows” that there is a small hole and a layer of putty will also need to be applied. Therefore, in such places there is no point in further sanding, since further work will be needed by applying an additional layer of putty.
It should also be noted that when working with adjacent planes that border, and in our case, this is a door, you must always check the transition of the planes. This is done to ensure that everything is smooth in these places and there are no holes or bumps.
In this case, the arch can be finished; then it will be processed with P150 sandpaper to remove the risks from the previous P80 paper.
Grinding the putty on a flat plane of the wing
Next, we’ll deal with grinding the putty on more or less even planes. In our example, in this area the putty is green in color, since a material with fiberglass was used.
The use of this putty was described in the previous video (see part #8). There was a difficult area here with old putty applied by the previous master and traces of rust on the surface. All this was completely removed and stripped down to bare metal.
There is a small radius on the wing itself that needs to be taken into account when processing the putty.
Helpful advice. If you are working with any plane, for example, after an impact, and do not know exactly how it should look “live,” then you can always look at this plane on the other side of the car body. Since both planes are mirrored, it can be compared to make it clear how it will look after repair.
To sand the putty, again use a hard block and P80 sandpaper. In this case, the P80 is the best fit. This is due to the fact that the fiberglass putty itself has a rather rigid structure and, moreover, a rather thick layer is applied in this place.
Fiberglass putty is quite difficult to sand due to its rigid structure, for this reason it must be sanded with P80/P120 sandpaper. It is not recommended to work with smaller skins, as this will be more problematic and ineffective.
Anyway, in the future this area will need to be replastered with finishing putty.
As always, we work “herringbone” so as not to leave a sample on the processed plane. When working, always check the surface being treated with your hand to feel any flaws (pits, bumps), thereby controlling the work process.
If a bump or visible hole appears, the grinding process in this place must be stopped, as additional application of putty will be required.
It is worth mentioning that when grinding putty on any surfaces, they must be repeated with the movement of the block. When there is a radius, it needs to be ground, repeating the bending angle; if the plane is flat, it is leveled as a flat surface under a large block. This method is applicable to all planes, and is selected depending on the specific part that we want to get in the end.
So, the preliminary grinding of the part is completed and you can already see what the end result is. Now all the holes and existing bumps are clearly visible and it is immediately clear what to do to level this area.
In the area of the wing where the putty with fiberglass was applied, we will also apply a layer of fiberglass for now, as deep pores are still visible. We will cover the upper part of the wing, above the area with fiberglass, with universal putty. In this place, the unevenness is small and the universal putty will lay down in a thin layer, which is what we need to remove the slight waviness of the part.
Grinding putty on the smooth surface of doors
Next, let's move on to sanding the putty on even surfaces. In our case, this will be shown using the example of a door.
As in previous cases, take a hard block and initial P80 sandpaper for the first layers and light sanding of the surface to be treated. Then we will move on to the P150 and further preparation under the ground. We work with our hands, as usual, in a “herringbone” pattern.
At the same time, we try to work with our hands exactly on the putty itself, without catching the unputtyed area of the door. You can go slightly beyond the putty area to better level the plane.
At the same time, you need to be careful not to “climb” onto the adjacent part. In our case, we opened the door so as not to touch the plane of the threshold when working. If you grind with the door closed, then for reliability you need to close the adjacent area so as not to damage it.
Don't forget to leave a layer of putty under the next sandpaper R150. It can be seen that the ends remain and now we remove the transitions and level the plane. At the same time, with this “sandpaper” you can already treat an area somewhat wider than the putty surface; in our case, you can “reach” the very edge on the door.
We also sand with herringbone...
Addition. Quite extensive planes, as in the example of this part, can and should be ground using a longer block if the plane being leveled has large volumes and waviness.
We check it by hand as we work to determine any unevenness. It can be seen that the plane of the door has become stained, which shows the alignment of the plane.
So, having finished processing the plane under P150, you can clearly see that the putty areas have been shaded and the hard boundaries of their transition have disappeared. Now small holes and irregularities are clearly visible.
Next, sandpaper P220 or P240 will be used for processing to remove the marks from the previous P150 and prepare the surface for applying a primer.
On all parts where an additional layer of putty is required, it will be applied, processed, and in the next parts of the video we will talk about preparing the surface for primer.
And let’s say a few more words...
So, in general, the principles of applying and sanding putty were clear, as well as what was needed for the work, what tools and materials needed to be prepared.
Also, what you should pay attention to in order to properly sand the car putty on the part. In the next video we will look at how to finalize the surfaces for applying primer and look at the existing nuances.
If you liked the video of Vlad ShchCh, then leave comments and like. And also, if you have questions about the series, ask in the comments, your questions will be answered.
Don’t forget to look at the description, where there are a lot of videos, including previous videos regarding this project - “Preparing a car for a complete repaint from A to Z.”
This concludes editing the article. Goodbye!
Source
Not enough power under the hood
IV. If the car does not have enough power for such experiments, for such a case, experts have some tricks in stock that help one hundred percent prevent the wheels of the car from slipping.
1. Lighten your car, especially for rear-wheel drive cars. There should be nothing unnecessary in the trunk, not even a spare tire. Before arriving at the site, take care of this in advance. The car's axle will be slightly unloaded and it will be easier for the wheels to slip.
2. Burnout - slipping on a chip. Rolling back at low speed with the clutch depressed, you do almost everything the same as the previous times. Release the clutch, then press the gas, but do not press the brake. As a result of multidirectional forces, one of the forces will be directed downward, and the engine force will be directed in the opposite direction, that is, it will pull upward; in this case, the car will remain in place without the brakes pressed.
3. Try this on a wet surface. The grip on the asphalt will be much weaker than it would be in dry weather, and this will definitely increase your chances of success.
V. And in conclusion, the last thing. To reduce stress on the braking system itself, use the Brake line locking system, - i.e. blocking. After installing it on the car and pressing the button, it will automatically turn off the rear brakes. This will simplify your task and keep the car in its original technical condition.
And as a snack for all readers, - Fail and Win compilations of burnout.
A snowy winter is a joy for many, but it can cause a lot of troubles for car enthusiasts, among which, perhaps, the most relevant for our realities is deep, loose snow that no one is even going to clean, dense snow and mud “porridge” and holes in compacted snow .
The role of the clutch in a car
To learn how to move off manually, you need to understand the operating principles of this box. The clutch in a car with a manual transmission acts as an on/off switch, disconnecting the engine from the transmission. When the left pedal is fully pressed, the connection between these components of the car is broken, at which point you can change gear. Smooth running at the beginning of movement is also ensured by the clutch.
Difficulties and errors when driving a manual transmission are associated with incorrect operation of the clutch pedal. The driver needs to bring all movements to automaticity, including starting from a standstill.
In addition, you need to remember the positions of the gearshift lever corresponding to certain gears, and when driving, shift them without looking. This is achieved by a simple exercise: with the engine turned off and parked on a level surface, depress the clutch pedal, engage first gear, and smoothly release the pedal. Such movements are repeated for all gears.
Car with automatic transmission - subtleties
It is much more difficult for owners of cars with automatic transmission in such situations. After all, an automatic transmission is a delicate thing and requires more careful handling. The design features do not allow smooth engagement of the clutch; when it is activated, the discs immediately converge and, as a result, the car begins to slip. Also, the drive may fail due to excessive loads. Therefore, prolonged slipping of such machines is strictly contraindicated.
To try to leave, you need to rock up. To switch modes faster, you should clearly remember the selector positions D and R. If the gearbox indicates the stages “1, 2, 3,” then you will have to swing in mode R and 2. The main thing is to throttle smoothly.
If, after several attempts, a positive result is not achieved, it is better to seek outside help: ask to be towed or call a tow truck.
A couple of tips
After freeing yourself from snow captivity, it is important to check whether the radiator is clogged with snow. Blocked air flow can lead to overheating with all the further consequences.
If, after driving onto a flat asphalt road at high speed, vibrations (oscillations) of the steering wheel begin, you should check whether snow has gotten on the inside of the disc.
Start of movement
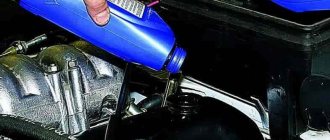
Any trip begins with starting and warming up the engine. Don't rush to start moving right away. If the temperature outside is above zero, it is enough to wait a minute or two for the oil to distribute throughout the box and for it to return to operating mode. Remember, the colder it is outside, the longer it will take to warm up, so in cold weather it won’t hurt to stand with the engine running for 10 minutes or more. In addition, this will also be a plus for the car engine.
Reminder!
The engine can only be started in position “P”
or
"N"
.
Moreover, preferably in the “P”
.
If your car does not start, check that the gearbox lever is set to one of these two positions.
So, you have warmed up the car, now you can start driving. Switch the gearbox lever from position "P"
into one of the driving positions and be sure to wait for the easy point
! The box takes some time to switch modes (usually about 1 second), and if you sharply press the gas before this point, it may cause damage.
Hand sanding
- Sanding can be done by hand or using a sanding machine. Hand sanding with a stone gives you more control over the process. The machine can be used at the initial stage, and the final leveling should be done with a block of sanding paper. Hard-to-reach areas are also sanded by hand.
- A long sanding block allows you to smooth out unevenness in the putty that cannot be felt with your hand. On a glossy surface, such irregularities may look like small “waves”. For uniform action, you need to press the bar with equal force along its entire length.
When using a whetstone, it is important to follow the grinding technique. You need to make passes crosswise, up and down, back and forth alternately, making the previous pass in the opposite direction, 5 times in one direction, 5 in the other. Never sand just one area as this will cause indentation. When working with a large surface, you need to use the largest sanding block possible. Thus, when grinding, the high points will be cut off, but the depressions will not be affected.
The sanding paper must be unworn and clean. It can be used as long as you feel that it is cutting the material. When the paper begins to simply slide easily across the surface, it needs to be cleaned or replaced.
- Change the abrasive grade consistently. Do not immediately change large to small. Use a medium abrasive first. Start with P60 or P80 and continue with P100-P120, P180-P220. By skipping the abrasive size by several steps, you complicate your work. It is possible to remove scratches left by P80 abrasive with P180, but it will be more difficult to do than with P120 and then P180. More sanding paper will be used and more time will be required.
- If you are sanding close to the edge of a panel, apply masking tape to the edge of the adjacent panel to protect it in case you accidentally hit it while sanding.
- On a repair area with a large area, you can start sanding the putty until it hardens completely. You need to wait until 5-10 minutes for the putty to harden but still be a little sticky and soft. This will make the processing process easier. You can check by scratching with your fingernail, which should leave a mark. Putty in this state can be processed with a special file or sanding paper with coarse abrasive P60-P80. With this method, you don’t need to press too hard, otherwise you won’t be able to remove deep scratches during subsequent sanding. This method reduces processing time and reduces the amount of dust. It is necessary to cut off the unevenness of the putty, but stop when it is still above the surface level so that the remainder can be sanded down when it hardens with a finer abrasive. Next, use sanding paper P100-P120, which you use to finish giving the putty the basic shape and remove rough scratches. Add putty if necessary. The next step is to change the sanding paper to P120-P150, and then P180-P220, which are already used to remove large scratches and prepare the surface for priming.
- When sanding with medium-graded abrasives, the putty needs to be completely hardened so that the sanding paper does not clog. At this stage, your task is to achieve a perfectly smooth surface by sanding the surface with light pressure, and not pressing hard.
- The very thin metal of modern cars can create additional problems during repairs. When you sand the repair area, some places may sag, and the putty there will wear off differently. This must be taken into account and the degree of pressure controlled when grinding.
- To level rounded surfaces, you can use special elastic bars.
Answers
Carrot asses 7 (34775) 2 11 26 2 g
I see that there will soon be another dead clutch. If you don’t know how and don’t have the finances for something cooler than a 20-year-old small-capacity bucket, don’t even try
gas + handbrake + stable degree of rotation and naturally the skill to be able to do this
Some people consider spinning to be pranks that young people do for fun. But it is not always the case. In drag racing, skidding heats up the tires. The slipping technique will vary depending on the type of transmission.
Tip #3: Wheel swing and angle
If you are stuck on the “automatic machine”, and you don’t have a shovel with you, and you don’t have time, try to get out yourself. Remember that your red mode is 2 minutes of slipping. You just need to look at your watch. Two minutes pass, then let the box cool for about 7-10 minutes.
So, first you need to put the box either on L or 1, that is, eliminate the possibility of the automatic transmission changing gears. If these modes are not there, what can you do, set it to D, just don’t give it high speeds.
First we try to do a “front swing”. We give gas, the car pushes forward and immediately moves back. We seize the moment, increase the amplitude, and leave.
Is it worth it? Then change the angle of rotation of the wheels. First - the extreme positions, maybe the car will catch the clutch off the track. Then simply make the track wider at the stuck place by turning. Front-wheel drive allows this. As soon as the acceleration area is reached, the car will leave the snowdrift.
SvarogovMSK › Blog › Answer: How to grind on site? How to burn rubber? How to do Burnout.
Good health. I don’t know why today I received such questions as “How to grind on site?”, “How to burn rubber?”, “How to do Burnout?”
etc. I don’t understand why they started asking me such questions, but I feel it won’t end with 4 guys and that’s why I decided to quickly answer everyone at once.
You can sand everything, even Zil 124 (Yes, it happened, I was about 13 years old and I was acting up, calm down.)
. Do you have a weak car? Do you feel sorry for the tires? It's simple. In winter on snow it is easy and without much harm to the tires, but there will be no smoke. In summer you can create a lot, a lot of smoke and the secret is simple. Take engine oil, pour it onto the asphalt, add water so that there is a puddle and just stand on the drive wheels and grind it, there will be a lot of smoke from the oil, but don’t forget that then you need to wash the tires if you drive on them, so that you will The road didn't get carried away and didn't get into an accident. Try to use bald tires on light rims for the drive wheels; you can even buy a used one and polish it.
Next and the most important thing is how to do it. The easiest way is on a front-wheel drive car with manual transmission.
Stand on snow, a puddle, or the consistency mentioned above, lift the clutch and as the gas begins to move off, the handbrake and it will begin to grind. Some people simply drive their drive wheels up to the curb and grind against it.
Automatic front wheel drive
The same thing, you just need to set the L3 mode and turn off the traction control.
With rear wheel drive on mechanics
it’s more difficult, here you need to have the wheels spinning and you press the brakes, and since the rear brakes will grab, it’s difficult to do this on a weak car, the same check, you need to make a system that will block the front wheels, but not the rear ones, also without the system will cause the brakes to overheat, and the old ones also have drum brakes, which is generally crap.
You can read about this in other articles (Not mine, I won’t describe this.)
.
For powerful cars this is overheating of the brakes, but it is still real. You need to depress the clutch with your left, press the brake with your right heel, and press the gas with your toe. By the way, in the new Dodge Challenger Hellcat
there is a button that blocks the front brakes and you only need to press the gas. The system is not difficult to create.
Automatic, rear wheel drive
, this is the most difficult thing, unless of course you have a system like the
Dodge Challenger Hellcat
. There is a very high probability that your box will simply collapse, so I won’t advise you and you need to run.
There is also special rubber that has the color of smoke, but it is expensive.
And most importantly, there are advisers who tell you to unscrew the brake hoses, but they apparently don’t know that most cars have a parallel system, and when you unscrew one hose, it is responsible for the front left and rear right brakes, and the other is for the front right and rear left brake. So let’s say it’s X-shaped, so that if 1 hose breaks, for example, then you will have 2 wheels brake on opposite sides, and not pull you to the side.
In general, I advise you not to burn rubber randomly (Unless it’s garbage, which you don’t mind)
, be careful, follow traffic rules and do it wisely so that no one gets hurt. I hope there will be no more questions.
Source
Why skidding is not recommended
It’s unlikely that anyone would dare to say that slipping is beneficial for a car. In real life it's just the opposite. Thus, it often significantly increases the likelihood of partial or complete breakdown of the machine, up to the failure of the engine or other important unit. If we classify the negative consequences of slipping, we should note several of the most common points that result from car execution:
- Various types of mechanical damage affecting bumpers, sills, wheel arches and other parts, not to mention deformation of the bottom and plastic engine protection.
- Major functional damage, such as transmission breakdowns, the upgrade of which invariably costs a pretty penny. The likelihood of its breakdown increases significantly if the oil in the transmission has not been changed for a long time, and the car’s mileage exceeds 50 thousand kilometers. The saddest thing is that an unlucky driver can do this literally in a matter of minutes if he thoughtlessly and powerfully accelerates “to the limit,” naively hoping to escape from the towing site due to this.
Therefore, experts almost unanimously consider towing to be an extremely undesirable phenomenon for any car and strongly recommend avoiding it at all costs, regardless of what kind of gearbox the car has.
Tip #2: Shovel, Floor Mats, Flat Tires
Alas, friends, but the main weapon of the owner of a car with an automatic transmission is a shovel. It’s better to put a full-sized shovel in the trunk in advance in the fall so that it takes up less space; the handle can be shortened a little. But a sapper shop will also do. This is the only and completely safe way. First you need to remove the parapet in front of the bumper, clear the track, and then try to drive out.
Don't have a shovel? Then we trample the ruts with boots and hands, remove excess snow from under the wheels, and clear the way, at least for acceleration. Feeling embarrassed and cold? But repairing a burnt box will be an even bigger nuisance. Wheel mats, tires deflated to 1 atmosphere and other standard means also help to safely drive out of a snowdrift with an automatic transmission.
Manual labor is the key to safety. But if you are too lazy to work and don’t have a tool, try method No. 2 at your own risk.