When to replace
All transmission units (manual transmission, transfer case, both axles) are serviced simultaneously.
The first time, according to the service book, this must be done after driving 45 thousand kilometers, the next replacement of transmission fluids is carried out when the speedometer shows an indicator of 105 thousand kilometers, then every 60 thousand km. mileage To avoid them for as long as possible (driving 300,000 km on a Niva with regular scheduled maintenance is not a problem), it is recommended to change the oil in Niva axles 2121, 21213, 21214 and other modifications every 50 - 60 thousand kilometers, and when operating the car mainly in difficult conditions - after 30 - 40 thousand.
Which oil to choose
The Chevrolet Niva SUV is a classic all-wheel drive vehicle. Choosing the right oil for the Niva transfer case and axles is a guarantee of long and flawless operation of these transmission mechanisms. Lubricating fluid reduces friction and protects vehicle components from wear, and also increases the service life of the vehicle itself.
For transfer case
The main nuance in the question of which oil is best to use for the Chevrolet Niva transfer case is not so much the manufacturer as the prevention of mixing different compounds.
Based on viscosity characteristics, it is recommended to use the following gear oils: 78W-90, 80W-85, 80W-90.
The oil specification for the Chevrolet Niva transfer case is API GL-4. Purchasing gear oil will not require significant expenses, since the filling volumes are small: about 0.75 - 0.8 liters. When refueling a Chevrolet Niva, visually monitor how much oil is used in the transfer case. It is necessary to monitor the volume so that the next oil change will no longer cause difficulties.
For bridges
Choosing the right oil is one of the key conditions for reliable and fully functional drive of the rear and front axles of the Chevrolet Niva during everyday driving.
Niva 2131 how to fill oil into the rear axle housing video
Home » Articles » 21214 Niva oil change in transfer case
For any vehicle, the importance of timely replacement of lubricants cannot be overestimated. Oils used in components and assemblies subject to friction at high speeds significantly reduce their overheating and wear, helping to extend their service life.
Among such components, one cannot fail to note the transfer case, which is equipped with all-wheel drive vehicles.
note
Both old Niva cars and models under the Chevrolet brand, produced since 2002, need no introduction - these are one of the most popular all-wheel drive vehicles in our country, which have earned the love of motorists for their unpretentiousness, ease of maintenance and low cost.
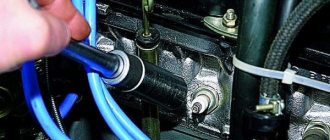
What is especially pleasing is that the vast majority of maintenance operations on a domestic SUV can be performed independently, without turning to the help of specialists or a car service center. In particular, this also applies to changing the oil in the Niva transfer case - a procedure that does not require special professional skills or special tools.
Also interesting: What to choose: Chevrolet Niva or UAZ Patriot
The oil in the Niva transfer case should be checked every 10 thousand km.
07.12.2017
The Niva 21214 car is distinguished by its increased cross-country ability on roads. The car has an engine that has a volume of 1.7 liters, which complies with Euro-4 standards.
The transmission system includes a transfer case with a crankcase ventilation system. All components on the VAZ 21214, just like on the VAZ 21213, are characterized by a long service life.
It is important to take proper care of the automotive system and select high-quality oil for the Niva.
The Niva SUV (VAZ 2121), which has all-wheel drive and is equipped with a manual transmission, is capable of producing 75 horsepower.
HomeVAZ 2110 Niva 2131 how to fill oil into the rear axle housing video
Filling volumes for a VAZ 21214 car
It’s one thing to buy a car, and another to know and understand what to do with it: what to protect it from, when to “feed” it, how to operate it. No matter what kind of car you own, sooner or later you will need to refuel it. Today we will talk about the filling volumes of the VAZ 21214 and what to fill where.
First of all, let's talk about the fuel tank. Its volume in the VAZ 21214 is 42 liters (including reserve). Fill with gasoline with an octane rating of 91 to 93.
The fuel supply system is necessary to power the car engine, as well as its cleaning and storage.
The volume of the cooling system is 10.7 liters, which also includes the interior heating system. Fill in coolant whose freezing point is not higher than minus 40°C.
Cooling system - devices that provide supply of cooling medium to heated engine parts and removal of excess heat, i.e. maintaining the engine within the required thermal limits.
Engine lubrication system - 3.75 liters. It is necessary to select a specific oil, depending on the ambient temperature.
-20°С +40°С SAE 15W-40
-25°С +45°С SAE 10W-40
-30°С +45°С SAE 5W-40
-25°С +35°С SAE 10W-30
-30°С +35°С SAE 5W-30
The main task of the lubrication system is to reduce friction of mating parts. It also provides cooling of engine parts, protection against corrosion, removal of wear products and carbon deposits.
The filling volume of the gearbox housing is 1.35 liters, the transfer case housing is 0.75 liters, and the front axle housing is 1.15 liters. and rear axle housing 1.3 l. To fill these units, gear oils with a quality level corresponding to API GL-5 and a viscosity of 75W-90 are suitable.
Choosing the right gear oil
All Niva transmission components are filled with the same mineral oil at the factory. During maintenance, they usually fill in the same oil, and not always of good quality. This fluid is really good, but only for the break-in period of a new car. When driving 10 - 15 thousand km.
It is recommended to replace mineral water with semi-synthetic water, which has better performance characteristics. Synthetic lubricants for Niva axles are not the best choice, since in hot weather their viscosity is so low that the chances of oil seal leakage increase. In severe frosts, the mineral water thickens so much that both changing gears and moving the car becomes very difficult until it warms up.
The viscosity of transmission oil for Niva 2121, 21213, 21214 is 75W90. You can fill in any mineral or semi-synthetic transmission fluid with the appropriate characteristics. At the same time, 1.3 liters of oil is poured into the rear axle of the Niva of all modifications, and 1.15 liters into the front axle. The oil volume in the Niva's rear axle is slightly larger, since this is, by definition, the main drive axle, and the load on it is generally slightly higher.
And also interesting: Do-it-yourself Niva suspension lift. How to lift the front and rear suspension of a Niva car?
Engine
Changing the lubricant in the engine is an elementary process that is carried out according to the regulations either every 10 thousand kilometers, or every two years - depending on what comes first in your case.
Useful tips for the amateur
So:
- Lubricant replacement should be done in a timely manner; the engine life before major overhaul directly depends on this.
- The replacement procedure is best performed on a warm engine.
- It is recommended to fill in the grease of the same brand that was poured into the engine during the previous maintenance.
- If you decide to change the brand of oil, or you don’t know (forgot) which brand was used during the last change, you need to flush the entire engine lubrication system with flushing oil or lubricant of the brand that you will continue to use
- To flush the engine, drain the old grease as described below and fill in the flushing fluid to the bottom mark of the level indicator dipstick
- Then start the engine for 10 minutes, after which we drain the flushing lubricant
Attention: this procedure (rinsing) is performed with the old filter!
Work tool
This:
- Funnel
- A key set to “17” or a hexagon set to “12” (depending on which plug is installed in your pan)
- New oil filter
- Clean rags
- Special filter remover (many people do without it)
- A canister of new oil with a volume of at least four liters
- The empty waste container is also more than four liters
- Overpass or inspection hole
To replace the lubricant in the engine, the instructions prescribe the following actions:
- We drive the car into a pit or overpass
- Be sure to stop the car with the parking brake
- You can additionally place shoes or boards under the wheels (to prevent the car from rolling away)
- Warm up the car engine to at least 50-60 degrees so that the lubricant is more fluid
- Place the drain container and unscrew the plug
Unscrew the plug using a hexagon to “12”
- We drain the waste into a prepared empty container.
Draining the waste
- We continue to drain the grease for about ten minutes (so that there is as much glass as possible)
- Screw the drain plug back
- If you are planning to flush the engine, see the steps described above.
Attention: there is about 150-200 grams of lubricant in the filter housing, unscrew it and place a container for processing
- Use a puller or other available means (screwdriver, or just your hands) to unscrew the oil filter
Unscrew and remove the filter
- When choosing motor oil, pay attention to its viscosity
- The manufacturer regulates the viscosity either 5w-30 or 5w-40
- In addition, mineral or semi-synthetic oil is used (when using synthetic oil, in VAZ engines it seeps through the seals and flows out little by little)
- Be sure to lubricate the sealing gasket of our new filter with fresh oil, and also fill it into the filter to about half the volume (which will prevent engine parts from rotating dry in the first seconds of operation)
Lubricate the filter gasket and fill it with grease to half the volume.
- Screw the filter onto the fitting, tighten it 3/4 of a turn by hand from the moment the gasket touches the cylinder block
- Remove the cap from the oil filler neck
- To control the amount of oil being poured, take out the dipstick - level indicator
- A sufficient level of lubricant on the dipstick is located in the middle, between “min” and “max”
Lubricant level marks on the dipstick
- We start the engine, wait for the red lubricant pressure lamp to go out on the dashboard, and stop the engine
- Check the oil level again with the dipstick and add if necessary.
That's all, the engine oil change is complete, this unit requires the most frequent replacement, in gearboxes and axles the replacement is performed less frequently, but do not forget to check its level in all units, otherwise the cost of the issue will be their repair and replacement.
VAZ 21213: oil change in all units
Filling with oil
Many car owners are faced with the task of having to perform maintenance on their car.
At the same time, some perform the maintenance with their own hands and enjoy the repairs, and at the same time save their money, some prefer to spend money (so as not to get dirty and mess around) and take the car to a car service center, blindly trusting their iron horse to strangers.
And, by the way, changing the oil of the VAZ 21213, as in other models, is a responsible process and the service life of all components of the car directly depends on its correct and timely implementation! The replacement process is simply elementary, it doesn’t take much time, and anyone can do it themselves.
Chevrolet Niva gearbox breather repair instructions
Reasoning of a car owner named Vintsas: Low gasoline consumption - 6.5 - 7 liters per 100 km highway (at a speed of 100 - 120 km/h, after 130 km/h consumption increases to 8 l/100 km) Build quality and interior ergonomics - everything is convenient, at hand, nothing breaks unless you break it on purpose. Trunk capacity (not bad for a sedan) Confident dynamics for both the highway and the city. Accelerated up to 170 km/h on a toll highway - there was still room for more Clear suspension operation and excellent handling Excellent gearbox - after the Chevrolet Lacetti you understand that the Passat is the standard High ground clearance - the SUV didn’t pretend to be, but it storms any curbs, it walks confidently on an unclean road , you are not afraid to go to the side of the snowy road. The bottom touched only a couple of times along the deep rut of a country road, without consequences for the car.
Category: Repair yourself
Vehicle characteristics: The vehicle dimensions are as follows: body length - 3936, width - 1100, height - 1233 mm. The wheelbase is 2398 mm. Ground clearance 188 mm. The car is equipped with a hybrid power unit. The 4-cylinder engine is equipped with a system that provides engine power output. There are 4 valves per cylinder. The diameter of one cylinder is 76 mm, the piston stroke is 77 mm. The engine crankshaft accelerates to 2000 rpm. Maximum torque is maintained up to 3000 rpm.
Posted by admin: at the request of Pafnutiy
Views: 2398
Original name:
Release date: 10/19/2022
Duration: 5:22
Quality: WP
Laughter in the topic: The flight attendant turns to the Russian: - Your neighbor is wondering if you took his watch. Russian: - Yes, why the hell do I need it! The flight attendant translates: - Yes, he needs it for his penis. The American nods understandingly: - Ahhh, well then let him wear it!!!
Sequence of actions for changing the oil
Draining the old oil and filling in new oil in the front and rear axles of the Niva is a generally similar procedure, but differences still exist due to the design features of the domestic SUV. Changing the oil in the Niva's front axle is carried out simultaneously with changing the fluid in the gearbox; in any case, you will not need other tools and materials, including:
- a special technical syringe (or a funnel of suitable size and geometry);
- hex wrench 12;
- 17 mm spanner (working with a socket wrench will be extremely inconvenient and ineffective);
- rags, container for draining waste.
The drain hole can be found on the lower plane of the front axle, the filler hole is located on its side wall.
The procedure for changing the oil in the Niva's front gearbox:
- Place a container prepared in advance under the drain hole.
- When the filler plug is unscrewed, the draining process occurs noticeably faster, so first unscrew it.
- Unscrew the drain plug with a hexagon.
- We wait until the old lubricant flows out (this takes an average of 15 minutes).
- We screw the drain plug into place, having previously cleaned it and the seat from dirt and old oil.
- Fill in fresh transmission fluid in a volume equal to the amount of waste (this is a little more than a liter).
- We tighten the filler plug.
Also interesting: Transmission oil for Chevrolet Niva: which is better and how to replace it?
To change the oil in the rear axle of a Niva, you will need the same tool, since both the drain and filler plugs are the same. However, the procedure itself is practically no different, with the exception of the location of the gearboxes:
- place a suitable container under the drain hole;
- use a hexagon to unscrew the drain plug located at the bottom of the rear gearbox;
- drain the old lubricant (this will take a total of 10 - 15 minutes);
- thoroughly clean the plug itself and the area around the drain hole with a rag;
- we screw the plug into its regular place, but without fanaticism;
- Unscrew the filler plug located in the middle of the rear axle using a 12mm wrench;
- fill in fresh lubricant in a volume equal to the collected one, use for this either a technical syringe or a funnel with a connected hose;
- if the liquid does not reach the lower edge of the filler hole, add it until it begins to spill;
- clean the filler plug together with the seat from drips and dirt, tighten the plug;
- Usually, when changing the oil in the rear gearbox, they unscrew and clean the breather, put it in place, replacing the gasket if necessary.
As you can see, pouring new oil into both the front and rear axles of the Niva is a simple procedure. And, as already noted, it is carried out together with the replacement of lubricant in the gearbox and transfer case during TO-4, TO-8 and so on.
Read news about the new Niva
- Changing the oil in the Niva Chevrolet transfer case: which transmission oil is better to pour into the box and axles, volume in the gearbox, do-it-yourself replacement
- Front axle. VAZ 21213, 21214 (Niva)
- Replacing the drive gear oil seal of the front axle VAZ 2121 Niva 2131
- Quantity of oils and fuel liquids VAZ 4×4 2121 Niva
- How to remove a brake drum on a Chevrolet Niva
- Hard or soft brake pedal. What is the reason and what to do
- How to bleed the brakes of a Niva Chevrolet
- Rear disc brakes
To understand the differences in transmission fluids, watch the video:
Is it worth changing something that lasts a lifetime? The answer to this question disappears by itself when in the backyard of any service station you see a bunch of dead automatic and manual transmissions removed from cars. It becomes clear that gearboxes are now being made disposable. It's easier to replace the whole thing than to try to repair it. Based on this, it follows that the box must be cared for and cherished, and, most importantly, pampered with good oil. And now we will try to find the right oil for Niva 21214.
Difficult choice
Walking into a car shop, your eyes widen at the variety. It’s a pity that there are very few domestic transmission synthetics. Imports all around. Recently, manufacturers began to specify both GL-4/5 and GL-4+ instead of GL-4. But more on that later.
GL-4, according to the API classification, is intended for gearboxes of front-wheel drive VAZ cars;
GL-5 – for all other models of the domestic automobile industry;
GL-4/5 is a universal oil.
What we pay attention to
It is much easier for oil to work in a box than in a motor. But there are enough problems here: it is necessary to simultaneously ensure lubrication of the gears and form a thin film, which protects against wear and scuffing
Therefore, it is necessary to pay attention to the characteristics of the gear oil: set of additives, viscosity and composition
Viscosity
To determine oil viscosity, the SAE J306 classification, which was developed in the USA, is used. The indexing system and classification standards are presented in the following table.
Viscosity classes that contain the letter “W” refer to seasonal oils. Such oils can be used in the cold season. If the letter is missing - for the warm season.
However, seasonal oils are not the most popular, because... A seasonal oil change saves you from a product that has not yet exhausted its service life. Therefore, thickened oils (all-season) are widely used. They combine the properties of two types of oil - both winter and summer. The index of such a product consists of two designations written with a hyphen.
Performance properties
The classification of transmission oils according to performance properties, developed by the American API Institute, has become widespread. The five categories that the system includes show the quality level and applicability of the product.
Let's sum it up
After analyzing all the factors mentioned above, the leader emerged immediately. It was MOTYL GEAR 300. It is this oil that has the best performance in terms of scuffing index, welding load and critical load.
Changing the lubricant in the transmission and engine is a fairly simple procedure if you do it yourself. But if you don’t want to waste time on replacing it yourself, then you can bring the car to a service station. Any car enthusiast who buys a Niva before the winter season should take care of timely replacement. Currently, choosing a lubricant is quite a difficult task. Many subclasses of oils create special viscosity for winter and summer. Oil changes are carried out in the transfer case, gearbox, engine and axles. This article will help you choose the most optimal lubricant for the NIVA 21213, 21214 and 2131 vases.
Removal
If you do the work yourself, then you need to do the following:
- Removing the wheels
- There is oil in the crankcase that needs to be drained, disconnect the driveshaft from the front axle gearbox
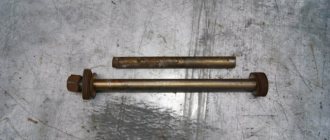
- We unscrew the nut and remove the bolt that secures the left gearbox bearing cover to the suspension cross member.
- We remove the existing drive from the wheel and unscrew the nuts that secure the bearing cap
- We take the steering knuckle and turn it, pulling the drive from which we disconnect the gearbox and then remove it.
We carry out the installation in the reverse order, after which we fill the lubricating fluid to the required level.