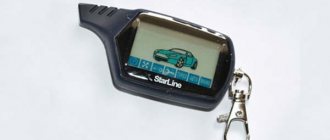
1. Where are the sensors located?
Starline A93 shock and tilt sensors are located in the antenna module. It receives and transmits the signal. The module is installed on the windshield away from the alarm control units. The sensitivity of devices is also affected by the location of the antenna. Therefore, to change the parameter, you can try moving the module across the windshield.
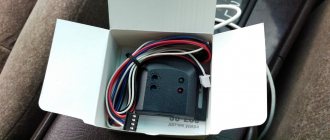
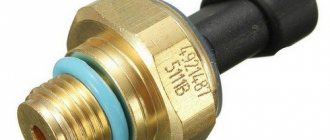
Antenna Starline A93 disassembled
What is alarm sensitivity?
This means adjusting the sensitivity of alarm sensors. These include:
- Shock sensor. It is the main and only one in most systems. It perceives vibrations that spread throughout the body upon contact and impact. Its sensitivity is assessed by the strength of perceived vibrations.
- Motion sensor. It evaluates movement in space and will sound an alarm if your car starts to move. Adjustable depending on the amount of movement.
- Volume sensor. Measures the volume of a car's interior . If it changes to a larger (broken window) or smaller (penetration into the interior) side, it will signal an alarm. The percentage of change at which the sensor generates a signal is adjusted.
The shock recognition sensor is the most common in car security systems. Its correct configuration allows car alarms with one sensor to work with sufficient efficiency. Therefore, adjusting the sensitivity level will be discussed using his example.
2. Setting the sensitivity of the shock sensor
The minimum sensitivity of the Starline A93 shock sensor corresponds to the value 01, the maximum - 14. According to the factory settings, the parameter is set to 10.
The shock sensor has 2 levels: warning and alarm. They are configured sequentially. For each, you need to set a specific sensitivity from 01 to 14. Please note that the value for the alarm level cannot be higher than the warning level.
What to do to configure.
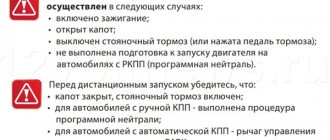
1. Having turned off the ignition and the security mode, press button 3 sequentially, i.e. first for a long time (until the sound signal), then briefly.
2. Set the sensitivity value: button 2 increases the value, button 3 decreases.
3. 3. Repeatedly press key 3.
4. Set the value for the alarm level, again using keys 2 and 3.
5. To exit the setup mode, press button 3 in succession again. You can simply wait, and the system will exit automatically after 15 seconds of inactivity.
2.1. Shock sensor adjustment video
Settings options
The security system has a multi-level scale, divided into several divisions. There can be up to ten of them. Zero in our case means turning off the sensor, 10 means setting it to the maximum sensitivity level. At the factory it is usually set at the golden mean: 4–5 points.
You can adjust the function as you wish. Just don’t strive for “ten”, otherwise the siren will be triggered even by raindrops and a cat walking nearby.
Be prepared for the fact that the settings you give will be valid for 10 operations. In the future, the system will return to the original settings, and the adjustment will have to be made again.
Change the sensitivity of the sensors taking into account:
- vehicle weight without loading;
- method of mounting the alarm unit;
- features of the situation at the site of long-term parking.
If the siren sounds too often, reduce the level of shock sensor perception. If the alarm does not go off when you push the wheel with your foot, then you will have to add numbers to the scale.
@ilifia-club.ru
3. How to set up the tilt sensor
The Starline A93 tilt sensor has the same sensitivity limits: minimum - 01, maximum - 14. According to factory parameters, it is set to level 10.
Setting up the Starline A93 tilt sensor follows the same principle. The only difference is in some of the buttons, and also in the fact that there are no two levels. Setup instructions:
- With the ignition off and security mode, press button 4 successively.
- By pressing keys 2 and 3, set the desired sensitivity value.
- Exit the mode by successively pressing key 4 again. Or simply do nothing for 15 seconds, and the exit will occur on its own.
3.1. Tilt sensor adjustment video
How to increase the range?
In urban environments, there are many obstacles to signal transmission between the key fob and the alarm unit. These include high-rise buildings, other cars, and a large number of other radio waves. Sometimes there is so much transmission interference that the communication range becomes unsatisfactory.
You can increase the communication range between the car alarm and the remote control in the following ways:
Check that the antenna is installed correctly. This greatly affects the range of reception and sending of signals. Here are some rules for correct installation:
- Do not place it on metal parts or close to them. This material prevents the passage of radio waves and distorts them;
- It is not recommended to place it under or inside the instrument panel. A large amount of electrical wiring in it also interferes with the signal.
The best place for the antenna is the windshield. However, there are nuances here too:
- it cannot be placed in the silk-screen printing (darkening) zone, as it contains metal particles;
- if the glass has heating filaments, then the antenna rod should be oriented parallel to the horizon. If it doesn’t have it, then the stem is down;
- If the car is left-hand drive, it would be best to place it in the upper right corner of the windshield. For a right-hand drive car - in the upper left.
Extending the antenna of the control unit or alarm key fob will only help if the alarm does not have feedback.
The most effective method of increasing the communication range of the alarm system is to install a GSM module. This type of communication between the key fob and the unit uses cellular communications and has an almost unlimited range
There is one “folk” method of increasing the signal coverage area. If you need to turn on autostart while in your apartment, but the signal does not reach the car in the yard, then there is one way:
Reference! Attach the key fob with the antenna to the handle of the plastic glass unit. It, in turn, will act as an amplifier and the signal may have enough power to reach the car.
4. How to temporarily disable the shock sensor
To disable the Starline A93 shock sensor, you must first deactivate the warning level, and then the alarm level. Everything is done with the security mode turned off.
Instructions for disabling and enabling the sensor.
1. Double-click button 1, i.e. briefly press the key 2 times. This step will disable the warning level.
2 Repeat steps. The alarm level of the sensor will be deactivated.
3. If you need to turn on the sensor, press key 1 again 2 times.
4.1. Video of turning off and turning on the shock sensor A93
How to turn down the volume or turn off the sound completely?
Alarm sound is one of the main functions. After all, it is he who, when attempting to steal or steal property from a car, will inform you about it, attract the attention of others and frighten the criminal. Think seriously before turning it off.
If the sound bothers you when disarming and arming, then use the “silent” mode. On each model of the security system key fob, it is activated differently, but basically, you need to hold down the key with the loudspeaker crossed out, and then the key to open or close the doors (depending on what you need). In this case, the car will signal you that the command has been completed only by flashing the turn signals. The message will also be displayed on the key fob.
To completely turn off the sound on a car alarm, you can use the following methods:
- disconnecting the wires from the sound detector is the easiest method;
- key fob commands (if provided);
- through specialized equipment by connecting to the security system software.
You can turn off the sound of the car alarm remote control or reduce its volume by going to its settings.
Detailed instructions can be found in the manufacturer's instructions. If you need to turn off the sound of the standard security system, then you can turn it off in two ways:
- in the settings of the on-board computer (if the system allows it);
- from an authorized dealer using specialized diagnostic equipment.
Turning down the volume of signals is no longer such an easy task. The sound emitter has certain characteristics and cannot be louder or quieter. The issue can be solved in one single way - by installing a lower power speaker.
Attention! To reduce the volume, we do not recommend covering the sound detector with rags, wrapping it with tape, etc. Finding such things in the engine compartment increases the chance of a fire! They can also get stuck in moving parts of the car and lead to dire consequences.
5. Temporarily disabling the tilt sensor
How to turn off the Starline A93 tilt sensor - press key 3 twice. To turn it on, just do the same.
5.1. Video of turning off and turning on the A93 tilt sensor
5.2. What is dh off, dh on on the key fob
When working with a tilt sensor, it will be useful to know what dh off and dh on mean on Starline A93. The inscription dh off means a temporary shutdown, and dh on means the sensor is turned on. The first inscription is displayed on the key fob screen when you press button 3 twice for the first time, the second, respectively, when you press the same button for the second time.
6. Purpose of the button on the antenna
The Starline A93 antenna module, like other alarm systems of this brand, is equipped with one button that serves as a service button. With its help you can:
- enter your personal code;
- perform a hidden activation of the anti-robbery mode;
- write key fobs into the alarm memory;
- activate security mode without a key fob;
- enable automatic engine start based on voltage.
We also advise you to study in more detail the Starline A93 service mode, which is necessary when contacting service centers for repairs and maintenance.
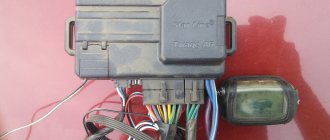
Antenna Starline A93
Car alarm installation process
Setting up and installing a car alarm from StarLine does not require calling special technicians. Using the instructions supplied with the equipment, the car owner himself will be able, after properly reading its text, to install an alarm system on the car.
- First, you need to choose the location of the future alarm, namely the place where the control unit itself will be located, as well as the sensors. Moreover, it is important to understand that you need to remove the negative terminal from the surface of the battery, otherwise a short circuit may occur.
- Secondly, you need to prepare the necessary tools. These are a Phillips and blade screwdriver, a scalpel, side cutters (will help remove linings inside the cabin), a multimeter, as well as casings and a head.
- Thirdly, using tools you need to install the car alarm control unit in a selected secret and inconspicuous place. Afterwards, the device is powered from the car’s network and the alarm is connected to the central locking of the vehicle.
During the connection process, it is necessary to use the electrical circuit of a specific machine model. Next, you need to connect the cables that detect alarming moments, as well as power the touch sensors and install limit switches.
The final stage is installing the siren, away from potential exposure to water, installing the shock sensor (preferably closer to the central part of the car) and installing the Valet service button in the same place as the control unit.
8. How triggered sensors are displayed on the key fob
When the vehicle experiences an impact that causes the shock or tilt sensor to be activated, the corresponding icons are displayed on the key fob display:
- dy – 1 and 3 short sound signals, 6 size flashes. The shock sensor warning level has activated.
- dy – 1 and 30 with sound signals and size flashes. The alarm level of the shock sensor has triggered.
- Indication in the form of three arrows, 30 s of sound and light signals. Indicates that the tilt sensor is activated.
Displaying triggered shock and tilt sensors on Starline A93
In general, sensors are configured individually. Your task is to try to set a specific value and test it in practice. To do this, having set this or that sensitivity, activate the security mode, wait 1-2 minutes. and check. If you are not satisfied, we reduce or increase the value. As a result, you will be able to configure the Starline A93 shock sensor so that the sensitivity indicator is suitable for your car.
Semi-automatic setup
Such adjustment is not available for all models of signaling devices. The idea is to put the sensor into memory mode. Next, blows are made on the car body with different intensities.
The microprocessor stores the amplitude and force of the blows into memory. In the future, he uses the acquired knowledge to recognize impacts.
Attention! Impact on different parts of the car with the same force will be perceived by the impact sensor differently.
The sensor may remember a hit to the hood, but ignore one to the wheel. There may also be confusion with the “alertness” of the gadget and the need to turn on the siren.