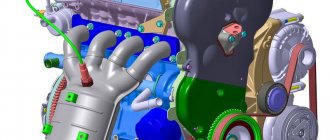
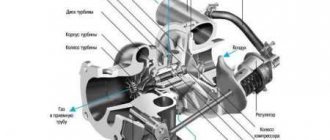
Features of the design of the connecting rod and piston group of the 2101 engine
The main dimensions of the piston, connecting rod, piston pin and piston rings.
Piston
The piston is made of aluminum alloy and coated with a layer of tin to improve run-in. The piston skirt is oval in cross section and conical in height. Therefore, it is necessary to measure the piston diameter only in a plane perpendicular to the piston pin and at a distance of 52.4 mm from the piston bottom.
The hole for the piston pin is shifted from the axis of symmetry by 2 mm to the right side of the engine. Therefore, for proper installation of the piston into the cylinder, there is a “P” mark near the hole for the piston pin, which should be facing towards the front of the engine.
Since 1986, repair size pistons for all engine models have been manufactured with an outer diameter increased by 0.4 and 0.8 mm. Until 1986, pistons of the following repair sizes were produced: for engines 2101 - with an increase of 0.2, 0.4 and 0.6 mm; for 21011 - with an increase of 0.4 and 0.7 mm.
Piston rings
The piston rings are made of cast iron. The outer surface of the upper compression ring is chrome plated and has a barrel shape. The lower compression ring is of the scraper type (with a groove along the outer surface), phosphated. The oil scraper ring has slots for oil removed from the cylinder and an internal coil spring (expander).
Piston pin
The piston pin is steel, tubular in cross-section, pressed into the upper head of the connecting rod and rotates freely in the piston bosses.
connecting rod
The connecting rod is steel, forged, with a split lower head in which the connecting rod bearing shells are installed. The connecting rod is processed together with the cover, so during assembly the numbers on the connecting rod and the cover must be the same.
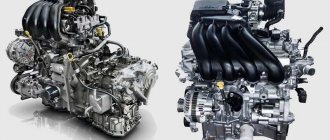
Passenger cars are equipped with different types of engines; power units may differ in volume, power, and design.
If oil consumption in an engine increases, the most common reason for this is worn or broken piston rings; replacing them is quite labor-intensive work, and also requires certain plumbing skills.
Engine piston rings
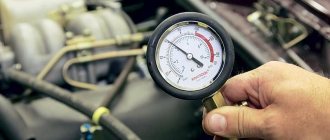
In an internal combustion engine (ICE), piston rings (PR) serve as a seal between the cylinder walls (liners) and the piston, due to which compression is created in the cylinders. If you forget to put the PC into the engine during assembly, the engine will not start, since the necessary compression of the working air-fuel mixture will not be ensured.
In passenger cars, three rings are standardly installed on each piston - two compression rings and one oil scraper ring, and oil scraper rings can be stacked, that is, consist of several elements. Compression piston rings (CPRs) are used to create compression in the cylinders and are always made of high-strength cast iron with various additives. The upper CPC has the greatest strength, since it operates in the most severe temperature conditions and experiences maximum loads.
Engine oil piston rings (OPRs) are needed to drain oil from the cylinder walls; if the rings do not perform their function, the engine will consume oil. MPKs can be either cast iron or steel, and cast iron PCs are almost always made in one piece, but steel oil scraper rings can only be assembled (composite). Steel MPC for one cylinder consists of:
- two spring steel rings;
- axial expander;
- radial expander.
Thermal clearance of piston rings
PCs are spring discs with one cut - when installed on the piston, they expand, and in the sleeve they are pressed tightly against its walls. In order to achieve maximum compression of the working mixture, the cylinder walls must be as smooth as possible (without defects), and the shape of the internal cavity must be perfectly round. On the piston, the PCs are placed in special grooves, moreover, they are not seated tightly, and on a cold piston they move freely in the grooves.
Piston rings have thermal clearances:
The clearances must be certain; if they are larger or smaller than the required value, the piston group will quickly fail. One should take into account the fact that when heated, the metal expands, and if the thermal gap of the PC is too small, the piston group will begin to overheat. With large gaps, tightness is not ensured and power losses occur.
For passenger cars, as a rule, the following clearances are established:
- between the grooves and the PDA - from 0.02 to 0.08 mm (for the upper ring the gap should be slightly larger);
- between grooves and MPC – from 0.05 to 0.06 mm;
- at the junction - from 0.25 to 0.5 mm.
As wear occurs, the gaps in the PC increase, and they should not exceed:
- between the ring and the groove – 0.15 mm;
- at the junction – 1.0 mm.
Tuning
Recently, tuning connecting rods have appeared; their advantage over conventional connecting rods is that they are lighter. Tuning connecting rods are made from light but strong metal alloys, and since the weight of the connecting rods plays a big role for the engine, the lighter the connecting rods, the faster the engine. For example, take a heavy stone and quickly lift it up and down, and then a light one, and you will understand that it is faster to raise and lower a light stone than a heavy one, and for the engine it is easier for the crankshaft to raise and lower light connecting rods.
Engines are boosted in different ways, they are equipped with turbocharging, special gas installations, etc. But this leads to overloading of engine parts, and such engines usually quickly fail. And if you put lightweight connecting rods in the engine, then, on the contrary, its resource increases, plus agility and power are added. For me, it’s much more interesting to drive a standard engine, but it’s easy to overtake new cars of the same class, while other drivers think that the car has a more powerful engine.
Tuning connecting rods can be easily bought online, but it’s true that they are more expensive than standard ones, but if you want to make your engine more playful, install tuning connecting rods, or lighten the standard ones by removing excess metal and adjusting them by weight, but don’t overdo it.
VAZ piston rings
The Volzhsky Automobile Plant produces engines for front-wheel drive and rear-wheel drive cars; piston rings for VAZ engines were originally supplied by the Michurinsky plant. The Michurins produced a lot of defects in their products, and since 1986, their own production was established in Tolyatti. Currently, there are many different manufacturers that produce PCs for VAZ engines, in particular, these are:
- AVTOVAZ (Tolyatti);
- STK (Samara);
- GOETZE (Germany);
- MAHLE (Germany);
- NPR EUROPE (formerly SM, Japan).
Signs and causes of wear (breakage) of piston rings
On VAZ cars, the engine wears out during operation, and the PCs also fail. Rings can:
- break into two or more parts;
- wear out in thickness;
- have general wear and tear.
Parts often break down due to overheating of the internal combustion engine; in this case, compression in the cylinders decreases and the engine loses power. Signs of a faulty PC are:
- bluish smoke from the muffler pipe, especially often it appears after a long period of idling when the gas pedal is sharply pressed;
- increased engine oil consumption;
- drop in power, the motor stops pulling;
- coking of spark plugs.
Replacing piston rings
On VAZ cars, as well as on all other models of passenger cars, it is advisable to change only the piston rings only if:
- there is no exhaust in the cylinders;
- there are no signs of damage to their inner surface.
If the liners are significantly worn, they need to be bored, and if the last size was already used before, the cylinder block needs to be relined. You can replace the PC on any VAZ engine without removing the internal combustion engine; this will require removing the cylinder head and oil sump. PCs are replaced if the gap at the joints does not exceed 1 mm.
For example, let's consider replacing piston rings on a VAZ-2114 car with an 8-valve internal combustion engine; such work must be carried out on a pit or a car lift:
- turn off the ignition, put the gearbox in neutral, disconnect the negative terminal from the battery;
- drain the antifreeze, remove the air filter housing along with the pipe (injector corrugation);
- remove the valve cover, camshaft, loosen the timing belt and move it to the side;
- disconnect the wires and cooling system pipes from the cylinder head, unscrew the head bolts;
- unscrew the nuts of the exhaust pipe of the muffler;
- We completely free the cylinder head from all fasteners that prevent it from being removed, and we remove the cylinder head;
Positive and negative points
The main disadvantages that the 21011 engine has, it retained from the ICE 2101 sample, from which it originated:
- increased noise from chain transmission;
- Suitable only for rear-wheel drive cars;
- periodic adjustment of idle speed;
- complex valve adjustment.
Long partitions are used inside the intake manifold, so when throttling the first chamber, cylinders 2 and 3 experience air-fuel “hunger”, and when the damper of the second chamber is opened, on the contrary, cylinders 1 and 4 experience.
However, for its time, 21011 became an advanced technical solution for the domestic automobile industry. Knowing the characteristics of the engine, the user does not have problems with what oil to pour and what coolant the engine cooling system uses.
Decarbonization of piston rings
If the engine starts to smoke, there is a possibility that there are rings stuck in the piston grooves. Nowadays, there are many different modern means for decarbonizing piston rings, and many drivers use them to restore engine performance. Among the most popular compositions are:
- Nitrox Power;
- LAVR ML-202;
- Titanium;
- LIQUI MOLY;
- WYNN'S.
Motorists believe that if the engine starts smoking, you need to use a decarbonizer, and the engine will work as before, without oil consumption and without smoke. Indeed, sometimes these remedies help, but only in cases where the motor has stood motionless for a long time (for example, after winter), and moisture has accumulated in it. If the car is subject to long-term preservation (put in a garage for winter storage), you should remove the spark plugs and pour oil into the cylinders, and plug the spark plug holes with plugs. With such prevention, the spark plugs will not become damp and rust will not accumulate on the sleeves.
But if, after all, a forgetful car owner has not taken preventive measures, you can use a decarbonizer. We get rid of rust in cylinders as follows:
- pull off high-voltage wires;
- unscrew all spark plugs;
- rotate the crankshaft so that all pistons are in the middle position;
- pour 45 ml of liquid into each cylinder, install spark plugs;
- leave the cylinders to “soak” for 6-7 hours;
- why do we turn out the spark plugs, turn the starter a few revolutions so that all the dirt flies out of the engine;
- We put the removed parts back in place and start the engine. At first it may smoke a lot, but then the smoke will go away.
Car owners should remember that decarbonization is not a panacea for all ills, and if the piston rings are worn out, then only replacing them will help.
As a rule, in Zhiguli cars with an age of more than 150,000, the wear on the piston group is already quite significant, and if you are also the owner of, to put it mildly, a little used “penny” that is being repaired by someone unknown and when, then in 90% of cases you will have to replace the piston with a VAZ 2101.
Replacing piston rings
So, replacing the piston rings of a VAZ 2101 takes place on an overpass or in a pit, without removing the engine:
Attention! Before starting work, do not forget to remove the negative terminal from the battery.
- Drain the oil and coolant. Since we will no longer use the old oil, we unscrew the oil filter;
- We dismantle all the “attached” equipment that prevents us from unscrewing the pan and cylinder head, namely the exhaust pipe, air filter, gas drive with choke cable, valve cover and starter;
- We unscrew the bolt and remove the camshaft sprocket, having previously secured it with a screwdriver;
- Unscrew and remove the camshaft bed and the block head;
- Unscrew the fastening of the left engine mount, lift it and unscrew the pan;
- We unscrew the connecting rod caps and, together with the connecting rods, push the piston up;
- We very carefully inspect the pistons for cracks and chips; if the inspection is satisfactory, we remove the old rings, clean the grooves on the pistons from carbon deposits and install new rings.
Advice! Don't forget to check the condition of the connecting rod bearings. As a matter of fact, to extend the life of the engine, it is better to change them, in the end, so as not to open them again later.
Removing old rings
At this stage you are given the opportunity to practice installing the rings. That is, test with your own hands the elasticity of the metal, the thickness of the groove, try to pull it out and put the ring in place without fear of breaking it.
Cleaning the piston grooves
The World Wide Web is full of photo material on how to replace piston rings on a VAZ 2110. But since we do all the work with our own hands, which requires a minimum of special tools, I suggest an option for cleaning the grooves for the rings - cleaning with the ring itself (which was pulled out from there, of course).
Checking piston ring clearances
In this paragraph we have only two points:
In the first case, the calculated (nominal) gap between the groove wall and the first compression ring should be 0.045-0.08 mm, the second compression ring should be 0.025-0.06 mm and, accordingly, the oil scraper ring should be 0.02-0.055 mm. Wear tolerance for all gaps is 0.015mm.
- In the second case, the gap for all new rings should be 0.25-0.45 mm. Wear tolerance is 1mm.
- If there is a small gap, grind off the rings.
If it is large, replace it.
Selection of spare parts
Before going to the store, you need to roll the car out to a bright place or use a flashlight for work. You need to open the engine compartment cover (hood), approach the car from the left front fender and carefully inspect the left vertical wall of the cylinder block. It is there, in the very center, that the capital Latin letter should be located, indicating the class of the motor.
If the letter is not visible, it means the engine is dirty. You need to clean the surface of the power unit from dirt using a sandblaster and look again. If after this the letter does not appear, it means that it was “eaten” by corrosion. In this case, before going to the auto store, you need to purchase a bore gauge and use this tool to measure the actual dimensions of each cylinder. It happens that some craftsmen do not bore all the cylinders during a major overhaul.
Class A engines that have not been overhauled or bored have cylinders with a diameter of 79 to 79.01 mm, class B - from 79.01 to 79.02, class C - from 79.02 to 79.03, class D - from 79 .03 to 79.04, class E - from 79.04 to 79.05 mm. The original pistons for these blocks have diameters of 78.93, 78.94, 78.95, 78.96 and 78.97 mm, respectively. These are approximate figures, since in reality there is a tolerance of 9 thousandths of a millimeter.
Table of dimensions and tolerances of VAZ classic engine parts
Spare parts stores supply cast pistons of classes A, C and D, intended for unbored engines. Forged pistons for the VAZ 2106 are made to order and come in any size. The main repair dimensions of the VAZ 2106 engine cylinders are 79.4 (first bore) and 79.8 mm (second bore). Piston diameters for the first boring depending on the class (in millimeters):
Piston diameters for the second boring:
It should be noted that pistons are also divided into 3 categories based on the diameter of the piston pin hole, so new pistons must be purchased complete with pins. It is very difficult for a non-professional to distinguish a bored block from an unbored one, so if you are doing major engine repairs yourself, you must definitely purchase a bore gauge, and if this is not possible, then at least take old parts with you and compare them with store-bought parts.
Installing rings on the piston
Once again, to what was said above, I repeat - this instruction implies that replacing the piston rings of a VAZ 2101 is done only with your own hands, in a private garage. Therefore, by default, we do not have any “sophisticated” tools and use available materials to install the rings on the piston and the entire piston with rings into the cylinder. In our case, this is... a tin can.
- We cut out metal strips from a tin can and install them around the entire circumference, at even intervals;
Advice! One strip should be under the “lock” of the ring to prevent scratches.
- We move the desired ring along the metal strips to the bottom until it is opposite its seat;
- We lift the strips up, while the rings fall into the groove;
- The operation is then repeated for all rings.
Of course, you can perform this action with your bare hands, but the risk of breaking the rings and scratching the piston is too great.
Installing a piston into an engine cylinder
Lubricate the piston rings with oil, insert them into the cylinder block from above and, using a homemade mandrel, insert the piston into the cylinder.
Attention! During this procedure, make sure that each piston fits exactly into the cylinder from which it was taken and is in the same position as before. The cylinder markings must be on the lower connecting rod heads.
How to balance connecting rods
And you can easily balance the connecting rods yourself at home. But here the difficulty arises in correctly balancing the connecting rod itself. Because in addition to the fact that the connecting rods must be of the same total mass, the upper part of the connecting rod and the lower part of the connecting rod must also be the same in weight. There are special scales for this at the factory, but there are no such scales at home.
I came up with a way to balance connecting rods at home using simple scales, I use simple medical scales, which I also use to weigh gunpowder when loading hunting cartridges. What's good about these scales is that they provide weighing accuracy down to the milligram.
The process of balancing connecting rods is as follows.
First, weigh all the connecting rods without connecting rod cushions and find the lightest connecting rod, you will have it as a template to which you will begin to adjust the weight of the remaining connecting rods. Just be sure to mark the connecting rods with the cushions so as not to confuse them; each cushion must return to its own connecting rod.
Next, also find the lightest pillow; this will also be a pillow template to which you will adjust the weight of the rest of the pillows.
Photo. Connecting rods before balancing. Connecting rods VAZ 08
The question arises of where exactly to grind off the metal on the connecting rods and pads.
On pillows everything is simple, the metal is ground or drilled from the very bottom of the pillow.
Photo. Connecting rod cushions before balancing. Connecting rods VAZ 08
But with connecting rods, everything is not always simple, although the metal from the very top of the connecting rod is also ground off normally, but sometimes you put the connecting rod to the connecting rod, and the heavier connecting rod at the top is ground off less than the lighter one. This means that if the top of a heavier connecting rod is visually smaller than a lighter one, grinding down the top will make it even lighter.
Photo. Balanced connecting rods. The arrow shows where the metal was ground off
Therefore, pay attention to where there is visually more metal and grind off the metal.
Photo. Balanced connecting rod pads. The arrow shows where the metal was ground off
Balanced connecting rods thus provide excellent engine dynamics, resulting in more power and more economical gas mileage.
Photo. Balanced cranks with cushions.
