01/26/2022 8,099 VAZ 2114
Author: Ivan Baranov
Any modern car is equipped with a control module - an electronic unit that allows you to ensure the most optimal operation of the engine. As a result of incorrect operation of the ECU, problems may arise in the operation of the vehicle. What is the VAZ 2114 ECU, where is it located and how to replace it yourself - find out from this material.
[Hide]
Removal and replacement of ECUs on VAZ 2110, 2111 and 2112 vehicles
So, the first thing you need to do is disconnect the negative terminal from the battery. Now it's worth noting that to do this simple job you will need the following tool:
- Socket head for 10
- Ratchet handle
- Phillips blade screwdriver
When you get to the engine control unit, you need to disconnect the plug with the wiring harness from it, after opening the metal latch:
Now you need to unscrew the two nuts securing the “brains”, as shown in the photo below:
When these two nuts are unscrewed, you need to slightly move the bar to the right to release it from its engagement:
After which you can carefully remove the ECU:
It is worth noting that if the controller fails, a new one must be installed the same as it was before - from the factory. The price of new controllers can range from 4,500 to 10,000 rubles, depending on the type and year of manufacture of the car. Installation is carried out in reverse order.
I came across an article by McSystem. Actually, here it is below
In January - about Januarys. Again and in detail about the ECM-ECU masses
One of the rather serious problems affecting the stable operation of engines controlled by the January ECU (7.2, 7.2+, M73, 7.9.7) is the “mass problem” of the ECM. Moreover, the point is not so much in bad (or uncrimped) contacts and their fastenings, but rather in the rather incorrect wiring of the ECM harness itself. And the solution is not in “pulling a fancy cable (KG-25 or 50)” to the ECU. Therefore, this material will be devoted to a technically competent approach to solving this problem. What is described below is a kind of compilation, or an attempt to “chew” what has been published more than once, in particular on ChipTuner.ru, and to convey to readers the specifics of solving this problem. The articles by I.N. turned out to be the most complete and informative. Skrydlova, (aka Aktuator) “About the masses”, “MASS: AN UNEXHAUSTABLE SOURCE OF GLITCHES” “ONCE AGAIN ABOUT THE MASSES” ©Oleg Bratkov. Many years ago, having read and comprehended what was written, I implemented it on my typewriter. I completely agree with the conclusion of the author (aka Aktuator): “All the assurances of AVTOVAZ OJSC about improving the quality of electrical connections in manufactured vehicles are not worth a penny. In most cases, it is possible to achieve normal operation of the engine under the control of the ECM I 7.9.7 and January 7.2 only by carrying out additional, and not accepted by the manufacturer as a warranty, work to change the electrical circuit of the car.”
So, on to the topic! Classic ECM 21124 with ECU January 7.2(+) or M7.9.7 Electrical connection diagram of ECM EURO-2 M7.9.7, January 7.2 LADA 2110 with engine 21124. 21124-1411020-30, 21124-1411020-31.32
Fig. 1 ECM 21124 January 7.2, M7.9.7 Noticed, often described and characteristic problems - unstable idle speed, freezing speed, “jerking” of the engine at start and operation of the cooling fan, unreasonable jumps in the electrical parameters of the ECM during diagnostics. And this is not the entire list. And the whole problem is a rather incorrect wiring of the harness masses, not in relation to the body, but to the ECU. Therefore, in this article you will not see recommendations for tightening the “hoses” of additional mass to the ECU, due to its complete uselessness. This is not a newfangled “razmasovka” or “razminusovka”... Don’t get your hopes up!
Program for computer diagnostics of VAZ.
As I did, with a digital camera, we set it to macro photography, raise the flash and put our hand with the camera on the computer and take a photo, everything is clearly visible, even the dust. KKl VAG adapter for computer diagnostics: Order and do the diagnostics yourself! Another program for home diagnostics of injection cars using a KKL adapter and laptop. The functionality of this program reminded me of working with the Scanmatic scanner. Great opportunities for diagnosing various parameters of injectors. It is possible to create your own sets of parameters, which is very convenient when diagnosing various sensors. You can create a diagnostic kit for, for example, an oxygen sensor and include the necessary parameters to test it. The program also has auto-detection of the ECU, which makes life very easy when you don’t know what kind of unit is in the car.
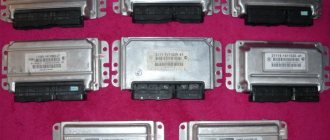
Description of "brains"
The VAZ 2110 is considered the first vehicle in the domestic automobile industry equipped with an injection engine. The power unit is controlled by an ECU, an electronic device that determines the basic parameters of engine operation in accordance with sensor signals. In fact, the ECU of a VAZ 2110, VAZ 2112 or any other model is the “brains” of the car, the operation of which affects the functionality of the vehicle as a whole.
Control controller in VAZ 2110
In the “Tens”, as well as the VAZ 2112, there are 16 valves and other models equipped with BOSCH 7.9.7 or January 7.2 systems, one M6 screw is installed in the head. From this screw the mass is taken to the ignition coils, and the mass is taken directly to the control model in the cabin. Typically, the mass is a welded stud mounted on the ECM bracket, particularly behind the center console, behind the left screen. In this case, the mass is transferred to the bracket through a pin, which is welded on the engine shield in the middle. It should also be noted that the nut on this stud is not usually tightened.
Control unit location
Now let's consider the location of the VAZ 2110 ECU. This device in the Ten is located under the center console, in its lower part, in particular, under the control panel. In order to gain access to the control module, you must remove the plastic panel on the passenger side, to do this you will have to use a Phillips screwdriver. Once you remove the cover, you will see many different wires, plugs, and safety devices. The controller itself is located behind them, it is screwed to the bar in a horizontal position.
The arrow indicates the location of the ECM module behind the center console
Typical malfunctions: their symptoms and causes
If the electronic engine management system malfunctions, this can lead to problems with the operation of the power unit. Unfortunately, ECU malfunctions in dozens of domestic cars are not uncommon, so the car owner should be aware of the main problems, as well as the reasons for their occurrence.
First, let's look at the symptoms of malfunctions:
- There is no connection with the diagnostic tester. If problems begin to appear in the operation of the engine, the car owner can diagnose the performance of the power unit using a tester or laptop. But if the ECU does not work, then when trying to contact the on-board computer, the car owner will see that there is no connection.
- The ECM does not receive signals about the operation of the injectors, ignition system, fuel pump, valve or idle speed sensor. There may also be no signals from other actuators.
- Another sign is the lack of response to the oxygen sensor, engine temperature controller, throttle position sensor and other controllers.
- Mechanical damage to the device can also be a sign of failure. Cracks may appear on the case as a result of strong mechanical impact; radio elements or conductors could burn out (the author of the video about the repair is Pavel Ksenon).
As for the reasons, malfunctions in the electronic control unit can occur as a result of:
- Unskilled intervention. This reason is one of the most common. If a car owner independently carries out electrical repairs or installs an anti-theft system, or entrusts this work to unqualified craftsmen, errors may be made in the process.
- A common problem is lighting a car battery from a vehicle with the engine running. When lighting the engine, the engines of both cars must be turned off, otherwise there is a risk of brain damage, this is important to remember.
- Another problem that does not occur so often is polarity confusion when connecting a car battery. If you confuse plus with minus, it can not only damage the control unit, but also damage the battery itself, which can lead to expensive repairs.
- The reason may be that the battery terminals are disconnected while the engine is running.
- Also, the control unit may fail as a result of turning on the starter unit with the power bus disconnected.
- The engine control system can be damaged if an electrode accidentally hits the sensor or vehicle wiring during welding work.
- One of the most serious problems is water getting into the ECU. If liquid gets into the device, the board itself may become covered.
- A break in the electrical circuit or a short circuit in the wiring.
- The cause may also be malfunctions in the high-voltage component of the ignition system. For example, a breakdown of the ECU can be caused by a failure of the coil, high-voltage cables, distribution mechanism, etc.
How to independently replace an electronic engine control unit (ECU, ECM, controller)
The electronic engine control system detects failures associated with wire breaks, short circuits to each other or to ground. With poor contact quality in the connectors. And also with a malfunction of the sensors themselves. However, there are malfunctions in the power and ignition systems that have external signs (which are noticed by the driver), but no fault codes are recorded in the memory of the electronic unit.
Main symptoms of malfunctions:
- Difficulty starting the engine.
A normal start is considered to be when the engine starts in one to three attempts. In this case, the starter should be turned on for 10 - 15 seconds, with a break between attempts of one minute. In this case, the minimum crankshaft rotation speed should be 60 - 80 revolutions per minute or one revolution per second.
If, when starting the engine, the battery voltage drops to eight volts (determined by the voltmeter on the instrument panel), then these are poor starting conditions (low ambient temperature) or the battery capacity is less than nominal. Quite often, a voltage drop is associated with oxidation of the battery terminals. Also, starting the engine will be difficult at low temperatures and high oil viscosity.
The following elements of the electronic system may be associated with the appearance of this symptom: mass air flow sensor, throttle position sensor, crankshaft position sensor, coolant temperature sensor, idle speed control, injector tightness, injector clogging, malfunctions in the ignition module (high-voltage wires are pierced , spark plug tips, the spark plugs themselves are faulty, the high-voltage terminals of the ignition coils are heavily oxidized). Lack of required fuel pressure due to a malfunction of the fuel pump or pressure regulator.
— jerks or failures in engine operation.
When you press the gas pedal, there is no expected acceleration. A well-warmed-up engine should, when you sharply press the gas pedal, increase the crankshaft speed from low (800-900 rpm) to high (5000 rpm) in no more than 0.75 seconds.
The following elements of the electronic system may be associated with the appearance of this symptom: mass air flow sensor, oxygen sensor, clogged injectors. This symptom can also appear when the injectors are unbalanced, there is a malfunction in the ignition module (high-voltage wires, spark plug tips are punctured, the spark plugs themselves are faulty, the high-voltage terminals of the ignition coils are heavily oxidized. Lack of the required fuel pressure due to a malfunction of the fuel pump or pressure regulator.
— insufficient throttle response (power).
When the car is moving, downshifts are often used. The speed is picking up slowly. There is a feeling that the engine “does not pull, it’s dull.”
The following elements of the electronic system may be associated with the appearance of this symptom: mass air flow sensor, oxygen sensor, clogged injectors, unbalanced injectors, lack of required fuel pressure due to a malfunction of the fuel pump or pressure regulator. You should check whether the throttle valve opens fully and whether the exhaust system is clogged.
- frequent detonation.
A sharp metallic knock is heard, changing when the throttle valve is opened. The main factors contributing to the occurrence of detonation are temperature and pressure in the combustion chamber. As well as the ignition timing.
The following elements of the electronic system may be associated with the appearance of this symptom: mass air flow sensor, coolant temperature sensor, oxygen sensor, knock sensor, lack of required fuel pressure due to a malfunction of the fuel pump or pressure regulator.
The air filter should be replaced. If the filter is heavily contaminated, the correspondence between the action on the gas pedal and the signal from the mass air flow sensor sent to the control unit is disrupted.
The temperature in the combustion chamber depends on the health of the cooling system. If the engine overheats, you need to check the coolant level, the coolant pump drive belt, the operation of the electric fan of the cooling system, contamination of the radiator, the absence of vapor locks in the cooling system, and the operation of the thermostat.
- delays, twitching, failures.
This is most noticeable when starting off.
When you press the gas pedal, the engine does not immediately respond by increasing the crankshaft speed. Such delays can occur at all vehicle speeds.
The following elements of the electronic system may be associated with the appearance of this symptom: mass air flow sensor, throttle position sensor, injector imbalance, lack of required fuel pressure due to a malfunction of the fuel pump or pressure regulator, malfunctions in the ignition module (high-voltage wires, spark plug tips, etc.) the spark plugs themselves are faulty, the high-voltage terminals of the ignition coils are heavily oxidized).
— interruptions in engine operation.
Uneven engine operation. When the crankshaft rotation speed changes, jerking begins, especially when the load increases. There is a constant popping noise in the muffler at idle.
First you need to check the ignition system (high-voltage wires, spark plug tips, etc.). The resistance of the high-voltage wires of the first and fourth cylinders should be no more than 1 kilo-ohm (1000 ohms), and the resistance of the wires of the third and second cylinders should be no more than 0.9 kilo-ohms (900 ohms). The resistance of spark plug tips is within 7-8 kilo-ohms (7000-8000 ohms). With a higher resistance, the reliability of the ignition system operation decreases; with a lower resistance, electromagnetic interference will occur, affecting the operation of the crankshaft position sensor, as a result of which misfires are possible.
The correct operation of the same sensor can be disrupted by magnetization of the toothed synchronization disk (checked with a thin steel plate).
The following elements of the electronic system may be associated with the appearance of this symptom: imbalance of injectors, lack of required fuel pressure due to a malfunction of the fuel pump or pressure regulator.
- increased fuel consumption.
Tire pressure is below normal, a malfunction of the brake system (braking of one or more wheels), an aggressive driving style, all malfunctions in the engine, power and ignition systems, malfunctions in the cooling system.
The following elements of the electronic system may be associated with the appearance of this symptom: mass air flow sensor, coolant temperature sensor, oxygen sensor, injector seals are broken, lack of required fuel pressure due to a malfunction of the fuel pump or pressure regulator.
— unstable engine operation, stopping at idle.
Air leaks behind the mass air flow sensor, improper operation of the idle air control.
The following elements of the electronic system may be associated with the appearance of this symptom: crankshaft position sensor, coolant temperature sensor, mass air flow sensor, throttle position sensor, injector imbalance, lack of required fuel pressure due to a malfunction of the fuel pump or pressure regulator, faults in ignition module (high-voltage wires and spark plug tips are pierced, the spark plugs themselves are faulty, the high-voltage terminals of the ignition coils are heavily oxidized), the seal of the injectors is broken.
— a strong smell of gasoline in the exhaust system.
This phenomenon usually occurs when the working mixture is very rich, and the enrichment is associated with a misfire. It is also not recommended to idle the engine for long periods of time.
The following elements of the electronic system may be associated with the appearance of this symptom: mass air flow sensor, crankshaft position sensor, coolant temperature sensor (Coolant temperature sensor), oxygen sensor, injector imbalance, lack of required fuel pressure due to a malfunction of the fuel pump or regulator pressure, malfunctions in the ignition module (high-voltage wires, spark plug tips are punctured, the spark plugs themselves are faulty, the high-voltage terminals of the ignition coils are heavily oxidized).
— self-ignition of the fuel mixture.
After turning off the ignition, the engine continues to run unevenly. This type of engine operation is associated with increased temperature in the combustion chamber and the presence of fuel in it. When this symptom appears, you should check the tightness of the injectors.
— popping noises in the muffler or in the intake manifold.
Popping noises in the intake manifold indicate a lean mixture. And the popping noise in the muffler is a rich mixture and its remains ignite in the heated muffler.
The following elements of the electronic system may be associated with the appearance of this symptom: mass air flow sensor, throttle position sensor, injector imbalance, lack of required fuel pressure due to a malfunction of the fuel pump or pressure regulator.
You can purchase an electronic engine control unit (ECU, ECM, controller) from us!
To get to the electronic engine control unit (ECU, ECM, controller), you need to perform the following steps:
— Open the hood.
— Disconnect the wire from the negative terminal of the battery, so that suddenly a short circuit does not occur, which could destroy the ECU.
— Open the front passenger door.
— Unscrew the side fastenings from the console of the car’s instrument panel using a Phillips screwdriver.
— You get direct access to the engine control unit.
— Unscrew the 2 screws holding the controller.
— Take the block with one hand and gently pull it towards the front passenger door. At the same time, hold the wires with your other hand so that they do not rest against the carpet.
— Disconnect the unit from the wires. To do this, look for where the connector lock in the form of a bracket is located and pull it to the side.
— You receive a car without an ECU, ready to install new equipment.
You can purchase an electronic engine control unit (ECU, ECM, controller) from us!
Before installing a new engine control unit on a VAZ, it is worth remembering that not all ECM models are suitable for this.
We recommend installing ECUs from Itelma and Avtel on your VAZ.
Among the advantages of such blocks it is worth highlighting:
- ease of installation;
- low cost;
— compatibility with almost all models of domestic cars, regardless of configuration;
— engine control units from these manufacturers already have standard firmware with the latest updates upon purchase.
Reassemble everything in reverse order and with a new electronic engine management system. Do not forget to connect the connector with wires to the ECU, connect the wire to the negative terminal of the battery. Then you check the work of the controller. Good luck on the roads.
Instructions for removing and replacing the computer
The need to dismantle the ECM unit 16 of the ten valve engine arises if repairs are necessary when faults are identified. The repair process itself will depend on what exactly happened in the operation of the ECU. For example, if the contacts on the module connector have oxidized, the unit must be dismantled to clean or replace them. If the reason lies in damage to the housing, then the device must be removed for replacement; if water has gotten inside, then the module should be removed in order to dry it. Only after you have dried the block can it be tested.
If the problem lies in the performance of the board and some burnt-out elements, then you can try to repair it yourself by re-soldering some components. But we would still recommend turning to specialists for help, especially if you have never encountered such a problem before (the author of the video about repairing the control controller is Vyacheslav Chistov).
Tools
To replace the module, you will need:
- socket head 10;
- ratchet handle;
- Phillips screwdriver.
Work sequence
Before dismantling the device, you should disconnect the negative terminal from the car battery:
- The vehicle must be placed on a flat surface, without slopes, and the parking brake must be set.
- The following stages of work are performed inside the car. You will need to carefully unplug the wire connector from the control box, but before doing so, you should unplug the latch.
- When you get directly to the powertrain control controller, using a wrench you will need to unscrew the two nuts that secure the module to the bar.
- After these nuts are unscrewed, you will need to move the bar itself slightly to the right side, this will allow it to be released from engagement.
- After completing these steps, the control controller can be dismantled. If you are replacing a device, then if it breaks down, you should replace the module with a similar one that was installed. That is, if you had a January 7.2 ECU, then the same module is installed. If the unit is subject to repair, it should be repaired and then reinstalled. The installation procedure is performed in the same way, only in reverse order.
Do not attempt to repair the control unit if you have never had to deal with such a task before.!
Photo gallery “How to properly dismantle an ECU”
Signs of the need for internal combustion engine repair
The reasons why the operation of the engine is disrupted are arranged in a small list, starting with refusal to start and ending with floating idle speed (this problem was removed on the 127 “engine”). Not all breakdowns end in capital damage - sometimes it’s enough to add oil, sometimes it’s enough to adjust the ECU settings.
Compression reduction
A decrease in cylinder compression below 16 atmospheres is a bad sign. Such a high limit corresponds to a compression ratio of 11.
Knocks in the engine
Engine knocks can come from several points. These could be hydraulic compressors, timing belt rollers or pins. The knocking noise could also be caused by low oil level. The answer to the question will be given by a thorough detailed inspection of all parts of the unit and checking the oil level.
Blue smoke from the exhaust pipe
The blue smoke that comes from the exhaust pipe appears when oil enters the combustion chamber. It can leak either from the valves or from under the piston. The result is the same: the oil is eaten up and blue smoke pours out of the chimney. Once the leak is located, half the problem will already be solved.
Troit motor
Sometimes in the cold the engine may stall - don’t be alarmed by this, because it may simply be one of the spark plugs that fails. In this case, we advise you to simply restart the engine and it will stop running.
How much does it cost to overhaul a Priora engine - average price
Self-repair of a Priora engine with 16 valves costs an average of 16-20 thousand rubles. The cost depends on the severity of the breakdown and may be lower or higher than this average range. Repairing a Priora engine can be entrusted to the wrong hands, but then you will have to pay for the work - sometimes the cost of repairs reaches as much as 40 thousand rubles.
This is an unreasonably inflated figure, because, as practice shows, you can rebuild the engine on a Priora, working at a moderate pace, in just three days - and three days of work is definitely not worth that kind of money. Don’t be afraid of not being able to cope - your Lada is easy to repair, and using the advice and “tutorials”, you will conquer even such a task that is impossible at first glance.
Basic malfunctions of the ignition module 2110
Despite the fact that the ignition module on the 2110 is a fairly reliable device, the element can still fail. The most common causes of breakdowns identified during diagnosis in almost 90% of cases are:
- Using components that do not meet the parameters. These could be high-voltage wires that do not match the parameters of the module, spark plugs that can damage the ignition module itself (a large charge can break the coil), etc.
- Parts with factory defects or poor quality assembly. As a result, failure of other elements of the ignition system.
If the ignition module does not perform its functions, this is reflected in the performance of the vehicle’s internal combustion engine:
- increased fuel consumption;
- the engine stops starting;
- during acceleration (sharp change in speed), dips appear;
- unstable operation of the internal combustion engine (two cylinders do not work);
- After the engine warms up, there is a noticeable drop in power and thrust.
Stories from our readers
“Fucking basin. "
Hi all! My name is Mikhail, now I’ll tell you a story about how I managed to exchange my two-wheeler for a 2010 Camry. It all started with the fact that I began to be wildly irritated by the breakdowns of the two-wheeler, it seemed like nothing serious was broken, but damn it, there were so many little things that really started to irritate me. This is where the idea arose that it was time to change the car to a foreign car. The choice fell on the melting Camry of the tenth years.
Yes, I had matured morally, but financially I just couldn’t handle it. I’ll say right away that I am against loans and taking a car, especially not a new one, on credit is unreasonable. My salary is 24k a month, so collecting 600-700 thousand is almost impossible for me. I started looking for different ways to make money on the Internet. You can’t imagine how many scams there are, what I haven’t tried: sports betting, network marketing, and even the volcano casino, where I successfully lost about 10 thousand ((The only direction in which it seemed to me that I could make money was currency trading on the stock exchange, they call it Forex. But when I started delving into it, I realized that it was very difficult for me. I continued to dig further and came across binary options. The essence is the same as in Forex, but it’s much easier to understand. I started reading forums, studying trading strategies. I tried it on a demo account, then opened a real account. To be honest, I didn’t manage to start earning money right away, until I understood all the mechanics of options, I lost about 3,000 rubles, but as it turned out, it was a precious experience. Now I earn 5-7 thousand rubles a day. I managed to get the car buy after half a year, but in my opinion this is a good result, and it’s not about the car, my life has changed, I naturally quit my job, I have more free time for myself and my family. You’ll laugh, but I work directly on the phone)) If If you want to change your life like me, then here’s what I advise you to do right now: 1. Register on the site 2. Practice on a Demo account (it’s free). 3. As soon as you get something on the Demo account, top up your REAL ACCOUNT and go to REAL MONEY! I also advise you to download the application to your phone, it’s much more convenient to work from your phone. Download here.
The second serial family of ECMs were the “January-4” systems, which were developed as a functional analogue of GM (with the ability to use the same composition of sensors and actuators) and were intended to replace them. Therefore, the dimensions, fastenings, as well as the pinout of the connectors were preserved.
“January-4” is designed for Russian standards; the oxygen sensor, catalyst and adsorber were excluded from the composition, and a CO adjustment potentiometer was introduced. The family includes:
- "January-4" (small batch)
- "January-4.1" for 8 (2111) and 16 (2112) valve engines.
Development, together with Bosch, of an ECM based on the Motronic M1.5.4 system, which could be produced in Russia. Other air flow sensors (MAF) and resonant detonation sensors (developed and produced by Bosch) were used. The software and calibrations for these controllers were first fully developed at AvtoVAZ. For Euro-2 toxicity standards, new modifications of block M1.5.4 (has an unofficial index “N” to create an artificial difference) 2111-1411020-60 and 2112-1411020-40 appear, meeting these standards and incorporating an oxygen sensor, catalytic neutralizer and adsorber.
Significant features of Lada Priora engine tuning
The main feature of chip tuning for a Lada Priora car is that it can be used to improve certain engine characteristics without the need to disassemble it.
Engine chip tuning can only be done if the car has a special electronic control unit that controls the operation of the engine system. It looks like a kind of automobile-type computer that controls the operation of the engine. The main tasks of the control unit are to provide signals to turbocharging systems, fuel injection devices and ignition systems. The computer receives this information from special sensors that determine fuel consumption, speed and other parameters.
This device has a special chip with a microcircuit on it containing programs that control the motor system. Some changes may be made to the microcircuit regarding operating parameters: marking ignition timing, amount of fuel in the cylinders, controlling the level of exhaust toxicity, etc.
Connection to diagnostic motor
The chip tuning process is carried out in two ways. The first involves dismantling an existing chip and reprogramming it after removal. After this, the chip is installed in its original place. The second way is to replace the standard microcircuit with a new one with different software.
To improve some technical characteristics of the engine, there are several methods for modifying it. For example, it is possible to increase the power ratings of an atmospheric turbocharged or gasoline power unit. The microcircuit can provide the car with economical characteristics that significantly reduce fuel consumption.
Most of the programs used by Russian manufacturers for the Lada Priora do not meet all the requirements and are rather imperfect. Therefore, individual chip tuning helps eliminate all the shortcomings present in the factory version. The new version of the program has improved algorithms for calculating the fuel mixture and the ignition timing. In addition, improvements have been made to cold start calibration and idle speed control.
Recently, it has been possible to install special systems in a car, with the help of which you can select programs for working with the engine. Their convenience is that the driver can switch the engine system to sport or economical quiet mode at any time.
Engine chip tuning is very useful for the Lada Priora car. It will be appreciated even by those car enthusiasts who do not like a sporty driving style and high speeds. It provides high-quality speed and traction performance, the ability to carry out sharp accelerations of the car when overtaking, and guarantees ease of movement even when the vehicle is heavily loaded.