Even with a well-heated stove, in winter the surfaces of the cabin, including the steering wheel, warm up over a longer period of time than the air.
The first 30 minutes of driving with a cold steering wheel are very uncomfortable and even dangerous. When your hands are in warm gloves or mittens, the grip of the steering wheel is less reliable, and it is also inconvenient to press the buttons on the instrument panel. It is much more convenient if the steering wheel rim heats up to a comfortable temperature within a few minutes in the cold season. To make a heated steering wheel with your own hands, you need to remove the braid, install a heating element on the steering wheel rim and supply electrical power to it, which is the most difficult task.
It’s worth saying right away that it is impossible to write a single detailed instruction for installing and connecting a heated steering wheel. Each car has its own characteristics and difficulties in connecting. This article explains the main points of the process of installing a heated steering wheel with your own hands, and also discusses the solutions offered by manufacturers of heated steering wheel installation kits.
Disassembly and removal of the steering wheel
To install a heated steering wheel yourself, the steering wheel must be disassembled and removed. We will consider installing a heated steering wheel on cars whose steering wheel has an airbag. In such cars, electrical devices on the steering wheel (airbag, horn, control buttons) are connected to the car's electrics through a special spiral or U-shaped cable (clock spring/steering column cable/"snail"), which allows the steering wheel to rotate and do not disrupt the electrical connection with it. We will look at the topic of connecting heating elements in more detail in this article below.
So, to disassemble and remove the steering wheel, you need to turn off the ignition and disconnect the negative terminal of the battery. Next, you need to wait 5 minutes after removing the terminal so that the charge completely disappears from the SRS system.
Place the wheels straight. Disassemble the steering wheel. Make marks on the shaft splines and on the steering wheel so that you can later install the steering wheel back in the same position. To remove, unscrew the steering wheel fastening nut not completely and sharply pull the steering wheel towards you. This will free the steering wheel and rest against the nut, after which it can be easily removed by unscrewing the nut all the way.
Installing heating elements involves removing the steering wheel cover and reinstalling it, or replacing the cover with a new one. If there is no braid on the steering wheel, then it will also be necessary to install a new braid. Before installing the heating elements, you need to take into account the location of the butt seams of the braid segments and pre-cut recesses for them in the steering wheel. You can read a detailed article about re-upholstering the steering wheel with your own hands.
You can try to unravel the thread of the old braid to reuse it, or you need to buy a new thread of a similar size.
The steering wheel angle sensor may be located on the steering column housing (“snail”). It is better to secure it with tape or tape so that it does not accidentally get knocked down. Or you will need to set it according to the marks before turning on the voltage, otherwise an error will occur in the system.
What's next?
No car on sale today has a feature like adaptive climate control for the steering wheel, which can not only warm it up, but also cool it?
However, every year manufacturers are forced to introduce something new to the market so that buyers get the impression of constant progress and the need to buy its fruits. Therefore, it is very possible that the day will come when a unique premium and innovative steering wheel with climate control is announced to us in a press release. And let his idea come up with in 1983... Photo: powerfuluk.com, Kia, Land Rover, Hyundai, Kia, Opel, BMW
Nichrome wire
Nichrome is made from alloys of nickel and chromium (typically 50–80% nickel, 15–25% chromium, with added aluminum, manganese, iron or silicon). It has a fairly high resistivity. For this reason, the heating element made of nichrome wire has the shortest length in comparison with other types of wire. It is wound onto the steering wheel into pre-cut grooves.
You need to choose a wire, taking into account its parameters:
- Typically, the power of heating elements for heating the steering wheel ranges from 20 to 60 W. When the power is less than 25 W, the surface of the steering wheel will heat up slowly. If the power is more than 50 watts, the heating will be too strong. Thus, the most preferable option is 50 W.
- The heating power is limited by the current passing through the volute (steering column). Due to the excess current passing through the cochlea, the track heats up and burns out. A wide trace carries a current of 2A. The maximum current passing through a wide loop path is 3 A. Thus, the heating element must be calculated for the required power, as well as in accordance with the limitation of the snail.
- One wide track may not be enough to connect a heating element of the required power.
- In accordance with Ohm's law, to increase power you need to increase the voltage or current (P=U*I).
- Increasing the current strength is only possible by using additional tracks in the steering column cable. We will consider various options for implementing this possibility in this article below, when we deal with connecting heating elements.
- Another option for increasing power without increasing current is to increase voltage. For this, a step-up voltage converter is used. As the voltage increases, you need to select a heating element with the desired resistivity (R=U/I). Based on the formula I=U/R, using increased voltage, you will need to increase the resistance of the heating element, otherwise the current will also increase. Resistance depends on the cross-section and length of the wire. It will be easier to change the length.
- It is important to consider the resistance of the piece of wire used. Electrical power is equal to voltage squared divided by resistance. The higher the resistance, the less power. For normal heating rates, the total resistance should not exceed 2.5–5 ohms.
The heating element can be installed on the steering wheel in one piece, taking into account the total resistance. You can divide the heating element into several sections connected in parallel, which will reduce the total resistance.
- When using a long nichrome wire of small cross-section (to wind the entire steering wheel rim), the power is low due to high resistance. This can be solved by connecting a step-up voltage converter, replacing the wire with a thicker one (up to 1 mm, having less resistance), or connecting several short pieces of wire in parallel. As you know, with a parallel connection, the total resistance of the circuit is less than the smallest of all the resistances included in the circuit.
- You can use 2 pieces of nichrome wire, several meters each (on top of the steering wheel and below and on the sides), connected in parallel. Limiting the heating area reduces energy consumption. Again, you need to calculate all the parameters and degree of heating.
- When all the calculations have been made and the heating elements are connected, it is necessary to measure their current strength under load. The current must not exceed the maximum limit for a track or several tracks of the steering column cable.
Installing nichrome wire only in the hand grip areas (the sections are connected in parallel) reduces the overall resistance and reduces the overall power consumption.
So, having decided on the size and location of the nichrome wire, you can begin winding it on the steering wheel rim.
- The wire is wound around the steering wheel rim. Next, you need to circle it with a regular pen. Then, according to the markings, you need to make an incision 1–5 mm deep and drown the thread. The grooves in the steering wheel can be cut with a hacksaw blade or a stationery knife, depending on the thickness of the wire. There is no need to bury the wire deeply, as this will slow down the heating. It is important not to cut through the recess to the metal.
- The result is a steering wheel with a smooth surface and turns isolated from each other.
- The turns should be made at a distance of 0.8–5 cm. You can wind the wire evenly so that the heating is the same, or you can make turns more often in places where hands are more often located. The ends of the nichrome wire must be drawn to the center of the steering wheel. After winding, it is better to ring both circuits.
- To control the heating temperature, a time relay is used, which will disconnect the power supply to the heating elements after a certain time of their operation, or a temperature sensor. The 40–45 degree thermal relay (a device that will open the network when a certain temperature is reached) crashes into the steering wheel spoke. The thermostat is connected to the positive contact of the heating elements.
- Temperature sensors KSD-301 or KSD-9700 are often used; they are designed for voltages up to 250V and current 5A. The KSD-9700 sensor is more convenient for embedding into the steering wheel. It is made in the form of a rectangle with two contacts. There are normally closed (NC, normally closed) and normally open (NO, normally open). To protect against overheating, you need to use a normally closed type, which, when a certain temperature is reached, will open and turn off the power, and close again after cooling. The face of the sensor should be flush with the overall surface of the steering wheel, and the housing will be located inside the rubber of the steering wheel. A heating element must pass over the sensor.
- The ends of the nichrome thread must be crimped with a regular wire. The wires are routed inside the rubber of the steering wheel towards the center.
- It is better to use flexible wires for connecting heating elements (copper, consisting of many wires, 0.75–1 mm).
Heated steering wheel, what are the advantages of a heated steering wheel
The heating device consists of a specialized heat-conducting wire, similar to the one in the rear window.
At the ends of the wire there are terminals that are connected to the on-board network of the vehicle itself. A regulator is sometimes added to this design to control the degree of heating and the ability to set the desired temperature, however, as a rule, heating is standard everywhere.
First of all, a heated steering wheel is necessary for comfort; it is much more pleasant to put your hands on a warm steering wheel in the cold season. In addition, a heated steering wheel is installed for safety reasons. You should not drive in warm gloves, especially woolen ones, as your hands will slip in them, which may well lead to an emergency on the road.
Copper wire
Copper has tens of times less resistance than nichrome.
The resistivity of copper wire (0.25–0.3 mm in diameter) allows you to wrap the entire steering wheel rim in one piece, without breaks, and connect without using a step-up transformer. However, with the same power as nichrome wire, copper wire has less heat transfer.
On the Internet, on AliExpress, you can find a wire that is designed to heat seats or steering wheels (heating wire for car seat or steering wheel). It is coated with heat-resistant polymer (FEP coated or Nylon coated). Together with the coating it has a thickness of about 1 mm. You can choose the material from which it is made (copper, copper-nickel alloy, constantant, tin+copper+stainless steel). Due to the large cross-section, such wire will need to be recessed into the pre-cut grooves of the steering wheel so that it does not stick out and imprint on the braid.
Recommendations for choosing cases
It is best to cover the wiring system with a leather cover. It can be purchased ready-made, but in this case you need to carefully select the size. In this case, it is necessary to take into account that, under the influence of the thickness of the insulation and the heating element, the steering wheel will be enlarged. It is recommended to steam a leather product in advance or soften the material by treating it in alcohol. Thanks to such measures, the leather will stretch and fit perfectly on the wheel. You can also sew such a cover with your own hands, but to do this you need to have at least minimal sewing skills.
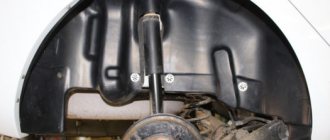
We recommend: Anti-gravel treatment of wheel arches and the underbody of the car
Steering wheel heating is a thing that is useful not only for a car, but also for a motorcycle. Especially if a person needs to travel in the cold season. You can put a hat and helmet on your head, and insulate your body with a jacket, but warming your hands is more difficult - turning the steering wheel or driving a motorcycle in mittens is inconvenient, and without them, your hands will freeze.
A heated steering wheel is a good device that increases the comfort of driving a vehicle. However, it has several shortcomings that can be corrected. If you simply wrap heated handles with electrical tape, they will not look very attractive. This can be easily disguised with a nice cover. Another disadvantage is more significant: heating is very expensive in terms of energy consumption. You can install a night light lamp with a lower power.
Carbon heating tape
Carbon (carbon) tapes of different widths can be found both in Russian companies (M-Carbo Company, AvtoTerm) and on the websites of Amazon, ebay, alibaba; English name "Carbon heater tape". The tape has good heat transfer and a large heating area, unlike nichrome or copper wire. In addition, carbon tape is fireproof. Due to greater heat transfer, less heating power will be required.
Carbon tape is widely used to create heated clothing, defrost roofing, pipes, heated car seats, and also heated steering wheels. As the manufacturer writes, at a low heating temperature of the carbon tape, a high degree of thermal emission (thermal radiation) is obtained. Heat is released to a greater extent in the long infrared range, which is most effective for heat transfer.
Due to the large heating area and higher heat transfer than nichrome wire, heating for a comfortable temperature can be achieved with less power. So heating with a carbon tape with a power of 25 W may be sufficient.
Carbon fiber cannot be soldered. It can be connected to wiring in the following ways:
- Crimp terminals.
- Conductive silver glue. It will be more convenient if you first sew the wires to the tape to secure them. Then you need to saturate the wire and carbon tape with silver glue. The glue will ensure good contact and prevent oxidation of the wire.
- Copper tape with adhesive backing (from Aliexpress).
- Slip rings can be made from copper foil. For slip rings on the steering wheel, you need to cut out pads 1 mm deep. One of the heating tapes should go over the thermostat. The slip rings are installed at the same distance. Copper foil needs to be rolled tightly around the rim and glued to the steering wheel or soldered the ends to each other. Wires need to be soldered to the slip rings. Carbon tapes must be glued so that they overlap the slip rings. The tapes must fit tightly to the contacts so that the tape itself heats up, and not the connection to the wires.
- The kit from Autoterm includes nickel plates and copper wires. Plates can be glued to carbon strips with conductive glue.
So, having decided on the method of connecting the carbon tape and wires, you need to move on to installing the heating tapes on the steering wheel rim.
- There are many different ways to install heating tapes and connect them to each other. The zone and heating rate depend on this. The power (heating of the tape) depends on the voltage and length of the carbon tape. The longer the heating tape, the less heat generated.
- Since the carbon tape is not particularly stretchable, folds may form when it is installed on the steering wheel. You need to try to glue the tape as evenly as possible so that it does not show through the braid. The width of the carbon tape can reach 45 mm, which allows you to wrap it around the rim of the steering wheel, however, it is better to use separate strips 15 mm wide, which will be more convenient to stick on without folds.
- To glue the tape, you can use rubber glue or moment. Glue must be applied to the steering wheel rim. Carbon tape absorbs glue well, so you need to try to position it straight away, as it will not be easy to rearrange it. The tapes must be glued so that they do not touch each other and do not change the conductivity. The gaps between the carbon tape can be sealed with rag tape. Depending on the thickness of the carbon tape, you may need to apply 2 layers of electrical tape.
- Heating the steering wheel using carbon tape is usually made of 2 circuits (on the sides of the steering wheel or on the top and bottom). Each circuit consists of several tapes (4–5), which are connected in parallel. Parallel connection of circuits gives faster heating, since the total resistance is reduced. The right and left sides (or top and bottom) are connected in series. This will give the optimal ratio of heating speed and current consumption.
- To speed up heating, you can use a step-up voltage converter. In this case, you need to take into account the amount of current passing through the steering column cable.
- As in the case of using nichrome wire (see above), you can use a time relay or build a temperature sensor into the steering wheel. Heating tapes will need to go over it and touch it.
- For power wires, you need to cut channels in the steering wheel that lead the cable to the center of the steering wheel.
- An interesting option for installing a carbon tape was shown by one of the members of the drive.ru community (kv-corona). Steps are cut into the steering wheel in 4 places. Copper or brass rings are installed in the cut out places. A channel for the wire is also cut out on the inside of the rim. Wires are soldered to the rings through which current will flow. The tape is glued to the steering wheel, and its ends are tightly pressed with electrical tape to the rings, through which the carbon tape will receive power and heat up.
- Heat-resistant Kapton tape can be glued over the heating elements. Also, many wrap the steering wheel rim with stretch film or fum tape to reduce unevenness before installing the braid and protect the heating elements from damage that may occur during installation of a new braid.
- After installing the carbon tape to heat the steering wheel, you need to take into account that the thickness of the steering wheel will increase (the thickness of the heating tape varies) and the old braid will be more difficult to install if it has lost its elasticity.
Purpose of the heating function
The function of heating the steering wheel, seats and even wipers was developed and introduced relatively recently. In a relatively short time, car enthusiasts all over the world began to use it. Most of them welcomed the fact that they made car trips more comfortable.
At first, heated steering wheels were installed exclusively on premium models. Nowadays, a similar function is available in more affordable cars, but only in relatively new ones.
If the vehicle is many years old, or when it comes to a cheap option, you can equip it with a heated steering wheel in the following ways:
- go to the service station and install it there;
- purchase ready-made and deliver;
- do the heating yourself.
We recommend: Modification of the VAZ 2110 thermostat
It will be especially important to make steering wheel heating yourself for old Soviet-made cars. Such tuning will be a beneficial innovation for them. To work you will need to buy some parts. There is no need to save money, because it depends on how reliably the device will work.
By design, the device consists of several heating elements.
In order to control the degree of heating and also turn off the device when the temperature reaches the possible limit, a relay is used. The heating design is not as complicated as it might seem at first glance. If you make an effort, you can easily assemble it yourself, without turning to a specialist.
Connecting the heating element (pulling voltage to the steering wheel)
In most cases, the heated steering wheel is connected to the car's power supply via the steering column cable (clock spring). It is available on cars that have an airbag on the steering wheel. On steering wheels without an airbag, you can use a slip ring. In this article we will not consider this connection option. The steering column cable, or so-called “snail,” acts as a bridge between the vehicle’s electrical wiring and the electrical devices on the steering wheel. This is a spirally twisted (or U-shaped) cable enclosed in a protective housing that allows the steering wheel to rotate while maintaining the electrical connection of the signal, buttons and airbag located on the steering wheel.
There are two types of steering column cables: spiral-laid and U-shaped.
The possibility of installing a heated steering wheel requires the presence of free contacts in the steering column cable. The manufacturer leaves free contacts because the same car may have another, richer configuration with additional options that use these contacts. Or for further modernization of the car. On Japanese and Korean cars you can often find loose contacts. Vehicles from other manufacturers may not have free contacts. This can sometimes be solved by installing an additional cable, if the size of the snail body allows it. The free contacts in the volute (steering column cable) correspond to empty spaces for “pins” in the standard connector of this cable. If there are no free tracks, then you can find another steering column cable with free contacts (on cars for the American market, the cable has more free tracks). If there are no other options, then you can use the cable tracks responsible for illuminating the steering wheel buttons. You can use the contact responsible for the horn mass by moving the mass to the steering wheel body. Through free contact + will come.
The cable has tracks 1 and 2 mm wide. A contact 1 mm wide will pass a current of 1 A, a contact 2 mm wide will pass 2 A. If the current is higher (2.5–3 A), the contacts will heat up, but will withstand the load. The maximum current at which the track burns out is 4 A.
If there is the required number of free tracks, then you can use two tracks in parallel to have a reserve.
If you already have information about which contacts you can connect the heating to, then it is not necessary to disassemble the steering column housing. You can immediately connect to the connector. Pins for connecting to the cochlea (can be bought at a radio parts store or taken from a computer power supply).
You need to first check the contacts in the “snail” to see if they can withstand the load by connecting the heating to the battery. With the steering column housing open, check whether they are heated by touch or using a thermocouple.
Connection to car wiring:
- The positive heating contact, going through the steering column cable, can be connected to any thick electrical wire of the car, from which + comes after turning on the ignition. The heated steering wheel can be connected in parallel with any switch, or you can make a separate switch. The power supply can be taken from the standard heated seats, heated rear window, etc.
- The fuse is located near the connection to the power source. A fuse should be used no higher than 3.5A (if the tracks in the cochlea are not soldered in parallel, then 4A is the maximum for one wide track). A regular fuse from a radio parts store will do, since a flat fuse of this rating may not be available. If several loop tracks connected in parallel are used, then a fuse of a larger rating must be used.
- The heating minus can be connected using a free track in the cochlea. Many people connect the minus to the steering mass, which also works. However, this is not entirely correct. The resistance between the steering wheel and body mass is high and unstable. Using mass from the steering wheel is not advisable, since this is not a reliable connection (the connection to the body is made through ball bearings). This may affect the functionality of the steering wheel buttons when the heating is on and the steering wheel is rotating.
- The steering wheel can be connected via a relay. This is necessary to ensure that the button contacts do not get hot. A regular car relay with a socket will do.
- The switch can be installed anywhere, on the front or back of the steering wheel, on the steering wheel cover, on the instrument panel.
- If the body of the steering column cable (snail) was disassembled, then after assembly and before installing the steering wheel, the “snail” must be centered. Alignment information is located on the steering column housing. The point is that you need to twist the cable to the limit, first in one direction, then twist it to the end in the other direction, counting the number of revolutions. Then divide this amount by 2 and scroll the train to the middle.
How much does it cost on new cars?
As noted above, a heated steering wheel, despite our cold climate, is not found in the list of standard equipment and options for all manufacturers. For example, on Mazda, Renault, Nissan, Citroen, Chevrolet and Mercedes-Benz, a heating pad can only be supplied as an option for an additional fee.
Occasionally, heating is found as a separate option. So, for example, on a BMW 1 Series it will cost (July 2014 prices) 11,168 rubles, and on a Range Rover - 13,500 rubles. Much more often it can be found in special option packages. On the Opel Zafira, the Enjoy package for 18,000 rubles, in addition to a heated steering wheel, includes an air quality sensor, dual-zone climate control and heated electric mirrors. On the Volvo XC60, the winter package for 19,900 rubles also includes heated windshield and washer nozzles.
1 / 3
2 / 3
3 / 3
It also happens that steering wheel heating is included in the standard equipment of a particular configuration. Automakers have different policies here. For example, at Toyota only the expensive SUVs Highlander, Land Cruiser and LC Prado have this coveted option; even the not-so-cheap RAV4 and Camry, not to mention the Corolla, lack it. But Korean manufacturers do not skimp on warmth for the driver’s hands. Kia has a Warm Options package that is included as standard equipment on almost all of the brand's vehicles, including the Rio. Only the cheapest basic Comfort package lacks it.
Kia Heated Steering Wheel Advertising
How to connect the heating, step-by-step connection instructions
- First, you need to think about how you will adjust the heating function on and off. For this purpose, a compact steering wheel heating button is best suited, which will work on the basis of only two contacts. It can be mounted in the lower section of the steering column housing. This place is easy to use and discreet. To carry out the procedure correctly, you need to use a stencil. It will be used to determine the cutout configuration on the steering wheel trim.
- To determine the places where the “plus” and “minus” will be located, you will need two copper rings, the thickness of which should not exceed one and a half millimeters.
- The wires are connected to the rings using a soldering iron, and the connection to the battery is made through a relay. It is activated when the ignition is turned on.
- The rings are attached to the spiral cable in the steering wheel hub using double-sided adhesive tape.
- Epoxy glue thickly poured between the rings prevents short circuits.
- One of the contacts is left on the positive side; a component from the steering shaft can serve as a negative contact.
- It is necessary to drill a minimum hole in the steering wheel into which we mount another contact. It should be located directly opposite the copper rings.
- Now we completely isolate all contacts to avoid contact with the steering wheel.
- Then we mount a spring, which will ensure tight contact between the contact and the rings. To do this, you can use a thin plate. One side of such a plate will put pressure on the contact, and the other will press firmly against the steering wheel.
- At the end, the device is installed in its permanent location.
Why should you contact us?
Installers have more than 15 years of experience
Certified equipment
No queues
Guarantee on all work
It is absolutely no exaggeration to say that installing a heated steering wheel is a complex and time-consuming job. It requires good knowledge of electrics, the ability to handle leather well, as well as non-standard thinking and accuracy. In our organization, in order to achieve high-quality results, the work process is structured in such a way that everyone does their job, and does not grab onto everything in a row. Therefore, the work of re-stitching the steering wheel and introducing a heating tape into it is carried out by a specialist who specializes in work related to leather reupholstery and related tasks, and the issues related to connecting the electrical part of the process are dealt with by another specialist who has been working professionally in the field of auto electricians for many years .