How to install a thermostat from Granta on Priora yourself
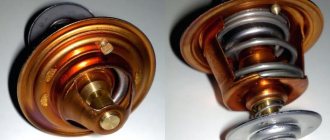
The Lada Priora, like other cars, has a cooling system, the indispensable element of which is a thermostat. The functions of the thermostat are to cool the engine and reduce the volume of harmful substances formed after fuel exhaustion. The first releases of the Lada Priora car imply the presence of a pump part, which comes into action when the engine heats up to a temperature of 90-95 degrees. As for modern machine models, such as Granta, here the thermoelement reacts to relatively low temperatures - 60 degrees.
How much does a thermostat cost on average for a Priora and what does the price depend on?
A car has long ceased to be an element of luxury. Its presence is a prerequisite if you need independence in movement both around the city and outside it. But before purchasing, many car owners do not think about how much vehicle maintenance may cost.
https://www.youtube.com/watch?v=JAr5mDyNl98
For example, the cooling system of a Lada Priora car requires considerable investment, especially when it comes to replacing the thermostat. The cost of this unit in Russia can vary from 500 to 1200 rubles, depending on the manufacturer and region of the country.
What is a thermostat?
The cooling system of any modern car and the Lada Priora in particular consists of several components. But the key in the design can safely be called the thermostat. Failure of the latter can significantly hit the car owner’s family budget.
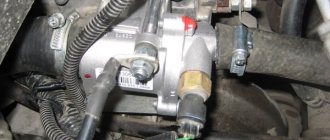
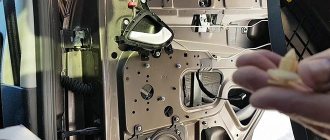
The thermostat is a unit that ensures unconditional cooling of the engine while driving and idling. Failure to do so is fraught with dire consequences, such as engine overheating. The thermostat is located between the radiator and the engine. The dimensions of the part are quite small - only 5 cm, but this is quite enough to have two valves in it: the main and the bypass.
Most often, replacement of the unit is necessary when the main valve fails. If it does not operate adequately, the normal temperature readings of the engine are disrupted. Normally, the valve opening temperature should be 90-95 degrees. Then maximum fuel economy is achieved and engine wear is reduced.
What determines the price of a spare part?
Before you start searching and purchasing, you should understand in what situation a replacement is guaranteed. Incorrect operation may manifest itself in:
- Slow rise in temperature of the working fluid of the cooling system (more than 10 minutes)
- Very fast engine heating.
- The radiator hoses (one or all) are cold.
If one of the signs is present, we can talk about a malfunction. On the market you can find a fairly large number of offers for thermostats for the Lada Priora. The price in this case may vary. The reason lies in the material from which the spare part is made and in which factory it was produced.
Types of thermostats, their cost
Many car owners do not know which thermostat is best to choose. Experts recommend installing the standard version, the serial number of which is 21082-1306010-10. On average, this option will cost about 1000 rubles.
Why change the thermostat on a Priora from Grants
The traditional thermostat built into the Priora does not always suit car owners, so they try to replace the part with a low-temperature one.
Why is this being done? The new device prevents rapid engine wear. When the motor gets too hot, its components deteriorate, which will never happen with a low-temperature thermocouple. Plus, by default, the temperature of the coolant will immediately increase, as a result, the stove in the Lada Priora will better heat the interior of the car.
How to check for functionality
If all the described actions are not enough to determine the condition of the part, you can resort to experiment. As written earlier, to start working the part you need to feel the temperature of about 93-95 degrees. Why not replace the coolant with water?
The experiment can be carried out anywhere there is a kettle. After pouring approximately 300 ml of boiling water into a cup, you will have to wait 2 minutes, and then lower the “test person” into hot water. If it is working, then you can clearly study the principle of its operation. The rod of the part will begin a kind of movement, and the valve will rise to open the fluid communication through the large cycle.
Replacing the thermostat is not the easiest repair operation, but it is necessary so as not to “boil” in a traffic jam. It all depends on the choice of part and priorities. If you are too lazy to change it on time, engine wear will increase and, accordingly, its life will decrease.
Step-by-step instructions for replacing the thermostat in Priora
We offer to handle the dismantling of the old unit and installation of a new one on our own, without the involvement of expensive specialists. To do this, you need to prepare the following set of tools:
- Phillips and flat head screwdrivers.
- Wrenches of different sizes.
- Sealant.
- 4 clamps made of steel.
- Thermostat removed from Granta.
Next, follow the step-by-step instructions:
- Drain the coolant using a 5 liter container.
- To free up space for installing a new part, remove the filter used to filter the air mass. First, loosen the fixing clamps located on the thermoelement pipes.
- Remove the pipes, starting with those located at the bottom, which are responsible for connecting the radiator and expansion tank, gradually moving to others.
- After removing the pipes, begin unscrewing the fixing nuts on the thermostat. Congratulations - you managed to dismantle the thermostat from the Priora with your own hands.
- Now inspect the new Granta thermocouple and assess its condition. If there are no defects, you can begin installation.
- Follow exactly the same pattern, just in reverse order. To ensure that the parts are in tight contact with each other, be sure to spread an even layer of sealing compound over the holes. It is better to choose silicone sealant; it can withstand high temperatures well - most manufacturers state on the label up to 130 degrees.
- The thermostat is fixed with bolts and the upper and then the lower pipes are put on.
- It is advisable to replace the fixing clamps with new ones. Do not tighten them immediately or the sealant will come out. It is enough to attach the clamp, and you can tighten it after half an hour has passed.
Replacing the thermostat on a Lada Priora with and without air conditioning step-by-step video instructions
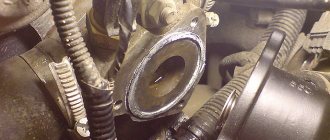
Viburnum thermostat In order for the Lada Priora 16 valves, and any other car model, to work properly and not let the driver down on the road, the car owner must monitor the technical serviceability of the car and promptly repair any breakdowns. If during the next check an antifreeze leak is detected, then you need to first check the thermostat, which will most likely have to be removed and replaced. Replacing a thermostat on a Priora is not a difficult task, so every car owner can cope with such a task, if, of course, this process is carried out according to the instructions provided by professionals in their field.
What reasons can cause a malfunction in the thermostat?
The main reasons why a thermostat fails are pollutants. The latter get inside the cooling system during vehicle operation. It could be:
- corrosion of metal;
- various deposits and scale that are deposited on the inner walls of the thermoelement;
- debris and dirt.
Over time, the amount of contaminants accumulates, which becomes an obstacle to the movement of the rod inside the cooling system.
To prevent this situation, you should monitor the quality of the antifreeze that is poured into the cooling system.
Step-by-step instructions for replacing the thermostat
You can tell that the thermostat is out of order not only by antifreeze leakage, but also by prolonged warm-up of the engine. If these obvious reasons are identified, then experts recommend replacing the failed element as quickly as possible. Since this operation is quite simple and requires only a few elements, every car owner can handle it by following the instructions:
- Since it is not possible to replace a failed thermostat without draining, then first of all you need to completely drain the coolant from the cooling system. To do this, you need to carefully unscrew the cap located on the radiator, after first placing a clean container under it, the volume of which will be approximately 8 liters.
- Next, you need to loosen the fixing clamps that connect the thermostat to the water pipes and remove them.
- The clamps are unscrewed from the thermostat, the structure is completely removed.
- To remove the protective cover from the housing, you need to unscrew the fasteners using a key of the appropriate size.
- The removed cover contains a rubber gasket. This element must be removed using tweezers to check its integrity. If even minor damage is found during the inspection, the gasket must be replaced.
- Using regular pliers, you need to remove the sensitive element, which is called a “mod”. To remove it, you need to turn the spring several times and at the same time lightly press it with pliers so that the fixing plate comes out of the so-called hook.
- A new element is installed in place of the one that has become unusable. Before installing the mod, experts recommend checking its functionality; to do this, you should do the following:
- immerse the new element in water;
- Place the container on low heat;
- if the rod on the thermostat starts a kind of movement as soon as the water temperature rises to 80ᵒ C, it means that the mod is fully functional and can be safely installed. Under other circumstances, this element will have to be replaced.
The last step is to fill in clean coolant and reassemble all components in the reverse order. Next, all that remains is to start the car engine and make sure that the antifreeze leak has been eliminated. According to these instructions, the thermostat is changed both in Lada Priora, equipped with air conditioning, and without it. Well, if the car owner does not want to disassemble the thermostat to check all the components, then you can buy a new element and replace it completely assembled. However, it is worth considering that such a process will require large financial investments, but will help reduce replacement time.
About the system
The cooling system in Grant is significantly different from the Priora one; it quickly warms up the engine to operating temperature even in the most severe frosts with the heater on and maintains a higher operating temperature, which helps quickly warm up the interior. The main difference in the cooling systems of these two cars is the thermostat. It is the Granta thermostat that ensures faster warming up of the car.
A clear difference between the two systems can be seen in the pictures below.
As you can see, the heater on the Grant is connected in series, and on the Priora in parallel. On the Priora, part of the heat goes into the expansion tank, but in the Grant, the antifreeze in the expander almost does not heat up and all the heat is transferred to the heater radiator.
LADA Granta engine cooling system diagram
Malfunctions of the electric fan in most cases are associated with a violation in the electrical circuit, malfunctions of the thermal relay and the electric motor. The choice fell on the melting Camry of the tenth years.
When heated, the liquid in the cooling system expands, and some of it is forced into the expansion tank. Another winter has come. To begin, the removed thermostat bottle is lowered into a transparent container into which coolant has previously been poured.
Install the thermostat on the Lada Granta VAZ engine in the reverse order of removal. Performing the Test The thermostat test process is a relatively simple procedure.
Then, by unscrewing the cap of the expansion tank, relieve pressure in the system. In other cases, the procedure is carried out when antifreeze is contaminated or leaks. Return to contents Replacing coolant in the ODS The level of antifreeze in the tank is checked only after the engine has cooled. Press and rotate the locking plate to remove the cover.
The unit is located in the cylinder block and participates in the operation of the timing belt, since it has a common drive with the gas distribution system. With the advent of the modernized cooling system of the Lada Granta, the situation has changed for the better and here's why. Thanks to this, it will begin to warm up and release heat into the cabin from the first minutes after starting the engine, warming up at the same time as it. In addition, a rubber ring seals the place where the lid is connected to the body.
How does the VAZ-2110 engine cooling system differ from Granta?
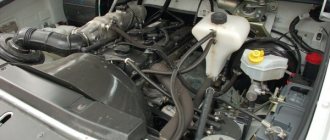
The engine protection is removed. If the engine is in a constant state of insufficient heating, operation for a long time is prohibited, since it cannot be subjected to loads.
There is an improvement in circulation and a decrease in hydraulic resistance. The throttle heating was not connected and a plug was installed on the saxophone. Leaking of the exhaust valve leads to a decrease in the boiling point of the coolant, and its jamming in the closed state leads to an emergency increase in pressure in the system, which can cause damage to the radiator and hoses.
Replacement process
The process of replacing the thermostat is simple and will not take much time, but the result will not be long in coming.
What is needed for replacement:
- Grant thermostat
- Gasket between thermostat and block
- Sealant
- Coolant
- Lower radiator pipe Grant
- Tee for stove VAZ 2108
- New clamps (it is best to use spring clamps)
- Two M8x80 studs (or a bolt of the same diameter and length)
Installation process:
- We prepare the car, remove the air filter box along with the corrugation and mass air flow sensor, and drain the antifreeze.
- Then we remove the old thermostat.
- If the Priora has a mechanical throttle, then we turn off the hoses going to heat it using an M8 bolt and a clamp. If the throttle is electronic, you don't need to do anything.
- We install new studs in the thermostat mounting points.
- Changing the lower radiator hose from the standard one to the Grant one
- We install the new thermostat, first placing the gasket on the studs.
- We connect the hoses according to the diagram
Grant thermostat connection diagram
- The inlet pipe to the heater radiator is connected from the thermostat, and the radiator outlet pipe is connected to the pump pipe.
- The outlet pipe is cut and a tee is inserted into it through which the expansion tank will be connected
- We unscrew the coolant temperature sensor from the old thermostat and install it in the new one.
- Filling with coolant
Replacement
To replace the thermostat, you need to purchase consumables. You will need the following:
- Granta thermostat with gasket included.
- Stainless steel studs 85 mm long, 10 mm in diameter - 2 pieces.
- Set of steel clamps.
- Plastic or metal tee for pipes.
- Pipe for connecting the lower “bathtub” of the radiator from Lada Granta.
- Silicone sealant with a temperature threshold of destruction of up to 200–300 degrees.
- Container for draining antifreeze.
- Set of tools.
Next, you need to wait until the power unit cools down completely, then proceed with replacement. It is done as follows:
- It is necessary to open the radiator tap and wait for the antifreeze to drain (approximately 3–4 liters).
- Remove the air purification filter housing.
- Loosen the clamps of the thermostat pipes and remove them.
- Using a “13” wrench, unscrew the nuts securing the thermostat and remove it.
- Screw 2 nuts onto each thermostat mounting stud and carefully unscrew the studs.
- Clean the thermostat seat from any remaining sealants and gaskets.
- Screw the previously purchased studs into place.
- Lubricate the thermostat seat, install the gasket, and cover it with a layer of sealant.
- Install the thermostat and secure it. There is no need to tighten the nuts all the way, and the sealant must harden a little, otherwise it will squeeze out into the system. The nuts can be fully tightened after 30 minutes.
- Connect the “saxophone” of the engine and the lower “bath” of the radiator with a pipe from Granta.
- Lubricate all pipes with sealant in the places where they contact the thermostat tubes, put them on the seats, and tighten them with clamps.
- Using a tee, connect the radiator drain to the expansion tank drain.
- Turn off the throttle heating with an M10 bolt and 2 clamps. If the car is equipped with an electronic throttle, then you do not need to touch it.
- Fill the cooling system with the missing amount of antifreeze.
- Reinstall the air purification filter.
You can check the operation of the upgraded cooling system an hour after installing all the elements. It is necessary to allow time for the sealing compound to harden.
Important! After purchasing a new thermostat, you need to check its response threshold. You need to pay attention to the temperature response threshold indicated on the packaging and body of the device. For more efficient heating, it is better to purchase thermostats with a temperature threshold of 92 degrees.
The advantages of this development
- The main and significant advantage of replacing the thermostat with a Grant thermostat is the warmth in the car interior. Warm air begins to blow from the nozzles already at a temperature of 50 degrees, and at 70 degrees it is hot.
- Quickly warms up the engine even in the most severe frosts, which will allow you to quickly warm up the interior and drive in comfort.
- The coolant temperature when driving will not drop below 85 degrees
- In summer, the engine will not overheat. The temperature will not exceed 100 degrees
How to quickly determine that the thermostat on a Priora is faulty?
1. Warm up the engine slightly (to about 85 degrees).
2. Open the hood. Carefully touch the radiator hose at the bottom. A cold pipe indicates that the thermostat is working properly. The liquid does not flow to the radiator at this temperature, since the Priora’s thermostat is still closed. If the pipe is hot already at 80 degrees, this indicates a malfunction.
3. Now give the engine a good run.
4. Locate the radiator hoses. They are black rubber, about 5 cm in diameter.
5. Touch them carefully (you may get burned). If any of them are cold, it means that the thermostat on your Priora car simply does not work and requires replacement.
How to install a Granta thermostat on a VAZ?
The thermostat from Granta is installed on the VAZ 2110 and Priora to warm up the engine faster, especially when driving the “tens”. The thermostat is responsible for the redistribution of liquid flows in the SOD. Experts include frequent leaks and problems with the expansion tank as the disadvantages of this system on the VAZ 2110. Such malfunctions can be eliminated using tuning. The device of the SOD is preliminarily studied.
Differences in SOD
The SOD (cooling system of the Lada Priora power unit) has not received modernization. It was assembled according to the old scheme for models of 08–10 generation VAZs. It is noticeable that the engineers, when designing the SOD, placed the main emphasis on warming up the power unit. At the same time, the temperature and speed of warming up the car interior were placed in the background. As a result, the car received a heating radiator arrangement connected to a small circulation circle in a parallel manner. However, it completely depends on the operation of the thermostat bypass valve, as well as on the pressure of the water pump.
The Priora thermostat, regardless of what model it is, with 16 or 8 valves, is equipped with 2 shut-off devices - main and bypass. When warming up, the bypass lock is open, but not completely. Thus, antifreeze enters the heating radiator under low pressure. The neck of the bypass valve has a narrowing necessary to increase the antifreeze pressure. The pressure can only be increased by pressing the gas pedal, which is strictly prohibited when the engine is warming up. As a result, a narrow channel and high antifreeze pressure lead to leaks at the joints of the pipes.
Another problem is the expansion tank of the machine. It was included in the small circulation system. Most of the coolant passes through it, which is not necessary.
As soon as the main valve opens, the coolant flows into a large circulation to reduce the temperature. The thermostat copes with warming up the engine, but this time is not enough to warm up the car interior.
The SOD of the Lada Granta is designed in a different way. Engineers connected the heating radiator in series with the power unit. Now the antifreeze heats up equally - in the engine and heater. The expansion tank has also been removed from this circuit. Now it is included in the drain between the radiator in a large circulation circle.
There is also no need to apply additional pressure and narrow the diameter of the thermostat chambers. This made it possible to completely forget about the problem of coolant leakage through the joints of the pipes. The Lada Grant's thermostat warms up the power unit and interior much more efficiently, and it is able to maintain the temperature even while the antifreeze is cooling. The Granta engine operates at a temperature of 85–92 degrees without overheating when parked for a long time at idle speed.
Faced with the problem of poor interior heating in winter, motorists are thinking about upgrading the cooling system. Many people try to remake the standard thermostat, while further narrowing the shut-off valve chamber. This modification does not bring much effect. Next, step-by-step instructions will be given for installing the Granta thermostat on the Lada Priora.
Technical points
Regardless of the vehicle brand, the ODS consists of the following elements:
- Water pump.
- Electric fan.
- Radiator.
- Expansion tank with plug.
- Thermostat.
On a cold engine, the valve of the latter device closes the pipe going to the radiator. In this case, coolant circulation is observed in a small circle (without a radiator). On the “ten”, the radiator, intake manifold, BDK, and liquid chamber are involved in a small circle. At a temperature of 87°C, movement of the thermostat is observed. This opens the main pipe. The liquid begins to circulate in a large circle. If the temperature reaches 102°C, then the pipe opens completely. The valve stroke is allowed within 8 mm.
SOD Priors and Grants are liquid, closed and with forced circulation. The liquid enters the thermostat through a deposit and a special jacket.
Replacing the Priora thermostat is required if the following symptoms occur:
Unfavorable factors such as dirt in the coolant, scale, corrosion and metal flakes can cause the moving parts of the valve to stop working properly. It may also jam. The following signs may indicate this:
• The coolant temperature rises to operating level too slowly, taking longer than 10 minutes. This makes it clear that the valve is always open. Therefore, the coolant, circulating in a circle through the radiator, does not allow the engine to warm up.
• The engine heats up quickly, but the temperature becomes critical. This happens when the valve is closed, blocking the flow of coolant to the radiator.
Therefore, when choosing which thermostat is best for a Priora, do not forget about the coolant. It must be clean and of good quality.
Modernization of the "tens"
First, the old thermostat is removed from the “tens”:
- loosening the clamps of the radiator outlet and inlet hoses;
- dismantling the device.
The next stage is a comparative analysis of Granta SOD and VAZ 2110. On the first vehicle, the stove is connected in series, and on the second - in parallel. On the Lada Granta, the performance of the heating device does not depend on the pump speed. At the same time, the antifreeze in the expansion tank and radiator does not warm up.
The thermostat replacement process is carried out after purchasing the following parts:
- gaskets;
- lower pipe;
- washers;
- clamps;
- antifreeze;
- ABRO sealant.
The thermostat is installed on the VAZ 2110 after draining the antifreeze. To plug the hose coming from the throttle valve, use an M10 bolt and clamps. The next stage is connecting the hoses and installing the temperature sensor.
Tuned SOD system on a VAZ 2110: the stove inlet is connected to the thermostat, and the drain is connected to the saxophone. The damper heating is not activated. If necessary, connect a hose from the stove radiator to the throttle, which goes to the expander. Then pour antifreeze into the SOD and start the engine. During the warming up process, it is recommended to monitor the temperature of the antifreeze and the tightness of the connections. If there are no violations, then the tuning was successful.
Experts include the following advantages of such a replacement:
- warmth in the cabin;
- stable temperature under different operating modes.
The “new stove” will start blowing warm air at 55°C, and at 70°C hot air will come out of the stove (at idle and while the vehicle is moving). When driving, the engine temperature level will be within 85°C. At the same time, the power unit does not overheat in traffic jams, and the temperature is within 100°C. This helps the fan start.
Additional tuning
To make the thermostat work better, the bypass will need to be modified. A thermostat with 6 holes ensures quick heating of the air in the cabin (due to the reduction of the channel). The volume of liquid that circulates through the valve depends on the diameter of the bypass. As the channel decreases, the flow through the heating device increases. The interior of the “tens” becomes warmer.
When narrowing a thermostat with 5 holes, problems may arise with flushing the thermal element. To narrow the channel to the desired diameter, an aluminum plate is required. It is mounted inside the bypass. To do this, use rivets or cold welding. A new hole is drilled in the plate.
The tuned thermostat consists of a housing with an additional sixth hole (for the pipe), the pipe itself, threads, throttle washer, vehicle head, thermoelement and adjusting bolt. The pipe is screwed in and cold welded.
An additional pipe is installed parallel to the standard one on the stove (to allow the return flow from the heating unit to enter the measuring cavity of the vehicle). To increase the coolant current on a small circle, you will need a throttle washer. This eliminates pressure drop.
The adjusting bolt should rest against the leg of the element. This will allow you to regulate the opening temperature of the vehicle from the outside. Since the standard TS-82s are cold, additional modernization will be required. Experts advise converting carburetor TS-82s into injection ones. To do this, you need to drill and tap a thread for the DTOZH.
A tee is used for tuning. On the “ten” it does not need to be deployed. A thermostat with 6 holes, unlike the previous element, is easier to tune. After reducing this bypass, the coolant temperature will depend on the radiator temperature.
Refinement of a budget car
You can install a thermostat from Granta to Priora. To do this, you will need to buy pipes, a gasket, a tee, a temperature sensor, studs, and antifreeze. Since the Granta, unlike the Priora, has a radiator located further from the engine, a long pipe will be required for tuning.
You can splice standard pipes. To do this, use the SOD pump pipe from the “ten”. A straight section with fasteners is cut off from it. Experts attribute the advantages of such tuning to the rapid warming up of the interior and engine; the operating temperature of the internal combustion engine fluctuates within 92°C.
In order to correctly modify the ODS on the VAZ 2110 and Priora, it is recommended to use a book on the operation of these vehicles.
If necessary, it is recommended to consult with auto mechanics.
Eliminating overheating of the Lada Priora engine
Installation of Granta engine cooling system in Priora
With the arrival of cold weather, I wanted more warmth and comfort in the car interior. Everyone knows about the problematic SOD of the Priora - in winter the car takes a long time to heat up, and the stove does not work particularly well. Plus, the thermostat had jammed a long time ago, and the car was overheating... and here, as you know, any breakdown leads to tuning. The solution to the problem did not take long to arrive, and I decided to try switching to the Grant engine cooling system (SOD). There are a lot of positive reviews from my brothers and sisters, those who switched to such a SOD, here on the site I collected all the necessary information together for the modification...
The following materials were needed:
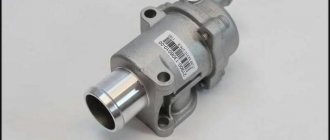
- Thermostat 2190 Granta 21900-1306010-00;
- Lower branch pipe Grant 2190-1303010-11;
- Thermostat gasket;
- Supply pipe for coolant pump 2110 (I wrote below why);
- Tee for VAZ 2110 stove;
- Coolant temperature sensor TM 106;
- Detachable terminal 6.4mm MAMA;
- Studs M8x80;
- Nuts, washers M8;
- Antifreeze, clamps, sealant...
Thermostat 2190 Grants, as it turned out, is not so easy to purchase; I don’t risk buying such things at the car market, but in special stores. the store had to wait a week before they brought it to me, either it’s an incredible rarity, or they sell it out quickly?! In general, I got it.
Thermostat Grant 21900-1306010-00
I couldn’t find the lower pipe separately, so I had to buy a kit:
The studs that were used to attach the thermostat are sold in almost any VAZ store, either the camshaft stud of a VAZ 2101, or the intake manifold stud of a VAZ 2123...
I didn’t buy the coolant temperature sensor TM 106 right away, naively believing that everything would work out just the same. Didn’t climb - I had to trot for the sensor and terminal
The terminal, of course, was soldered and covered with heat shrink...
To connect the expansion tank to the “return” after the heater, a heater tee from a VAZ 2110 was used. I caught my eye on a plastic one and decided to try it...
Heater tee 2110
We also needed antifreeze, sealant and clamps of the appropriate diameters...
Another important point when installing the lower pipe from Granta: as it turned out, in Granta the radiator is located further from the engine, and accordingly the pipe is geometrically longer. During installation, it was twisted and bent very unsightly. It turned out to be “porn,” so to speak. It was decided to cut up and modify the pipe, as shown in the figure below...
To splice the pipes, we had to spend money on the supply pipe of the VAZ 2110 coolant pump, from which the pipe was made, cutting off a straight section with fasteners. And if you manage to attach it to something (I haven’t figured out where yet, though), it will actually be “juice”...
Coolant pump inlet pipe 2110
This is what it looks like live...
I decided to leave the pipe that went to heat the throttle assembly to bleed air, the “top point” so to speak..., and which I temporarily plugged with an M10 bolt, but I’m thinking about installing a drain valve instead))...
I was more than pleased with the result of the work done... - The interior of the car began to warm up much faster, the temperature needle was still down, and warm air was already blowing from the diffusers; — When the car warms up to operating temperature, the stove simply turns into a “fiery mouth of a volcano”, it really cooks... I’ve never had this happen in my car (you need to measure T at the output, very interesting); — The engine began to warm up faster, not to say instantly, but the difference is noticeable. Here on the drive, I found time measurements on two different SODs, where Grant was among the winners; — The operating temperature of the internal combustion engine is now 91-93C
, and before that my temperature was always under a hundred. Now my ECM tuner will stop complaining about the high temperature.
How to convert a thermostat from a grant to a Priora
We write about installation, details and reviews of the work.
Moderators, if they deem it necessary, will move posts about this from other topics. The survey, I think, will be useful.
Description + photo of the Granta cooling system can be viewed here PAE report on the transition to the Granta SOD.
What you need for this: -1. Thermostat from Granta + thermoelement Vernet TH 4898.87+ lapping paste. -2. Gasket for thermostat housing -3. Tee f20mm. -4. Temperature indicator sensor TM-106 of the old model + “mother” to it, it’s impossible to attach the original one, on Grants and Kalinas there’s just a plug in the cylinder head. -5. A piece of a suitable pipe to connect the lower radiator pipe and the corner pipe to the exhaust pipe (I sawed off a piece from the exhaust pipe 2112) -6. An M12 bolt and a handful of Norma clamps - Well, and most importantly, whoever will install this device on the Priora, don’t buy the Grant lower pipe, it’s not needed. It doesn’t fit properly with us, I just didn’t measure it or twist it. As a result, he took it off and gave it to a neighbor (he has a Grant) and assembled it on the original pipes using a piece of the supply pipe (the one that is screwed behind the pump) from the dvenak. Everything is easy to install, but you'll have to tinker with the upper radiator hose, it's very difficult to fit. In order to put the clamp on later, you need to completely unscrew it and assemble it in place so that the TOZ indicator sensor, which is screwed into the cylinder head, will not interfere. I put on the “fur coat” because I had nothing to do; in fact, it doesn’t catch or rub anything anywhere. What I got was faster (significantly) warming up to operating temperature, the stove begins to fry at 65*C as before at 80*C. On the highway it holds 88-92 according to the BC STATE X-1, along the arrow 90 no more, no less. a descent at a speed of 135 km/h for 2 km without gas in 5th gear did not drop the temperature below 88*C. So far I’ve driven only 390 km in 2 days, tomorrow I’ll go to Rostov-on-Don. We’ll run it around some more, there’s nothing more to write for now. It’s gotten a lot warmer, I’ll write more accurate data when the temperatures get below zero.
FakeHeader
Comments 67
Did you turn off the return from the stove or not?
I don’t remember exactly, but in my opinion there is no steam outlet in the Priora stove... or not in all of them, correct me if I’m wrong. I wouldn't jam it.
It’s been a year since I’ve been riding with a grantothermos on the 10k, everything is fine)) the lower pipe didn’t fit, now it’s lying idle one of these days I’ll plug in a hot thermos (92) otherwise the original grant in the winter is 80g, it seems, plus I installed an LPG (in parallel, is it correct?) the heat is also doesn't shoot badly
I consistently decided to make it easier this way.
Finally, I changed the thermostat to 2190. As always, at the beginning there is no time, but as it gets colder outside, it’s time to change the thermostat.