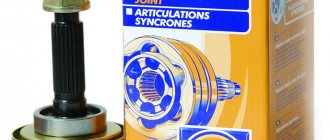
A CV joint is an angular velocity joint. An alternative name is considered to be grenade due to its visual similarity. The main purpose is to transmit rotational movements between the axle shafts. The angle, due to rotation, constantly changes in relation to each other.
Periodic breakdowns are associated with the influence of constant loads; the issue remains during the period of operation. In the manufacturing process of the part, strong carbon steel is used, which can withstand heavy loads for a long period of time.
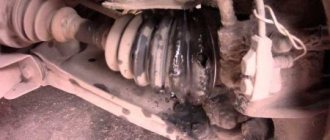
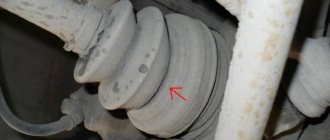
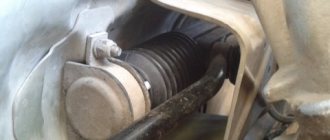
Over time, the VAZ 2110 CV joint still needs to be replaced. Among the main reasons for failure is contamination with sand getting inside the mechanisms, loss of lubricant, torn boots or mechanical damage to the structure.
Replacing the internal CV joint of a VAZ-2110
To extend the life of this component, which significantly affects the level of safety, you need to:
- firstly, monitor the choice of the original spare parts, made of high-quality carbon steel, designed for long-term loads;
- secondly, it is necessary to undergo regular maintenance and independently inspect the functional components of the car.
The need and timing of these procedures follow from the manufacturer’s recommendations and the functionality of the element in question. The CV joint can fail as a result of foreign objects, significant constant load, and loss of lubrication. Replacing the internal CV joint of a VAZ-2110 will require a certain set of tools.
Please note that it cannot be repaired, it can only be replaced. You can do this yourself, without the help of specialists. We are considering how to do this without draining the oil, and also without a pit.
How to completely remove the drive
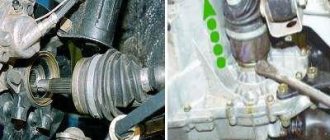
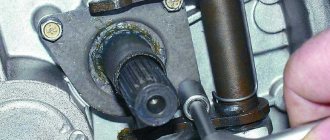
You have already removed the outer hinge. But the internal one is still in the gearbox. Before removing it, drain the oil from the gearbox (at least 2/3 of the total volume). The easiest way to remove the inner CV joint is to use a short, wide chisel and a hammer. How to use these tools? Position the chisel so that it rests against the joint and lug on the transmission housing. Using sharp blows of a hammer in the direction from the wheel to the gearbox, remove the hinge. Usually 2-4 hits are enough. You should not use a mounting spatula. Practice shows that with its help the CV joint is removed much worse. That's all. The drive is in your hands. You can begin further repairs.
Equipment and tools for replacing CV joints
To replace the CV joint, you need to prepare the following tool:
- internal grenade, including a clamp and lubricant; timely replacement of the grenade ensures long-term operation;
- replacement without a pit requires a lift. The inspection hole also implies the presence of a jack and fixing the car in a safe and convenient position for performing work;
- standard tool for replacing a hinge.
Any set for motorists can be used as a tool without any other accessories.
Signs of a problem
Malfunction of CV joints can be identified by very characteristic moments in the operation of the unit:
- Crunch when starting from a place;
- There is also a crunching sound when cornering. Here you can determine which of the CV joints has begun to fail. This is done on the side of the turn when a crunch is heard;
- Jerks during acceleration;
- There is play in the hinge itself.
If you look closely at the car, you can quickly notice the problem and fix it.
Replacing the CV joint - instructions
Stage 1:
- Secure the vehicle off the ground using a lift while engaging 4th gear and applying the handbrake.
- Install wheel chocks under the wheels.
- Remove the protective cap and use a pry bar to unscrew the hub nut.
- After removing the hub nut, unscrew the car wheel components.
- Raise the wheel using a jack.
- Find the CV joint and unscrew the 6 bolts, in this case the hinge will be fixed only to the flange.
- Unscrew the knuckle mounting bolts (2 pcs.);
- Turn the steering mechanism to its most extreme position; after these steps, the hinge should fall out by itself.
Stage 2. Dismantling:
- replace the boot as part of an updated design solution;
- remove the retaining ring;
- remove the hinge secured by the shaft splines;
- carry out equipment diagnostics;
- install all components, new CV joint.
Preparing for repairs
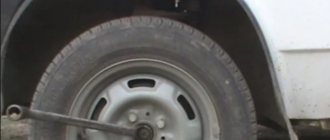
Place the car on a level surface. Place chocks under the rear wheels. In this case, the neutral gear must be engaged. Your task is to unscrew the nut from the hinge. To do this, you need to unlock it with a drift and turn it with a key at “30” with a large lever. It is possible that this will not be done the first time. But replacing CV joints on a VAZ 2110 model is impossible without unscrewing this nut. The wheel must be on the ground. There is no need to jack it up at this stage. Unscrew the nut and bolts securing the wheels. After this, you can raise the side to be repaired. What's next? Remove the wheel and lower the car onto a support.
Installation of CV joints at the final stage in detail
Please note the following notes:
- install a plastic plug on the end of the shaft;
- the retaining ring is installed before mounting the hinge;
- Before installing a new CV joint, the installation site is generously treated with lubricant to ensure a tight fit;
- After installing the drive, the hinge must “sit” tightly on the gear until it is completely fixed, which is done with a hammer.
Carrying out this replacement of a functional element of a VAZ shaft with your own hands does not require experience in car repair. The replacement can be carried out following the video instructions. If you are not confident in your abilities, contact a specialist to ensure that the hinge is installed reliably.
Required spare parts
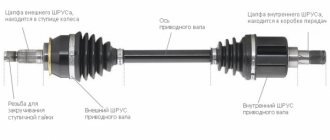
Each car is equipped with two grenades: internal and external. The first joint transmits rotation to the shaft from the gearbox, the second – to the hub from the shaft. Depending on the scope of the repair, you may need:
- internal hinge (article 302315, 2108-2215056);
- external CV joint (article 3107K, 2110-2215012);
- front wheel drive shaft (article 2110-2215070, 21100221507000);
- cover (article 2110-2215068, 21100221506800, 2108-2215068);
- buffer (article 2108-2215073-01);
- hinge clamp (article 2108-2215086);
- internal hinge retaining ring (article 2108-2215104, 21080221510400, 2121-2215084);
- thrust ring (article 2121-2215082);
- clamp (article 2108-2215034Ч, T-00040, 2108-2215036, 2108-2215034-31, 2108-2215034);
- protective ring (article 2108-3103060, 21080310306000).
Attention! It is better to purchase a new hinge using an old grenade, so the risks of purchasing the wrong part will be reduced to zero. It’s better to go to a trusted store for a CV joint.
First type
Let's start with the most popular. This is the so-called “Ford” clamp. Recently, it can increasingly be found in kits from various manufacturers of grenades for the VAZ 2110 and other domestic cars. Among its advantages, of course, is the full connector, that is, if you accidentally forget to put it on in advance, you can do it at any time. In addition, you can’t “tighten” it. Among the disadvantages, of course, is its disposability; you can use it a maximum of 2 times. Many may think that there is always a new one in the kit, but they would be extremely mistaken. It also happens that he is not there. Anything can happen. To install it you will need pliers or regular side-cutting nippers. We just tighten it as much as we can with our hands, then squeeze it.
Second type
These are purebred Chinese clamps. As soon as you see them, you will immediately understand why there is such an opinion about them. These clamps are simply made almost from foil. That is why they are tightened in two turns. To install, simply place the screwdriver into the plastic to avoid turning, then tighten it, bend it, bend the antennae, cut off the excess. The advantages include ease of installation; absolutely no tool is needed except a screwdriver. Well, the downside, as with the previous option, is that it is disposable, since after installation you will have to cut off the extra tail of the clamp with scissors.
Third type
The third type can only be found on grenades for domestic cars. On the one hand, they are the most convenient, since they are made of thick metal, which, by the way, is quite soft; installation takes about five seconds. It can be installed at least 10 times, it all depends on accuracy. Of course, there is one drawback - the need for a special clamp, the cost of which is several times higher than the cost of replacement at a service station. Of course, if you plan to buy only the same grenades, then you can buy the necessary thing.
General recommendations
Obviously, the inner joint cannot be removed without lifting the vehicle structure, since the wheel must be removed.
This can only be done when the car is suspended. Some technicians recommend draining the oil before such repairs, but you should not do this. Carrying out the replacement according to the instructions will allow you to do without draining. It is also recommended to replace the CV joint seal together with the hinge. The CV joint is changed separately without replacing the boot and oil seal only in cases where there is a functional reserve, and the wear of the CV joint is more pronounced than other structural elements. Typically, repairs are divided into two stages if it is not possible to complete a replacement in full. Don’t forget to replace the oil seal and boot afterward in order to maintain all variations to maintain the level of vehicle safety.
Watch the video instructions for performing the work. For example, the grenade and hub are changed until the mechanism completely fails.
Sources
- ladaautos.ru/vaz-2110/kak-delaetsya-zamena-vnutrennego-shrusa-vaz-2110.html
- drive2.ru/l/7210376/
- vazweb.ru/desyatka/hodovaya/zamena-vnutrennego-shrusa.html
Functionality check
of the inner and outer CV joints should be examined separately , since the procedures and signs are somewhat different.
External grenade
The most obvious and main sign of wear of this element is the appearance of a sound similar to a crunch. It appears because the grooves have worn out and the balls do not move along them as well as before. The crunching becomes noticeable when entering turns, sharply pressing the gas pedal or passing difficult road sections.
Grenade
If you want to verify that the outer CV joint is faulty, do the following:
- When starting from a standstill, deliberately create jerks, but not strong ones;
- Try to accelerate sharply and slow down;
- Move the shaft transversely between the CV joints. If you feel any play, then the grenade is definitely worn out.
Internal grenade
It is noteworthy that the internal hinge is more durable and less subject to wear. Most often, the inner CV joint declares its malfunction when simply driving in a straight line or when passing through difficult sections. A check for play, similar to an external grenade, will allow you to verify problems.
But to understand whether an element really needs to be replaced, do this:
- Raise the drive wheels, which will allow you to bring the inner CV joint to its maximum angle;
- Start the engine;
- Turn on first speed;
- If the hinge is at the limit of wear, you will hear a characteristic crunch. This is a signal that you need to change the grenade.
What will you need at work?
When replacing the internal CV joint of a VAZ 2110 car, it is necessary to select the right equipment and tools, without which subsequent work is impossible. Repairing the unit is not possible; it will only need to be replaced.
To perform the following operations, you will need a set of equipment and tools:
- A new internal grenade, which includes a clamp and lubricant, will ensure subsequent trouble-free operation of the system over a long period of time;
- A lift, or a special inspection hole with a jack, will be required to lift and secure a VAZ 2110 model vehicle, guaranteeing safety during the work;
- A set of standard tools used to replace the internal CV joint. Includes wrenches, screwdrivers, pliers and much more needed for repairs.
Order of Operations
If there is no inspection hole or overpass, you need to prepare a place for repairs. Raise the car with a jack, put on the handbrake, provide the work area with good lighting, and support the wheels with clamps.
Replacing the inner CV joint of the VAZ 2110 and other models is carried out in the same way as the outer joint. They are both located on the shaft drive, which you need to get to first:
- On the crankcase protection, two nuts are unscrewed at the front and rear.
- You need to drain the oil from the box - 40 percent of the total volume.
- When replacing the right CV joint on a VAZ 2110, the wheel bolts come off on the right; if the left one is changed, the wheel bolts come off on the left.
- The outer hinge fasteners are completely unscrewed.
- Now you still need to jack up the car and remove the wheel.
At this stage, two hub bolts securing the grenade become accessible; they need to be removed.
- The hub needs to be separated from the rods, this is done with a pry bar.
- The stand is pulled forward and the CV joint pin is removed from the hub.
- The shaft drive is removed and set aside.
Now you need to remove the inner grenade from the box. With the hood open, you need to insert a pry bar between these elements. Then the tool jerks the hinge towards the box. The grenade should move. If this does not happen, the operation is repeated again. If the CV joint moves, then both hinges and the shaft can be removed from the wheel arch area. - You need to remove the covers from the grenades; to do this, use pliers or special pliers to open the small and large clamps.
- The boot must be inspected for integrity. If the cover is damaged, it must be replaced. If the boot is in good condition, you can simply move it away.
Use a hammer to remove the inner hinge. They need to hit the clip hard. The grenade should fly off. The same action must be performed on the other side.The rings are removed from the shaft drive, new ones are installed in their place and the boot is put on.
- The new grenade is also installed using a hammer. It and the boot need to be lubricated.
- The covers are secured to the hinge and shaft with clamps.
- A nut is screwed onto the grenade, then the hinge is driven into the box.
- Further operations are similar to the first, but are performed in reverse order.
