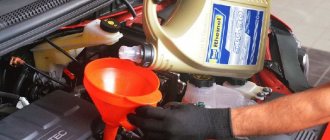
All internal combustion engines have a lubrication system. Thanks to it, the rubbing units work for a long time and without interruption, regardless of the load. The lubrication system consists not only of the oil pump, filter and channels in the cylinder block. The VAZ 2110 has another important part - an oil pressure sensor. This is a simple part that has a responsible function. The article will discuss how it works, where it is located and how to check the oil pressure sensor on a VAZ 2110.
Purpose
This device detects the oil pressure level and displays the corresponding information on the control panel. Timely notification allows the car owner to quickly fix the problem. If you ignore it, problems may begin with the engine, leading to expensive repairs. After all, if there is not enough oil in the engine, the piston of the car runs “dry”.
The oil pressure sensor on a VAZ not only notifies that this liquid has run out. Sometimes a glowing red indicator may indicate a malfunction in the pump. This happens even if there is enough lubrication in the motor.
When to change the oil pressure sensor
On average, this needs to be done after 10 thousand kilometers. In addition to the distance traveled, the need for an early oil change is also affected by the vehicle's driving mode. For example, prolonged engine operation under increased loads on poor quality roads (slipping). And, of course, the change of season - in winter (when the cold is more than -5°C) and in summer (when the atmospheric temperature rises after the cold to +5°C).
Monitoring the operation of engine oil in the VAZ 2110 engine is provided by several sensors:
- engine oil pressure sensor;
- engine oil level sensor.
How the sensor works and how it works
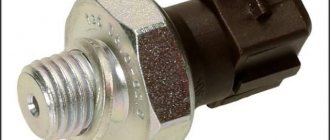
The oil pressure sensor on the VAZ 2110 includes the following components in its design:
- movable and fixed contacts;
- body (usually metal);
- membrane;
- pusher in the form of a rod.
On the VAZ 2110 model there is a contact sample sensor. It connects to the warning light on the panel. When you turn on the ignition, a “plus” from the vehicle’s power supply goes to one contact of the light bulb. The remaining, second contact, contacts the moving part of the meter.
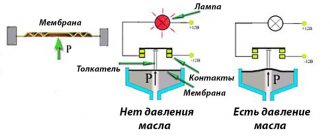
The working principle of the part is not complicated. The algorithm is based on the fact that the lamp terminals are connected to ground. This is the functional task of the moving contact - it is through it that the pusher is connected to the diaphragm. Under the diaphragm itself there is a cavity in contact with the lubrication system in the engine block. When the pressure inside it increases, the load on the diaphragm also increases. And it begins to bend, as a result of which the movable contact moves away from the stationary one. If there is no pressure, the contacts remain closed and the corresponding indicator lights up on the dashboard. For the circuit to open, the pressure must rise above 0.3 atmospheres. At the same time, the light bulb goes out.
What to do if the sensor lights up
If the sensor is working properly, and during the operation of the car an emergency light comes on on the dashboard, you should immediately determine the cause of its appearance, and also solve this problem as soon as possible. The main reason for the appearance of the corresponding icon on the dashboard of the VAZ 2110 is a decrease in the amount of oil in the engine.
A lack of oil reduces the pressure in the oil system, and the sensor manages to detect this, sending a warning signal to the dashboard.
In this case, it is recommended to begin to resolve this issue as quickly as possible, since a lack of fluid can lead to such unpleasant consequences as premature wear of the car engine elements, as well as the wedge of the shafts (camshaft or crankshaft).
If you ignore the problem, you can subsequently spend a lot of money on repairing damaged parts and devices, up to and including major engine overhauls.
As a result, it should be said that the operation of any vehicle, including the VAZ 2110, requires a responsible and attentive attitude. The car owner must regularly inspect the performance of the car’s structural elements, as well as check the serviceability of the sensors and mechanisms present in it.
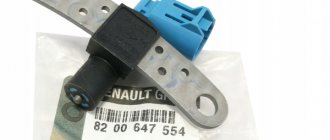
Where is
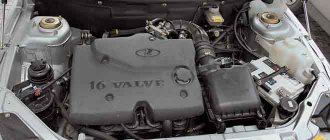
In the tenth VAZ model it can be located in two places, which depends on how many valves the engine has.
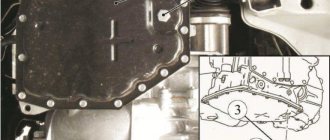
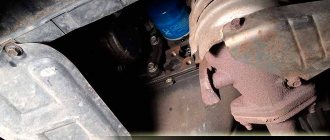
For 2110 8 valves, it is located in the rear right part of the engine, in the cylinder head socket, not far from the belt guard. It is easy to find by the single wire.
Drivers of a VAZ with a 16-valve working unit will have to look for it in a slightly different place. It is also located behind the engine, but to the left. The sensor is mounted on the camshaft block. There is also one wire coming from it, but nearby there are two bundles of cables protected with black insulation.
Price and article
Below is a table with the most common oil pressure sensors that are used in the car in question, article number and price.
| Sensor | vendor code | Cost, in rubles |
| Oil pressure sensor Vernet | OS3573 | 150 |
| Oil pressure sensor TRS ERA | 330337 | 300 |
| Oil pressure sensor (Era) Iveco | 330684 | 250 |
At the moment, there are other names depending on the sensor model and its manufacturer.
Possible faults
There are a number of situations that lead to the breakdown of the DDM on the VAZ-2110 8 valves:
- the membrane is damaged;
- the resistive layer is worn out;
- the heating element of the bimetallic plate has failed or is deformed;
- the channels through which oil is supplied are clogged;
- Wires are oxidized or torn. This leads to “parasitic” resistance;
- The sensor relay has failed. The relay's job is to sound a buzzer if there is not enough pressure in the system. It just starts at certain engine speeds (more than 1500). At idle, it is inactive, because the pressure does not even reach mark 1.
Important information to note
It happens that after replacing the oil pressure sensor, oil begins to leak through the new one. You buy a new one, change it, after a while the situation repeats itself. What causes this?
The most common cause of such a malfunction is due to defective sensors, even new ones purchased in a store, and not on a tray around the corner. Many car owners complain about similar problems that they have to change the sweat several times in a row.
However, in such a case, we recommend contacting a car service to find out the real reason, so that you don’t end up with a lot of stupid fuss, as already described above.
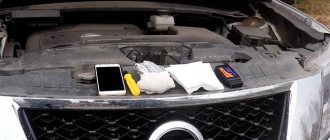
Sensor check
Sometimes it happens that when starting the engine, when it is idling, the DDM light comes on. It continues to burn even if everything is fine with the motor. Another situation also occurs - the indicator goes out as soon as you turn on the ignition.
To make sure the node is working, you need to check it. It is likely that the wires through which it is connected are damaged. They are checked simply: connect one cable to the engine and see if the lamp lights up. If yes, then everything is fine with the wiring.
One of the reasons for its inoperability is that the sensor is simply oily. But, if upon visual inspection it turns out that it is dry, but the light is still on, this is not the reason.
Here you can already think about replacing the unit, fortunately, it is inexpensive - within 100 rubles. The VAZ 2112 oil pressure sensor is checked in a similar way.
Note to car owners
Quite often, the self-replacement procedure ends in a fiasco, since installing a new device does not give any result; lubricating fluid continues to flow from under it.
But the point here is not at all the crookedness of your hands or lack of repair experience. If you did everything according to the instructions, the culprit in this situation is no longer you, but the sensor itself.
Statistics show that approximately 40% of all auto parts sold on the market are counterfeits.
Therefore, your task is to take the defect you purchased along with the receipt and go to the store where you purchased it. The store employees are obliged to exchange the device for you or return your money. Of course, if you do not save the receipt, you will not be able to return the money or change the sensor according to the law. Therefore, think twice before throwing away this piece of paper.
Another important piece of advice is to avoid such purchases on so-called spontaneous markets. This is where the largest number of fakes and defective devices are concentrated. There are many reliable, certified outlets selling auto parts. If you go to a service station to replace the sensor, you will have to pay more than if you repair it yourself, but you will be provided with a quality guarantee. A kind of protection against counterfeiting.
How to replace
The replacement is easy to do with your own hands; you don’t even have to go to the garage or visit a service station, where the car owner will be charged a tidy sum.
Replacing a sensor is a task similar in complexity to replacing a wheel. What will be useful for work:
- spanners;
- gloves to avoid getting your hands dirty;
- new device.
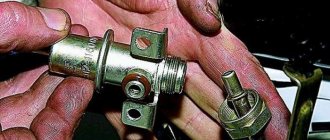
Instructions for disconnecting the old sensor and installing a new one:
- Disconnect the wire going to the device.
- Remove the sensor using a 21 mm wrench.
- They take it out.
- Together with the DDM, the sealing ring, usually made of aluminum, is removed. It is also better to replace it with a new one.
- Install and tighten a working sensor.
- Connect the wire that was disconnected at the very beginning.
This is what the procedure for replacing a node looks like. You should be careful when buying DDM, since now about 40% of these products are fakes.
Replacement
You can carry out the replacement yourself, and you don’t have to be in the garage to do it. It’s not worth talking about service station services at all, since they charge a lot of money for work that even a beginner can do.
In terms of complexity, replacing a sensor is equivalent to replacing a wheel. Difficult? Absolutely not.
To get started, prepare the necessary tools and materials:
- Spanners;
- Gloves that will allow you to avoid unnecessary contamination of your hands;
- New sensor.
Next, following the simple instructions step by step, you can easily remove the old one and install a new oil pressure sensor.
- Disconnect the wire that goes to your device.
- Dismantling of the device is carried out using a regular 21 mm wrench.
- The sensor is now removed.
- Along with the device, you should get an o-ring made of aluminum. It is not recommended to reuse it. Replace with a new ring.
- Armed with a new sensor, insert it in place of the old one, screw it in and secure it.
- Reconnect the wires you disconnected in the first step. The matter can be considered completed.