Almost every car owner has probably noticed the following pattern: license plate or license plate illumination is provided only at the rear of the vehicle. Lamps are usually not used in the front. These can be exclusively home-made lighting options, made at the request and discretion of the motorist.
Replacing car license plate lamps
In this case, the backlight operates on the basis of light bulbs enclosed in shades. Often two lamps are used, installed in the area of the rear saber of the trunk. Periodically, the lighting device may burn out, which impairs the visibility of the license plate in the dark.
According to the traffic rules, there is a fine for such a malfunction, since vehicle license plates must be easily readable during the day and at night.
There is nothing complicated about replacing the license plate light bulb. The car owner can carry out the corresponding activities independently, simply by following a few rules and recommendations. Just remember to comply with applicable laws.
Is it important to change the license plate light bulb?
Above, I indicated that license plate lighting is a very important point, and not a whim of the traffic police, but why?
After all, it has absolutely no effect on driving safety and does not affect drivers in any way - neither oncoming ones nor those following behind. Is it so? Let's assume that a car with a faulty backlight has committed some minor offense (in the dark, of course). How can a traffic police officer or random witnesses identify him? Naturally, by license plate. But since there is no backlight, the number is impossible to read. This means that the violator is not caught, not punished, and will continue to violate until he himself gets hurt or injures other drivers or pedestrians. It turns out that the lack of license plate illumination affects road users!
Now let's look at the legal aspects of this problem. According to Art. 12.2 part 1 of the Code of Administrative Offenses of the Russian Federation, failure to illuminate the rear license plate at night will result in a warning or a fine of 500 rubles.
Important! Illumination of the front license plate is prohibited (same article, part 3), and the punishment for such a violation is much more severe: deprivation of the right to drive a vehicle for six months to a year. Therefore, when tuning your car, know when to stop.
In addition, we can say that the rear license plate should be illuminated only with white light of any shade (GOST 8769-75 clause 2.8.2). This is understandable; multi-colored lights can create confusion and confuse drivers following behind.
Signs and causes of license plate light malfunction
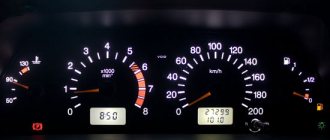
The main sign of the need to replace the license plate lamp is the absence of glow when the side lights or low/high beams are turned on. Along with this, there are several other indications of the need to repair the license plate lighting system:
- message about a corresponding error on the dashboard or on-board computer;
- uneven glow (flickering) of the lighting level while driving;
- lack of luminosity of one of several elements of the lighting structure;
- Uneven license plate illumination.
Video - quick replacement of the license plate lamp on a Kia Rio 3:
The causes of malfunction of the license plate illumination are:
- wear of light emitters;
- violation of contacts of the structure;
- clouding of the filter and lampshade;
- damage to electrical wiring, blown fuses;
- Body control unit malfunction.
Important Features
The main culprits for non-working room lighting are burnt out lamps. However, often the backlight bulbs that have gone out can remain in working condition. To correctly determine the real cause of the breakdown, you need to carefully examine the lamp removed from the socket. The main sign of failure is a darkened bulb or damage to the threads visible to the naked eye.
If the lamp is working properly, but the lighting does not work, oxidized contacts may be the likely culprit of the breakdown.
To resume operation of the C5W cylindrical lamp (equipped with end contacts), it is enough to carefully clean and bend them.
The spring contacts do not hold the light bulb - another likely cause of the malfunction. Replacement is also not required. It is enough to return the light bulb to its place.
Selecting lamps and backlight emitters to replace burned out ones
As already mentioned, you should not replace an LED emitter with an incandescent lamp and vice versa. It's easier if there is an incandescent lamp. Usually a standard light bulb with a power of no more than 5 watts is used. Such lamps can be purchased at any normal gas station.
The situation is more complicated for LED designs. If it is not so difficult to purchase emitters for common designs, then for unique car models it is more difficult to do, except perhaps during disassembly.
In this case, you can find ordinary radio amateurs who will change the LEDs element by element, that is, they will perform ordinary radio repairs. LEDs should be replaced as a set. Typically there are three diodes in series on the board. Therefore, even if one of the three is faulty, all three must be replaced.
If you live in a small town where there is no radio parts store, you can buy an LED in online stores that sell radio parts.
It is better to choose a powerful LED (about 1 Watt), white, so that there are no complaints from inspectors and during technical inspection. Installation difficulties may arise. LEDs are often connected using spot welding instead of soldering. This will not cause any difficulties for an experienced radio amateur. Active acid fluxes can be used to facilitate soldering. In everyday life, flux is an excellent substitute for an aspirin tablet. Just don't inhale fumes when soldering. They are not dangerous, but extremely unpleasant.
If problems with the license plate illumination cause great difficulty when replacing lamps and emitters, as a last resort, you can purchase a license plate frame with built-in illumination. Difficulties may arise during the technical inspection, but they can be solved.
Tips for purchasing automotive diodes
W5W bulbs are used to illuminate license plates on most car models. But there are manufacturers who equip their brands of cars with C5W lamps, which differ in the type of base. Therefore, when purchasing, you need to know what type of spotlights are installed on a particular car.
There are LED analogues, the installation of which is permitted by law, but within certain limits. It is important that the lamp light is white and the license plate is clearly visible and readable from a distance of 20 meters. In this case, the lighting should illuminate only the sign, and not the entire road behind the vehicle.
When installing a new light bulb, you should pay attention to the power declared by the manufacturer and compatibility with the lampshade. Brighter diodes can cause contact melting, overloading the car's electrical network and darkening the lampshade.
This is interesting: Causes of high fuel consumption: solutions to the problem
We recommend products from the company specified in the instructions for the vehicle from the car dealer. There are many fakes on the market that are almost impossible to distinguish from a high-quality original. When choosing a product, you should pay attention to the packaging itself, the inscriptions on it, markings and the quality of the soldering of the light bulb.
The process does not require trips to a car service and can be completed in 10–15 minutes in the garage. Tools needed to replace the license plate lamp:
- damp cloth;
- flat and Phillips screwdrivers;
- liquid key or WD-40;
- LEDs.
Before starting dismantling, you must remove the negative terminal of the battery, first turning off the ignition.
Each car model has its own nuances of the location of light sockets and fastening methods. The standard method is to clamp and install the lampshade onto bolts.
The best manufacturers
License plate lights for Priora W5W with T10 base are produced by almost all well-known lighting manufacturers. Among the most famous and reliable companies are:
- a German company whose products are considered a model of quality and durability;
- Bosh. A world-famous brand, which is also home to Germany. Today it is a powerful concern whose enterprises are located in many countries;
- Philips. A famous company from the Netherlands, whose history goes back almost 130 years of successful work;
- MTF. A transnational company with factories located in Taiwan. Produces a wide range of lighting products;
- Narva. Another German company, which is more than 70 years old. Demonstrates the country's traditional quality and care in the manufacture of automobile lamps;
- Neolux. A European brand that will soon celebrate its 100th anniversary. It originally appeared in Switzerland, but then changed its home country several times. Today Neolux is a subsidiary of OSRAM;
- Koito. Japanese manufacturer producing all types of automotive lamps. It is distinguished by the high quality of its products.
The above list cannot be called exhaustive. There are many manufacturers, they all produce high-quality lighting devices.
Troubleshooting algorithm
At the first sign of a malfunction in the license plate illumination, you should immediately begin to determine the cause and eliminate it. A non-functioning license plate lighting system is one of the significant reasons for stopping a vehicle at night.
For traffic police officers, the absence of license plate illumination can be regarded as an attempt to hide the ownership of the car and information about its registration. In most cases, this will result in a fine.
Trying to make an excuse like “I don’t know, it just happened” leads nowhere. The driver is obliged to check the car before leaving, especially when driving in the dark. Moreover, usually two backup light sources are usually used for illumination. As soon as one emitter fails, the car owner is obliged to immediately fix the problem.
Video - replacing the license plate lamp on a Mitsubishi Outlander 3:
At the first stage, it is advisable to perform a complete computer diagnostic of the car, including monitoring the multifunctional unit (body control unit). In most cases, it will indicate the cause of the problem. But it can also provide a more concise explanation of an error such as “faulty license plate illumination.” This is understandable even without diagnostics.
Typically, a reverse fault finding algorithm is used, that is, from the final control element, that is, from the emitter (lamp or LED system). To do this, you need to have the simplest measuring instrument - a multimeter.
In many cases, it is quite difficult to reach and dismantle the emitter light, especially if the license plate itself is installed in the bumper: access from below the car is required. To be on the safe side, it's best to first check the fuse that supplies the license plate lamps.
The specific location of its installation can be found in the operating manual of your car or you can find this information using Internet search engines or special resources.
Further actions:
1. Remove the license plate light.
It is necessary to find detailed information on this issue, since intuitive actions can lead to damage to the latches or connector.
2. Disconnect the connector.
3. Check for voltage at the connector when the side lights are turned on. To do this, turn on the ignition and dimensions. Next, using a multimeter in the position of measuring direct voltage at the limit of 20 Volts, connect the multimeter probes to the connector contacts. If there is no voltage, then most likely the problem is not in the flashlight emitter, but in the wiring, control unit or fuse.
4. If voltage is supplied, proceed to disassemble the flashlight in order to remove the emitter.
First of all, the diffuser mounted on the clamps is usually removed.
5. Next, remove the emitter. It can be of two types:
- incandescent lamp;
- LED.
The incandescent lamp is easily removed from the socket.
Usually it has two thin leads that are bent on the sides. The cause of its malfunction may be broken leads or burnt-out filament. For greater confidence, you can ring it using a multimeter in resistance measurement mode at a limit of 200 Ohms.
LED design is usually more complex.
It is better to call it from the connector.
To do this, switch the multimeter to the “diode” control mode. The LED emitter should ring in one direction and show “1”, that is, infinity, when the probes are connected back. If the design does not ring, you often have to “unplug” the lantern, as in the Lifan X60.
6. If it is determined that the light emitter (lamp or LED structure) is faulty, it must be replaced. You cannot replace a lamp with an LED or vice versa. They have different current consumption. The body control module may detect an error. You can install an emulator, but this is an additional unnecessary hassle.
7. If the emitters are working properly, no voltage is supplied to them, you should follow the wiring to the fuse. It is necessary to check whether there is voltage at the fuse contacts when the dimensions are turned on. If not, then the problem is in the control unit. If so, then the problem is in the wiring. The weakest point of the wiring is under the threshold in the driver's seat area. It is necessary to dismantle the threshold and inspect the wiring harness. It will be good if you know the color of the wire that serves the backlight. Another weak point is under the corrugation of the tailgate (if the license plate is installed on it).
This is interesting: Causes of malfunctions and self-repair of the fuel sensor level
8. Finally, the most unpleasant case is when the backlight is controlled directly from the multifunctional unit without a fuse in the circuit. If there is a short circuit or a non-original emitter is connected, the control circuits in the electronic unit may fail. In this case, expensive repairs to the unit may be required. It is cheaper to turn to Kulibins, who will install a bypass circuit or connect the lights directly to the side lights.
Video - replacing license plate lamps on a Skoda Octavia A7:
Possible fine
It is impossible for additional lighting to be installed in front of the license plate. There is even an article that talks about this. That's right, the article indicates exactly the front number. Therefore, traffic police officers do not have the right to fine people for having a backlight installed on the rear license plate. Bulbs for room illumination can be easily installed right at home and with your own hands. Just before you do this, you need to think about everything, since there is a chance of getting a fine, the price of which can be several times higher than the price of the light bulbs themselves. If, nevertheless, it was decided that light bulbs need to be installed, then it is worth reviewing various photos and videos. If you come across instructions on a given topic along the way, you shouldn’t discard it.
Replacing the license plate light on a Lada Priora car is carried out in case of damage, as well as when carrying out other work in which its presence will interfere with the progress of their implementation. Prepare a standard set of tools and perform the following sequence of actions:
First of all, it is necessary to de-energize the car to prevent the formation of a possible short circuit during dismantling by disconnecting the minus terminal from the battery.
- Using a Phillips screwdriver, unscrew the screws and remove the decorative trim of the trunk lid lock.
- Next, use a socket wrench to unscrew the nuts securing the trunk lid trim.
- Remove the trim.
- Slide the license plate light to the side until it comes out of the mounting slots and can be removed.
- We remove the flashlight from its mounting socket and, having pressed the plastic lock, disconnect the block with the power wires from it.
- Carry out the necessary repairs or replacement, then install in the reverse order.
At this point, the repair work to replace the license plate light on the Lada Priora car has been completed.
A common malfunction of vehicle exterior lighting devices is the failure of the rear license plate illumination. There are many reasons for this:
- Burnout of lamps or damage to their filaments due to vibration and shaking. The simultaneous burnout of all backlight lamps, if there are more than one of them, as on most cars, may be indirect evidence of incorrect operation of the generator - increased voltage in the on-board network. It is recommended to compare it with the normal one for a given car model. But we must take into account that the relatively high voltage in the on-board network (14.6-14.7 V), characteristic of many car brands, is not a malfunction, but significantly reduces the life of low-quality incandescent lamps, and they can often burn out;
- Miscalculations in the aerodynamics of the car, leading to heavy contamination of the installation area of the license plate lights. Liquid will sooner or later begin to leak through the lampshade seals, leading to corrosion of the contacts. Such defects for many car models, for example, the VW Transporter T5, are so frequent that the structures can be transferred from the status of “childhood diseases” to “chronic”;
The license plate backlight does not light up due to a break in the wires at the point where they bend when the body element on which the license plate is attached, the trunk lid, the fifth door, and so on, moves. As a rule, this malfunction is typical of fairly old cars with hardened wiring insulation, which is more prone to fractures. Both the power wire and the ground wire (ground) can be damaged. If there is a short circuit in any circuit powered by the license plate illumination through one fuse, the absolutely serviceable lamp will go out. You will have to look for a fault in this direction if all of the above reasons do not appear.
On vehicles equipped with a towbar, you should pay attention to the contact group of the socket and the condition of the wiring of the trailer itself.
General principles of replacement
You must first wash or clean the necessary part of the body from dust. If the headlights and the holes for their fastening are dirty, cleaning is required. Replacing the license plate lamp proceeds in the following stages:
- Use a Phillips screwdriver to unscrew the bolts that secure the headlights to the trunk door trim. If they are rusty, use WD-40 or liquid wrench: spray on the corroded parts and wait a little. The product will provide additional lubrication and help relieve resistance when unscrewing.
- If the lights are secured with clips, then removing them is even easier. Simply pry up the latches with a flathead screwdriver. However, it is not always possible to pry off the lampshades; then you need to move them to the side (left to left, right to right). On the other side there will be a gap where you can insert a flathead screwdriver.
Light control
Penalty for covering a license plate
All cars that come off the assembly line have light bulbs installed to help you see the license plate from the rear. Typically, a pair of instruments is located in the lower trunk saber. Traditionally, problems do not arise for the first few years, but over time the lamp may burn out, so it is necessary to periodically monitor the condition of the backlight on cars with high mileage.
Almost every motorist can cope with the replacement. You don't even need special equipment for this.
The license plate light bulb can be replaced in the following sequence:
After all the manipulations, we check the functionality of the node. To do this, we connect the battery to the network. Each car model has its own procedure.
Hyundai Solaris
Minor repairs on one of the most popular car models in Russia are not difficult. Before you replace the license plate light bulb in this car, you need to know that there are two lights there. They are located on the trunk lid under the trim.
The rear lighting fixtures on Solaris are interconnected. Dismantling begins with removing the trim on the trunk lid. There is a cover in the handle that needs to be lifted with a flat-head screwdriver.
Now use a Phillips screwdriver to unscrew the screws holding the handle, after which you can remove it. Using the same tool, we unscrew the pins that the manufacturer uses to secure the casing in the lid. The upholstery is removed after removing the pistons.
The cartridge is unscrewed clockwise until it stops. Next, we lightly squeeze it and unscrew it from the housing along with the lamp, which is easily removed by the glass bulb.
Assembly is carried out in the reverse order of disassembly. You should not use excessive force to avoid damaging the housing.
Lada Kalina"
Three to four years later, Kalina car owners are faced with the problem of illuminating the license plate from the rear. The license plate light bulb may oxidize in the area of contact with the socket or burn out.
Disconnect the wiring from the battery. To replace, use the algorithm:
- press lightly on the lantern on the right, while moving it slightly in the same direction (it can be easily dismantled);
- Together with the wiring, the lampshade is removed outwards, which greatly simplifies further work with the unit;
- slightly lift the plastic clamp up and install the plug that provides power;
- carefully unscrew the lamp housing;
- to remove the light bulb, move it slightly to the side;
- install a new classic or LED light;
- We carry out the assembly in the reverse order.
We return the wiring to the battery. We check the functionality of the lighting. Owners of the Lada Priora carry out similar operations to restore the unit’s functionality.
Nissan Qashqai
On popular foreign cars, license plate lighting also often fails. Car owners can replace the lamps themselves. As in other cars, first of all we unplug the cable from the power source.
Next, the lampshade is dismantled; in this case, you can get by with one screwdriver. You can simplify the operation by applying slight pressure on the lampshade, while swinging it slightly left/right, and then remove it outward.
As soon as the lamp cover is removed, we unfasten the connector and remove the light bulb, replacing it with a working one. Assembly is carried out in reverse order. Next, we return the connection of the on-board electrical system to the ABK and check the functionality of the unit.
TOYOTA Corolla
When working with the rear lamp of the Corolla, you must lower the lamp diffuser. This will allow easy access to the lamp. To do this, press lightly on the tongue, which will allow the diffuser to move down.
It is necessary to unscrew the lamp socket counterclockwise to make everything easier to remove. Next, unscrew the screws holding the backlight mount so that you can lower the backlight. When removing the lamp holder, unscrew the thread also counterclockwise, and then remove the lamp. All that remains is to put everything back together in reverse order.
An example of replacing lighting on different cars
To change a burnt-out license plate light bulb, you need to:
- clean the area where the lampshades are located from dust and dirt;
- remove decorative trim;
- clean the surface of the lampshades;
- unscrew the screws;
- remove the lampshades;
- remove the lighting fixture;
- make sure it is faulty;
- replace light bulbs with new ones;
- check the functionality of the unit by turning on the lights;
- secure the lampshades by first lubricating the screws with silicone grease;
- Reinstall the fastening of the trunk lid trim.
Replacement can only be carried out when the power supply is de-energized. This way you can avoid the occurrence of a short circuit if the cartridge is destroyed or accidental contact of contacts occurs.
The basic algorithm for replacing license plate lamps can be changed depending on the make and type of car.
Hyundai Santa Fe
First, let's look at how to replace the headlight bulb on a Korean Hyundai. For work we will need:
- Crosshead screwdriver.
- 2 W5W bulbs.
Each of the license plate lamps on this car is attached using a self-tapping screw and an L-shaped clamp. I marked the location of the screws with red arrows and the locations of the clamps with green arrows.
We unscrew the screw and remove the flashlight, disengaging the latch. The wire powering the lampshade is quite short, so we pull out the light fixture carefully and without fanaticism.
Removing the lantern
Now we see the cartridge with power wires (photo above). Turn it counterclockwise and remove it along with the lamp. The light bulb is removed from the socket by simply pulling it out. We dismantle the burnt one and put a new one in its place. We install the cartridge in place, fix it by turning it clockwise. All that remains is to put the illuminator in place and secure it with a self-tapping screw.
Hyundai Solaris
Both lamps, which provide room illumination, are located in the Hyundai Solaris under the trim on the trunk lid. To remove them, you need a flathead and Phillips screwdriver. The dismantling process looks like this:
- using a flat-head screwdriver, open the cover in the handle;
- remove the handle by unscrewing the screws with a Phillips screwdriver;
- remove the pistons holding the casing in place;
- remove the casing;
- unscrew the cartridge clockwise;
- remove the lamp, holding it by the glass bulb;
- install a new light bulb;
- Reassemble in reverse order.
Interesting video on the topic:
Volkswagen Tiguan
The list of tools intended for replacing headlight bulbs in a Volkswagen Tiguan includes gloves and a Phillips screwdriver. Lamps – C5W. To reinstall you need:
- open the trunk lid;
- remove the lampshades by unscrewing the screws;
- unplug the light bulb from the spring clips;
- install the new device by snapping it into the latches;
- return the lampshades to their place and secure them with self-tapping screws;
- check the result using the side lights.
This is interesting: Handbrake: self-adjustment of cables
Toyota Corolla
To get easy access to the backlight lamp of this brand, you will have to lower the flashlight diffuser down. To do this, you will need to lightly press the tongue.
Further actions are performed in the following order:
- unscrew the cartridge by turning it counterclockwise;
- unscrew the screws;
- remove the lamp holder;
- remove the non-working old one;
- install a new light bulb;
- assemble the structure in reverse order.
We recommend videos on the topic:
Toyota Camry
To replace the backlight bulb in a Japanese Toyota Camry, you need a flat-head screwdriver. Lamps – W5W. Then follow these steps:
- open your trunk lid;
- release the upholstery opposite the lamp, carefully removing the plastic pistons (use a flat screwdriver to pry up the latch, pull it out and remove the pistons from the upholstery, holding it by the head);
- bend back the upholstery (the back of the flashlight, the socket and the power supply connected to it should open);
- pull out the block;
- squeeze the flashlight clamps;
- push the lantern out;
- pry off the protective glass with a screwdriver;
- remove the protective glass;
- pull out the burnt out light bulb;
- install new lighting;
- snap the glass;
- insert the flashlight into the socket and push it in until the latches click;
- check the operation of the backlight by turning on the side lights;
- assemble the structure in reverse order.
Nissan Qashqai
On this model, replacing the license plate lamp is even easier, since the lamp is attached using latches. We arm ourselves with a flat screwdriver (the author of the photo used a plastic card) and pry the flashlight from the side located closer to the center of the car.
Removing the lampshade using a plastic card
Carefully remove the lampshade from its seat and get to the socket.
Turn the socket counterclockwise and remove it along with the W5W bulb. We pull out the burnt out device, insert a new one and install the lamp in place, making sure that the latches snap into place.
Lada Priora
Here the Lada Priora will act as a “test subject”, in which you don’t even need to dismantle the lamp to replace the license plate light bulb. Open the trunk lid and find the back of the lamp sockets, focusing on the location of the lamps.
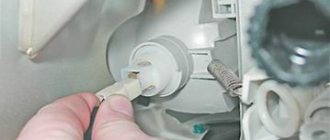
We take the socket, turn it counterclockwise until it stops and remove it from the lantern along with the light bulb.
We pull out the burnt out device (W5W) and install a new one in its place. We turn on the dimensions and make sure that everything works. We return the cartridge to its place and fix it by turning it clockwise.
Lada Kalina
What tools will you need:
- flat screwdriver,
- a piece of rag
- new lamps.
The left side of the lampshade is made in such a way that you can place a thin object (in our case, a screwdriver) under it and pry it, releasing the first latch. This requires a little effort. If you are afraid of scratching the plastic, place a prepared rag under the tip of the screwdriver.
Once the left side of the latch has come out, move the lamp itself a little to the left and remove the right side. Pull the lantern out. Now you can either disconnect the wire, or simply turn the lamp a little and remove it from the housing.
The light bulbs in the license plate illumination are the most common ones - W5W. The same ones are in the front side lights. We take out the old incandescent lamps and insert new ones - LED ones. It’s better to immediately check whether you placed them on the wrong side; LED lamps have polarity! Well, now, with a clear conscience, everything can be put back together. The license plate light bulbs on Kalina have been replaced.
What advantages will we get after replacing the standard license plate light bulbs with LED ones?
- Firstly, they shine much brighter. This is noticeable even to the naked eye. And at the same time they consume much less energy, which leads to at least insignificant savings.
- Second, they don't get so hot. Having removed the old lamps, you may have noticed some melted plastic near their seats. It is not good. This definitely shouldn’t happen with diode lamps.
- And last but not least, it looks beautiful. Agree, the bright, white backlight of the license plate looks much better than the standard one.
How to change a light bulb
How to change the alternator belt: step-by-step instructions with a replacement diagram and video.
Answer to the question “How to remove the license plate lights on a Toyota Corolla?” is not difficult. To change the light bulb, you need to open the trunk, examine the back door, and you will have to remove the panel fastenings.
Then the trunk panel is partially detached and the screw securing the light to the car body is turned out. Next, it is pulled out and the electrical connector is disconnected. To get the lamp, you need to remove the light panel by unfastening two fasteners. When changing lamps, it is advisable to observe the sequence of arrangement of wires in the bundle and the correct sealing of the joint. The manufacturer uses 12V 5W bulbs to illuminate the license plate. Difficulties often arise in how to replace a light bulb. It is quite difficult to pull it out, it takes some effort. Just pull. The same goes for installing a new light bulb. You need to take it by the base and press until your fingers go deep inside the lantern.
Installation Tips
- When buying new elements, it is worth paying attention to the fact that in addition to sizes 36 mm, which are suitable, there are also sizes 41 and 38 mm, which are not suitable.
- They have polarity, so before replacing elements on the Chevrolet Niva, you should turn on the backlight and only then carry out the installation.
- If, when examining the light bulb, the bulb turns black, but continues to shine, it should also be replaced as it will soon fail.
- Try to avoid moisture, as the device will quickly fail if water gets in.
Using the tips for replacing and installing backlights, you will be able to replace the burnt-out backlight yourself in your garage as hard as anyone.
Sources
- https://LampaExpert.ru/avtomobilnye-lampy/neispravnosti/zamena-lampy-podsvetki-nomernogo-znaka
- https://voditeliauto.ru/poleznaya-informaciya/avtoustrojstva/svetotexnika/zamena-lampy-podsvetki-nomernogo-znaka.html
- https://InfoKuzov.ru/remont/plafon-osveshheniya-nomerov
- https://LampaSveta.com/avto/zamena-lampochki-podsvetki-gosnomera-na-avtomobile
- https://car-hobby.ru/zamena-lamp-podsvetki-nomera.html
- https://expertniva.ru/elektrooborudovanie/kak-pomenyat-lampu-podsvetki-nomera-v-nive-shevrole-samostoyatelno.html
[collapse]
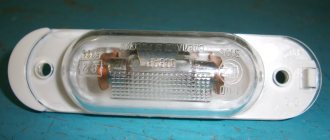
Ceiling lamp
All illumination of the room is carried out by the lampshade into which the lamp is directly installed. It is the lampshade that scatters the light and fully illuminates the license plate of the car. It happens that when dismantling or in the process of replacing lamps, the lampshade may break. If this happens to you, then do not panic, lampshades are sold at any auto parts store.
Catalog number of the Priora lamp: 2170-03717010-00;
Its price is: from 100 to 200 rubles;
You should also not forget about the lampshade gasket; it is necessary to protect against moisture getting into the interior.
Gasket catalog number: 2170-03717012-00;
Cost of laying: from 20 rubles;
The lampshade is the same for all Lada Priora models.