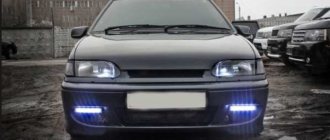
DRLs (daytime running lights) are additional lighting devices installed on a car for use during daylight hours. I would like to emphasize that DRLs are intended to indicate your vehicle in front of other road users, and not to provide additional illumination of the roadway. There is no doubt about the benefits of using DRLs; your car will become noticeable at a distance of several kilometers. This is achieved by using bright LEDs in the DRLs. In this article, I will tell you about the legal aspects of installing DRLs, as well as the various DRL wiring diagrams.
Switching on through dimensions or low beam
The second version of the DRL connection diagram involves using the power circuit of the side light bulb.
To do this, the positive wire from the running lights is directly connected to the “+” from the battery. In turn, the negative wire is connected to the “+” of the side light, which is currently electrically neutral. As a result, the following current flow path is formed: from the “+” of the battery through the LEDs to the size, and then through the light bulb to the body, which serves as the minus of the entire circuit. Due to the low current consumption (tens of mA), the LEDs begin to glow, and the lamp spiral remains extinguished. If the driver turns on the side lights, then +12 V appears on the positive side of the side lights, the potentials on the DRL wires are equalized and the LEDs go out. The circuit goes into normal mode, that is, current flows through the side light bulbs. This circuit solution has several disadvantages:
- running lights remain on when the engine is turned off, which is contrary to current regulations;
- the circuit will not work if LEDs are also installed in the dimensions;
- the circuit will not work correctly if the DRLs contain powerful SMD LEDs, the rated current of which is comparable to the current of a light bulb;
- For safety reasons, an additional fuse must be installed.
This connection method can be improved by connecting the positive wire of the LED module not to the “+” of the battery, but to the “+” of the ignition switch, thereby eliminating the first drawback. Some motorists use schemes for turning on running lights through a low beam lamp. That is, when the low beam is turned on, the DRLs automatically go out, but in other cases they work. In addition to the above disadvantages, this method does not comply with GOST R 41.48-2004 and traffic rules.
This is interesting: How to replace the battery in a Toyota RAV 4 key - a generalized view
Operating mode
According to technical regulations for cars, DRL should automatically turn on when the engine starts. When you turn on the low beams, they should turn off automatically so as not to dazzle at night.
There are also combined models with installed turn signals on sale. The turn signal duplication section is connected separately in parallel to the standard turn signals. Having a stable diet is also a must.
DRL with turn signal
For models with additional control, there is a follow-up backlight function that operates for 10 minutes after the engine is turned off. It illuminates your path to your home or dugout, depending on where you live. Osram DRL has a mode in which they do not turn off, but dim by 50%. I just don’t know how legal it is and whether it will cause blindness.
Useful video
You can see some options for installing and connecting the DRL in the video below:
Many car enthusiasts have not yet installed daytime running lights on their car, but perhaps they have been thinking about it for a long time. It's no secret that the absence of running lights, as well as the low beam/fog lights being turned off, can cause your vehicle to be stopped by a vigilant traffic police inspector, which is not very desirable for most drivers, unless the latter lack communication with people and are happy any company at any time.
In addition, if you use low beam or fog lights as daytime running lights (hereinafter referred to as DRLs), you will probably have to change the lamps in these headlights much more often. There is also the issue of increased gas consumption when constantly driving with the low beams on. Of course, this expense is negligible compared to the main one, but it still occurs.
If you have a certain amount of time (depending on skills and experience) and desire, correctly installing DRLs on a car is not such a difficult task for people who know how to hold a soldering iron in their hands and crimp terminals with wires, and in this article I will tell you how to do this .
Of the tools and materials we will need: a crimping device (if you have some skill, pliers will also do), a soldering iron, wire cutters, a knife, a lighter (as an option for tightening the heat-shrink tube), 3-4 meters of two-core wire in PVA insulation 2x1.5 (2x0 is possible .75 if the DRLs are LED and not the fog lights with halogens!). This wire will be needed to connect two lamps in parallel with each other.
You will need a standard 12 V automotive relay, four-pin, reed switch (any), single wire with a diameter of 1.5 to 2.5 mm. approximately 2-3 m., plastic clamps, heat shrinkage. That seems to be all.
Now a few words about connection options.
Option 1.
You can make the DRLs turn on when you turn on the ignition and not turn off until the engine is turned off. This is the simplest option. The negative wire is attached to the car body in any convenient place, the positive wire is attached to the positive wire from the ignition switch or to terminal D of the high-voltage module, preferably through a fuse (not indicated on the diagram).
Option 2.
The same option, but when the low beam is turned on, the DRLs go out. In this case, we connect the plus in the same way as in the first option, and the minus – to the positive wire of the low beam lamp (either of the two). The fact is that an incandescent lamp consumes much more current and has a much lower resistance than LED DRLs and therefore, when the DRLs are turned on in this way, the lamp filament will not heat up even to the minimum glow at full incandescence, and when the DRL is operating, the resistance of the lamp filament is ( even warmed up) will have practically no effect.
As soon as you turn on the low beam, a plus will appear on the negative side of the DRLs and they will go out. True, if you turn on the high beam, the DRLs will light up again. In this case, you can connect the DRLs to the side lamps in the same way (if incandescent lamps are used as such, and not LED!). In most cars I know, the side lamps are a priori connected in parallel, so you can connect the common negative wire from two DRL lamps to any side lamp.
Option 3.
This is an option where the DRLs turn on automatically only when the engine is started and running. In this case, we also connect the minus of the DRL to the car body, and the plus to the 30th contact of the relay. Contact 87 is connected to the more powerful positive (you can connect to the positive terminal of the battery), contact 85 of the relay is connected to the vehicle ground through the running lights, and 86 is connected to the reed switch, to one of its terminals.
We also connect the second output of the reed switch to any plus nearby (can be from the generator or from the same place - from the battery). We start the car and by moving the reed switch around the generator we achieve the relay activation and the DRL ignition. We attach the reed switch, pre-packaged in heat shrink, using a plastic clamp to the generator in the found position and you’re done.
Option 4.
If there is no reed switch. Everything is the same, only contact 86 goes to the oil pressure lamp in the instrument panel.
That's all. In conclusion, I will say that using something made with your own hands is much more pleasant than something made by others. Good luck in implementing your and not yours, but most importantly, interesting ideas.
– these are lighting devices installed on a car and intended for use during daylight hours to improve the visibility of the vehicle while driving. DRLs can be provided by the manufacturer or installed additionally.
Daytime running lights on the VAZ-2114 are not provided by the manufacturer, therefore, if there is such a need, they can be installed additionally.
It couldn't be simpler
This is the simplest scheme, which involves connecting to a battery or generator as a power source.
The scheme provides that the DRLs will be activated simultaneously with the engine starting. The point is to connect the plus to the positive terminal from the ignition switch of your Renault Logan or the same Lada Largus, and fix the minus on the car body in any convenient place. Everything looks simple and extremely logical. But you should not rush to conclusions, nor should you make such a connection. After all, it has an obvious drawback.
If the system is assembled according to this scheme, the diodes from the DRLs will start working constantly while the key is in the ignition switch. There is no question of any coordination with other headlights here. Therefore, such a connection contradicts GOST and traffic regulations.
DRL control unit
The most reliable and simplest option is to connect DRLs without a relay, but using a special running lights control unit. It ensures that the DRL turns on after starting the engine, guarantees safe operation, protects against overloads and can be installed on cars with any type of lamps, including LEDs.
Unfortunately, among the variety of industrially manufactured DRL units, the vast majority do not comply with GOST and have mediocre build quality.
Among all the diversity, only 2 options can be noted: the Russian DayLight+ DRL control unit and German products from Philips and Osram. The DayLight+ control unit was developed by Russian radio engineer Fedor Isachenkov, taking into account all the features of the vehicle’s on-board network and has a number of positive aspects:
- there is built-in voltage stabilization;
- full compliance with GOST;
- the maximum long-term load power is 36 Watts (significantly less is required for DRLs);
- simplest connection diagram.
In addition to the points described above, the DayLight+ unit is universal and is suitable for all cars with an on-board 12-volt network, and also has good build quality and a high degree of protection from moisture and dust. German products from Philips and Osram also have all the above-described advantages of the DayLight+ unit, however, German control units are supplied only together with daytime running lights and are more expensive.
Today, daytime running lights (DRLs) are an integral part of automotive lighting technology. In our country, starting in 2010, amendments to the traffic rules came into force, requiring (according to clause 19.5) that during daylight hours on all moving vehicles, for the purpose of identifying them, either low-beam headlights, or running lights, or (according to clause 19.4) fog lights. The number of old cars without standard DRLs on our roads is still high.
Most of the drivers of such cars, in the old fashioned way, as prescribed by traffic regulations, drive with low beams during the day. This leads to increased fuel consumption, as well as frequent burnout of the headlights, instrument panel and taillights involved. But many may not be aware of the most unpleasant consequence of such use of low beam, and this is nothing more than accelerated burnout or darkening of headlight reflectors with subsequent deterioration in the characteristics of low and high beam. That is, the headlight simply stops illuminating the road at night and in this case must be completely replaced.
Another part of drivers mistakenly believes that side lights can be used as DRLs, thereby risking a fine for driving without the appropriate light.
The rest of the drivers, the most advanced and progressive, of which I include myself, are those who install additional LED lights. But even here it is not without certain problems, errors and subtleties, which I will now try to talk about using the example of three implemented LED DRL options (English: DAYTIME RUNNING LIGHTS). Namely:
Other less popular methods
Many people are interested in how to connect DRLs without a relay on their own, but it depends on the electrical system of your car; look for a solution in online clubs dedicated to your car. The most important thing is that power is supplied to this place after the engine starts.
The basic diagram for connecting the DRLs is through a 4 or 5 contact relay, which turns off when the low one is turned on. Those who are not too lazy to rummage through the car’s wiring can connect it from the oil pressure sensor or generator. On any vehicle, when the engine starts, the oil pressure light on the dashboard lights up, the signal from this wire is used to supply power. The second way to connect running lights yourself is to connect to a generator. They will turn on automatically when voltage appears on the generator.
LED lamps and the law in
The main regulatory framework has not changed: 12.5 of the Code of Administrative Offenses of the Russian Federation, part 1,2,3, 12.20 of the Code of Administrative Offenses of the Russian Federation, TR CU 018/2011 clause 77, Traffic Regulations, clauses 19.6, 3.7 and 3.8 of the Code of Administrative Offenses of the Russian Federation.
LED lamps are installed in standard headlight locations instead of halogen lamps. It is quite difficult to notice the replacement with an LED when the light is correctly adjusted.
Lamps must have a certificate from the manufacturer that this lighting device has all acceptable characteristics. LED is not xenon and is classified according to 2.5 Code of Administrative Offenses of the Russian Federation, part 1 with a fine of 500 rubles. A fine is issued only at the initiative of the inspector (in rare cases). There is no legislative framework for LED with deprivation of rights. When drawing up a protocol, be sure to record the color of the glow and the certificate of conformity of the lamps, then any Resolution under 12.5 Part 3 of the Code of Administrative Offenses regarding LEDs can be challenged.
The condition for a quiet ride is a correctly adjusted light with a glow color that is not prohibited by traffic regulations.
I will quote once again the Russian Traffic Regulations “Appendix. List of malfunctions and conditions under which the operation of vehicles is prohibited:
Don't use over-powered bulbs, adjust your headlights, and be respectful of other drivers on the road at night.
8(800) 350-34-54
Nuances of using lights
There is a special GOST that defines and regulates installations, technical parameters and the connection itself of daytime running gears.
Thresholds on Niva: do-it-yourself installation options, photos, drawings Category: Tuning
The regulations state that the circuit should be used in such a way that the drive wheels turn on automatically when the key is turned in the ignition switch. That is, when starting the power plant. But DRLs are also required to turn off automatically as soon as the main beam headlights come on. Here, as you understand, we are talking about the headlight unit (low or high beam). There is also a rule indicating that the head light should turn on only when the headlights turn on. The exception is short-term signals to warn other drivers.
Based on the above, we can safely say that you should not output the DRL through the button. The same as through the handbrake. But you can install it in turn signals, but you will need to connect 2 additional wires from each turn signal.
How to install DRL on a VAZ 2110 and connect it to the wiring
All this is extremely important to take into account when connecting the movers. After all, you should be concerned not only with the fact that the light bulbs do not burn out
Although this is an extremely significant point.
Without a well-thought-out and competent scheme, you will definitely not be able to install DRLs yourself. After all, everything should work with a shutdown when the high or low beam is turned on.
There are a number of schemes according to which, in theory, you can install DRLs on your car if they are not included in the standard configuration of your vehicle. The only question is which scheme is better to use.
An important role is played by the voltage stabilizer, which is a subject of much debate when using diode running lights. The DRLs themselves are equipped with resistors that act as a current limiter. But during voltage surges, they are not able to maintain the voltage at a single level. Therefore, it is correct to assume that the use of a stabilizer in such a scheme will be mandatory and necessary. Otherwise, the service life of the DRL will be significantly reduced due to regular voltage drops. Although some still believe that the connection can be made without a stabilizer.
It is worth considering several schemes separately, drawing appropriate conclusions from them and making a final decision for yourself.
Advantages and disadvantages of DRL
The debate continues on the Internet - is it worth installing “daylight”, or is it pampering and a tribute to fashion?
Proponents make the following arguments:
- Electricity consumption compared to halogen lamps is negligible;
- The service life of low beam lamps increases, fuel is saved;
- The car is better visible in bright sunshine;
- The car seems “cooler”, especially if the LEDs are built into the headlights.
Opponents of installing non-standard lighting devices are guided by other principles:
- Generators of modern cars are designed for standard load, including lights on. In addition, on many models, the factory DRL (day running lights) turns on the lamps at 70% filament, so there is no talk of a reduction in service life.
- The lamps themselves cost money, but do not last forever. And for this amount you can buy low beam lamps for 10 years in advance. And gasoline savings are within the measurement error.
- From a design point of view, someone who understands modifications will immediately see a foreign design. And those for whom all cars are the same will not pay attention to the lights.
Many motorists who installed DRLs on their own did not read the Rules. Therefore, it is not uncommon to see a “UFO” on the road with low beams on and DRLs operating at the same time. And this is a traffic violation. In which, according to tradition, the “evil inspector” will be to blame, but not the skilled car enthusiast.
There are no ready-made solutions to the issue of car tuning; everyone improves a car to their own taste. Or leaves the factory equipment.
The main thing is that the decorations do not affect traffic safety, do not blind oncoming drivers and pedestrians, comply with traffic regulations, and do not provoke emergency situations.
Be careful and careful on the roads!
Garage option
Now let’s look at a simplified version, often called the “collective farm” version. Before you start using the method, keep in mind that there is a risk of breaking the plastic body kits. If you are not sure of the accuracy of your actions, do not try this method. Before starting work, disconnect all connectors from the headlight. The procedure is as follows:
- Partially unscrew the radiator grille. Wring it out and unscrew one of the screws securing the “eyelashes”;
- Unscrew the top screws of the headlight;
- Twist the upper bumper mounts. They press it away from the body, so they gain access to the headlight screws and unscrew them;
- Remove the optics.
How to choose DRL?
The requirements that must be taken into account when installing DRLs have already been described above.
If you want your running lights to comply with traffic rules and GOST, you should pay special attention to their selection. After all, a lot will depend on what kind of road running light you decide to install on your car.
The highest quality products are produced by companies such as Hella and Philips Osram. It is worth choosing them not only because they meet all the standards, but also because they can make your journey on the roads as safe as possible. There are usually no problems with the products of the brands presented above when the car is diagnosed at a service station. Homemade devices cannot meet all requirements.
Usually there are no difficulties with installing DRLs. The only thing that can cause you inconvenience is a violation of the integrity of the car’s structure. This problem is most common among drivers who bought their car before the law on the mandatory use of DRLs came into force.
If you have an old car that does not have DRLs, then you will have to collect a lot of paperwork to obtain permission to make changes to the vehicle. In addition, you will also have to put in a lot of effort to install running lights. After all, to do this you will have to create holes in the bumper and deal with the electronics.
Hotlines:
Moscow:
+7, ext. 206 St. Petersburg: +7, ext. 997 Regions of the Russian Federation: +7, ext.
669 .
Applications are accepted around the clock, every day. Or use the online form.
Legislation
Before practicing installing DRLs, I would like to dwell a little on the legal standards for installing DRLs, as well as the rules of their operation.
The very first and basic rule is that unauthorized installation of additional light signals on a car is prohibited. Yes, you are right, you do not have the right to install DRLs on your car if it was not equipped with them by the manufacturer. This will be considered as making changes to the design of the vehicle. For every change to a vehicle's design, a certificate must be obtained, which in itself is neither quick nor cheap. Otherwise, traffic police officers will issue you a fine, or even take your car to the impound lot.
DRL connection diagrams
Since DRL can be mounted at your discretion, there are many connection schemes that allow you to configure the optics in the most convenient way for the driver. Let's look at the most popular of them.
Option 1 (to speed sensors)
This connection of running lights through a relay, the diagram of which is shown below, is considered one of the simplest. In this case, the DRLs will turn on depending on the operation of the speed sensor. In order to implement this scheme, it is necessary to connect contacts K1.1 to the circuit section (into the wiring break) from the low beam switch button to contact 85. In this case, you can use any relay with an opening pair, but experts recommend using a product with a TC code.
If you want the dipped lights to work while the engine is on, rather than the side lights, then the contacts must be “paralleled.”
Option 2 (to the oil sensor)
Another scheme for connecting daytime running lights via a relay uses an oil sensor. You should immediately check that it is in good working order, since if the regulator provides incorrect information about the fluid pressure, then the operation of the entire system will be disrupted.
With this installation of DRLs, the lights will turn on when the engine starts, and will be turned off by the dimensions. As optics, you can also use low beam or fog lights.
Option 3
It will be a little more difficult to connect the DRLs so that they turn on when the engine starts and turn off when it stops. In this case, the running lights will turn on together with the low beam headlights. This will require two low-power diodes (for example, 1A + KD10), which must be connected in series. After this, wires about 400 mm long are soldered to the light bulbs and connected. Don't forget that they are polar.
At the next stage:
- Dismantle and disassemble the dashboard of the car and connect the “blank” to X1 (most often the yellow wire).
- Remove the button through which the optics will be turned on.
- Plug the other end of the wire into the connector.
- Reinstall the button and check its functionality.
Option 4 (connecting running lights from the generator)
To implement such a project, you can use one of three schemes.
The first one is suitable if only the handbrake and the engine are used.
The second scheme for connecting running lights from the generator will require the use of an additional resistor, which is responsible for turning off the daylight when the side lights or headlights are activated.
The third scheme will allow you to deactivate the running lights:
- When you raise the handbrake, during the start of the internal combustion engine or during the automatic start of the engine along with the alarm.
- When the lights are turned on (in this case, it is necessary that the headlights or fog lights operate normally).
Roughly speaking, this type of connection “cancels” the automatic start of the DRL simultaneously with the ignition of the generator.
Healthy! It is this scheme that is “working” when passing the GTO.
Before connecting the running lights from the generator, it is recommended to watch the video at the end of the article. The fact is that there is more than one or two ways to activate the DRL. However, the connection will be much easier if you purchased a ready-made set of running lights.
Option 5 (connection of a ready-made kit)
In order not to rack your brains over how to install running lights on a car yourself, the easiest way is to buy a ready-made control unit to automatically turn off and turn on the DRLs. To install this module you need:
- Connect the black wire to the negative of the battery, and the red wire to the positive.
- The orange wire (if included) must be connected to the headlights or low beam. If the wire is not connected, the lights will not deactivate when the low beam or side lights are turned on.
After installing the DRL using any of the schemes described above, it is necessary to check that the installed elements are working correctly. To do this, start the engine and see if the light on the control panel is functioning, if the running lights are activated, and so on.
Choosing a stabilizer
In this form, the first and second methods will be combined. Even if your daytime running lights do not have a stabilizer, I recommend purchasing one or making it yourself.
You can buy Chinese modules at prices ranging from 50 to 120 rubles, so as not to order on Aliexpress, take a look at Avito, you can find very reasonable prices. The most common modules are pulse LM2596 and linear LM317. They are of course outdated, but they will draw a current of 1 ampere, which will be a power of 12 watts.
The XL6009, XL4015 chips are considered modern for 2016. They have higher efficiency and heat up much less. They can withstand a current of 2 Amps without a chip cooling system, this is equivalent to a load of 24 watts.
What requirements must PTFs meet?
Finally, let’s note what rules modern fog lights must meet:
In order to illuminate the road surface well, this type of optics must have a clear beam boundary at the top. Thus, the light in the headlights is scattered slightly horizontally above the plane. If the car manufacturer has not provided for the location of the PTF fastenings, in no case should you install the headlights higher than them. Try to place them as close to the roadway as possible. below The location of this optics, the better it will “break” the foggy obstacle in front of you. But don’t forget about ground clearance If. The headlight of the car will be located at a distance of 10 centimeters from the asphalt, then during rainy weather it will constantly get wet, and the water that gets inside the reflector will linger there for several weeks. And throughout this period the glass will be cloudy, and the quality of lighting will deteriorate significantly. On cars like VAZ, the “optimal” classic solution to the problem is to install a steel bumper under the PTF. This way you will “kill two birds with one stone.” Firstly, at such a distance from the headlight, the road will never get wet, and secondly, it looks very attractive and does not disfigure the external appearance of the car. But where there is no point in installing a PTF at all is on the roof (this is what SUV owners often do). The benefit of such illumination is zero, but such a technique will be able to blind in full. If this is not factory optics, it is advisable to purchase it with special plugs. You will significantly increase the service life of the headlights and ensure high safety when driving on rough roads.
And the fog lights are plugged all year round at any time of the day. During operation, it is important to avoid clouding or fogging of the optics glass. To prevent this, you should regularly treat their surface with special polishes (at least once every 2-3 months)
In conclusion, you see, connecting foglights to many VAZ and 2110 other domestically produced cars is a fairly easy task, which every car enthusiast can handle. A fog light is your reliable assistant, which allows you to distinguish objects on the roadway in a timely manner and react to the traffic situation with plenty of time to spare.
Installation process
After purchasing regular or flexible DRLs with a turn signal function, you are faced with the question: how to connect new devices to the VAZ? This requires:
take a five-pin relay from a domestic manufacturer;
Five-pin relay of a domestic manufacturer
- to contact No. 30, take a positive charge from the ignition (alternatively, a wire from the button responsible for heating the rear window);
- connect connection No. 86 to the low beam using the button for activating the headlights and low beams;
- No. 85 - throw on ground;
- No. 88 - connect to DRL;
- No. 87 is not required during operation and is not connected to anything.
Connection diagram for daytime running lights on VAZ 2107
Relay - put it in the cabin. Under the car hood, run only the wiring that goes directly to the lighting fixtures. This connection diagram for the daytime running light on the VAZ 2107 automatically turns on the LEDs when the ignition key is inserted and turns them off when the engine is turned off. In addition, when the vehicle's low beams are on and the engine is running, the lights will go out and turn on again when the daytime running lights are turned off.
A simple diagram for connecting LED DRLs. Verified.
I did it myself according to this scheme:
Many will not understand why I made it more dependent on the starter, when it would have been possible to get by with the 1st relay from the gene, but before that I already had it that way, and when you turn the key to the ignition position, the DRLs would light up for a split second, even if current is the current on the control circuit, i.e. it jumps from the control circuit to the power circuit and ends up on the DRL, how to explain this? Arc or what?
Yes, and I recently became an electrician, and of course, while I’m “green” and my hands are itching, I want to experiment, so I did that, but now nothing blinks, but turns on with a slight delay after starting. The DRLs go out when the lights are on, but the other headlights don't.
Hi all. It is no secret to everyone that from November 20 you will need to drive with low beam headlights on (clause 19.5 of the traffic regulations) or you can use fog lights (clause 19.4 of the traffic regulations). Here I also offer a diagram for connecting daytime running lights (DRLs). Their installation is regulated by GOST R 41.48-2004 (I provide an extract from it) ************************************ *********** 6.19. Daytime running light 6.19.1. Installation Optional on vehicles. Prohibited on trailers. 6.19.2. Number Two. 6.19.3. Installation diagram There are no special instructions. 6.19.4. Placement 6.19.4.1. By width - the point of the surface visible in the direction of the reference axis that is furthest from the median longitudinal plane of the vehicle must be located at a distance of no more than 400 mm from the edge of the overall width of the vehicle. The distance between the inner edges of two visible surfaces must be at least 600 mm. This distance may be reduced to 400 mm if the overall width of the vehicle is less than 1300 mm. 6.19.4.2. In height - at a distance from 250 to 1500 mm above ground level. 6.19.4.3. In length - on the front of the vehicle. This requirement is considered to be satisfied if the emitted light does not interfere with the driver directly or indirectly as a result of reflection from mirrors (rear view mirrors and/or other reflective surfaces of the vehicle. 6.19.5. Geometric visibility Horizontal angle beta = 20° outward and inward. Vertical angle alpha = 10° up and down from horizontal 6.19.6 Direction Forward 6.19.7 Functional electrical diagram If installed, daytime running lights shall turn on automatically when the engine start/stop control is turned to the "on" position. The ability to activate and deactivate the automatic activation of daytime running lights without the use of a tool. Daytime running lights must turn off automatically when the headlights are turned on, except when the headlights are turned on for a short period of time to signal road users. **** **************************************** ************** Taking into account the requirements for turning on and off the DRL in automatic mode, I propose a diagram (I drew and developed it myself)
DIY turn relay
Sometimes situations arise when the standard turn signal relay fails and it is not possible to purchase a new device. In such a situation, you can try to make a turn signal relay with your own hands to provide the car with the necessary signals. The simplest electronic devices that you can create yourself are simple and easy to use, operate smoothly and reliably. High accuracy is achieved through the use of PWM controllers used in all circuits.
The simplest replacement for an electromagnetic relay is designed for a maximum load power of 150 W. It is connected to the positive terminal. If the IRFZ44 field switch is replaced with the IRF3205 model, then 200 W can be connected. This simple circuit ensures high accuracy of operation. The blinking frequency does not depend on the power of the light bulbs, so LED, halogen and other lamps can be included in the circuit.
The frequency of flashing is directly related to the capacitance of the capacitor. As the capacity increases, the light bulb will blink more rarely, and, conversely, decreasing the capacity will lead to faster blinking. The low-power 1n4148 diode can be replaced by any similar element. When the circuit reaches a power of 80 W, a slight generation of heat is observed in the field-effect transistor area. This means it is ready to use.
There is another simple circuit of a turn relay with a coil - simple, reliable and inexpensive. It is capable of lighting both regular light bulbs and LED ones and is designed for 12 V. The contacts are connected according to the principle of a regular switch, that is, in series with the light bulb. The LED is installed in the circuit as an indicator during commissioning work. The device parameters are adjusted by changing the resistance of the resistor.
It is often difficult for novice auto electricians and people modifying their car to understand the phrase “connect via a relay.” What does connecting via a relay mean and how to do it? Let's figure it out.
Before studying the wiring diagram for any automotive device via a relay, you need to know what a relay is in general and how it works. This is written about in detail here
. Once you understand the operating principle of this simple device, it will be much easier to figure out how to connect it.
The general meaning of connecting via a relay is the load on the switch that controls the installed equipment. All powerful consumers of electricity in the car (for example, headlights, starter, fuel pump, heated rear window, electric power steering) are connected through a relay. Thanks to this, these devices can be controlled by small, beautiful buttons instead of rough and large switches. In addition, in some cases, the relay allows you to save on wires.
The relay is connected to an open circuit in the electrical circuit. Let's look at installing a relay using the example of a gas pump. Power is supplied to it by the engine control unit (hereinafter referred to as the computer) and in order for the computer board tracks to withstand the current consumed by the pump, they would have to be made too powerful. Passing strong current near sensitive electronic components of a computer can affect their operation. To avoid such problems, a relay is installed between the computer and the fuel pump and the computer is connected not to the pump, but to this little “helper”.
The relay, as it were, divides the wire going from the fuse block to the pump into two parts, which can close inside the relay when voltage is applied to the control contacts of the magnet. As already mentioned in the article about the relay device, the control current is very small and cannot damage the computer in any way. The computer supplies voltage to the control contacts of the relay, and it then “connects” the power circuit within itself and connects the fuel pump.
Nuances of using lights
There is a special GOST that defines and regulates installations, technical parameters and the connection itself of daytime running gears.
Alarm Starline: instructions for selection, installation and operation
Category: Auto gadgets
The regulations state that the circuit should be used in such a way that the drive wheels turn on automatically when the key is turned in the ignition switch. That is, when starting the power plant. But DRLs are also required to turn off automatically as soon as the main beam headlights come on. Here, as you understand, we are talking about the headlight unit (low or high beam). There is also a rule indicating that the head light should turn on only when the headlights turn on. The exception is short-term signals to warn other drivers.
Based on the above, we can safely say that you should not output the DRL through the button. The same as through the handbrake. But you can install it in turn signals, but you will need to connect 2 additional wires from each turn signal.
All this is extremely important to take into account when connecting the movers. After all, you should be concerned not only with the fact that the light bulbs do not burn out
Although this is an extremely significant point.
Without a well-thought-out and competent scheme, you will definitely not be able to install DRLs yourself. After all, everything should work with a shutdown when the high or low beam is turned on.
There are a number of schemes according to which, in theory, you can install DRLs on your car if they are not included in the standard configuration of your vehicle. The only question is which scheme is better to use.
An important role is played by the voltage stabilizer, which is a subject of much debate when using diode running lights. The DRLs themselves are equipped with resistors that act as a current limiter. But during voltage surges, they are not able to maintain the voltage at a single level. Therefore, it is correct to assume that the use of a stabilizer in such a scheme will be mandatory and necessary. Otherwise, the service life of the DRL will be significantly reduced due to regular voltage drops. Although some still believe that the connection can be made without a stabilizer.
It is worth considering several schemes separately, drawing appropriate conclusions from them and making a final decision for yourself.
