Reverse parking is one of the most difficult exercises during the driving test. And in the ordinary life of a novice motorist. Only practice, a sense of the car’s dimensions or technical progress can help here.
20 photos of North Korea, after which they were forever banned from entering the country
Eric Laforgue is a photographer who travels around the world. He visited North Korea alone 6 times, from 2008 to 2012. During his trips, he managed to photograph life in the country as it was, and secretly take these pictures on memory cards...
Read more …
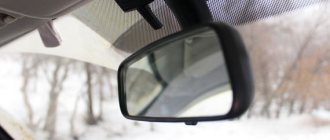
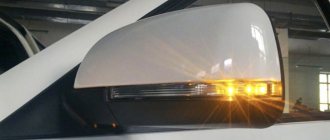
The first assistant when reversing is parking sensors - ultrasonic sensors installed in the rear bumper and sending an audible signal into the cabin when dangerously approaching an obstacle. The famous phrase “Madame parks by sound” has taken on a new meaning. But this method of warning will only help you understand that you are critically close to an obstacle. Visual contact can make the process of driving and parking in reverse easier. And then cameras came to the rescue.
A miniature device that is installed in the rear of the car and broadcasts the image to a monitor in the cabin. Modern devices also have dynamic marking lines that help determine the desired steering angle for movement along the optimal trajectory.
In premium cars or expensive mid-range and budget models, such cameras can be installed from the factory. But what to do if the camera is not included in your package? The answer is simple - install it yourself or in a service.
How to connect a rear view camera to a mirror with your own hands
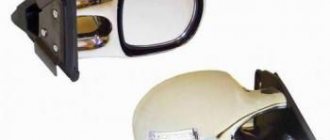
Today there are many different types of car mirrors with built-in monitors. The most common models are with 4.3 and 5 inch displays. Standard resolution values for such screens are: 480×272 and 800×480. This is quite enough to get a high-quality picture of what is happening behind your car.
Models offered on the market usually provide the possibility of mounting directly on a standard mirror, using special flexible clamps. Power can be connected from the cigarette lighter or directly from the battery. Another option for supplying a plus is from the reverse signal. In this case, the system will only be activated when reverse gear is engaged.
There are also models with built-in batteries. This applies to “smart” devices that have a wide range of additional functionality (wireless communications, voice control, etc.).
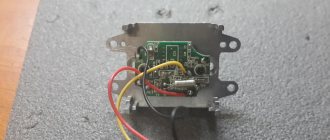
The camera itself is installed in a place that provides the best view. It is desirable that the device is protected from splashes of dirt, and its appearance does not attract the attention of vandals. The best options are mounting on a license plate or inside the bumper, in a specially drilled hole. The second method is better suited for products with a round body. You can also buy a license plate frame with a built-in camera or a slot for it. This method is optimal for devices with a square cross-section.
The connecting cable is laid inside the car. You can use technological holes and niches, tie wires to standard electrical wiring harnesses. It is necessary to provide for the possibility of damage and chafing of the cable. It is advisable to further strengthen it with electrical tape in such places, especially on bends.
How to install
Installing a view camera with a mirror is a simple process. The easiest way to install a camera is mounted in the license plate frame. Installing a camera instead of a lamp will require skills and tools. You will also need to decide on the installation location to ensure good visibility and prevent fogging and road dirt.
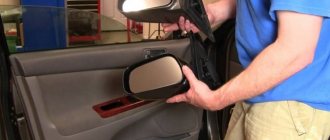
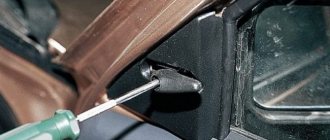
Mirror installation
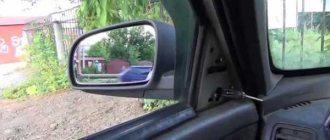
If you are using a universal spring latch, then to install it on top of the standard mirror, you should press one of them as hard as possible. Then the accessory is carefully put on and the latch is smoothly released. Another latch is fixed in the same way. When installing in place of a standard mirror, the latter is removed and the new device is installed using the mount included in the delivery package.
Camera installation
To install the camera on a view with a license plate frame, you should remove the latter and screw on the device. The wires from the accessory can be routed into the body through the trunk by drilling a hole next to the license plate area. After laying the cable from the camera, it must be sealed. Once the frame is in place, the license plate is screwed into place.
If you plan to install it instead of one of the lampshades, you should purchase a special kit suitable for the vehicle. You can also put the camera inside the standard case. To do this, you need to disassemble it, cut space for the accessory in the front and back covers and insert it. After this, the housing is assembled and sealed with silicone sealant.
Connecting a camera to a mirror with a DVR
Instead of a simple mirror with a display, you can install a device with a built-in DVR. In this case, the image from the rear view camera will not only be displayed on the monitor, but also recorded on the media. Such mirrors with recorders usually already have a front video camera installed on the back panel of the product.
Connecting the rear view camera to the mirror with the DVR is carried out according to the algorithm described above. There may be some differences in the way power and control signals are connected, which will be discussed below.
Criterias of choice
Before purchasing, you should pay attention to the input and output interfaces. Most often, a rear view camera is connected using cables with RCA connectors and a power socket. If the accessory is designed for 5 V, then you need to make sure that there is a 4-pin jack socket on the mirror. The rear view camera must be compatible with this device.
The higher the resolution of the image received from the camera, the clearer and more visible small objects will be. When choosing a mirror based on the size of the display, you should focus on convenience. For example, a device with a six-inch screen is suitable for viewing videos and photos, but viewing behind the car may be difficult due to the reduction in the usable area of the mirror.
Connection diagram for rear view camera to mirror
We have already described the main features of the connection diagram as a whole above. More details can be seen in the picture below.
The signal from the camera is connected directly to the car mirror to the corresponding video input. There are models with two inputs that can be used to connect two video cameras at once, including the front one. The second input can also be used to display a video signal of a suitable format from any other source.
Power supply is supplied to the mirror and video camera. Depending on the type of product, several connection schemes are possible. There are cameras with different numbers of pins - from 3 to 6. The diagram above uses a separate control wire that is connected to the back light power. In this case, the main power input of the camera can be connected directly to the on-board network.
Another method is used if the video camera does not have a separate control input. In this case, the main power is supplied directly from the rear light. This ensures that the video signal is supplied to the car mirror only when driving in reverse.
Finally, there are different wiring diagrams depending on the type of mirror used. To activate the image, a signal from the rear lights can also be used here. Another option is if the picture starts when it is fed directly from the video camera. In this case, the use of a separate control wire is not required.
Device characteristics
If you decide to purchase a salon mirror, then you will probably be interested in the features of such devices:
- Of course, the first feature is the ability to know exactly what is happening behind the car, including the space of “blind spots”. Even if there is a small obstacle behind, the driver will still be warned about it.
- Large viewing angle, on average this parameter is about 170 degrees, which again allows you to fully control the space behind.
- Most cameras connected to a mirror display a color image.
- The ability to operate the cameras in any weather conditions, since the device itself has a sealed housing.
- Such cameras demonstrate a mirror image of the image, so the driver will know about the real location of objects.
- If you choose a more modern device with a highly sensitive matrix, the video quality will be high even if the lighting is low.
- Most car mirrors with cameras turn on automatically when reverse gear is activated.
- If necessary, the driver can always adjust and configure the camera to select the most optimal viewing angle.
- Special parking lines are superimposed on the image displayed on the mirror, which will allow an inexperienced motorist to park more quickly.
- Versatility of mounting a mirror device and a camera. The gadget itself can be built into the license plate of the car.
Now let’s briefly look at the types of gadgets that can be found on sale:
- Universal options. Installation of such devices is carried out in specially designated places.
- Gadgets sold with a numbered frame in which they are installed.
- Standard rear view devices manufactured for use in specific car models (the author of the video is the All Miscellaneous channel from China).
Advantages and disadvantages
Of course, any electronic devices have both their advantages and disadvantages, this is quite normal. It should be noted that all the pros and cons depend solely on the specific model of the gadget.
The advantages of such devices are as follows:
- Simplicity of design, as a result of which installation of the mirror and the camera itself is possible in any place convenient for the car owner.
- Affordable price.
- Possibility of full control of the situation behind the vehicle.
As for the disadvantages, they are:
- Depending on the device, it may be equipped with too little protection against damage. And when driving a car on our roads, the device can fail quite quickly.
- Bad image. If you purchased a cheap device, then you should not be surprised at the low picture quality.
- Typically, devices of this type do not support the ability to change the angle.
Wireless connection
If you want to simplify the installation process, you can use a wireless connection. For this purpose, special radio modules are used. There are also radio modems on sale that are already combined with a video camera.
In this case, the need to lay wiring inside the car is eliminated. It is enough to power the radio modules and connect them to the camera and mirror. Power can be supplied to them either directly from the on-board network (in this case, they will be constantly energized after turning on the ignition), or from reverse gear.
Where and how to install DVRs
DVRs ensure the legal safety of drivers, as they can become an indispensable assistant in controversial situations with employees of the relevant authorities. An important point in obtaining high-quality footage is the correct installation of the recorder in the car.
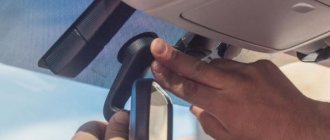
Let's look at how to properly install a DVR. Usually, attaching a recorder begins with finding a location. It is best to attach it at the top of the car, as close to the ceiling as possible, since in this position it can be tilted down to protect it from sunlight. The lower the DVR mount, the more likely it is that the sun will hit the lens.
The device is often attached to the windshield, but it can also be placed on the dashboard of a car. In both cases, they are guided by the fact that the camera should not interfere or distract the driver while driving. If the DVR is small, it can be attached to the glass behind the rear view mirror. As practice has shown, this is the most optimal place for the camera, which does not cause discomfort to the driver. The only disadvantage of such a DVR mount is the inability to rotate the camera, for example, at the time of a conflict with traffic inspectors.
If the device is massive, installation location options are reduced to a minimum. In such a situation, the DVR is mounted not on the glass, but on the dashboard. Only such an installation deprives the camera of proper visibility.
Based on the experience of motorists, before attaching a car recorder, you should pay attention to the type of device. It can be on adhesive tape or on a suction cup. Both methods have advantages and disadvantages. The suction cup is very easy to use. It can be easily removed and replaced. But this type of fastening is short-lived. Over time, it begins to hold on less well, which causes the device to fall and break. The strength of this type of fastening is also affected by temperature differences. For example, in winter the suction cup works worse.
As for DVRs with double-sided adhesive tape, they are much stronger than the previous version, but if you want to remove the device, you won’t be able to reattach it.
Let's look at how to attach the suction cup. In order for the suction cup to hold tighter, before attaching it, you need to treat the glass to remove excess fat. For this purpose, you can use glass cleaner or regular alcohol. If the glass is frozen, you should warm it up. You also need to warm up the suction cup itself, since the cold turns it to stone. For this purpose, you can simply warm up the car by turning on the heater.
At the top of the windshield there is often a dark, pimply strip that protects from the sun. The suction cup will not stick to it, since the air present in the pimples will interfere with fastening, so the recorder is placed below the dark tape. If placement on it is unavoidable, then you will need to use tape.
The next important nuance when installing DVRs is the coverage area of the devices. When choosing a seat, consider the location of the airbags. The camera should not be damaged when the airbags deploy.
Connection via filter or relay
Sometimes, when connecting the camera to the power supply of the rear lights, strong interference, stripes, and complete loss of the picture are observed. This may be explained by the design features of a particular car model. To solve this problem, power filters or connection via a relay are used.
The relay ensures a stable supply of constant voltage to the camera input when the back light signal is activated.
Setting up a camera with a mirror
After installing and connecting the equipment, it is advisable to configure it. Algorithms can vary significantly depending on the type of models used. Therefore, we will only mention the most basic nuance - the use of a scale grid displayed on the monitor.
This function is not available everywhere, but many models are equipped with it. After engaging reverse gear, a characteristic grid appears on the display, helping to better navigate. If it is not possible to adjust its parameters, it is necessary to at least determine the correspondence of individual lines to real distances. To do this, you need to drive close to the obstacle (until the first line of the grid “rests” against it). After that, go out and measure the actual distance between the bumper and the wall.
Functionality check
If a mistake was made during the installation process, the device will be unstable. For example, show a picture upside down. To identify possible malfunctions, you need to:
- Check the cable used for connection. If kinks are found, the wire must be replaced with a new one.
- If there is no signal, you need to check the correctness of the connection.
- If noise occurs on the display, you should check whether the settings are correct.
An incorrect connection can cause the gadget to break down or damage the car's standard electronics. Therefore, if you do not have the necessary experience, it is better to entrust the work to specialists.