The circumstances in which you will need to remove your rear view mirrors can vary. For example, repairing or replacing cracked glass, purchasing new modified models, and even regular window tinting. In addition, you can install a heater in your car, as well as a monitor and a rear view camera. Removing a damaged mirror, disassembling it and gluing a new one with your own hands is not so difficult, as is installing devices more convenient than a regular reflector. To do this, arm yourself with your machine's operating manual and our instructions.
How to remove a rear view mirror
Mirrors of this type are designed to study the situation on the road behind the car. They can be divided into two categories:
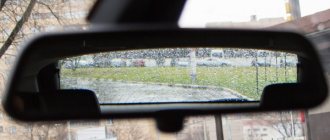
- salon - installed inside the car;
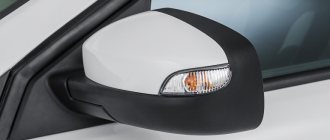
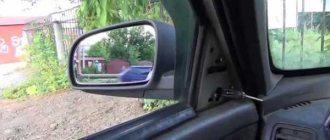
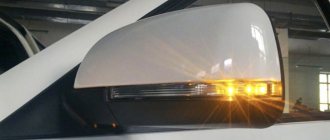
- side - located on both sides on the front door pillars.
The interior mirror is located inside the car
side mirrors are located on both sides of the car
It seems that it could be easier than dismantling the mirror? In fact, this is not so easy to do, and the principle of dismantling can vary significantly between different brands and models. We will tell you about the most universal methods of removing, disassembling and installing internal and external ones. However, if any of the methods described here do not work for you, check your machine's owner's manual. Today, many automobile companies make all such processes much easier: perhaps, instead of unscrewing bolts and bending terminals, you only need to press a small button or pedal.
Required Tools
In order to remove the mirror, you do not need any specific or hard-to-reach tools. As a rule, everything you need can be found in any motorist’s garage.
- a set of screwdrivers (most likely, only figured and flat ones will be useful);
- wrench depending on the size of the bolts;
- household hair dryer for removing the mirror element.
Add to this set skillful hands and the desire to do everything efficiently, and you can get down to business.
Mirror removal process
Salon
Interior mirrors can be installed in a variety of ways depending on the make, model, and year of your vehicle. There are two methods that are used most often.
- Installation into the car ceiling using bolts or self-tapping screws.
- On the windshield using glue or suction cups.
Thus, on many domestic cars the assistant device is installed using ordinary bolts, which greatly simplifies the dismantling process. To do this, you just need to unscrew the bolts after removing the plug.
in order to remove such a mirror, you just need to unscrew the bolts
The situation can become more complicated if the mirror is mounted on a bracket glued to the glass. First of all, check whether it is possible to separate the bracket itself and the platform glued to the glass. On most cars, they are separated by moving the clamps or turning in a certain direction.
if the mirror is glued to the glass, you need to try to separate the bracket from the holder platform
If this is not possible, you will have to resort to a radical method and remove the bracket along with the windshield. The fact is that the glue holds the elements very firmly, so when you try to separate the mirror, you may accidentally damage the glass.
Before you begin this process, take a look at your vehicle's manual: it should detail the process of removing certain components. Remember that buying a new windshield will cost you a lot.
You most likely will not be able to separate the bracket platform from the mirror on your own, so it is better not to risk it and contact a special salon. Especially if you are dismantling it for future tinting. However, if you decide to do it yourself, be prepared that a trace of glue will remain on the glass.
Video: separating the interior mirror bracket from the holder platform
Side left and right
Side mirrors are divided into two categories:
- with mechanical drive;
- with electric drive.
On almost all cars, you will need to remove the door trim to get to the mounting screws. You can find out how to do this on your model in the instruction manual.
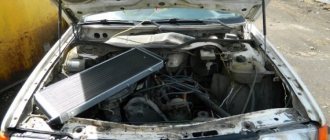
This is what a car door looks like with the trim removed
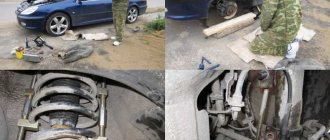
Next, to remove a mechanically driven part, you need to follow a certain procedure.
- Remove the regulator locking bracket.
- Unscrew the fastening screws on the inside of the door.
- Remove the mirror.
Video: dismantling the side mirror
If the mirrors are electric, the procedure will be slightly different.
- Disconnect the negative terminal from the battery.
- Disconnect the block from the wires.
- Unscrew the fastening screws on the inside of the door
- Dismantle.
Position and adjustment
5 accurate rear view cameras for a car from AliExpress
Before you begin dismantling the mirror, you need to understand the method of attaching it. Some cars have mirrors mounted on the fenders, but this is extremely rare these days. Fastening is realized using special studs through the car body.
But most often mirrors are placed on the pillars of the front driver and passenger doors. They are secured with several studs through a nut. If a car is equipped with a function such as electrical adjustment, then microcircuits are located in the case; they often break down, which necessitates repair work.
Disassembling the rear view mirror
Salon
In order to disassemble the internal, you will need special picks and push-ups. The case is divided according to the same principle as a mobile phone or control panel to replace the battery.
- Find the junction of the body and the mirror part.
- Insert the wringer into this area and press firmly. A gap should form on the housing.
- Carefully walk the pick along the entire gap and divide the body into two parts.
- Remove the mirror. All the elements you need will be located under it.
Disassembly process on video
Lateral
Once you have separated the side mirror housing from the car body, it should be disassembled. First of all, you need to remove the mirror element. This process may not be the same for different brands, however, the following procedure is most often used.
- Use a regular household hairdryer to thoroughly heat the junction of the reflective element with the body. The temperature of the air flow should not be too high, so a technical hair dryer will not work here.
- Using a flat-blade screwdriver or a small spatula, pry the mirror away from the housing. On some models, at this stage you need to bend the terminals. To avoid damaging the glass, you can wrap a screwdriver or spatula with electrical tape or a soft cloth.
- In some designs, to separate it, you need to lightly press it in the center and, as it were, push it to the side. After this, the reflective element can be removed with careful movements.
- Then remove the center screw from the plastic frame (if equipped).
- All side mirror mechanisms are located under the frame. Using a screwdriver, you can unscrew any of them and put them in place. You can independently divide the structure into all its component parts, including adjustment and folding motors.
Article on the topic: Replacing the heater valve VAZ 2109, 21099, 2108 and other measures to restore the stove
Video: process of disassembling the side mirror
The mirror is assembled in the same way, but in reverse order.
Diagnosis of mechanical faults
After making sure that the electrical networks are in good condition, it is necessary to diagnose mechanical damage. First, it is recommended to make sure that they are securely attached to the elements fixing them to the drive mechanism. It is also worth checking the integrity of the plastic parts and all latches that become accessible after the mirror element is removed.
A mechanism defect can be easily determined when power is applied to it. The detected defect must be eliminated slowly and very carefully. The mirror requires special care, as it can easily be damaged during dismantling.
How to secure and how to glue a new one
If you have successfully dismantled the mirror yourself, then returning it back will not be difficult. As a rule, all actions are performed in reverse order.
But you should pay special attention to the selection of glue, since not everyone is suitable for this process.
it is necessary to choose the right adhesive for attaching the mirror to the windshield
Glue selection
There are three types of compositions for gluing mirrors:
- chemically cured;
- light-curing;
- compositions based on epoxy resin.
A composition with resins will work well only if it is allowed to dry properly. This usually takes from 10 hours to a day. In this case, the part must be pressed tightly at all times. This approach is not very convenient, so such products are not used in everyday life.
Light-curing mixtures operate when exposed to special ultraviolet lamps. This is one of the most common methods in production. However, if you are not the happy owner of a lamp, you should not purchase such a composition. Sunlight, especially diffused light, is not able to have a sufficient effect.
For these reasons, chemically cured compounds are the most popular. A special hardener starts the polymerization process. As a rule, they consist of the glue itself and an aerosol activator, although one-component compositions are also found.
Please note that some materials cannot be used to glue the mirror.
- household superglue;
- double-sided adhesive tape.
The adhesive component of both materials has such a composition that when used on glass or metal, it will not be able to harden completely. High air temperature inside the cabin or heating of the glass from sunlight will soften it and the mirror will fall off. You can use household adhesives only if the mirror fell completely unexpectedly, and now you need to urgently get to a car service center.
I tried it with superglue three times. I confirm: it doesn’t last more than a week.
Max
https://homo-habilis.ru/v-garazhe/223-chem-prikleit-zerkalo-zadnego-vida-v-avtomobile
How to stick to windshield
Having selected the appropriate glue, you can begin returning the rear view mirror to its rightful place. Choose a warm day for this or install a heater in the garage: the air temperature should be between 20 and 25 ° C.
process of applying glue to the holder platform
- Clean the holder platform of any old adhesive residue.
- Lightly sand the surface of the holder to improve the adhesion effect.
- In the same way, sand the area of the windshield where it is glued.
- Degrease the holder and glass area.
- Apply a thin layer of glue to the holder.
- Spray a special activator onto the place where the part is attached.
- Place the adhesive side of the part onto the glass. Try to follow the trail left from the previous time.
- Press the mirror firmly against the glass and hold for the time indicated on the package.
- After making sure that the part is firmly in place, clean the mirror from any remaining activator and glue around the holder.
- Reinstall the windshield (if you removed it) according to the owner's manual.
Ready! If you followed all the instructions carefully, the mirror looks like it was installed at the factory or at least in a car repair shop.
Be extremely careful and attentive! A crookedly glued mirror cannot be moved, so you will have to start the whole process all over again.
How to install on bracket
If during dismantling you did not separate the bracket platform from the glass, it will be even easier to assemble it. To do this, find a fixing element: it may be a screw or a latch. After this, connect the bracket leg to the platform.
There are also special brackets that are not glued to the glass, but are installed on the ceiling or other elements of the car, for example, on sun visors.
Video review of replacing the mirror element on the Lada Kalina
The video is embedded from my YouTube channel.
And below everything will be shown with photo instructions.
The first step is to turn the mirror element with your hands to its extreme position in order to obtain maximum clearance. This is clearly shown in the photo below.
And through the resulting gap, using a screwdriver or fingers, you need to release the element from the latches.
In general, if you stick your fingers in, you can easily bend the latches one at a time, and by turning the mirror with the other side, free yourself from the latches in a circle.
We completely remove the element, since after detaching it from the clamps, nothing else secures it.
In the photo above you can clearly see everything that is used to attach the mirror element to Kalina! The new one is seated in place by hand, without any extra effort, evenly pressing the element in the center so that it sits until it clicks! The main thing is that these are not clicks from a broken mirror