Noticed oil stains under your car? There may be several reasons for this. The simplest is leaks in the oil filter gasket. Replacing them is not at all difficult. But when it comes to problems with the crankshaft, then the task becomes a little more complicated.
You can replace the crankshaft oil seal on a VAZ 2110 either independently or contact specialized services. When making repairs yourself, it is important to prepare well so as not to make critical mistakes.
Oil stains usually appear much earlier than stated in the manufacturer's warranty.
When is it necessary to replace the crankshaft oil seal on a VAZ 2110
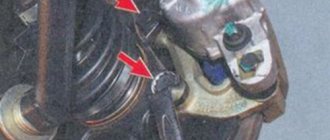
Oil leakage can be caused by even a slight displacement of the oil seal.
But since there are two oil seals on the crankshaft, it is imperative to check both sides of the cylinder block. In addition, when engine oil spills, this is a clear sign that small contaminants and dust have entered the part, which causes poor quality o-rings. This negatively affects the operation of the engine and various vehicle systems. The reason for all this is the design features of the oil seal in 2110. In winter, the oil seal can be clogged with a mixture of condensate and waste oil. Because of this, it is impossible for crankcase gases to escape. But the gas cannot remain inside all the time; it needs an outlet. The weakest link in the gas seal system is the O-rings that surround the crankshaft on both sides. Exhaust occurs through them. Sometimes, when exhausted, the seals expand significantly, so the engine compartment is stained with used engine oil.
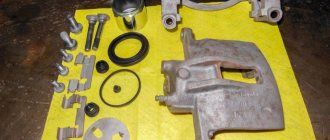
Necessary tool
To replace the seals you will need the following set of tools:
- Set of wrenches or sockets. Among them, you need to remember the keys for 10, 13 and 19.
- A couple of screwdrivers.
- Pliers.
- Prepare a special container for draining the oil. It can be made from a plastic canister cut into two parts. Five-liter water bottles will also work.
- New seals.
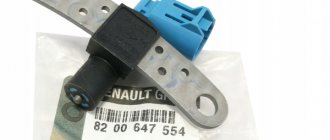
Front crankshaft oil seal.
Rear crankshaft oil seal.
Articles
As for new oil seals, it is better to replace the front and rear at the same time. They are also called big and small.
- The most popular AvtoVAZ spare parts with catalog numbers 21080100516000 and 21081005034.
- ESPRA seal kit, part number E07418, higher quality. A foreign manufacturer costs twice as much.
ESPRA seal kit.
Replacement algorithm
To replace parts, follow these steps:
- First of all, you need to drain the oil from the engine. To do this, you will need an empty container with a capacity of at least four liters.
- Then the front timing belt cover is removed.
Remove the two screws on the sides of the cover.
Remove one screw in the center of the cover.
Remove the timing belt cover.
It is necessary to jack up the right front part of the car and remove the front wheel.
Lift the front end and remove the wheel.
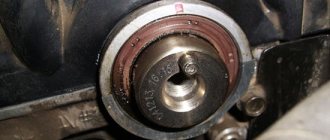
It is necessary to turn the camshaft screw clockwise. Align the marks on the pulleys.
Align the mark on the pulley with the tab on the cover.
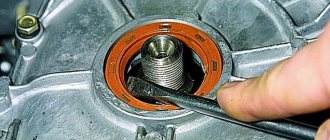
The crankshaft must be securely locked.
The crankshaft can be locked with a screwdriver...
...or block the valasroki pulley.
Remove the generator drive pulley.
First, loosen the tension of the generator belt under the hood, then loosen the bolt through the wheel arch with a socket wrench 17 and remove the pulley.
Then remove the timing belt. To do this, turn the tensioner so that the belt is in its loosest position.
Loosen the roller and remove the timing belt.
How to change the crankshaft oil seal on a VAZ 2110 yourself
For those who do not know how to replace the crankshaft oil seal, you should start with the front one. Because it is much simpler than replacing the rear crankshaft oil seal on a VAZ 2110. This is due to the design of the engine. Access to the rear oil seal is usually blocked by the transmission. Therefore, before disassembling, it is necessary to prepare two spare parts. Visually they are different from each other. The front diameter is slightly smaller. You can buy them either in pairs or separately.
Before starting work, you must disconnect the battery, clean the outer part of the cylinder block from dirt and oil, and put the car on the handbrake.
Stories from our readers
“Fucking basin. "
Hi all! My name is Mikhail, now I’ll tell you a story about how I managed to exchange my two-wheeler for a 2010 Camry. It all started with the fact that I began to be wildly irritated by the breakdowns of the two-wheeler, it seemed like nothing serious was broken, but damn it, there were so many little things that really started to irritate me. This is where the idea arose that it was time to change the car to a foreign car. The choice fell on the melting Camry of the tenth years.
Yes, I had matured morally, but financially I just couldn’t handle it. I’ll say right away that I am against loans and taking a car, especially not a new one, on credit is unreasonable. My salary is 24k a month, so collecting 600-700 thousand is almost impossible for me. I started looking for different ways to make money on the Internet. You can’t imagine how many scams there are, what I haven’t tried: sports betting, network marketing, and even the volcano casino, where I successfully lost about 10 thousand ((The only direction in which it seemed to me that I could make money was currency trading on the stock exchange, they call it Forex. But when I started delving into it, I realized that it was very difficult for me. I continued to dig further and came across binary options. The essence is the same as in Forex, but it’s much easier to understand. I started reading forums, studying trading strategies. I tried it on a demo account, then opened a real account. To be honest, I didn’t manage to start earning money right away, until I understood all the mechanics of options, I lost about 3,000 rubles, but as it turned out, it was a precious experience. Now I earn 5-7 thousand rubles a day. I managed to get the car buy after half a year, but in my opinion this is a good result, and it’s not about the car, my life has changed, I naturally quit my job, I have more free time for myself and my family. You’ll laugh, but I work directly on the phone)) If If you want to change your life like me, then here’s what I advise you to do right now: 1. Register on the site 2. Practice on a Demo account (it’s free). 3. As soon as you get something on the Demo account, top up your REAL ACCOUNT and go to REAL MONEY! I also advise you to download the application to your phone, it’s much more convenient to work from your phone. Download here.
Replacing the front crankshaft oil seal
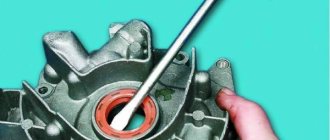
To replace the front oil seal, there is a special place in the oil pump housing or on the front cover of the device. The seal can be removed without further disassembly of the supporting parts, but the manufacturer's recommended option is preferred.
Repair steps:
- oil leak detection;
- engine drive shutdown;
- opening access to the crankshaft;
- removing the oil seal;
- visual inspection of the damaged part;
- adjustment;
- Assembly is in the reverse order of removal.
Work order
- First of all, we disconnect the negative terminal, as a result of which we de-energize the VAZ-2110. After this procedure, it is necessary to remove the protection of the timing belt and the car engine.
- We loosen the tense timing belt, and then simply remove it, making sure that the marks match.
- We remove the right wheel in front of the VAZ. After completing the manipulations with the wheel, the generator drive belt is also removed, after which you must unscrew the bolt securing the crankshaft pulley.
- The engine oil is drained and the oil pump, to which the front oil seal is attached, is dismantled. We replace the cuff and carefully coat it with sealant.
- The cuff on the inside is generously coated with oil, then remove the seal and take out the front cuff of the car. We collect all this in the reverse order of the above steps.
Replacing the rear crankshaft oil seal
Replacing the rear crankshaft oil seal requires a lot more work than the first one. Here it is already necessary to remove some parts, such as the gearbox and clutch housing. The work is performed after removing the clamp in which the oil seal is installed.
The algorithm looks like this:
- removing the clutch;
- unscrewing the bolts to remove the flywheel and the housing hidden behind it;
- securing the elements with a cover that holds the oil seal;
- installing a new spare part, lubricating its outer diameter.
It is also advisable to additionally change the gaskets under the protective covers, since old gaskets may lose their elasticity after reinstallation.
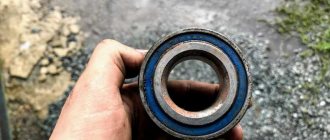
Instructions for removing the bearing from the crankshaft
In every car service, in order to remove any of the several dozen bearings that are in the car, there is always a pressing tool, a puller or any other special device. But in our case, when everything is done in an ordinary garage with your own hands, the car enthusiast has to make devices with his own hands or use improvised means. There are 2 ways to remove the ball bearing from the crankshaft seat in a garage.
Method No. 1
If the bearing is not seated in the rear wall all the way, then it can be removed from the inner race using an inertial hook made by yourself. In order to make it you will need:
- a piece of reinforcement or rod (D = 6-8 mm, L = 300-400 mm);
- a metal cylinder with a through hole, d larger than the selected rod (a hub, a massive sprocket or any other similar object may be suitable).
Making the device:
- One of the ends of the reinforcement is bent at an angle of 900, and the length of the bend should be about 10 mm.
- A metal cylinder is placed on one side of the rod.
- On the other hand, a section is welded and a T-shaped tip is made on it.
In order to remove the bearing with such a homemade device, the rod is inserted into the inner race of the bearing and secured with a bend. When the load moves with acceleration, the T-shaped tip is struck. In order to remove evenly, with each blow the rod must rotate around its axis.
On video: How to press a bearing out of a blind crankcase in 3 minutes?
Method number 2
This method can be used to remove the crankshaft bearing; this can be done using a metal cylinder or bolt (with an approximate diameter of 14.5 mm) so that it fits into the hole in the inner race with minimal clearance. An entry that is too loose or too tight will not work. Removing the crankshaft bearing:
- Lubricant (such as “Solidol”) is placed into the cavity behind the bearing through the hole.
- A rod is inserted into the inner cage and hammered in until the rod is completely immersed.
- Add more grease, and under the influence of its pressure, the bearing is squeezed out of the crankshaft seat.
A crankshaft is a part (or assembly of parts) of complex shape that has journals for attaching connecting rods, from which it receives forces and converts them into torque. An integral part of the crank mechanism.
Quick disassembly method
Some experts suggest a risky removal option without removing the cover. All operations must be carried out directly with the engine open. This method saves a lot of time, but with little experience it can do more harm than good. After removing the old oil seal, a new part is installed on the shaft. This must be done very carefully so as not to damage the polished glass surface. If the shaft is damaged, the oil seal quickly wears out, a new engine oil leak appears, and all actions will need to be repeated.
What is needed for repair
If you decide to repair it yourself, take care of the site where you plan to inspect the machine. This could be an overpass or an inspection ditch in which it will be convenient to make the replacement.
The set of tools for work should include screwdrivers, cuffs, new oil seals, a set of heads and keys. Be sure to use sealant when making repairs. Remember that parts and consumables must be purchased only from the manufacturer, in order to avoid purchasing low-quality products or counterfeiting original parts.
Causes of failure
The most obvious factor indicating problems with the crankshaft oil seal is numerous traces of oil on and near the engine. There may be several reasons for the loss of strength of the crankshaft oil seal (CS). Here are the main ones:
- Natural physical wear of the part associated with a long service life, which has already approached 3 years or even exceeded it;
- Problems that arose during the last installation of a new SC;
- Incorrect assembly of the unit, which resulted in a violation of the tightness and integrity of the cuff;
- Presence of mechanical damage on the element;
- The use of rubber of dubious quality, which even theoretically could not last long.
The design of the “ten” provides for the presence of two crankshaft oil seals - front and rear. Their replacement is somewhat different. Therefore, they should be considered separately.
Tools and materials
What's a repair without tools?! You will need a certain set of everything you need. This set includes:
- Car keys;
- Timing belt tensioner;
- Set of screwdrivers with bits;
- Waste collection container;
- Antifreeze or high-quality graphite lubricant;
- Container with motor oil;
- Heat-resistant sealant;
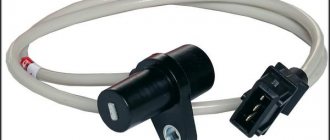
- New crankshaft seals.