Any malfunctions in the operation of the car’s cylinder block require immediate intervention from the driver, since they directly affect the quality of the engine. One of the unpleasant situations that can arise during the operation of this engine unit is antifreeze getting into the cylinder block. Of course, in this case the engine will not stop working instantly, and the car will continue to move with virtually no major changes. Therefore, many drivers do not pay attention to signs of BC malfunction. But if you ignore the symptoms of a breakdown for a long time and continue to operate the car without fixing it, the consequences can be very serious.
Consequences of antifreeze getting into the cylinder block
It doesn’t matter what kind of liquid gets into the engine, it could be ordinary antifreeze or modern expensive antifreeze, the consequences will be identical. Further operation of the vehicle in the usual sense is not permitted. Coolant (hereinafter referred to as coolant) cannot harm the engine, even taking into account the aggressive and toxic components included in its composition. The problem is that ethylene glycol, which most coolants are made of, when mixed with engine oil, is converted into a solid, insoluble component, similar in action to abrasive materials. All rubbing parts quickly wear out and fail.
White emulsion on the plug: a clear sign of coolant in the oil
The second problem is a kind of scale or emulsion in the form of deposits on the walls of oil lines and numerous channels. The filters cannot cope with their task because they are simply clogged, the oil circulation is disrupted and, as a result, the pressure in the system increases.
The next problem is dilution of the engine oil, as a result of which the washing, lubricating, protective and other properties are lost. All this together invariably leads to overheating of the power unit and deformation of the cylinder block and its head. It doesn’t matter at all whether the engine is gasoline or diesel, the consequences will be similar.
The most common factors by which you can understand that antifreeze has got into the oil
There are some signs of antifreeze getting into the lubricant. How to determine and detect antifreeze in oil:
- Reducing the amount of antifreeze, provided that it does not leak out of the car.
- The engine is shaking, the motor is running unevenly.
- Whitish traces of antifreeze on the dipstick.
- When you open the valve cover, you can see that it is white on the inside. There are also white spots inside the flask.
- Air bubbles are visually observed in the expansion tank at high engine speeds. There are grease leaks on the surface.
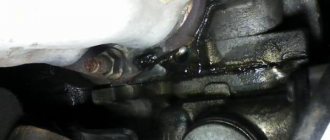
- Antifreeze is visible on the crankcase, spark plugs, under the head, in the pan.
- High concentration of exhaust carbon monoxide. The exhaust color is white, more like steam.
- The grease darkens quickly.
Reasons for getting there
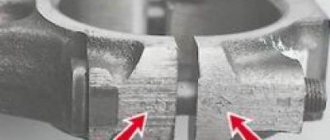
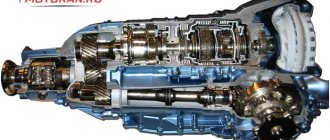
If you study the structure of a car engine, it becomes clear that the coolant circulates through the so-called jacket, removing excess heat. These channels do not normally communicate with the internal cavities, but at the junctions of different parts (especially where the cylinder head is connected to the block itself) there are weak spots and breaks. A special gasket is installed in this place, which becomes a connecting link and prevents antifreeze leakage. However, it often burns out as it wears out and the coolant leaks out or into the cylinders, sometimes in both directions.
Through such damage to the gasket, coolant enters the cylinders.
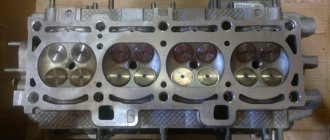
Often the problem occurs due to the fact that the cylinder head has defects along the plane that is pressed against the block. The slightest deviation creates microscopic cracks through which antifreeze is released under pressure. Well, the third reason is a crack in the channels on the block.
Clear downgrade problems
This is not entirely relevant to our question, but it’s worth mentioning. This needs to be checked first, and if you have not identified the reasons, then we will dig deeper. So, antifreeze may leak due to a leak in the system, let’s look at it point by point:
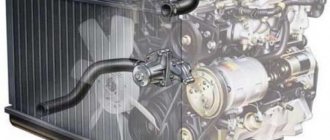
- Engine radiator leaked . Of course, this can be determined very quickly, just look at it and also look at the stains under the car; if it is leaky, there will be red, green or blue drops. Of course, you can try to solder or clamp the radiator tubes, but often the plastic component (sidewalls) is damaged, there is nothing you can do about it, you need to replace it.
- Heater radiator . Almost the same picture, only the interior heater is leaking, it is more difficult to diagnose, because the coolant will drip onto the seal (carpet) in the cabin. But the reasons for the determination are simple: if there is a smell of antifreeze in the cabin (sweet smell), but not outside. If the glass sweats even in dry weather, and there is an oily coating on the glass. Liquid leaving the tank means your heater radiator is covered, of course, if you remove the plastic (decorative) protection of the instrument panel, you will see that it is dripping somewhere. We do the same, either restore it, or if this is impossible, change it.
- Hoses . They wear out over time, because they expand each time (when the engine heats up) and contract (when it cools down), such work will sooner or later damage them, they will not be able to hold pressure and will rupture. Of course, there may be minimal damage, but it will leak constantly. It is useless to make hoses; it is better to replace them.
- Tubes _ The situation is the same as with hoses, they are metal and usually last a long time. But there are situations when they also occur.
- Thermostat and pump . These are two mechanisms that are designed to pump and regulate the flow of coolant; the housings are made of metal or plastic and they often leak, this happens from time to time. For replacement, they are practically not repaired.
- The cap of the expansion tank and the tank itself. The cap is a valve , after a certain mileage it also fails, if it does not hold pressure, then antifreeze from the expansion tank can splash out when warming up. The tank itself may also burst, because it is made of plastic; if the lid is faulty, it may rupture. For replacement.
These are obvious reasons, they are worth checking first - ALWAYS! It often happens that the driver searches and cannot find it, but antifreeze (antifreeze) goes into, say, the stove and then into the passenger compartment, which is quite difficult to immediately determine. Park the car in a dry area or in a garage, if possible, and observe, if there are stains the color of your coolant, then this is definitely a leak, look for it!
Antifreeze gets into the engine: signs
For any coolant, the signs of getting into the combustion chambers and into the crankcase with oil will be the same:
- white color of exhaust smoke (not to be confused with steam in winter);
- there is a specific sweetish smell of antifreeze in the exhaust gases;
- the level in the expansion tank is constantly decreasing (the sign is indirect, since it can also go away due to a banal leak through the pipes);
- when examining the oil level dipstick, you can see an uncharacteristic shade (dark or, conversely, white);
- spark plugs in cylinders with leaking damp from antifreeze;
- emulsion on the oil filler plug.
Before you begin to fix the problem, you need to find the exact reason why refrigerant is getting into the cylinder block.
Antifreeze in combustion chambers
How does the problem manifest itself?
You can determine that coolant has entered the cylinder block based on several signs. The main ones are considered to be the following:
Typically, the smoke coming from the exhaust pipe when antifreeze leaks into the cylinder block may not have any odor at first. Only later can it acquire the distinct aroma of burnt antifreeze. In addition, if coolant enters the cylinder block, the color of the oil may darken. In this case, it is quite possible that a coating in the form of a white emulsion will form on the oil filler neck.
Remedies
In the vast majority of cases, the cause is the cylinder head gasket, and it will require replacing it and restoring the tightness of the cooling system. It is inexpensive, and replacement will not cost a fortune, especially for a Russian-made car. The most difficult thing is removing the head, because you need a special torque wrench to control the force when tightening the nuts. You also need to take into account the sequence in which the nuts on the studs are unscrewed and then tightened.
Changing the gasket is not enough and you have to grind the plane of contact of the cylinder head to the block; most likely, if the seal is damaged, the “head” will move. In this situation, you can no longer cope on your own; you need to attract experts. They will carry out troubleshooting, and if it turns out that the head is severely deformed, grinding will no longer help, and you will have to replace the cylinder head. If antifreeze gets into the engine due to cracks in the block, then there is only one option for eliminating the leak: replacing the block, and in most cases this means installing a new or contract engine.
What to do
The method for eliminating an antifreeze leak depends on the cause of its occurrence. The simplest situation is a burnout or rupture of the gasket. It cannot be repaired, so the gasket should be replaced.
If a deformation of the cylinder head occurs, most often you cannot do without the help of a specialist, since performing this action incorrectly will lead to failure of the part. A deformed cylinder head will require grinding on a special machine. But if the defects are serious, it is necessary to remove more than the permissible layer. In this case, the part will have to be replaced.
The discovery of a large crack in the cylinder block requires its immediate replacement. Small cracks in cast iron or silumin blocks can be repaired by welding - electric or “cold”.
Replacing the BC gasket with your own hands
Replacing the cylinder block gasket is a simple manipulation, and any car owner can easily cope with this task on his own. The main condition for obtaining the desired result without additional breakdowns is to follow the car manufacturer’s recommendations regarding the strength and procedure for tightening the cylinder head with a torque wrench. The sequence of actions when replacing the gasket is as follows.
- The car is de-energized by removing the negative terminals of the battery. If necessary, drain the antifreeze and reduce the pressure in the supply.
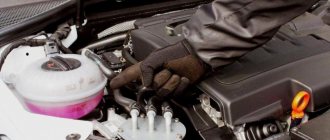
- First, the attachments are disconnected from the cylinder block. If you have no experience working with parts, it is advisable to sketch or otherwise record the sequence of dismantling the elements. Craftsmen advise arming yourself with a marker and applying the appropriate marks to each dismantled part.
- The screws securing the cylinder head begin to unscrew from the center, making half a turn each time.
- Disconnect the cylinder head and remove the old gasket.
- Clean the cylinder head and wash it with gasoline.
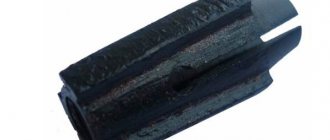
- Install a new gasket. To ensure precise installation, there are special bushings on the center of the block. The hole for the oil passage should be between the 3rd and 4th cylinders.
- Screw all parts in reverse order.
- Return hanging elements to their place
IMPORTANT! The fastening bolts must be cleaned before unscrewing. This will prevent the key from falling off and protect the bolt splines from damage.
Repairing a cylinder crack
The most common way to seal a BC crack is welding. The work requires certain skills and abilities, since a violation of the technology will lead to divergence of the seam, and the problem will return. The welding sequence and technology is as follows:
- The ends of the crack on the block are drilled at an angle of 90 degrees. This procedure is necessary to prevent further expansion of the crack.
- The cylinder block is heated to 650 degrees. Then a cast-iron-copper filler wire is applied to the crack and a continuous weld is made using flux.
- The part is gradually cooled in a heating cabinet. Sudden cooling of the cylinder block after welding is unacceptable: this will lead to rupture of the seam and complete failure of the part.
The seam on the part can be made without heating, using electric welding and copper electrodes in a tin wrapper. In this case, the resulting seam requires additional reinforcement with epoxy resin. The surface is degreased with acetone or a special compound, then a layer of epoxy paste is applied to the seam with a spatula. After this, the BC is dried for 24 hours at room temperature. After drying, the seam is sanded.
Minor cracks can be repaired without welding by applying fiberglass and epoxy resin. The surface of the crack is degreased, then several layers of fiberglass are applied one by one, each coated with epoxy paste.