Payment for goods and downloading of the book in electronic form (PDF format) is made on the website.
To do this, you need to find the book you are interested in and click on the “Buy” button. The price of the book is indicated on the button.
For convenience, the price on the website for residents of Russia, Belarus and Kazakhstan is presented in rubles.
For residents of Ukraine in hryvnias, and for all other countries - dollars.
After clicking on the “BUY” button, a payment window will open where you can select a payment system with which you can pay for the selected book using any bank card (Visa, MasterCard, MIR, etc.)
When you click on the “Pay by bank card” button, the Portmone payment system will open, which is the easiest way to make a payment.
In addition, the website offers four payment systems for payment:
- Yandex (payment from any bank cards, Yandex Money account, QIWI Wallet, terminals, etc.);
- Portmone (payment from any bank cards, Portmone account);
- PayPal (payment from any bank cards, PayPal account);
- WebMoney (payment from any bank cards, payment from WebMoney wallets).
Payment via Yandex Cashier
After selecting payment via Yandex, the Yandex Cashier payment system will launch, where you need to select a convenient payment method (bank card, QIWI, Yandex Money account, etc.)
After specifying payment details and confirming payment, payment for the goods will occur.
If you have a bank card in a currency other than the ruble, then the money will be debited from the card at the rate of the Central Bank of Russia at the time of the purchase.
This payment method is optimal for residents of Russia, Kazakhstan and Belarus.
Official website of the Yandex Kassa payment system https://kassa.yandex.ru
Payment via Portmone
After selecting payment through Portmone, the payment system will launch, where you need to select the payment method: bank card or Portmone account.
The price in the Portmone payment system is converted into dollars at the exchange rate of the Central Bank of the country where you are located.
If you have a bank card in a currency other than the dollar, then the money will be debited from the card at the rate of the Central Bank of your country at the time of the purchase.
After specifying payment details and confirming payment, payment for the goods will occur.
Official website of the Portmone payment system https://www.portmone.com
Front Brake Pad Replacement Guide
The frequency of replacing the front brake pads on a VAZ 2106 depends primarily on the mileage of the car, as well as on the quality of the linings themselves. It happens that on good quality pads alone you can drive more than 50,000 km with a moderate driving style. And there are also some vehicles that you can’t drive even five thousand: they start creaking and buzzing terribly, and the quality of braking becomes simply disgusting.
In order to replace the front brake pads on a VAZ 2106, you will need the following tool:
- Flathead and Phillips screwdriver
- Pliers
- Hammer (if necessary)
Pedal sticking
If the brake pedal does not move back when pressed, this indicates that the pad is sticking to the disc. This phenomenon is possible in frosty weather when moisture gets on the brake elements, but it would be useful to inspect the pads. If the car cannot be stopped for a long time when you press the pedal, then the reason lies in worn out pads or air getting into the hydraulic system. You will need to inspect the brake components and possibly bleed the brakes.
What are they used for?
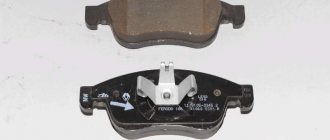
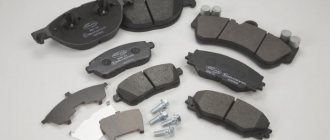
When you press the brake pedal, the pressure in the hydraulic system increases and the pads are pressed against the surface of the brake disc or drum. Structurally, a brake pad is a plate on which a lining made of a special material is attached. It contains various components: special rubbers and resins, ceramics, synthetic fibers. The composition may vary depending on the manufacturer. The main requirements that the lining must meet are high wear resistance and the ability to withstand high temperatures, resistance to destruction, but at the same time the material must cause minimal wear of the brake disc.
Payment via PayPal
After selecting payment via PayPal, the PayPal payment system will launch, where you need to select the payment method: bank card or PayPal account.
If you already have a PayPal account, then you need to log into it and make a payment.
If you do not have a PayPal account and you want to pay using a bank card via PayPal, you need to click on the “Create an Account” button - shown with an arrow in the picture.
PayPal will then prompt you to select your country and provide your credit card information.
After specifying the information required to make the payment, you must click on the “Pay Now” button.
Official website of the PayPal payment system https://www.paypal.com
Payment via WebMoney
After selecting payment via WebMoney, the payment system will launch, where you need to select the payment method: bank card or WebMoney wallet.
If you already have a WebMoney wallet, then you need to log into it and make a payment.
If you do not have a WebMoney wallet and you want to pay in another way, you need to select any of the methods that WebMoney offers and make the payment
After specifying payment details and confirming payment, payment for the goods will occur.
Official website of the WebMoney payment system https://www.webmoney.ru/
Downloading a book
After successfully completing the payment (by any method) and returning to the KrutilVertel store from the payment system website, you will be taken to the successful payment page:
On this page you need to indicate your e-mail, where access to download the book will be sent.
If you are already registered on our website, then simply follow the link to your personal account.
The book you purchased will be in your personal account, from where you can always download it.
Please note that after making the payment, you need to return back from the payment system website to the KrutilVertel website.
If for some reason you did not return back to the site and closed the payment system tab with a message about the successful completion of the payment, please let us know - we will send you a letter indicating access to download the book.
Pads for VAZ 2106
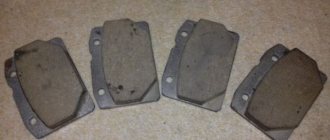
Despite the fact that the model has long been discontinued, there are plenty of original spare parts on the car market. In addition to factory parts, a number of components manufactured by foreign companies are available for sale. Obviously, the price of domestic brake system elements will be cheaper than their foreign counterpart.
Brake pads must be replaced if the limiting friction lining thickness of 2.0 mm is reached. Below this norm, there is a high probability of deformation and splitting of the lining into pieces. Elements of the brake system must be immediately replaced if engine, transmission oil or antifreeze gets on the surface.
The process of replacing pads is not complicated; every driver can do it, even without experience in servicing equipment.
Original
| vendor code | Price, rub.) | vendor code | Price, rub.) |
| 21013501090 “Cedar” | 450 | 21010350180083 | 470 |
| 21010350180082 | 470 | 21010-3501800-84 | 510 |
| 21010350180087 | 450 | 21010-350180085 | 470 |
Substitutes
| vendor code | Price, rub.) | vendor code | Price, rub.) |
| 0026400 TRW | 570 | 41062 | TRW |
| GDB140M ABS | 650 | ADB0281 | ABS |
| 98271307 Allied Nippon | 750 | Delphi 65139 | 780 |
| LP92/S | 800 | Delphi 0065139 | 780 |
| 98271307 Allied Nippon | 750 | Delphi 65139 | 780 |
| 98271307 Allied Nippon | 750 | Delphi 65139 | 780 |
| Allied Nippon | 65139 |
What rear brake pads can be installed on a VAZ 2106
The original rear brake pads are 3.5mm thick. With use, the friction lining wears out and is erased. When the thickness reaches 1.5 mm, the part must be replaced. Further operation of the machine is unsafe.
The process of replacing rear pads is as simple as replacing the front ones. Unless a handbrake cable is added, which should be removed. It is not necessary to have any special experience or skills. Please resort to the help of service station workers if you identify a large-scale breakdown that requires prompt intervention from professionals.
Original
| vendor code | Price, rub.) | vendor code | Price, rub.) |
| VIS 0021929 | 550 | VIS 0005937 | 570 |
| 68822 | 550 | 21010-350209002 | 570 |
| 2101-3502090 | 550 | START 12151 | 570 |
| 63276 | 570 | 21010-3502091 | 570 |
Substitutes
| vendor code | Price, rub.) | vendor code | Price, rub.) |
| Delphi 65140 | 850 | Finwhale 23593 | 800 |
| LS1219/S | 850 | VR311 | 800 |
| Bosch 17888 | 950 | TRW 26401 | 800 |
| 986487217 | 850 | GS8164 | 850 |
| HZTS 79927 | 800 | 2101-3502090 | 800 |
| Start 63275 | 800 | 21010-3502092 | 850 |
| MASTER SPORT 2103-3502093 | 850 | 030137-02332 | 800 |
The lists are presented for informational purposes. Before purchasing, be sure to consult with a specialist from a service center or auto store to determine the compatibility of the catalog article with the make/model of your car.
How to independently replace the front and rear pads on a VAZ 2106
Preparatory stage: a set of automotive tools, rags, new pads, liquid to remove layers of rust and corrosion.
- Place the machine on a level platform. The option with an inspection hole or road overpass is excluded due to inefficiency;
- We jack up the front wheel with a hydraulic jack, remove it, having previously installed the wheel chocks;
- Use pliers to remove the guide pins. Please pay attention to the pressure springs; they may fly out during the work;
- Using a flat-tip screwdriver, press the slave cylinder into its original position. We widen the gaps to remove the brake pads;
- We remove worn pads, carry out preventive maintenance on the brake caliper, and clean it from rust and deposits. If necessary, use a liquid like WD-40;
- Replace with new pads, assemble the structure in reverse order.
Subject to the above recommendations and the purchase of original spare parts, the service life of the brake system elements is 20 - 25 thousand km. mileage A moderate driving style and average ambient temperatures will increase the service life by 5 - 7 thousand km.
Sequence of actions when replacing rear pads
Preparatory stage: a set of automotive tools, rags, liquid for removing deposits, a new parking brake cable, graphite-based lubricant.
- We install the car on the inspection hole, fix the front wheels with wheel chocks, remove the rear wheel;
- Underneath the bottom, we unscrew (loosen) the handbrake cable for the convenience of carrying out maintenance work;
- Gently tap the drum guide bolts with a hammer. During operation and installation/disassembly, the bolts stick and are difficult to unscrew. If tapping does not help, spray with liquid to remove deposits, wait 10 minutes, then start unscrewing;
- After removing the drum cover, pay attention to the position of the parking brake lever. If it is not located near the lever, it means it is jammed and must be replaced. If you ignore this signal, it will be problematic to install the drum in its normal position;
- Remove the upper pressure spring, press the strut support, and turn it until it completely coincides with the slot. Remove the two cups and the spring from the stand;
- Disconnect the cable shank from the handbrake lever. We clean the disc from dirt, deposits, and rust;
- We carry out troubleshooting of the brake cylinder and seals. If there are signs of wear, leakage, or deformation, replace it with a new repair kit;
- We remove the parking brake lever from the old pads, take out the cotter pin and washer;
- Please note that the left and right levers are different and not interchangeable. Next, you need to install a spacer bar and move the pads apart. When installed correctly, the lugs are vertical;
- We start a new cable, fix it in the eye;
- We install new pads and assemble the structure in reverse order. If you have any difficulties with installation, it is better to watch the video presented in this manual.
The final stage: adjusting and tensioning the handbrake lever. In accordance with the requirements of the instruction manual, the handbrake should clamp the pads already at 5–6 clicks. Exceeding the norm indicates weakening, and decreasing indicates excessive tension.
Problems when paying with bank cards
Sometimes difficulties may arise when paying with Visa/MasterCard bank cards. The most common of them:
- There is a restriction on the card for paying for online purchases
- A plastic card is not intended for making payments online.
- The plastic card is not activated for making payments online.
- There are not enough funds on the plastic card.
In order to solve these problems, you need to call or write to the technical support of the bank where you are served. Bank specialists will help you resolve them and make payments.
That's basically it. The entire process of paying for a book in PDF format on car repair on our website takes 1-2 minutes.
If you still have any questions, you can ask them using the feedback form, or write us an email at [email protected]
The work is carried out on a car with the front wheels hanging (on a lift or a car raised on a jack and installed on supports).
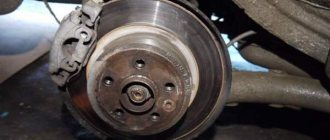
To replace the front brake pads on a VAZ 2106, you will need: calipers, a hammer, firmware (a bit or an old brake pad mounting pin), a file, a mounting blade, pliers, a wrench for wheel bolts, a jack, and supports.
1. Remove the front wheel from the car. Visually check the thickness of the brake pads. If the lining thickness is less than 2 mm, remove the brake pads for inspection.
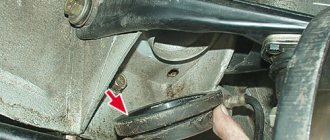
2. Clean the brake mechanism from dirt, especially the brake pad mounting pins.
3. To facilitate disassembly, apply WD-40 type liquid to the joints of the pins and cylinders.
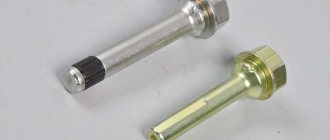
4. Remove the two pin pins.
5. Knock the fingers out of the brake cylinders.
NOTE To replace the brake pads, it is allowed not to completely knock out the pins from the inner wheel cylinder, however, for a detailed inspection of the brake mechanisms or if difficulties arise when knocking out the pins, it is advisable to remove them.
6. Remove the two brake pad pressure springs.
7. Remove the outer and inner brake pads.
WARNING Do not press the brake pedal with the brake pads removed to avoid pushing out the pistons from the working cylinders.
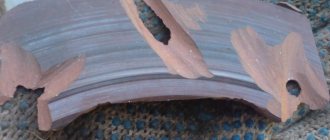
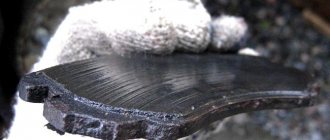
NOTES Oiling of the lining, disruption of the connection between the lining and the base, chipping and other damage to the surface of the lining are not allowed. If the indicated defects are present, as well as if the lining thickness is 1.5 mm or less, replace the brake pad. If there is uneven lining wear or uneven wear on the linings of one brake mechanism, replace the entire brake caliper assembly or the working cylinders (see “Removing and installing the front brake caliper” and “Replacing the front brake working cylinders”).
8. Wipe the inside of the wheel cylinders with a clean cloth.
9. Inspect the brake cylinder boots. Damage or signs of aging are not allowed.
10. Check the thickness of the brake disc by using a file to remove the shoulder on the disc on both sides. On each side, remove the bead in at least three places.
11. Measure the thickness of the brake disc in at least three places. In any place it should be more than 9 mm. Otherwise, replace the brake disc (see “Replacing the brake disc”).
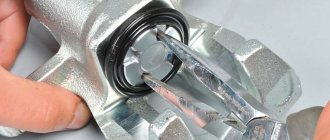
12. Using a spacer (or a worn brake pad) and a mounting blade, press the pistons into the brake cylinders one by one, resting the blade on the brake disc.
HELPFUL ADVICE As the pistons are pressed into the cylinders, the level of brake fluid in the master cylinder reservoir rises. If the brake fluid level in the reservoir is at or close to the “MAX” mark, pump out some of the fluid from the reservoir to avoid overflow.
13. Install new brake pads on the VAZ 2106 car in the reverse order of removal.
14. Press the brake pedal several times to set the pistons to the working position.
