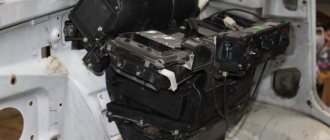
High-quality operation of a car’s heater in winter is one of the main conditions for comfortable driving. In domestic vehicles, even in new models, the heater is one of the problematic elements that very often fails. And if in the summer you can turn a blind eye to this, then in cold weather you immediately have to take measures to eliminate the problem.
To eliminate the malfunction, it is first important to diagnose which element of the car’s heating system has failed and repair the non-functioning unit. The easiest way is to turn to specialists for help, but their services are not very cheap. Very often, vehicle owners troubleshoot and repair the heater on their own, since domestic cars are highly maintainable.
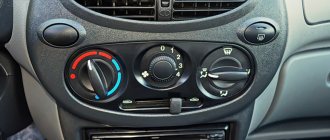
Heater regulator on the dashboard of a VAZ 2110
This article will talk about how to diagnose a malfunction of the VAZ-2110 heater control unit and repair it yourself.
Design of the heating system VAZ-2110
It includes three main nodes. This is a control unit for the VAZ-2110 stove, an air duct system, and a heating unit. The stove is controlled via an electronic unit. It consists of knobs with which the driver sets the required temperature and fan intensity.
The unit also includes a temperature sensor. As for the latter, it is necessary to automatically start the stove when the temperature inside the car drops more than two degrees below the set one. The sensor is equipped with a small fan. If you move the knob on the controller to position A, then a small electric motor is started in the heating unit, which controls the damper. The temperature sensor itself in the VAZ-2110 can be found on the ceiling, near the lighting lamp.
Another important component of the heating system is the air ducts. They pass directly from the stove itself, and each channel has its own separate function. Thus, the central channels are designed for interior ventilation.
The air distributor is responsible for supplying cool air to the cabin for ventilation or warm air for heating. The other two air ducts are designed to heat the interior in the back row. The rest are also intended for ventilation. Two side channels heat the mirrors and part of the interior. Separate nozzles are used to heat the driver's feet.
Causes of malfunctions
Depending on the design of the stove, the damper may cause a disruption in the efficient operation of the heater for the following reasons:
- deformation;
- wear of seals;
- deterioration or damage to control levers and rods;
- skew.
Deformation is a problem with old-style heaters. The first dampers of the VAZ-2110 stove were equipped with plastic elements that bent under the influence of temperature. Because of this, even when completely closed, cold air from outside leaks in and mixes with the heated air, and the efficiency of the stove decreases. Subsequently, the designers replaced the plastic flaps with aluminum ones and the problem with deformation disappeared.
To ensure tightness, the dampers have seals that reduce air leakage. Initially, foam rubber seals were used, which quickly wore out and became damaged. Later, foam rubber was replaced with rubber, but this only extended the service life of the seal; over time, the rubber ages, cracks and collapses.
Block responsible for temperature
The central unit in the stove system is the heating unit. Its main function is to directly heat the interior. This block is arranged as follows. An electric motor with fan blades pumps hot air, three dampers perform the function of recirculation and closing/opening the channels. There is also a heater core. On modern new generation systems, heat exchangers are not equipped with a tap.
Therefore, the radiator is always heated, regardless of the time of year. The manufacturer claims that this has solved the problem with constant faucet leaks. In addition, heating of the interior is significantly faster. In summer, supply ventilation occurs outside the radiator.
Modernization of the damper on the VAZ-2110
Malfunctions with the damper often result in the interior heating very poorly and slowly. The VAZ-2110 stove control unit is to blame. The controller is experiencing problems. The device does not send a command to extend the flap. In this case, it is recommended to check the temperature sensor. The controller handle is set to its extreme position and then twisted several times from the left to the right position. The temperature of the air flows must be checked by hand. In this way, the operating condition of the sensor is checked in one of the extreme positions of the handle. If the air flow changes the temperature when the knob is in the extreme position, then the sensor must be replaced. If the heating does not change, the cause is looked for in other places.
Adjusting the stove controller
The manufacturing plant provides for heating the interior to the specified temperature in fifteen minutes with a deviation of up to two degrees. Use the controller knob to set a comfortable temperature in the car interior.
To check the proper functioning of the stove, use a regular mercury room thermometer. If after fifteen minutes the interior has not warmed up to the required temperature, the controller must be adjusted.
To do this, pull the heater control module back out and rotate the temperature regulator, first to the maximum value, then in the opposite direction. After carrying out such actions, install the unit in place and check the operation of the stove again.
At the same time, it is necessary to check the operation of the heater dampers. If there are extraneous sounds when switching temperature modes, then you need to check the condition of the dampers. If cold air flows well, but hot air hardly flows in, then the lower damper is faulty. If there is no normal flow of cold air but there is a good flow of hot air, there is a problem with the upper damper. The reason may be deformation of the dampers under the influence of air of different temperatures. In this case, it is better to replace the standard plastic dampers with aluminum analogues, which are more resistant to temperature changes.
Fan problems
This will be indicated by noise or strong squealing while the car is moving. First you need to find out what is causing the fan failure. In some cases, the lower part on the heater housing falls off. Then the hooks are installed in place, which serve as fastenings.
However, it is more common to see broken tabs on the heater unit housing. Here the housing needs to be replaced. Another reason is uneven shaft expansion coefficients if the fan is heavily worn. In this case, experts recommend replacing the stove motor or its bushing. Sometimes the fan makes noise because of the washers, which are used to eliminate axial play. The element needs to be removed and cleaned. Replace the washer with a fluoroplastic one, then lubricate everything well.
If the stove does not work at first speed
Each fan speed (except the last) is connected through a separate heater resistor.
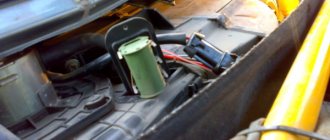
It is located not on the controller, but under the frill. One of the reasons for the inability to work at first speed is a faulty resistor. If the second speed does not work, then the reason is the same. But malfunctions can also be due to defects in the contacts on the board. Often, due to high temperatures, the board becomes very hot. As a result, contacts come loose. The entire board must be checked thoroughly. They look more carefully where food is served.
Stories from our readers
“Fucking basin. "
Hi all! My name is Mikhail, now I’ll tell you a story about how I managed to exchange my two-wheeler for a 2010 Camry. It all started with the fact that I began to be wildly irritated by the breakdowns of the two-wheeler, it seemed like nothing serious was broken, but damn it, there were so many little things that really started to irritate me. This is where the idea arose that it was time to change the car to a foreign car. The choice fell on the melting Camry of the tenth years.
Yes, I had matured morally, but financially I just couldn’t handle it. I’ll say right away that I am against loans and taking a car, especially not a new one, on credit is unreasonable. My salary is 24k a month, so collecting 600-700 thousand is almost impossible for me. I started looking for different ways to make money on the Internet. You can’t imagine how many scams there are, what I haven’t tried: sports betting, network marketing, and even the volcano casino, where I successfully lost about 10 thousand ((The only direction in which it seemed to me that I could make money was currency trading on the stock exchange, they call it Forex. But when I started delving into it, I realized that it was very difficult for me. I continued to dig further and came across binary options. The essence is the same as in Forex, but it’s much easier to understand. I started reading forums, studying trading strategies. I tried it on a demo account, then opened a real account. To be honest, I didn’t manage to start earning money right away, until I understood all the mechanics of options, I lost about 3,000 rubles, but as it turned out, it was a precious experience. Now I earn 5-7 thousand rubles a day. I managed to get the car buy after half a year, but in my opinion this is a good result, and it’s not about the car, my life has changed, I naturally quit my job, I have more free time for myself and my family. You’ll laugh, but I work directly on the phone)) If If you want to change your life like me, then here’s what I advise you to do right now: 1. Register on the site 2. Practice on a Demo account (it’s free). 3. As soon as you get something on the Demo account, top up your REAL ACCOUNT and go to REAL MONEY! I also advise you to download the application to your phone, it’s much more convenient to work from your phone. Download here.
SAUO pinout:
The SAUO receives information from:
- – cabin air temperature sensor (No. 6), which has a built-in small-sized fan.
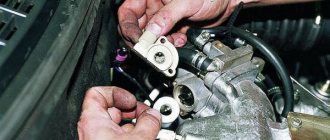
- – MMR (micromotor reducer) (No. 9), information about the position of the heater damper.
Damper control : Based on the received information and the set air temperature, the controller controls the position of the heater damper, sending appropriate signals to the damper drive micromotor.
Fan speed control : to obtain a low rotation speed (all but the last), an additional resistor (No. 2) is used, which has two spirals with resistance (0.23 and 0.82 Ohms). When both spirals are connected to the electric motor power supply circuit, the 1st fan rotation speed is ensured; if a spiral with a resistance of 0.23 Ohm is turned on, the 2nd speed is provided. When the electric motor is turned on without a resistor, the fan rotor rotates at the maximum 3rd speed (4100 min-1).
If the fan operating mode switch handle is in position A, then the controller also controls the fan speed depending on the difference in the air temperature in the cabin and the temperature set point.
Replacing self-propelled guns
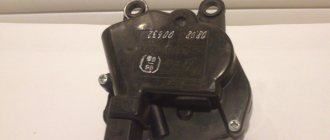
Control units cannot be repaired - they are simply replaced with new ones. But first you need to make sure that this mechanism is the reason. Instead of a broken one, install a working control unit. Its price is about 1500 rubles. The element is very easy to dismantle: just remove the buttons installed nearby. And then you can remove the device. The handles are set to zero positions and then removed.
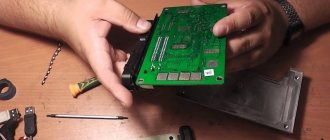
Then the glass and front cover snap off. Before removing the heater control unit on a VAZ-2110, unscrew two screws in the front and one in the back. The board can then be pulled out of the case and carefully inspected to ensure its integrity. If there is damage to the board tracks, they must be repaired. Subsequent assembly is performed in reverse order. If the temperature on the control unit is not regulated, then the entire board should be inspected. There will definitely be defects. But before you pull out the heater control unit on the VAZ-2110, you need to check the fuse box. Perhaps there is a bad connection there.
Repair and restoration of the stove damper
The deformed heater damper of the VAZ-2110 cannot be repaired; it only needs to be replaced. In this case, it is better to purchase a replacement metal part that is not so susceptible to temperature effects.
Whatever heater is installed on the VAZ-2110, to carry out repair work, the heater must be completely disassembled. In this case, the process of dismantling and disassembling depends on the design of the stove.
A positive aspect of the heater design on the VAZ - 2101 is its location - to get to it and the dampers you can from the engine compartment and you don’t have to remove the front panel.
Disassembling an old-style stove
For example, let's look at how to disassemble an old-style heater:
- Remove the terminal from the battery.
- We remove the windshield wipers, the seal, remove the air intake near the windshield (“jabot”) from the car, in the process you will need to disconnect the windshield washer nozzle tubes.
- We dismantle the insulation that separates the stove body from the engine compartment.
- We remove the gear motor.
- We divide the housing of the stove and air filter into two halves. To do this, unscrew the coupling bolts around the perimeter of the housings and remove the mounting brackets.
- Disconnect the fan power wires.
- Remove the outer half of the air filter and heater housing (along with the fan).
- We dismantle the inner part of the fan housing.
After this you will have access to the dampers. If you are only planning to repair or replace the heater dampers, there is no need to drain the antifreeze, since the heater radiator will remain in place and will not be removed.
Before removing the dampers, carefully inspect and remember their position and the way they are engaged. Further actions depend on the nature of the damage. Deformed damper parts cannot be repaired and only need to be replaced. As for damaged rods and levers, try to repair them or simply replace them. The damaged seal is replaced.
When assembling the stove, pay special attention to the engagement of the dampers. Do it as it was before disassembly, otherwise the dampers will not work correctly, which will affect the performance of the heater.
Disassembly and repair of a new type heater
The new model stoves are disassembled differently:
- disconnect the battery terminal, drain the antifreeze;
- dismantle the frill and insulation;
- disconnect the power wires of the fan and micromotor gearbox;
- unscrew the fasteners that secure the stove body to the body;
- disconnect the coolant supply pipes to the heater radiator;
- We remove the heater from the car along with the filter housing.
After this, we disassemble the stove body, dividing it into two halves, after first disconnecting the air filter housing and removing the mounting brackets. Next, we change or repair the damper, assemble the heater and install it on the car.
Note that the general algorithms of work are indicated above, but in reality, dismantling the stove is not so easy, since many fasteners are located in hard-to-reach places, sometimes you have to disconnect or remove elements that make it difficult or interfering with the removal of the unit.
Setting the air temperature from the heater
You can set the desired temperature in the cabin using the adjustment knob. But for a more accurate result and adjustment, the block has a special screw. To check the accuracy of temperature control, close all doors and windows. Place a control thermometer in the sensor area.
Then the element is set to automatic mode, and heating is monitored using a thermometer. How long can the control unit of the SAUO VAZ-21102 stove be adjusted in time? The procedure takes no more than half an hour. If after 15 minutes the actual temperature does not correspond to the set one, then the block is removed. Turn the adjusting screw clockwise. If you rotate the screw clockwise, the temperature will increase, if counterclockwise, it will decrease. Then install the element in place and check that it is working correctly. As for the possibility of repairing faults, the control unit for the VAZ-2110 stove of the new model cannot be repaired (however, like the old one). In case of serious malfunctions, it is replaced entirely. Moreover, the cost is low.
So, we found out why the stove does not work and how to solve this problem.
Climate control operating modes
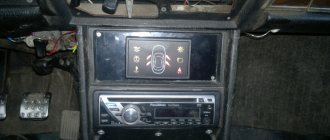
Before using the unit, you must calibrate the climate control by pressing the A/C button and, without releasing it, turn on the ignition. As soon as three horizontally oriented bars appear on the display, the button can be released. Calibration will be performed automatically, and its duration is about 5 – 10 seconds. If, during operation of the climate control, it is discovered that the position of the air damper does not correlate well with the entered value, it is necessary to recalibrate using the same algorithm. As already noted, climate control operates in three modes: automatic, manual and “Semi-automatic” mode.
When manual mode is selected (which will be indicated by a non-lit LED located above the AUTO button), the damper is controlled manually using the corresponding regulator. On the display, the left scale in the form of stripes is responsible for displaying the position of the damper. The rotation speed of the furnace fan is controlled by pressing the regulator handle and then rotating in the desired direction (clockwise - increase the speed, counterclockwise - decrease). After a five-second time interval has passed, the fan speed control mode is switched off, and the regulator returns to the damper climate system control mode.
To switch the QC operation to automatic mode, just press the AUTO button. At the same time, the corresponding LED lights up, and with the adjustment handle you can set the temperature required for a comfortable stay in the car. In the future, the VAZ-2110 climate control unit will independently control the operation of the air conditioner and heater to ensure the required temperature conditions. Semi-automatic mode is activated as soon as the user tries to change the fan speed using the appropriate control. In this case, the climate control damper will still be controlled automatically, unlike the furnace fan mode. To switch to automatic operating mode, press the AUTO button twice quickly.
The rightmost key with the inscription INJ is responsible for turning on the mode of monitoring and indicating the voltage of the vehicle's electrical network, the operating temperature of the power unit and displaying ECM error codes (if there are problems with the engine). The display of each of the listed parameters is selected by successively pressing the key. For the button to work, it is necessary to connect the VAZ-2110 diagnostic circuit to the climate control control unit.
The second button from the right is responsible for turning on the display on the air temperature measured by the internal sensor. The key located in the middle turns on the mode for displaying the air temperature outside the car. Both of these keys require the installation of appropriate sensors and their connection to the control unit. The leftmost A/C button is the air conditioning on/off switch (if equipped in the car). Maintaining the set temperature when the air conditioner is turned on is carried out in the same way - by controlling the damper that regulates the supply of warm and cooled air.
As befits an air conditioning system, the main parameters of its operation (including the temperature inside the car, the rotation speed of the furnace fan, the operating mode of the electronic control unit) are stored in the internal memory of the controller when the ignition is turned off or the on-board power supply is completely de-energized. When you turn on the ignition, the air conditioning system turns on with some delay so as not to interfere with starting the engine. After this artificial delay, the climate control begins to function in accordance with the saved user preferences that were working at the time the ignition was turned off.

