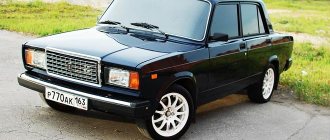
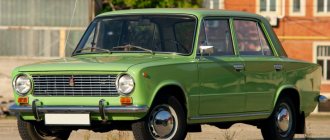
VAZ 2101
The legend of the domestic automotive industry, the VAZ 2101, was produced for 28 years (from 1970 to 1988), during which 4.85 million cars rolled off the assembly line. The VAZ 2101 had virtually no competitors in the vast country. Its technical characteristics, dynamics, braking system, handling and price made it a favorite in the domestic automobile market. “Kopeyka” still enjoys prestige and is often found on the streets of cities and towns. As with most damaged cars, the main problem of the “penny” is considered to be its body, since time, humidity and road reagents do not leave the body metal much of a chance. And if you consider that it is also a load-bearing part and makes up 60% of the cost of the car itself, then overhaul of the VAZ 2101 body is a necessary and labor-intensive operation, the quality of which directly determines the service life of the car itself.
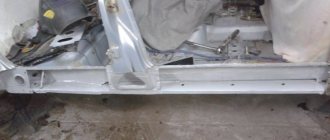
Rotten bottom
Preparing a car for painting
Washing your car with your own hands is not difficult.
This process will be the first operation in the list of painting works. Use water and a special cleaning agent to remove dirt. Grease stains that cannot be treated with water can be removed with automotive solvents. Rust must be removed; for this you can use ordinary sandpaper. The car is painted in parts; in connection with this advice, bumpers, headlights, external lighting equipment, decorative ornaments and all other parts are removed. If necessary, dismantle the door and wing. All removed parts are washed, removed from rust, and dried.
To prevent paint from getting on the windows and some other parts of the car, they must be secured with paper or film and secured with adhesive tape.
Remove old coating
Before painting the car with your own hands, remove the coating. This contributes to better adhesion and durability of the new coating. If a scratch appears on a freshly painted car, the old paint will not attract attention if it is removed before painting. After carrying out such actions, the car must be dried.
The paintwork can be removed from the body in two ways:
- For the manual version, various sandpapers, scrapers, and chisels are used.
- With the chemical method, a special substance is applied to the body to promote swelling and peeling of the coating. Remove peeling paint with a metal spatula.
Body defects away
Minor damage can be outlined with colored chalk. This will create convenience for further surface processing.
All designated areas are cleaned until clean metal appears. You only need to clean the damaged areas, there is no need to go beyond their boundaries, this will help you save materials and work time. Sometimes it is enough to touch up some parts, thresholds and others.
The transition from a cleaned area to a normal surface should be smooth, without protrusions or irregularities. A sensitive device of the human body - the hand - will help check the fulfillment of this condition. By stroking it over the surface of the body, the height difference is determined with high accuracy.
If the car needs serious repairs, the entire surface of the body is cleaned of varnish and paint. This process requires more experienced skill, although with step-by-step training and the desire of the owner, it can be carried out by a beginner.
Each stage has its own characteristics and is performed sequentially, without skipping. Failure to follow their order will affect the quality of the result. Skills can be acquired over time, but then they remain forever.
Basic tools and materials
Specialists who have a personal car dealership have the entire set of necessary tools. Painting a car with your own hands in the garage requires the use of the most basic tools, and if the car owner does not have them, then you can turn to your garage neighbors for help.
To prepare and paint your car, you will need the following:
- Spotlight to provide good lighting and heating of the surface to be painted.
- An electric drill with a vinyl attachment is useful for removing surface defects.
- Construction hair dryer for removing old paint.
- Grinding machine and plane for cleaning and polishing.
- A paint mask is needed to protect the respiratory system, eyes and face when working with equipment.
- Spray gun or compressor for applying any type of coating.
- Putty, primer, paint, varnish, sanding sheets of different thicknesses.
How to repair sills and the underbody of a car with and without welding
The sills and underbody of the car, like many other parts of the body, receive damage over time that cannot be avoided during intensive use of personal equipment.
But before repairing damaged thresholds, it is necessary to clearly define the restoration methods used in practice. As an option, the possibility of repairing car sills without welding should not be excluded. For a better understanding of existing techniques, it is advisable to familiarize yourself with the varieties of these cabinet products.
Fixed and removable
The designs of most machines provide only two types of threshold elements. The first ones are “seated” for welding and form a single whole with the body and side member, the second ones are removable or overhead sills.
The second type of thresholds is installed extremely rarely and most often for the purpose of additional protection from mechanical damage and strengthening the body.
Restoration of rigidly fixed thresholds is possible only by leveling the damaged areas, welding them, or completely replacing them with new elements. However, not everyone can weld thresholds with their own hands, even if they have a welding machine.
Restoring heavily worn removable thresholds attached to the body using special screws, as a rule, comes down to updating them. However, the seemingly simple replacement of thresholds also requires preparing the body for the upcoming repair.
Nature of damage requiring repair
The main types of damage to the sills (regardless of their type) and the bottom include:
- mechanical damage resulting from contact with other cars or as a result of impacts from stones and gravel particles;
- a corrosive effect on the material, leading to the formation of rusty cracks and cavities, the protective treatment of which does not bring tangible results.
The first group of faults is associated with the peculiarities of domestic roads and leads to the car losing its strength characteristics, and, as a consequence, the impossibility of operation in the previous modes. If there are a large number of them and the spar is damaged, driving a car becomes completely unsafe.
Corrosion processes also pose a serious threat to the supporting structure, which increases over time. Despite the many ways to combat corrosion, they, however, do not stop the destruction process, which ultimately leads to the need to replace rotten elements.
With non-removable body parts, the only way out of this situation is to use welding of the thresholds using any known method.
Technologies for restoring damage to the structure of these parts differ both in the methods used and in the cost of the materials used in welding.
Repair methods
The choice of method for restoring the sills and bottom depends on the nature of the damage received and can be reduced to the following options:
- classic welding of fixed body parts;
- straightening of small dents on removable and non-removable elements, for which the former must be removed from the car;
- replacement with new products (in case of severe damage or rust);
- Do-it-yourself threshold repair without welding using non-standard restoration techniques.
Atypical options include the use of fiberglass with epoxy glue, as well as a method that allows you to stretch the thresholds using special mechanisms. The latter method allows you to completely restore the previous shape of any car products (including the famous VAZ brand).
- One of the types of threshold stretching involves the use of special vacuum inverters, with the help of which any deformation (a dent, for example) is corrected due to the difference in pressure inside and outside the structure.
- Repairing the bottom without welding may consist of regular inspection of straightening, cleaning and painting.
Self-brewing
Restoration of non-removable thresholds and the bottom can begin only after placing the car on a repair platform or in a pit with a size sufficient for welding. The bottom is inspected by tapping it with a hammer.
- In case of severe rust damage, it is necessary to clean the surface around the embedded area using sandpaper or a grinding tool..
- Repairing a body by welding, including welding the bottom, comes down to installing a small patch of metal of the same structure and thickness on the damaged area.
- But first you should prepare the problem area, namely, carefully cut out the rusted metal.
- If painting after welding is not intended, then the appropriate color of the patch should be selected in advance, which, together with the threshold, after repair, must be carefully sanded and treated with an anti-corrosion compound.
If you have a certain skill and the necessary tools (semi-automatic or gas welding), anyone can repair the sills and bottom with their own hands. In addition to tools and materials, you only need a little free time and desire.
Source: https://svaring.com/welding/v-bytu/svarka-porogov
Welding work
At first glance, it may seem that welding body parts can be done using a conventional AC welding machine with electrodes.
Of course, this device will help weld rough iron or weld a broken frame of a truck. If you want to achieve high-quality and durable seams on the body of a VAZ 2101, use a carbon dioxide semi-automatic machine. It allows you to weld metal whose thickness is 0.8-1 mm.
Before using the welding machine, take care to ensure conditions for safe work, have a special mask that protects your eyes from bright light and small sparks, special clothing, etc.
DIY replacement
When replacing the thresholds yourself, you will need a gas welding machine, a set of parts and the necessary tools for cutting or cutting out the element:
- power screwdriver;
- chisel;
- spot welder, spotter or MIG welding;
- electric drill;
- metal brush.
To clean and align the element after welding you will need:
- automotive putty;
- primer;
- sandpaper R-80;
- anti-corrosion mastic;
- enamel.
The procedure for replacing thresholds using welding is step by step:
- Place the car on a flat surface.
- For ease of operation, dismantle the doors, having previously marked the position of the hinges on the body.
- Use a chisel or grinder to cut off the outer panel of the part.
- Remove the amplifier.
- Clean the seat from corrosion with a chisel, drill with an attachment or grinder.
- Try on the amplifier, modern replicas can be several centimeters longer than necessary, cut off the excess part.
- Weld the amplifier, first securing it with welding clamps or pliers.
- Try on the outer part of the threshold, remove the shipping primer from the factory part.
- Treat the panel with an anti-corrosion compound, install the outer part with screws or secure with clamps.
- Install the doors, check the gaps and the length of the part, which should not exceed the length of the door.
- Weld the outer part, start welding from the place of the central pillar, then work the seam left and right.
- Weld the connecting strip at the bottom of the threshold.
- Clean the welds with a grinder and sandpaper.
- Prime, treat uneven areas with putty, and paint at the final stage.
Experienced drivers often do not use factory parts, preferring to weld the body using square profile pipes. The material has the required thickness and has undergone a galvanizing process, which makes it extremely resistant to sandblasting and corrosion. To make a threshold from a pipe on a VAZ 2106, you will need the following materials:
- Profile pipe 60x60 mm - 180 cm long for the threshold itself, 70 cm for the cross member that will connect the threshold with the spar.
- Profile pipe 40x40 mm - 70 cm for an additional cross member, 25 cm for jack fastenings.
- Metal plates 50x150 mm for welding the threshold to the bottom.
- Anticorrosive – bitumen mastic – 500 gr.
- Welding machine, electrodes 2 and 3 mm.
- Bulgarian.
Pipe installation process step by step:
- Turn the car on its side and cut off the old threshold with a grinder.
- Remove the amplifier, tap all elements that are not cut with a hammer and bend them upward.
- Attach the pipe, cut to size, weld a plug along the edges of the profile.
- Grab the profile to the bottom from the front and back.
- Weld along the length from the outer part. If the standard threshold has a bend, use a hammer to align the profile along the bend.
- Weld the cross members that will connect the threshold and the spar, and weld the jack.
- Tie the part to the bottom using a steel plate.
- Clean the welding areas with a grinder, degrease, and apply bitumen mastic.
When installing a profile pipe yourself instead of a standard threshold, the cost of work does not exceed 2000 rubles.
Painting a VAZ 2101 car
Painting a VAZ 2101 with your own hands is a painstaking job and requires careful preparation
Particular attention should be paid to damaged parts of the body - rusty, deformed elements that should be replaced or repaired. The stage of selecting paint and primer is also important.
But first things first.
We have a VAZ 2101 car
with rusty, bent sills, and a body partially damaged by corrosion. The work begins with disassembling the machine and cleaning the parts from dirt.
Remove the hood cover by unscrewing the 6 mounting bolts connecting the hood to the body. We repeat the same with the trunk lid. Afterwards we remove the bumpers, headlights and radiator grille. It is also necessary to remove the doors from their hinges by unscrewing 3 bolts on each, after which you should remove the rear and front seats. At the very end, we pull out the front and rear glass, having first removed the decorative seal. As a result, our car should look like this:
Next we should replace our rusty thresholds with new ones. To do this, we remove the old thresholds by grinding off the old welding points, after which we fix the new thresholds in place of the old ones with clamps and weld them.
We grind off the excess part of the weld with an emery wheel. We determine the remaining places that require welding and weld them. Now, using fine-grained water-repellent sandpaper, we rub the old paint off the body. At this stage, be sure to keep the sandpaper, as well as the part of the body that we are sanding, in a damp state.
Depending on the depth of the dent, we adjust the thickness of the putty layer. It should be remembered that it is most convenient to putty curved surfaces with a rubber spatula. We wait for the putty to dry completely, after which we again rub the surface with fine-grained sandpaper, repeating the putty-grout process until a perfectly leveled surface is obtained.
Having finished with the putty, we proceed to priming the body, having first cleaned the parts from dust and dried the surface
It is important that the primer contrasts with the color of the future painting, to better identify unpainted areas. We opted for a black primer
After applying the primer to the body, we also rub the surface using fine sandpaper and water.
Now you need to prepare the car directly for painting. Cover the engine compartment, dashboard and wheels with film or paper.
We painted the car in two stages - first the roof, and then the rest of the body. Before starting painting, we made sure that the surface was perfectly clean by wiping it with special antistatic wipes. We painted with Duxone DX-603 + DX-25 in two layers, with a 5-minute break between paintings. We used an Intertool Hvlp II spray gun and a respirator. After the first stage of painting was completed and the roof had dried, we covered the already painted part of the body with paper and began painting the remaining elements.
After painting all the body elements, we waited until they were completely dry, and then began assembly. In the end, this is what we got:
This is the paint job we got for the VAZ 2101.
Reasons for repair
As we have already found out, repairing the body of a VAZ 2101 with your own hands begins with getting rid of illusions about its good condition.
The fact is that the car body is constantly in an aggressive and hostile environment, where, in addition to a significant temperature difference, it is also affected by road reagents and humidity. As a result, sooner or later, in addition to eliminating local deformations and pitting corrosion, you will have to undertake a complete restoration. When calculating repairs, first of all you need to find out how much body parts for the VAZ 2101 cost, and whether they are available at all. The fact is that on a “penny” the body is a load-bearing element, that is, it literally “carries” all the other equipment of the car, and its price is almost half the cost of the entire car. So, the instructions for the VAZ 2101 “Do-it-yourself body repair” consists of two parts:
- Elimination of deformations of the body and its elements;
- Elimination of corrosion and restoration of elements affected by it.
Part one. Deformations
Deformations of the car body and its elements occur in two cases - either you crashed into something or it crashed into you. But this is not the point; the main thing is how we will eliminate the consequences of this embarrassment. Costing
First, you need to assess the total amount of work, namely:
- all parts of the VAZ 2101 body must undergo defect detection (precisely ALL, since there is a high probability of detecting hidden defects);
- an estimate has been drawn up;
- the sequence of work performed is determined.
Checking control points
Since we cannot be sure that the previous owner of the “penny” drove flawlessly and, given the very advanced age of our car, first of all we will need to measure its geometric dimensions, which are contained in the instructions for operating and repairing the car.
The photo shows the dimensions of the main control points* of the frame, where the following are indicated:
| A | Anti-roll bar installation location |
| B | Attaching the front cross member |
| IN | Mounting locations for rear engine mounts |
| G | Lower longitudinal rods of the rear suspension |
| D | Rear suspension upper longitudinal links |
| E | Rear tie rod installation location |
| AND | Technological holes in the bottom |
*- The indicated dimensions are taken along the axes of the bolt or hole. By taking measurements from the control points of the body floor, we receive information about the correct location of the fastenings of the main elements of the car, and for this we did not need to dismantle them.
- We will also find it useful:
- Central pillars VAZ 2101 (without upholstery):
- Reference dimensions of the hood and windshield
- Geometric parameters of the trunk lid and rear window opening
- By the way, for the installation of mounted body parts, the manufacturer provides tolerances for unevenness (taperity) of gaps of up to one and a half millimeters, and for internal and external tolerances of the front part of the element relative to the stationary part, this value is increased to two millimeters.
Repair of deformed elements
Damaged surfaces are repaired by thermal and mechanical methods, as well as using quickly hardening plastic material or solder.
Mechanical method
If, when taking the dimensions of the control points of the body, we found a discrepancy between their location and the control parameters, then we need to return them to their place, which is done using both simple devices (jack, winch, vehicle’s own weight), as well as more complex settings.
Bed for straightening and checking the car frame
Mechanical straightening to give the original configurations and shapes involves stretching, straightening and extruding body parts that have undergone deformation. These works are performed both in “hot” and “cold” conditions.
Equipment for body repair
| 1 | For drawing out concave elements |
| 2,3 | Hydraulically operated self-clamping clamps |
| 4 | Grasping device with teeth |
| 5 | Hydraulic clamp |
| 6 | Double clamp |
| 7 | Pulling clamp |
| 8 | Hydraulic pump |
| 9 | Tension cylinder, with grips |
| 10 | Tension cylinder with pulling device |
DIY body repair of a VAZ 2101 looks something like this:
- we determine the places where efforts are applied to eliminate distortions and select the necessary grips and stops;
- We fix the straightening device in the chosen direction;
- we install or secure mechanical or hydraulic braces in the opening with selected grips, stops and extensions;
- we install and fasten the chain of the power body to the fixed grip/clamp on one side and to the power lever on the other. In this case, the chain must be pre-tensioned at a pre-selected and required angle of inclination;
- with the help of a power organ, damaged components and parts are pulled out, while extrusion is done from inside the cabin using hydraulic units and power braces.
I must warn you that this process is not quick, it takes many hours and even many days.
Body parts
The “feather”, as a rule, is straightened manually using special devices and tools:
| A | Hammer |
| B | Kiyanka |
| IN | Special amendment |
| G | Stops |
I agree, at first glance this set of tools does not make much of an impression, but believe me, when used correctly, these nondescript pieces of hardware literally work wonders:
VAZ 2101 body parts, removing dents
| A | Removing deformation using a clamping lever |
| B | Repairing a Dent Using a Hammer and a Pressure Lever |
| IN | Inserting the clamping lever with a hammer between the dented panel and the frame |
| G | “Removal” of dents under the elements of the hood, doors and hidden cavities of the front fender |
Heat straightening
In this chapter, I would like to say that body parts for the VAZ 2101 are best secured using resistance welding, since autogenous soldering causes very strong heating of the metal, which provokes its deformation. But this should not bother us - we do body repairs on the VAZ 2101 with our own hands and therefore we will use the deformation of overheated metal to our advantage:
- firstly, straightening with the help of heat is used to tighten (upset) stretched panel surfaces at a metal heating temperature of 600...650 degrees (red-cherry color);
- secondly, to prevent a sharp deterioration in mechanical properties and swelling, the heating points should not exceed 30 millimeters;
- heating and straightening in order to avoid additional dents and swelling must be done from the periphery to the center.
We straighten VAZ 2101 body parts using heat
Sometimes it happens that it is simply impossible to get to some body elements in order to straighten them with the tools listed above. Therefore, to remove an “inconvenient” dent, the following method is proposed:
- outside the dent we weld a metal pin with a diameter of 2...3 millimeters (if the deformation area is large, you can weld several pins, from the edge to the center);
- by pulling out the metal with a pin using a lever, and at the same time tapping along the edges of the dent, we correct the defect;
- You can also use screws, reverse hammers and other special tools in this method;
Special tool for pulling out dents
- after the dent has straightened out, the pin is cut off, the drilling area for the screw is welded and then everything is cleaned with a grinder.
12.3.3 Repainting the body with synthetic enamel / VAZ 2101
| 1. Wash the body with water and, using a spatula or brush, remove the old peeling coating from the defective areas. |
| 2. Wet sand the painted surfaces with 55C 4-P sandpaper. If the coating thickness is small and has no mechanical damage, sand the surface to a factory-painted epoxy primer. In case of significant corrosion, as well as surfaces previously painted with nitro enamel, clean down to metal. |
| 3. Wash the body with water, blow with compressed air and dry. |
| 4. Degrease the surfaces to be painted with white spirit or gasoline solvent BR-1 and coat the welds and joints of the replaced parts with sealing mastic “Plastisol D-4A”. Remove excess mastic with a rag soaked in white spirit. |
| 5. Insulate surfaces that are not to be painted with thick paper and adhesive tape. |
| 6. Apply GF-073 primer to areas of the surface that have been stripped down to metal using a paint sprayer and let it sit for 5 minutes. |
| 7. The viscosity of the soil should be 22–24 s at a temperature of 20 ° C according to the VZ-4 viscometer. Thin the soil with xylene. |
| 8. Then use a paint sprayer to apply EP-083 epoxy primer to surfaces coated with GF-073 primer, as well as to replaced body parts, and dry at a temperature of 90° C for 60 minutes. Before application, add NF-1 drier to the EF-083 soil, in a proportion of 5–7% of the weight of the soil. The shelf life of the finished soil with a catalyst is 7 hours. The viscosity of the soil should be 23–25 s at a temperature of 20 ° C according to the VZ-4 viscometer. The soil can be diluted with RE-11V solvent or xylene. |
| 9. Cool the body, wet sand with 55C 4-P sandpaper, wash with water, blow with compressed air and dry. |
| 10. If necessary, fill uneven areas with putty MS-00-6 with a thickness of no more than 0.3 mm. Dilute the thickened putty with xylene to a viscosity suitable for application. |
| 11. Dry the body for 30 minutes at a temperature of 18–20° C, sand the putty surfaces again with 55C 4-P sandpaper, rinse the body, blow with compressed air and dry. |
| 12. Insulate the unpainted surfaces of the body with thick paper and adhesive tape and place it in the spray booth. |
| 13. Degrease the surfaces to be painted with white alcohol. |
| 14. Open the doors, hood, trunk lid and spray paint two layers of ML-197 enamel (with an intermediate exposure of 7–10 minutes) on the internal painted surfaces of the passenger compartment, engine compartment, luggage compartment, doorways, and end surfaces of doors. |
| 15. Apply three layers of ML-197 enamel to the outer surfaces of the body with an intermediate exposure of 7–10 minutes. |
| 16. Dry the body at a temperature of 90° C for one hour and cool in natural conditions. |
| 17. Before use, add 4–5% DGU-70 catalyst or 10% maleic anhydrate in acetate to the enamel. The viscosity of the enamel should be 20 s at a temperature of 20 ° C according to the VZ-4 viscometer. Dilute the enamel with solvent R-197, followed by filtering through mesh No. 015K. |
| 18. If you need to remove the old complex coating, use SP-7 remover. Apply it with a brush 2-3 times, depending on the thickness of the paint coating. |
| 20. The time for softening the coating with a remover is 30–40 minutes. Remove the softened coating with a brush or spatula. |
| 21. Wipe the surface with white alcohol to remove any residue, rinse thoroughly with water and dry the body. |
HARD! THAT'S WHAT THE ZHIGULI PAINTED! Painting VAZ classic 2101 2106 how to remove old paint from a car
Painting is better than from the factory #VAZ-2101 Chernukha
KOPEYKA. BUDGET RECOVERY. Painting with Graffiti cans.
Polishing VAZ 2101, new life for an old Lada
WHEN PAINTING A VAZ 2101 IS MORE EXPENSIVE THAN THE CAR ITSELF.
Choice of paint coating
A VAZ car is coated with a multi-layer paint coating, the quality, manufacturer and price of which will depend on the financial capabilities and wishes of the owner. Therefore, the question of choosing a material, as well as the technology for its application, lies entirely with you.
As a rule, it includes a standard set: primer, paint and varnish
Please note that only if the technological requirements are fully and carefully followed when applying all layers, high-quality protection and a presentable appearance will be obtained. The paint used to paint cars can be aerosol or powder
The most modern and high quality, naturally - powder. Spraying at high temperatures causes the coating to polymerize, which becomes smooth and durable. This type of paint has increased resistance to aggressive external factors and provides good body protection.
Anti-corrosion treatment of thresholds
Treating thresholds with special compounds can significantly extend their service life. Here's what's required for this processing:
- safety glasses, rubber gloves and a respirator;
- electric drill with a metal brush;
- fine sandpaper;
- water;
- degreasing composition (usually white spirit is used);
- clean rags;
- construction hair dryer;
- anti-gravel bottle.
Sequence of operations
The anti-corrosion treatment itself does not take too much time. Much more time is required for preliminary preparation of the machine.
- The car is washed, special attention is paid to the thresholds during washing.
- After complete drying, the machine is installed on a pit or on an overpass (an overpass is preferable, since you can do without a flashlight there, but when working in a pit you will definitely need a backlight).
- Use a drill with a metal brush to remove all pockets of rust from the thresholds. The sills are then sanded with sandpaper, after which a thin layer of rust converter is applied to them.
- After drying, the surface of the thresholds is degreased with white spirit and dried.
- All parts of the body adjacent to the sills and not requiring anti-corrosion treatment are sealed with masking tape.
- Several layers of anti-gravel (at least three) from a spray can are applied to the thresholds. In this case, the can must be shaken periodically and kept at a distance of 30 cm from the surface to be treated.
The can of anti-gravel should be kept thirty centimeters from the threshold- The applied coating is dried with a hair dryer. The heating temperature should not exceed 40°C.
- After drying the thresholds, the masking tape around them is removed. You can drive a car no earlier than 3 hours later.
How to paint a car: step by step guide
When purchasing a new car, the owner wants it to always be in good condition. Painting a car with your own hands is a necessary measure, which is resorted to when various circumstances arise. Among them may be the consequences of road accidents, most often damage to the body. As the car ages, the coating is subject to corrosion and mechanical defects. In these cases, repainting your “friend” is simply necessary. How to paint a car yourself? A step-by-step guide to action will help you do everything right. And the few days that work may take, and self-confidence will give a worthy result.
Internal chrome trim
Threshold covers are installed not only outside, but also inside the cabin. The internal linings are a set of four chrome plates with mounting holes for self-tapping screws. In some cases, there may be no holes, and then the linings are simply glued to the threshold.
A set of internal sill plates; there are no holes in these sill plates
In addition, some overlays have a car logo. All this is in great demand among drivers who decide to further decorate their car. Installing the overlays is not particularly difficult: the overlay is installed on the threshold, marked with a marker, then holes are drilled for the screws and the overlay is screwed on. If the trim is installed with glue, then everything is even simpler: the surface of the thresholds and trims is degreased, a thin layer of glue is applied to it, and the trims are pressed down. After this, the glue just needs to be allowed to dry.
Sometimes the name of the machine or manufacturer is applied to the internal linings
So, the thresholds on the VAZ 2107 can be changed on your own. All you need for this is to have minimal skills in handling a welding machine and an angle grinder. But to perform local threshold repairs, the car owner, alas, will not be able to do without the help of a qualified auto mechanic.
Restoration of the VAZ 2101 body
The legendary VAZ 2101 car, which appeared during the Soviet period, is still quite often found on city streets. Thanks to the simplicity of the car’s design, its dynamic qualities, a good braking system for that time, controllability and low cost, the “penny” does not lose its authority. Modern car enthusiasts who want to emphasize their own style subject their car to various transformations. In recent years, such a direction of car modernization as car tuning in the “Klinlook” style has gained particular popularity. Let's look at this subtype using the VAZ 2101 as an example.
This type of tuning is based on giving a specific model a factory condition without affecting its technical characteristics.
First of all, the car body undergoes changes: it must have perfectly even components. Therefore, if you decide to carry out such a “penny” tuning, you need to familiarize yourself with the recommendations for the upcoming work with the body.
Full list of works
To summarize, let’s draw up a complete list of operations to be performed. To make your VAZ 2101 look like a new penny after painting, you must do:
- complete or partial disassembly of components and remove decorative elements;
- initial preparation (washing and rough mechanical cleaning of the body);
- welding and straightening work - as necessary;
- protect non-removable decorative parts, glass, engine compartment;
- degrease the entire surface;
- level the planes of the body by alternating putty and fine stripping;
- prime;
- Thoroughly degrease again immediately before painting;
- apply paint and varnish;
- dry in a special chamber (if possible);
- assemble components and install removable parts;
- perform final finishing and polishing.
The appearance of your “penny” depends on the careful and conscientious execution of all stages of work. In new clothes, the VAZ 2101 will continue to delight you with its reliability and unpretentiousness.
Preparing the car for painting
With prolonged use, any car loses its attractive appearance, shines less and is no longer as pleasing to the eye of its owner. Atmospheric factors and mechanical stress damage the paint layer, so there is a need to renew it.
Repainting a car is quite difficult. But if you take this responsibly and prepare well, the result will exceed all the owner’s expectations.
The painting process consists of the following steps:
1. Preparation.
There are two options for painting a car - completely and partially. Accordingly, the level of preparation should be different. Here you can learn in detail how to perform local painting to hide scratches and chips on the car body.
At this stage you should purchase the necessary tools:
• Abrasives – for removing paint and cleaning surfaces; • Spatulas – for applying the base; • Spray gun (paint gun) – spraying paint onto the car body; • Compressor – pumps air into the spray gun.
It is better to choose a room for painting that is spacious and well ventilated. It is worth making sure that it is dry, warm and clean. If the first two factors affect the drying time of the paint, then cleanliness is a condition for the quality of the result.
2. Identification of problem areas on the body.
Before painting, you need to meticulously inspect the car and objectively assess its condition. Which places need to be prepared especially carefully, where is it better to paint and what kind of work will be needed in each case.
Let us remember that in the previous article we talked about the capabilities of parking sensors with a rear view camera. Read more on our website.
3. Carrying out welding work.
It is possible that some damage will have to be welded, this applies to rusted areas, deep cracks and chips. If necessary, special metal “patches” are applied.
4. Cleaning the body with abrasives.
A special abrasive wheel is applied to the grinder, which levels the surface of the body. Welding areas are treated with special care.
5. Applying putty.
A universal type of putty suitable for applying minor damage to areas. For more serious scratches, putty with large fragments is used, which is applied in two layers. The strength and flexibility of the spatulas will create a smooth surface and save application time. Therefore, it is better to choose names that are more expensive, but suitable.
6. Surface grinding.
Leveling is done with a soft abrasive wheel to prepare the body for priming and painting.
7. Body priming.
A base coat should be applied underneath the paint; it prevents the paint from spreading and ensures even distribution.
8. Direct staining.
The paint must be applied carefully, in even layers, to avoid smudges, covering areas that cannot be painted.
Choosing a compressor and a spray gun is the key to correctly and beautifully painting your car. Therefore, it is better to buy a compressor that is more productive, at least 1.5 times higher than the consumption of the spray gun. You also need to know the values of its volume. For example, a volume of 100 liters. – this is a continuity of 15-20 minutes of painting. The larger it is, the faster the process occurs.
The spray gun is also used for priming, the quality of which depends on the size of its nozzle. Values from 1.3 to 1.5 mm are the best option, but if there is a large amount of work to be done, nozzles with a diameter of 1.6 - 2.5 mm are suitable.
It is important to know that before you start painting, you need to try the paint on a special surface, adjust the intensity of application and adapt to holding the tool. Video
How to prepare a car for painting
Video. How to prepare a car for painting
https://youtube.com/watch?v=FbeajYg7Y68
Preparing for painting
Preparing the car body for painting is an important and responsible process in the repair of a “penny”. Any mistake can lead to undesirable consequences, so you need to approach it as seriously as possible.
Grinding
In order for the paint to lie on the surface of the car as evenly as possible, you need to remove the old paint layer from the body. This can be done using sandpaper or a sanding machine.
Pay attention to depressions and bulges: they need to be leveled with the surface
If you are working with a sander, do not stay on one element for too long, otherwise cracks and deep scratches will form.
It is best to process body parts using a “cross” pattern, i.e. First make horizontal movements, then vertical ones. This sanding technique will allow you to remove the old paintwork as smoothly as possible.
Before moving on to the next stage of work, spray the surface of the machine with compressed air.
Putty
After we have cleared the surface of the old coating, we begin to putty. Apply the pre-prepared mixture to the damaged area in an even layer and let it dry.
Using a block or a grinder, we begin to give the body element a smooth surface, and also recreate the original lines of the body. At this stage, abrasives with large grains are used.
Primer
The next stage of preparing the body for painting is priming the treated parts. Any auto parts store offers a wide range of soil mixtures, so we will not dwell on recommendations for their selection.
Distribute the primer mixture over the surface of the VAZ 2101 so that there are no flaws, dents or cracks left on the body
Pay special attention to the joints of the parts and the surface itself - it must be perfectly flat
Re-sanding
Repeated sanding is used after priming. The element is sanded again using a special developer, which shows all the irregularities and deep risks left during the initial sanding.
If everything is done correctly, then after carrying out the listed preparatory work we should receive a perfectly flat surface of the body, with all the lines and bends, as it was when it came off the assembly line, completely ready for painting.
Finishing touches
At the end, tuning a retro car must be completed with polishing. Abrasive polishing of a car body is similar to the process of grinding it, i.e. movements are made first horizontally, then vertically. Start polishing each element at low speed (500 rpm), gradually increasing the speed to 2500 rpm.
VAZ 2101
When abrasive polishing is completed, we move on to protective polishing. After spreading the polishing paste on the body elements, start working with a polishing machine with a soft wheel. This process will level the painted surface, give it shine and protect the paintwork from alkalis, sand and ultraviolet rays. In addition, polishing paste can act as a kind of protection for the car body from corrosion.
If you worked through each stage efficiently, struggled with the difficulties that arose and boldly moved forward, congratulations! Now you have an updated “penny” that has retained its factory retro style!
Choice of paint coating
A VAZ car is coated with a multi-layer paint coating, the quality, manufacturer and price of which will depend on the financial capabilities and wishes of the owner. Therefore, the question of choosing a material, as well as the technology for its application, lies entirely with you.
As a rule, it includes a standard set: primer, paint and varnish
Please note that only if the technological requirements are fully and carefully followed when applying all layers, high-quality protection and a presentable appearance will be obtained. The paint used to paint cars can be aerosol or powder
The most modern and high quality, naturally - powder. Spraying at high temperatures causes the coating to polymerize, which becomes smooth and durable. This type of paint has increased resistance to aggressive external factors and provides good body protection.
Let's summarize
In order to replace thresholds, you need to have many different tools, as well as have welding and painting skills. If you do not have the tools or space for repairs, we recommend turning to professionals. It will be much cheaper and faster. The price of replacing one VAZ 2107 threshold at a service station (with treatment) is from 7 to 14 thousand rubles.
Sources
- https://neauto.ru/osobennosti-remonta-i-zameny-porogov-na-vaz-2107/
- https://avtorazbor59.ru/stati/vaz-2107-zamena-porogov.html
- https://bumper.guru/klassicheskie-modeli-vaz/kuzov/zamena-porogov-vaz-2107.html
- https://autorn.ru/vaz/2107/443-zamena-porogov-vaz-2107.html
[collapse]