01/25/2022 1,747 Alarms
Author: Victor
In accordance with the Fighter alarm instructions, this anti-theft complex implements the “floating” encryption principle, carried out using Keeloq® technology. Thanks to this, the security system recognizes only those key fobs that have been programmed by the user, which eliminates the possibility of electronic hacking by code grabbers or scanners.
[Hide]
Characteristic
A detailed overview of the technical parameters of the budget model of “alarm” for the Fighter car:
- The anti-theft system is powered from a 12-volt source, so the use of this model on motorcycles and heavy-duty vehicles is not allowed. It is possible to increase the voltage in the electrical network to 24 V, but under such conditions the system should operate for no more than one minute.
- When the security mode is turned on, the current consumption of the alarm system will be no more than 15 mA.
- The duration of the alarms is 30 seconds, but in the case of a permanently open zone the time increases to two minutes.
- Information about no more than three communicators can be entered into the memory of the system control unit.
- The temperature range for operation of the microprocessor module is from -40 to +85 degrees. It is possible to increase this parameter to +125°C, but under such conditions the device should operate for no more than one minute. For the communicator, the operating temperature range is from -10 to +55 degrees.
Leave a product review
If you have experience purchasing and using a certain product, please share information about it with other AutoPulse.ru customers - leave your own review.
Describe why you liked the product or, on the contrary, what problems you encountered when using this product.
Your review will be posted some time after it has been verified by a moderator.
Attention! We do not publish:
- very short and uninformative reviews
- reviews written in CAPITAL characters
- reviews containing profanity
- reviews not related to the consumer properties of a particular product
- reviews containing links to other websites
- product reviews that mention specific stores
Source: www.autopulse.ru
Equipment
Description of the elements included in the delivery package of the Fighter security system:
- Main control unit equipped with a processor unit and a relay module.
- The main key fob is equipped with five buttons and a liquid crystal display. The presence of a screen makes it possible to use feedback from the alarm control unit.
- Spare pager. The device is equipped with four keys, but the manufacturer does not provide a display.
- LED light bulb equipped with a cable with a connector for connecting to the on-board network. The diode is used to monitor the status and operating parameters of the alarm.
- A set of cables for connecting the main microprocessor module.
- Wiring harness for connecting the system to the standard central locking system.
- Button for activating and transferring the system to service mode. Equipped with cable.
- An additional external relay designed to block the motor starting electrical circuits.
- Sensor for detecting impact and other physical impacts on the car body. The device is adjustable and belongs to the category of dual-zone controllers. The sensor is equipped with a cable for connection.
- Service user manual allowing you to connect and install the system. The manual contains all the recommendations with which you can determine the necessary contacts for connection.
The Fighter alarm system does not include a siren, so this device must be purchased additionally.
Scope of delivery of the Fighter Excellent system
How to install
According to the user manual, installation of the Fighter F 90 anti-theft system involves the following steps:
- placement of the processor unit (installed under the dashboard and secured with self-tapping screws);
- installation of a siren (the part is fixed in the engine compartment away from the intake valve);
- installation of the limit switch (the part included in the kit is installed on the hood, the wires are laid towards the head unit under the interior trim);
- installation of a shock sensor (placed on the partition separating the passenger compartment from the engine compartment, the sensitivity regulator must be accessible to the driver);
- placement of the transceiver module (the part is installed at the highest point of the windshield, away from metal objects and electronic devices);
- installation of a service button (the key is installed so that it cannot be detected by hijackers);
- connecting components (installation cables are connected to the connectors according to the diagram contained in the instructions).
Key Features
Description of the capabilities that Fighter anti-theft systems have:
- Engine blocking when trying to start illegally. For this purpose, special contacts are used on the additional relay, which open the electrical circuit of the ignition system.
- Protection of the entire vehicle body along the perimeter. The alarm system provides protection for door locks, trunk, hood and car body.
- Availability of non-volatile memory of the system state. In the event of a power failure and its further activation, the alarm will return to its original state. If the anti-theft complex is dismantled, the system will retain the locking of the power unit.
- The presence of two sensitivity zones of the main controller - warning and alarm.
- Availability of the “Anti-robbery” option. Using this function, the user can block the power unit in the event of a robbery attack on the car. If the car is stolen, the engine will lock itself after a certain time (usually 30 seconds, user-configurable). The delay is provided by the developer so that the attacker leaves the crime scene at a distance that is safe for the car owner, but is not able to hide far.
- Panic function. Its purpose is to forcefully activate external lighting devices and sirens upon command given by the key fob. This is required in order to designate the car as protected and scare potential criminals away from it.
- Control of door locks from the ignition system. When the key in the lock is turned to the “ACC” position, the locks are locked; when turned to the “Off” mode, they are opened.
- Automatic arming in case of accidental shutdown. If the protection mode was not deactivated on purpose, and not a single door in the car was opened, the system will be able to detect this. As a result, the security will be automatically turned on.
- Availability of automatic engine start. The structure of the control unit allows you to configure this function by command from the communicator. Thanks to this, in order to start the engine, the user does not even need to approach the vehicle. It is enough for him to be within the range of the alarm antenna.
- Possibility of using a standard steering horn to play alarm signals. Since a siren is not included in the package, you can use a horn.
- The presence of additional channels with which the user can control auxiliary equipment. This refers to a luggage compartment lock, electric windows, a system for folding side mirrors and seat adjustments.
- Self-diagnosis and determination of the state of alarm structural elements. When arming and disarming the system, the system checks all connected devices. Information about defective areas is provided to the user in the form of messages and displayed on the communicator screen.
- Possibility of remotely changing sensitivity and disabling the shock sensor. A keychain is used for this.
- Disarming the system in two stages. The alarm can be configured to open the door locks first, and then the user enters a special password to unlock it. The personal code can be used to emergency disable the security if the key fob is lost or broken.
- Warns the user about unlocked vehicle doors, trunk or hood.
What is Valet mode in alarm systems?
Valet mode is a service mode in security systems of various levels. When the alarm switches to Valet mode, the main protective functions are disabled. The use of Valet mode is intended in situations, for example, when the car is in a service center and active security options may interfere with the work of car service specialists.
It is worth noting that in some older security systems, the Valet mode is used not only to remove security measures when leaving a car in a service center or other place without a key fob. Also, previously it was necessary to go into it to make alarm settings.
The Valet button is most often hidden in the cabin from prying eyes, since it can be used by attackers to deactivate the car's security system.
Advantages and disadvantages
Advantages of Fighter car alarms:
- System versatility. Installation of the alarm is possible on vehicles with a gasoline or diesel engine, regardless of the type of gearbox (automatic or manual).
- Affordable price for many consumers.
- Application of proprietary encryption technology to protect signals.
- Availability of a detailed service manual in Russian included.
- Great functionality, typical for full-fledged anti-theft systems.
Disadvantages characteristic of these alarms:
- Some system models are not equipped with key fobs with screens; accordingly, these versions do not have the possibility of feedback.
- Weak body of pagers. After several falls, the device may become damaged.
Fighter car alarm with Anti-robbery function
- Specifications
- Equipment
- Functions
- Varieties and model range
- How to install
- User manual
The Fighter alarm system is a full-fledged anti-theft system that has positive user reviews. The modern coding method prevents the connection of third-party key fobs and interception of the signal. The functionality includes options that allow you to remotely control adjustable elements of the car.
Varieties and model range
To choose the best security system, it is recommended to familiarize yourself with the list of popular Fighter models:
- F-14. The model implements a silent security and security mode (panic, anti-robbery), automatic unlocking/locking of doors, etc. However, this version does not have a feedback function, and there is no possibility of working with a GSM and/or GPS module.
- F-15. F-16, F-16B. The devices belong to high-reliability systems, are made on modern components and are designed for operation in a wide temperature range. Reliability is confirmed by tests, as evidenced by the ISO9002 quality certificate. These Fiqhter models perform all the functions inherent in “Standard” class alarms. Most service functions are programmed upon purchase of the system at the user's request.
- F-17. The model has a two-circuit engine blocking system using external and electronic relays built into the central control unit. The F-17 system includes two convenient miniature radio key fobs with soft rubber buttons.
- F-15 Stealth. The model has a minimum set of necessary functions in its arsenal and requires the installation of additional elements. These include: pager, engine start remote control module, position and volume sensors.
- Jet. In security mode, the system provides engine blocking in case of unauthorized start, activation of an alarm when doors are opened, the ignition is activated and impacts on the body.
- Revolution. The model has the ability to protect the car when the engine is running without a key in the ignition, connected to the handbrake and brake pedal. The possibility of remote autostart is also implemented.
- Excellent Plus. The model has more extensive functionality compared to previous versions. Options include: auto engine start, “turbo timer”, “safe driving”, “anti-robbery” modes and others.
- Jerry. The car alarm has many useful functions - Turbo timer, AV trigger (two-stage protection mode shutdown), security with the engine running without a key in the ignition, etc. The car alarm package also includes a small-sized siren.
- F-29. The model prevents unauthorized starting of the engine, opening of doors, hood and trunk, as well as two-level protection against impacts on the body and against power failure.
- F-31. The alarm system provides two types of protection against robbery “Anti-hi-jack”. This version also allows automatic control of door locks while driving.
High security efficiency: secret cipher
Of all the possible technologies for protection against interception (statistical, dialog, dynamic code), fighter alarm manufacturers chose the last one. And they were right. The Keeloq® dynamic cipher, which has become the basis of a barrier erected between a motorist’s movable property and an attacker attempting to steal it, is the best option, and here’s why:
- "Floating" cipher. Unlike a statistical code, protected by a single password key for all systems of a certain brand, a dynamic code implies constant updating of the cipher with each subsequent transmission of the package (after pressing the key fob button). Even if an attacker is able to intercept it, he will not be able to use it, since the next disarming action will use a completely different code unknown to him.
- Budget element. Unlike interactive code, which implies a more complex encryption principle and, accordingly, a more expensive creation technology, dynamic code costs several times less. Its use allows us to keep the cost of Fighters at a level accessible to everyone, without sacrificing the quality of their protective properties.
Regardless of the chosen system, be it models of the Ex series (ex,ex plus), F series (f - 35, f - 15, f - 31, f - 28) or stealth fighter S series (107, 111, 109) the machine is always will be reliably protected thanks to the use of an effective encryption principle using Keeloq® technology.
Installation instructions
The Fighter alarm installation instructions look like this:
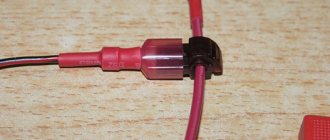
- Installation of a control device with a microprocessor is carried out as secretly as possible in the car interior; its placement under the hood is not allowed. It is recommended to locate the module behind the instrument panel to ensure a minimum length of wires when connecting. There should be no electronic devices, as well as moving mechanisms and machine components in the place where the unit is installed. To further protect the device from moisture and vibration, it can be wrapped in cellophane and foam rubber.
- The siren is installed under the hood of the car, away from the cylinder block and metal surfaces adjacent to it. If a standalone type device is used, then during installation it is necessary to ensure free access to its keyhole. It is recommended to place the device with the socket down to eliminate the possibility of moisture accumulation in it. After installation, you need to make sure that neither the siren nor its wires are accessible from under the bottom of the car.
- A limit switch is installed on the hood. Similar devices can be installed on all doors, as well as the luggage compartment. Triggers should not be installed in drains or places where moisture accumulates. Wires from the limit switches are routed to the microprocessor under the decorative upholstery.
- A touch-sensitive impact controller is located in the central part of the body. It is recommended to install it in the cabin, in particular, on the partition that separates it from the engine compartment. During installation, it is important to provide access to the sensor adjustments located on the housing.
- The transceiver module is installed on the instrument panel or on the top of the windshield. The surface of the latter must be cleaned and degreased using solvent or alcohol. The wire from the transceiver must be routed directly to the control unit, and the cable must not be twisted into coils. This may cause a poor signal and poor communication quality.
- The button for activating the service mode is located hidden in the cabin. It must be installed so that the consumer has access to the device when he is in the driver's seat.
- The LED is located inside the car. Its installation location must be clearly visible from the street.
- Some models include a separate button to control the “Anti-robbery” mode. If available, the installation of the element is carried out inside the car, most secretly.
Photo gallery: connection diagrams of main and additional elements
Connection diagram for the Fighter Excellent Plus system
Connection diagram for the system of additional elements Stealth Fighter S-111RU
Connection diagram for the system of additional elements Stealth Fighter S-107RU
Stealth Fighter S-109RU alarm connection diagram
Table: order of connecting the main 8-pin microprocessor connector
| Contact color | Purpose |
| Black | Common wire or ground. This contact must be connected to the vehicle ground. For connection, you should select any bolt screwed into the car body. |
| Red | Alarm power supply +12 volts. Connects directly to the battery, to its positive terminal clamp. |
| Orange | Output for connecting a siren or steering horn |
| Pink | Ignition system input. Must be connected to the ignition switch contact, which produces a 12-volt voltage when the key is turned to the “ACC” position. |
| Black and white | Contact elements for connecting to door triggers that must be connected to ground when opened |
| Black and yellow | Lock output |
| Two yellow contacts | Designed for connecting external car lighting devices |
Manual
According to the instruction manual, it is recommended to test the alarm after installation. To do this, you need to turn the security mode on and off and monitor the operation of the central locking system in the car. It should close and open accordingly.
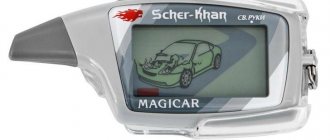
Control key fob
Working batteries must be inserted into the remote control before use. The batteries are inserted into a special compartment located behind the protective back cover.
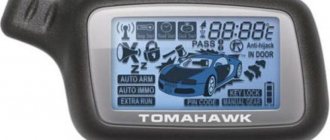
Designation of buttons and symbols on the key fob
Indicators on the display of the Fighter pager
Description of symbols on the pager screen:
- The mode of sending a command from the key fob is enabled.
- Receiving signals from the alarm control unit. If the indicator blinks, this indicates that the remote control did not receive an impulse from the microprocessor.
- A display for displaying the current time, as well as alarm and timer readings.
- Indicator of closed and open door locks.
- Symbol of activated vehicle protection mode.
- Vehicle security is disabled.
- Indicator of activated button locking on the control panel.
- Daily engine start icon.
- The energy saving function for the battery in the remote control is enabled.
- Parking timer indication.
- Periodic engine start.
- Icon of a running engine in a car.
- Indication of battery charge in the pager.
- Sensitivity controller warning level enabled symbol.
- Icon of a triggered sensor alarm zone.
- One of the doors is open.
- The car hood is not locked.
- The luggage compartment of the car is open.
- The car's ignition system is turned on.
- The alarm is activated.
- Vehicle protection mode with audible alarms is enabled.
- The remote control vibration mode option is activated.
- Autostart function reservation indicator for a car with manual transmission.
- Symbol for calling the car owner from the passenger compartment.
- The alarm service mode is enabled.
Designation of buttons on the Fighter communicator
Table: brief information on controlling commands using the remote control
| Button | Function |
| K1 | Used to control:
|
| K1+K2 | Disable sensitivity controller. To deactivate the sensor, you must simultaneously hold two buttons for six seconds after activating the security. |
| K2 | Used to control:
|
| K3 | With a short “click,” the button allows you to silently activate the security mode. Long-pressing the key for several seconds will enable the Search function. |
| K4 | Used to control several functions:
|
| K4+K1 | Request car alarm status |
| K4+K2 | Activating and disabling the option to call the car owner |
| K4+K3 | Controlling the vibration mode of the key fob |
Setting up the key fob
There are several ways to bind a communicator, for example, for the Excellent Plus model, programming is done as follows:
- The car door opens, but there is no need to close it. The driver gets behind the wheel.
- The key in the lock is turned seven times to the “ACC” position and back, as a result, the ignition must be left on. If all actions are performed correctly, the external lights will blink once after three seconds.
- On the device to be programmed, press buttons 1 and 2 simultaneously. When pairing is successful, the external lighting devices will flash three times.
- Similar actions are performed with each registered communicator. In total, the control unit memory allows you to program no more than three pagers.
- To leave the binding menu, the vehicle's ignition is turned off and the driver's door is closed.
In the Jerry model, you can program a new communicator using a personal code or without it (second setup option):
- The car's ignition turns on.
- The button to enter the service mode of servicing the system is pressed three times. After the last “click”, one siren signal will sound, indicating readiness for binding.
- Button 1 (to arm) is pressed and held for several seconds. You can release the key after the pager emits a melodic signal and the LED goes into blinking mode with long pauses.
- Other devices are programmed in the same way.
- To exit the binding menu, you must turn off the ignition system or take no action for 8 seconds.
When using a personal password, the programming procedure is performed as follows:
- In the car, the ignition system turns on, turns off, and then turns on again.
- Using the button to enter the service mode, the first digit of the password is entered. The number of presses must correspond to the code sign.
- The ignition in the car turns off and turns on again.
- The next password character is entered.
- Then the ignition is turned off and activated again. A siren will sound to confirm that the code has been accepted.
- Press the button to enter the service mode three times. On the communicator, the first button is pressed and held.
- To exit the binding menu, the ignition in the car is turned off.
Video: features of flashing the key fob
Taken by user Mikhail Autoinstructor.
Setting the security mode
To enable the Fighter alarm protection mode, use the first button on the remote control; press it briefly.
If you need to activate security without a key fob, perform the following steps:
- The button to enter the service mode is pressed and held for 3 seconds. The siren should sound once. If all the door locks are locked, then you need to open and close at least one of them.
- After the last door is locked, the security mode will be activated within three seconds.
To disable the security mode, use the second button of the key fob, but if the remote control is lost or broken, you can use the emergency deactivation method:
- The car door opens, which will activate the security function.
- The driver sits behind the wheel and turns the ignition system on and off three times. As a result, it must be left activated. There is no need to close the door while completing the task.
- The status LED will work without blinking. The security mode should be disabled. After this, the ignition is turned off and the LED will flash slowly.
- It is necessary to start counting the flashes. After their number matches the first digit of the password, the ignition in the car is turned off. The LED will start to light continuously.
- The ignition in the car turns off again. The diode light will begin to blink; you need to count the number of blinks corresponding to the second digit of the code.
- As a result, the ignition in the car turns on and off again. If the code is entered correctly, the alarm will disable the security mode.
Code change
The process of changing the password is as follows:
- The car door opens, there is no need to lock it.
- The ignition system is turned on and off 7 times by turning the key from the “Off” to “ACC” position and back. As a result, it should remain activated. The user must wait until the car's warning light blinks, this will happen in two seconds.
- Over the next 3 seconds, button 4 is pressed on the communicator. If you do not have time to do this, the system will exit the password change menu. When entering programming mode, the alarm light will blink three times.
- The first digit of the personal password is entered; for this, the first key of the pager is used. You need to have time to do this no later than three seconds after the last blinking of the light alarm. The number of presses must correspond to the code number.
- The next character of the password is entered, but now the second pager button is used for this. With each “click”, the external lighting fixtures will blink.
- The ignition system is turned off, after which the door to the car is closed. You need to wait a few seconds until the warning light blinks three times.
The process of changing the password for a car with a Jerry alarm is performed using a different algorithm:
- Security mode is disabled. The user must then activate, turn off and turn on the ignition system again.
- Over the next ten seconds, the first character of the password is entered. To do this, use the button to enter the service mode.
- The ignition system turns off and on.
- The second code value is entered in the same way. Then the ignition must be turned off and on again. If the valid password is entered successfully, the siren will play a short beep.
- Then within five seconds you need to turn off the ignition system and enter a new code.
- To enter the setup menu, the service mode key is pressed five times. This will cause the siren to sound first with a short and then a long signal.
- Within five seconds after the last pulse, the first button on the communicator is pressed. One siren signal will sound to confirm that the code is ready to be entered.
- Using the service key, the first password value is entered, for which the user has ten seconds. Characters are entered from 1 to 9, the number of presses must correspond to the number. The siren will sound as confirmation.
- The second key on the pager is pressed, this will cause the alarm to switch to the mode of assigning the next password character.
- After a double siren signal, a new value is entered.
- To exit the programming menu, the vehicle's ignition is turned off. The siren will play two beeps. If they are absent, you will need to activate and disable the security mode, and then perform the code assignment procedure again.
Sensor management
To enter the shock sensor settings menu, you need to press the third button of the communicator within three seconds after turning on the protection mode:
- with a subsequent short “click,” the controller’s warning level is switched off;
- double pressing will completely deactivate the shock regulator;
- with a triple “click” the device returns to its usual operating mode.
System operation in alarm mode
The alarm mode is activated in the following events:
- opening doors when security is on (the alarm detects the opening of the limit switches);
- receiving a signal from the shock sensor alarm zone;
- activation of the ignition system and attempt to start the engine;
- turning off the voltage in the car's electrical network.
The alarm mode is activated for thirty seconds; when activated, the siren is activated, as well as external lighting devices. If the limit switch remains open and the ignition is on, then the alarm cycles are repeated three times in a row. Accordingly, the total operating time of the mode can be 90 seconds.
To turn off the alarms, use buttons 1 or 2, while the vehicle remains protected. When the warning zone of the shock sensor is triggered, the siren beeps five times.
Automatic start
Before setting up remote engine start on cars with auto start, you need to perform the program neutral procedure:
- The parking brake lever in the car rises, the engine must be started at this moment.
- The third key is pressed on the communicator. External lighting fixtures will blink twice.
- The key in the lock is turned to the “Off” position and removed from the lock. The power unit should not stall after this.
- The driver leaves the cabin and closes the door, after which the engine should stop. If this happens, the vehicle is ready to implement the autostart option.
To configure the function, perform the following steps:
- The engine auto start button is pressed on the pager and must be held for three seconds. The siren will sound and the engine starting procedure will begin.
- The ignition is activated, which will cause the crankshaft to rotate by the starter mechanism. The system will make a total of four startup attempts if one of them fails. When using the function on a car with a diesel engine, a pause of 7 seconds is maintained between activating the ignition and cranking the crankshaft. It is required to warm up the glow plugs, which simplifies starting the engine at low negative temperatures.
- If the power unit has started, the corresponding indicator will appear on the indicator display. Depending on the user settings, the engine operating time can be 7 or 15 minutes.
Programmable Features
On most Fighter models, entering the options programming menu is done as follows:
- The car's protection mode is turned off.
- The ignition system is turned on and off three times, ultimately leaving the key in the “Off” position.
- The button to enter the car service mode is pressed 2, 4, 6 or 8 times. After the last “click” it must be held until the siren beeps several times. If an extended pulse is heard, this indicates entry into the function setup menu in accordance with the tables. The emergency button can be released.
- The controls on the remote are then used to assign options or disable them.
- The ignition in the car turns on. The siren should sound three times, indicating that the setup menu is deactivated. This mode turns off automatically within 15 seconds if the user does not take any action.
Photo gallery: tables for programming functions
List of functions to configure
Options Programming Table
List of functions
Options table
System setup: made easy
Of course, you need to start with “registration” of the Fighter alarm control panel. A step-by-step guide to linking a key fob for each specific model has its own characteristics. For comparison, we will describe this process using the example of two popular models:
- Fighter F – 31. Procedure:
- switching to programming mode (turn the ignition on and off twice, then press the Valet button and hold it, a long alarm will notify you that the system is ready);
- recording the key fob (press any button on the key fob, one short beep means that the remote control has been successfully memorized by the system).
- Fighter F – 14. Applicable scheme:
- switching to programming mode (turn the ignition on and off 7 times, one light flash and activation of the status indicator will notify you that the system is ready);
- recording the key fob (press the left button of the key fob, the alarm will confirm the identification with three short light signals).
What unites all Fighter alarms is the last stage of the key fob binding process: to record additional key fobs, we repeat the last step as many times as the PU is supposed to be registered in the system memory.
There are situations when the owner of a vehicle is faced with the question: how to determine the model using the key fob (in most cases, after purchasing a used car with an alarm already installed on it). You need to look for answers on the World Wide Web. It is there that there is all the necessary information regarding the topic: how to recognize the model by the key fob (alarm systems Panther, Starline, Tomahawk, Fighter and others can be easily recognized using their control panel, this is not a problem).
As for programming functions and modes, this action is not much different from binding a key fob. The instruction manual gives clear instructions that you just need to follow and then everything will work out!
Video: features of the Stealth Fighter Security alarm system
Filmed by the DenXR4i channel.
Do you have any questions? Specialists and readers of the AUTODVIG website will help you ask a question
Was this article helpful?
Thank you for your opinion!
The article was useful. Please share the information with your friends.
Yes (50.00%)
No (50.00%)
X
Please write what is wrong and leave recommendations on the article
Cancel reply
Rate this article: ( 2 votes, average: 4.50 out of 5)
Discuss the article:
Leave a product review
If you have experience purchasing and using a certain product, please share information about it with other AutoPulse.ru customers - leave your own review.
Describe why you liked the product or, on the contrary, what problems you encountered when using this product.
Your review will be posted some time after it has been verified by a moderator.
Attention! We do not publish:
- very short and uninformative reviews
- reviews written in CAPITAL characters
- reviews containing profanity
- reviews not related to the consumer properties of a particular product
- reviews containing links to other websites
- product reviews that mention specific stores
Source: www.autopulse.ru