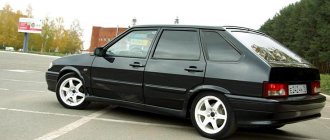
The VAZ 2114 car was produced by the Volzhsky Automobile Plant in the period 2001-2013. The bottom of the VAZ 2114, unlike the sills, was not a common consumable. If immediately after the purchase the driver carried out routine inspections and fully protected the body from the aggressive effects of salt reagents and moisture, parking and overnight stays of the car in the open air were limited.
An exception is an accident or collision with an obstacle, as a result of which the bottom is deformed from mechanical damage.
Design Features
Model 2114 was built on the basis of the VAZ 2109, it is a restyled version. The hatchback received a new steering column, a modernized dashboard, an updated one and a half liter engine, redesigned for Euro 2 protocol. The VAZ 2114 shares the same wheelbase with the Nine, 2460 mm. The configuration of the bottom panel is the same for the models.
Are there any differences between 2114 and 2115
The VAZ 2115 model is considered a related model. The hatchback is built on the basis of the VAZ 21099 with various transport sizes and shares one wheelbase with the entire Lada Samara family. The standard dimensions of the bottom and sills for VAZ 2108, 2109, 21099, 2113, 2114, 2115 models are the same and interchangeable.
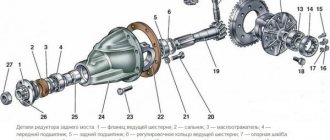
The bottom of the VAZ 2114 structurally consists of the following parts:
- central reinforced panel;
- driver's side panel;
- side passenger;
The factory stock bottom is a one-piece stamped part, primed and painted black. The polyethylene coating acts as protection.
When repairs are required
For all VAZ models, the body was made of black or low-carbon steel of class 08Yu, 08KP. The parts were not galvanized, but were coated with a polymer anti-corrosion composition; the film protected the bottom from moisture for up to 6 months, then natural oxidation processes began. After the purchase, drivers had to carry out thorough anti-corrosion treatment of the metal.
Repair or complete over-welding of the bottom of the VAZ 2114 will be required in the following cases:
- It is impossible to jack up the car; the jacks fall through.
- The floor in the car became uneven, the metal sagged from corrosion.
- The driver's seat cannot be adjusted; when the doors are closed, increased gaps appear.
- Noticeable areas of corrosion on the sills and wheel arches. If you lift the car onto an overpass and check it with an awl, the anti-corrosion layer from the bottom will fall off, and traces of rust will be clearly visible.
conclusions
The design of the 8-valve injection engine VAZ-2114 is quite similar to the first generations of this engine - “Samara”. Of course, the designers made many changes to the features of the power unit, but in many ways they remained similar. Repair and maintenance of this engine must be carried out regularly, which will not only extend its life, but also reduce wear on the parts located inside.
The current condition of the car can largely be assessed by analyzing the body. If all kinds of consumables need to be replaced, you can even rebuild the suspension yourself and even install a new engine, then restoring a completely rusted body is expensive and pointless.
No one will tune, modify, or invest a lot of money in a car if its body is already in its last years. This significantly reduces the cost of the car, even if the engine is in perfect condition.
Therefore, if you want to maintain the attractive appearance of your VAZ 2110, extend its service life, and, if necessary, sell it for good money, keep an eye on the body and periodically carry out repair or preventative body work aimed at combating corrosion.
Preparation for repair
Repairing the underbody of a VAZ involves a set of measures:
- preparation of the necessary material and tools;
- interior dismantling;
- installing the car on a lift or repair plane;
- cutting out rotten elements of the bottom during partial or complete replacement of a part, if it is necessary to completely digest the body;
- patch welding or bottom welding;
- anti-corrosion treatment;
- installation of interior, replacement of sound insulation, additional work.
To repair the body yourself, you will need to prepare the following materials and tools:
- A new bottom or part of it for a complete replacement, metal patches for a partial repair. It is recommended to take industrial steel with a thickness of up to 1-1.2 mm. The standard metal on the body of the VAZ 2114 has a thickness of 0.9 mm for the bottom, 0.8 for the sills.
- Angle grinder, grinder with a set of replaceable discs from metal, for processing a weld seam, stripping metal from corrosion, to a soft attachment for grinding soil.
- Welding machine. For self-repair, it is recommended to use a semi-automatic machine using wire in a carbon dioxide environment.
- Electric drill, set of drills.
- Sound insulation sheets.
- Metal brushes, coarse and fine sandpaper, chisel, set of screwdrivers.
- Zinc-based primer, putty, set of spatulas, anti-corrosive agent for final processing.
The first stage of work is dismantling the interior and lifting the car onto the overpass.
Craftsmen do not recommend carrying out repairs in a pit; it will be inconvenient for the driver to weld the body and treat the surface. The most convenient option is to lift the car on hangers or turn it on its side.
Dismantling the interior
The bottom 2114 is a stamped part that is welded to the reinforcements of the side members and hinged panels along factory lines. Original replicas require no trimming and are ready for installation. Description of replacement in stages:
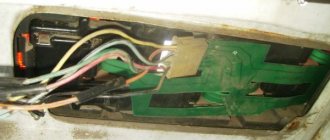
- The fuel is drained from the car and the battery is removed.
- The electrics are turned off, the front and rear doors are dismantled.
- The chairs and flooring are pulled out, and the sound insulation is removed.
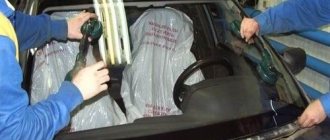
- All plastic lining of the pillars is dismantled, the dashboard must be covered with a thick piece of rags.
- The glass is sealed on both sides with thick paper.
- An inspection is carried out from the inside, rusty areas are tapped with a hammer, and the scale of work is determined.
Welding speed will be provided by an inverter
For many years, the UAZ 469 car has been very popular among Russians. Having rolled off the assembly line back in the Soviet Union, it is still in demand among extreme sports enthusiasts. It should be noted that the body of this car was very reliable. But it doesn’t last forever, so today the UAZ 469 can increasingly be found in workshops where its body part is being strengthened.
To complete welding work as quickly as possible, an inverter is most often used.
This welding machine uses high frequency currents in its work. Its main advantages are its compactness and excellent speed of operations. In addition, various operating modes allow even a novice master to master the unit in a matter of hours. However, the device also has disadvantages:
- high price;
- impossibility of welding iron thicker than 3 mm;
- frequent breakdowns due to dust.
Carrying out repair and welding work
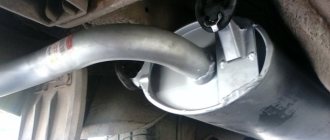
Repairing the underbody of a VAZ 2115 is quite difficult. Under the bottom of the car there is a fuel system, brake system and muffler pipes. When replacing an entire part, these systems must be completely removed and reinstalled after welding. Experienced tinsmiths recommend not dismantling the muffler elements, but cutting them out, after repairing the bottom, boiling the part and installing it in place.
If the underbody is partially repaired, there will be no need to remove the fuel and brake system pipes. When cutting out entirely, it is recommended to cut out the bottom not along the factory welding line, but leaving an allowance of 1-2 cm. The new element is welded with an overlapping seam, which increases the rigidity of the body and the durability of the weld seam.
What is the best way to cook?
Typically, welding work is carried out using electrodes. This welding method is quick and simple. But it is not recommended to use it when repairing the body, since the seam is quite rough, so the car with it will not look very aesthetically pleasing.
The equipment for welding with electrodes is quite cumbersome, which will not allow you to reach the most difficult areas of the body. But this work must also meet safety requirements. Therefore, electrode welding is used only in special cases, for example, if it is necessary to strengthen a broken frame.
Currently, when carrying out welding work, an inverter or semi-automatic machine is most often used.
Each of these methods has its own advantages and disadvantages. To use such welding, you must have special skills, as well as know and follow safety precautions. The critical point is the equipment of the workplace. If welding work is planned to be carried out in a garage, it is important to properly organize the space and purchase the necessary tools in advance. The lighting of the room is also of great importance. It is quite difficult to do welding work alone. It is good if the welder has an assistant.
Replacing parts or the entire bottom
Repairs begin with inspection and repair of thresholds. Rotting of the central part of the body begins with corrosion of the sills and wheel arches, so if rust has destroyed parts of the bottom by 30%, then we can confidently say that the sill is rotten by 60% and requires complete replacement. The bottom of the VAZ 2114 consists of the following elements:
- underbody panels under the seats;
- threshold extension;
- crossbars;
- side member amplifier;
- space for a jack or jacks;
- central support platform;
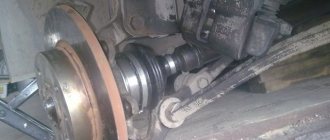
After cleaning the underbody from anticorrosion, the jacks, side members and panels under the feet of the driver and passenger are inspected. These are the most vulnerable parts. If the general condition is satisfactory, then it is recommended to cut out the problem areas and install the original floor parts from the repair kit. The process of partial overcooking of the bottom in steps:
- Drill out the spot welding points and cut out the rusted metal with a chisel.
- Clean the edge of the future weld with a grinder and treat with a degreaser.
- Attach the original part or the cut out patch. The metal patch should protrude 1 cm beyond the edges of the trim; welding will be carried out overlapping.
- Spot weld the edge of the metal. Weld the patch in increments of 2 cm welding, 4 cm skip.
It is not recommended to weld a one-piece sealed seam; when the engine vibrates, the body experiences torsional loads, and the solid seam may crack.
- Clean the weld seam.
- Treat with primer, apply a layer of oil anticorrosive or bitumen mastic under the sound insulation layer.
- After complete cleaning, treat the outer part of the bottom with bitumen mastic.
Spare parts catalog VAZ Samara 2115, 2114, 2113 - Body floor
1.
AVTOVAZ — 21080-5101372-00 — VAZ-2108 rear right floor spar
2002 r.
1.
AVTOVAZ — 21085101372 — LADA 21085101372 Rear right floor spar
check price
1.
EKRIS — 2108-5101372 — Rear floor spar of VAZ 2108 right
check price
1.
AVTOVAZ — 21099-5101372-00 — Floor spar VAZ-21099 rear right
2125 rub.
3.
AVTOVAZ — 21080 8404416 00 — Bracket for mudguard VAZ 21080 left (flag)
check price
4.
AVTOVAZ — 21080-5101376-00 — Spar reinforcement for lever mounting
check price
6.
AVTOVAZ - 21080-5101084-00 - Front floor cross member VAZ 2108 average,
check price
7.
AVTOVAZ — 21080-6810030-00 — Right side front seat bracket assembly
210 rub.
7.
AVTOVAZ — 21086810030 — Seat bracket
check price
7.
EKRIS — 2108-6810030 — Seat bracket for VAZ 2108
check price
8.
AVTOVAZ - 21080-5101082-00 - front right floor cross member
124 rub.
8.
EKRIS — 21080510108200 — right cross member for VAZ 2108 seats (crown strength)
check price
8.
AVTOVAZ - 21080-5101083-00 - front left floor cross member
124 rub.
9.
AVTOVAZ - 21080-5101066-00 - Middle floor threshold connector
146 rub.
9.
ChKPZ - 2108-5101066 - Threshold connector VAZ 2108-09-099
check price
10.
AVTOVAZ - 21080-5101024-00 - VAZ 2108-21099 body floor assembly
check price
11.
AVTOVAZ — 21080-5101302-00 — Front floor spar
check price
11.
AVTOVAZ — 21085101302 — LADA 21085101302 Front right floor spar
check price
12.
AVTOVAZ - 21080-5101064-00 - floor reinforcement assembly
check price
13.
AVTOVAZ — 21080-5101303-00 — Front left floor spar
128 rub.
13.
AVTOVAZ — 21085101303 — LADA 21085101303 Front left floor spar
check price
14.
Noname - 21085101067 - Threshold connector
check price
14.
AVTOVAZ — 21080-5101067-00 — Left threshold connector assembly
146 rub.
17.
AVTOVAZ - 21099-5101042-00 - Trunk floor VAZ 21099,
2547 rub.
17.
AVTOVAZ — 210995101042 — Part
check price
18.
AVTOVAZ — 21099-5101275-00 — Floor cross member 21099 rear
check price
19.
AVTOVAZ - 21099-2804180-00 - rear towing eye assembly
check price
20.
AVTOVAZ - 21099-5101276-00 - Rear trunk floor cross member VAZ-21099,
check price
21.
AVTOVAZ - 21099-5101047-00 - Rear floor extension 21099 (JSC AVTOVAZ)
check price
22.
AVTOVAZ - 21080-5101276-00 - rear floor cross member
328 rub.
23.
AVTOVAZ - 21080-5101042-00 - Trunk floor VAZ 2108-2109, 2113-14,
2650 rub.
23.
AVTOVAZ — 21085101042 — VAZ-2108 TRUNK FLOOR AVTOVAZ
check price
23.
BEGINNING — 2108-5101042 — Spare wheel floor (OAOAVTOVAZ) VAZ 21080
check price
23.
START — 21080 5101042 00 — Spare wheel floor (OAOAVTOVAZ) VAZ 21080
check price
24.
AVTOVAZ - 21080-5101272-00 - Floor cross member 2108 average (JSC AVTOVAZ)
check price
25.
AVTOVAZ - 21080-5101373-00 - Floor spar VAZ-2108, 21099 rear left
RUR 1,771
25.
AVTOVAZ — 21085101373 — SAR VAZ 210821099 REAR LEFT WITHOUT HOOK
check price
25.
AVTOVAZ — 21099-5101373-00 — Floor spar VAZ-21099 rear. left
check price
26.
AVTOVAZ - 21080 8404417 00 - Mudguard bracket VAZ 21080 right (flag) rear
check price
27.
AVTOVAZ — 21080-5101377-00 — Spar amplifier
check price
29.
AVTOVAZ - 21080-5101076-00 - floor reinforcement for installation of a jack Polad CJSC Tolyatti
check price
30.
AVTOVAZ - 21080-5101034-00 - Floor panel VAZ-2108-09, 2113-14 middle
check price
30.
AVTOVAZ — 21085101034 — FLOOR PANEL MEDIUM VAZ 2108
check price
31.
AVTOVAZ — 21080-5101286-00 — Connector for rear side member and front floor
130 rub.
31.
AVTOVAZ — 21080-5101287-00 — Connector for rear side member and front floor
127 rub.
32.
AVTOVAZ - 00001-0076711-01 - Screw 4.9x12.7
check price
32.
BelZAN - 1/76711/01 - Self-tapping screw 4.9*12.7 with cylinder head.
check price
33.
AVTOVAZ - 00001-0005193-01 - Washer 5
5 rub.
33.
BelZAN - 00001-0005193-01 - WASHER 5
check price
33.
BelZAN - 00001000519301 - WASHER 5
check price
34.
AVTOVAZ — 00001-0041897-71 — Flange nut 10
check price
34.
BelZAN - 1/41897/71 - Medium metal mounting piston for self-tapping screws
check price
Final processing
Primer, anti-corrosion treatment, installation of new sound insulation and installation of the interior with electrical connections are the final stage of work on the bottom. For external treatment, you will need bitumen mastic or anticorrosive Body 930. The product has a budget cost and is highly resistant. The mastic forms a dense but elastic protective layer that does not allow moisture to pass through and protects the iron. Final work step by step:
- Clean weld seams.
- Treat welding areas with a primer containing zinc.
- Cover the inner surface with mastic and install new sound insulation.
Rotten metal destroys the skimmer sheets in 3-5 months, so if the car needs the bottom to be overcooked, the sound insulation definitely needs to be changed.
- Treat the outer part of the bottom with bitumen anticorrosive. You can use paraffin aerosols; it is convenient to reach the hidden cavities of the bottom with an anticorrosive agent.
During operation, during routine inspection, it is recommended to periodically remove the plugs in the parts and pour the oil composition into the internal pockets.
- Install interior, doors. Connect the electrical.
Where and from whom can I order the service?
If it is necessary to digest the thresholds in the car, the motorist has three options:
- Contact the service center.
- Find a competent private auto mechanic.
- Do the work yourself.
The first option is the best, but expensive. You should only contact a private owner if he has been recommended by a good friend. You can digest the rapids yourself. But for this you need to have knowledge, skills, a welding tool, follow the algorithm of actions and be extremely careful.
Cost of the kit and work with it in the service
The service station carries out the full range of work to restore the body. You can weld the bottom of a VAZ 2115, the price of work without the cost of dismantling, materials and components starts from 15,000 rubles. It is also permissible to change rotten jacks, sills and replace part of the bottom, the cost of work is up to 10,000 rubles.
Repairing the underbody, like any other part of the body, is classified as labor-intensive and complex. The cost of the repair kit must be added to the cost of the work.
- original floor from AvtoVAZ - from 3,000 rubles;
- bottom with thresholds ─ from 5,000 rubles;
- sound insulation ─ from 500 rubles per 1 sq. meter;
- anticorrosive ─ from 600 rubles per 1 kg.
Simple calculations show that self-repair will cost three to four times less, but only if the driver understands the complexity of the work and has minimal skills in using electric welding and working with metal.
Types of service
According to the time allocated for digestion, the work can be:
According to the performer, overcooking is classified into:
- Professional (private craftsman or car service specialist).
- Independent.
Depending on the type of material, overcooking occurs:
- Alloys containing chromium.
- Aluminum linings.
- Stainless steel.
Overcooking also happens:
- With the dismantling of the thresholds.
- No dismantling.
Bottom, body repair, patches
A major overhaul was carried out and rotten body elements were replaced.
A lot of energy, free time and nerves were expended. I did it myself at my neighbor’s, who has a semi-automatic machine and his own garage. It was hell to see what happened when the carpet was removed. Absolutely everything just rotted. The quality of Russian iron and the lack of attention and proper care on the part of the previous owners took their toll. Those who say yes, why is it - it’s easier to take another one. I'll tell you one thing, do as you please, buy, sell, cook, don't cook, in short, fuck it.
So roughly the scope of work:
— Thresholds — Threshold amplifiers — Side member amplifier — Rear wheel arches — Front roof pillar or beak — Rear roof amplifier — Rear glasses (disease) — All kinds of holes saffron milk caps in a circle
This photo is not mine but it was about the same. Sorry author, I think you don't mind
So let's go. Let's start with the rapids. We remove all the old rotten stuff, cut it, adjust it, clean it, cook it.
Welded threshold amplifiers
Everything is similar here.
Rear end
Things have already started.
Upper part of the sill or trim
We're not in a hurry, the main thing here is to get everything right. Both sides are done alternately, but equally. There is also a strip with a corner at the bottom that forms a box. Unfortunately there are no photos.
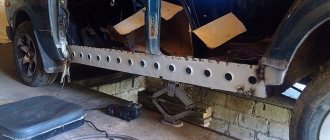
Next, cut off the remainder from the old bottom
We bought whole bottom sheets.
Like that
Bottom hardness has already appeared
Looks terrible, we're cutting everything down
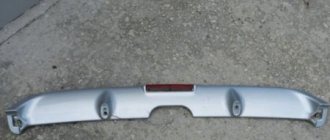
The sore spot on all fours and nines is the so-called beak. It rotted on both sides. To change it, I removed the windshield, hood, and wipers. Next, we saw along the marks in advance, drill out the metal and chop with a chisel. We adjust and boil.
Rem. insert
Ppts, even the roof reinforcement that holds the cracker hinges has rotted. Autumn before I drove stupidly sealing the trunk lid with tape))). In general, I cut it off to disassemble part of the roof. And so they brewed it
Even this happens
The arches themselves are made approximately this way
No comments
How to repair a hole in a car body without welding: the best ways
It often happens that before painting a used car, we discover a through hole formed due to corrosion.
What can be done in this case, if we leave the topic of professional body repair and high costs. Is it possible to fix the hole yourself, and if so, how to do it? All this will be discussed below. If you decide to start painting your vehicle, it is likely that you will be faced with through holes in the body that have arisen as a result of exposure to rust. It is worth noting that body repairs are quite expensive, so not every car enthusiast wants to turn to professionals. As a result, many are interested in how to repair holes in a car body without welding with their own hands. This is exactly what we will talk about now.
Apply putty
First of all, if you don’t know how to repair a hole in a car sill without welding, you should take a closer look at the putty method. This solution is distinguished by its simplicity, so you can resort to it even if you do not have special knowledge of body straightening.
Before repairing a hole in the car body, you should prepare:
- fiberglass and automotive putty;
- aluminum mesh;
- putty knife;
- sandpaper (if possible, it’s also worth looking for a sanding machine);
- primer, paint, varnish.
Fixing holes in a car body itself is distinguished by its simplicity. First of all, you should remove the rust using an angle grinder or any other suitable equipment. Next, we cut out the patch from aluminum, and then attach it to the body using masking tape. We apply a thin layer of fiberglass putty (here it is important not to touch the tape, because then you will have to remove it). When the putty sticks, peel off the tape and putty the remaining areas.
It is important that the layer is as thin as possible, without tubercles or other irregularities.
When everything is dry, sand everything using coarse sandpaper or a sander.
Having achieved a flat and smooth surface, apply a second ball of putty - automotive putty. We wait until it dries and level it again. Then the surface is primed (do not forget to cover the areas that do not require painting with film). When the primer is finished, you can paint the body.
It is worth noting that the patch will be more stable if you apply a couple of layers of putty on the back side. In addition, it is also possible to seal holes in the car body without welding using putty and without using a patch. In this case, it is necessary to apply a lining on the back side so that the composition is well fixed. On the other hand, this solution is only suitable for very small through holes.
There is another way to repair a hole in a car body without welding. A soldering iron is required here. First of all, we clean the area from rust. We make the patch from a sheet of metal (you don’t need to worry too much about this; an ordinary can of auto chemicals will do).
It is important that the patch is slightly larger than the holes and also completely covers them.
Additionally, you can coat the metal surface with anti-corrosion compounds - this will increase the quality of our repairs. Then we service the edges of the patch, after which, using a fairly powerful soldering iron, we solder it with a continuous seam.
In order for the putty to adhere well, it is important that abrasive marks (small scratches) appear on the patch.
The next step is primer. Here it is necessary to complete everything as quickly as possible to avoid the possibility of rust occurring in the future. It is best to first apply a thin layer of phosphate primer, and when it dries, another two or three layers of acrylic two-component composition (the interval between applications should be about 5-10 minutes). Everything dries in about 3-4 hours; if there is infrared heating, you can reduce the procedure to 20 minutes.
It is worth noting that this solution is more durable than in the case of aluminum mesh, and it can be used to eliminate holes of almost any size.
So, in the article we discussed how to repair holes in a car body without welding. It is worth noting that these options are not the most optimal. Naturally, it is better to turn to professional vehicle repair specialists. At the same time, self-repair will help give the body an aesthetically attractive appearance and also prevent further development of corrosion. Both options are distinguished by their simplicity, so repairs can be performed even without special knowledge and skills.
Recently, it has been possible to close the holes in other ways. One of them involves working with fiberglass.
Fiberglass patch
Instructions:
- The surface of the body is also cleaned and degreased, as in the two cases described above.
- Overlays are cut out of fiberglass, the size of which should be 2 cm larger than the hole size.
- The area is pre-primed and the composition is given time to harden.
- The pad is applied to a completely dry surface.
- Fiberglass linings are fixed using an adhesive-resin composition.
First, one overlay is glued, then the second, third, and so on. Again, it is recommended to put a lining on the reverse side.
After the glue has dried, the body surface is treated and painted.
Read more: How to quickly sell a car, sell your used car at a profit
As you can see, holes on the car body caused by corrosion can be easily eliminated with your own hands. Visual examples can be seen in the video and photo.
Tired of paying fines? There is an exit!
Forget about fines from cameras! An absolutely legal new product - Traffic Police Camera Jammer, hides your license plates from the cameras that are installed in all cities. More details at the link.
- Absolutely legal (Article 12.2);
- Hides from photo and video recording;
- Suitable for all cars;
- Works through the cigarette lighter connector;
- Does not cause interference to radios and cell phones.