January 26, 2016 Lada.Online 112 496 2
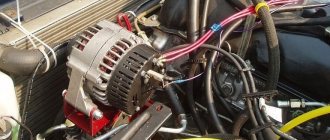
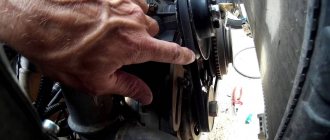
The standard location of the Lada 4×4 generator is at the bottom, which cannot be called a good solution. During off-road driving, water and dirt easily get on it, or antifreeze drips, which significantly reduces its service life. To protect an important part from moisture, owners resort to modifications. Let's look at how to move the generator up to a Lada 4×4.
Moving the KZATE 80A generator upstairs (without power steering)
| NIVA-FAQ | FORUM | NEW FAQ | SITE MAP | SITE SEARCH |
| Moving the KZATE 80A generator upstairs (without power steering) Author: Brigadir335 |
Step-by-step instructions for a 1.7 carburetor engine without power steering.
The bracket was kindly made by Vlad_aka_SoHm.
- What do you need:
- — generator 21214 or similar; — generator mounting bracket 21214-3701650 with two nuts and bolts with a thin head, for fastening to the KIT kit; — KIT generator transfer kit; — generator belt 1350 mm long; — mounting bolt for generator 2110 assembly; — two bolts M8x20 and M8x30 with nuts;
- - four M5x35 bolts and eight washers.
- 1) Remove the spare wheel from under the hood, unscrew the extension on which it was lying.
2) Unscrew two studs and two bolts above the crankshaft pulley. We replace them with four longer bolts. If there are no problems with unscrewing the bolts, then there may be an ambush with the pins. It’s not difficult to solve; you can either weld a bolt to the stud, or sharpen the stud with a file on both sides and turn it out with pliers (idea from Udalilsya). Everything turned out for us without any problems!
3) Now we take a grinder or a file and sharpen the engine block for the upper mounting of the bracket (the bolt to the left of the distributor, if they are located at the driver’s fender). On the block the tide has a round shape, but we reduce it to a rectangular shape!
4) We attach the generator mounting bracket 21214-3701650 to our massive structure:
This is where the first problems appear; the bracket 214 of the generator should not rest against the outlet fitting of the fuel pump. On the KIT bracket there are three installation positions for the bracket from the 214 generator:
- We chose the middle one, other options are possible: - top (requires a 1375 mm belt);
- — lower (replacement of the fuel pump with 2108 is required).
- 5) Attach the bracket to the engine block.
6) Disconnect the “-” from the battery, remove the belt from the generator, disconnect the wires from the old generator. We unravel the braid of wiring from the lower generator to the level of the battery itself and the electrics. wiper motor (this length was enough for me to reach the upper generator) We pack the wiring in corrugated:
7) Install the generator on the upper bracket, put on the belt. We check the alignment of the pulleys. If necessary, adjust the position of the bracket from the 214 generator. Install the tension bar. Let's tighten the generator belt!
We connect the wires, start the engine, check the voltage! (we didn’t succeed the first time due to a defective relay-regulator.
9) We inspect the engine compartment for the presence of jambs, making sure that they are absent, close the hood.
Niva is ready for new adventures!
04.02.13.
Alternator bracket diagram for VAZ 21213 (carburetor)
The author of the drawing made a bracket from a piece of metal 80x80 mm, 4 mm thick. The upper adjustment bar for the generator is borrowed from the Volga. It was cut in place and a new 8.5 mm mounting hole was drilled.
VAZ 2110 crankshaft pulley, GAZ 3110 pump pulley, 6RK1290 belt. A standard cooling fan is installed on the pump pulley. The location of the generator is top left. The lower mounting point of the fuel pump, at the front we attach it to a standard stud and bolt, and at the top there is an M8 cylinder head bolt. The lower long generator mounting bolt with an engraver and an additional locknut.
Another bracket drawing provides for a belt measuring 1375 mm. You will need to modify the plane on the head in the area of the M8 bolt with an angle grinder, and also change the studs and bolts securing the front cover.
Features of installing the bracket in the video:
Device Description
Start the engine, let it run for a few minutes, then, pressing the gas pedal, bring the crankshaft speed to 3000 rpm. Turn on the high beam headlights, heated rear window, and heater fan.
Measure the voltage at the battery terminals, which should be above 13.2 V for generator 9412.3701 and 13.6 V for generator 371.3701.
If this is not the case, the voltage regulator with the brush assembly, the generator windings are faulty (open or shorted) or the contact rings of the field winding are oxidized.
The removed voltage regulator of the generator 9412.3701 can be checked by connecting a lamp (1–5 W, 12 V) between the brushes, and a power source to the “D” and “ground” terminals (DC only, “minus” to ground!) , initially with a voltage of 12 V, and then 15–16 V.
In the first case, the lamp should be on, in the second - not. If the lamp lights up in both cases, there is a breakdown in the regulator; if it doesn’t light up, there is a break or broken contact between the brushes and the regulator terminals. In both cases the regulator should be replaced. To check the generator regulator 371.3701, the current source should be connected to terminals “B” and “C” (“plus”) and “ground” (“minus”).
Connect the “plus” of the battery through a lamp (1–5 W, 12 V) to terminal “B” of the generator 9412.3701 (to terminal “30” of the generator 371.3701), and the “minus” to its body.
If the lamp is on, then there is a short circuit in both the block of “positive” and the block of “negative” valves.
To check the short circuit in the “positive” valves, connect the “plus” of the battery through a lamp to the “B” terminal of the generator 9412.3701 (with the “30” terminal of the 371.3701 generator), and the “minus” - to the terminal of one of the phase windings of the stator. If the lamp is on, one or more positive valves are broken.
To check the short circuit in the “negative” valves, connect the “plus” of the battery through a lamp to the terminal of one of the phase windings of the stator, and the “minus” to the generator housing. If the lamp is on, one or more negative valves are broken or the stator windings are shorted to the generator housing.
To prevent short-circuiting of the windings, remove the generator from the car and, having disconnected the windings from the voltage regulator and rectifier unit, check their short circuit to ground with a lamp or ohmmeter. The generator valves can also be checked with an ohmmeter without connecting the battery and test lamp.
The short circuit of additional diodes can be checked by connecting the “plus” of the battery through a lamp to terminal “D” of the generator 9412.3701 (to terminal “61” of the generator 371.3701), and the “minus” - to the terminal of one of the phase windings of the stator (to one of the mounting bolts of the rectifier block ). If the lamp is on, one or more additional diodes are broken.
A break in the additional valves can be determined by the low voltage at plug “D” of generator 9412.3701 or plug “61” of generator 371.
3701 (below 14 V) at low and medium generator rotor speeds.
The serviceability of each diode (main or additional) can only be determined with a removed rectifier unit using an ohmmeter or a test lamp. If the rectifier unit fails, it is recommended to replace it as an assembly.
It is possible to replace individual valves, but the main valves will require repressing them in the holder - an operation that requires care and skill.
On Niva 21214 cars there is a generator of type 9412.3701, on VAZ 21213 - type 371.3701, on Niva Chevrolet there is a generator 2123. All of them are alternating current electric machines with electromagnetic excitation, having a built-in rectifier unit with silicon diodes and an electronic voltage regulator. The maximum current produced by the generator unit type 9412.3701 is 80 A, voltage - 13.2 - 14.7 V, rotation - right.
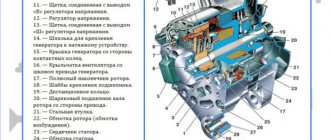
Design of unit 21214
The stator has a 3-phase winding, one of the ends of which is connected to a rectifier unit consisting of 6 diodes. Of these, 3 diodes are negative, 3 are positive. According to the polarity, they are pressed into the plates. The entire structure consists of a rectifier unit, which is located on the back cover of the generator unit covered with a protective casing.
The design of the unit also includes contact rings and brushes. On the back side of the back cover there is a brush holder, which is structurally connected to the voltage regulator. The rectifier contains a capacitor that protects the electrical network from power surges.
The “B” terminal of the generator set must be connected to the positive terminal of the battery, and the negative terminal of the battery to the vehicle ground. If the connection is incorrect, this will lead to breakdown of the diodes.
Generator Niva 21214
Dismantling and connecting the generator on Niva 2121: step-by-step instructions
Device Description
On Niva 21214 cars there is a generator of type 9412.3701, on VAZ 21213 - type 371.3701, on Niva Chevrolet there is a generator 2123. All of them are alternating current electric machines with electromagnetic excitation, having a built-in rectifier unit with silicon diodes and an electronic voltage regulator. The maximum current produced by the generator unit type 9412.3701 is 80 A, voltage - 13.2 - 14.7 V, rotation - right.
Design of unit 21214
The unit covers are attached to the stator using 4 bolts. The covers have bearings installed. They rotate the rotor shaft. In the front bearing, the inner race is clamped with a nut along with a thrust ring and washer. The 2nd bearing is also pressed into the back cover.
The stator has a 3-phase winding, one of the ends of which is connected to a rectifier unit consisting of 6 diodes. Of these, 3 diodes are negative, 3 are positive. According to the polarity, they are pressed into the plates. The entire structure consists of a rectifier unit, which is located on the back cover of the generator unit covered with a protective casing.
The design of the unit also includes contact rings and brushes. On the back side of the back cover there is a brush holder, which is structurally connected to the voltage regulator. The rectifier contains a capacitor that protects the electrical network from power surges.
Basic malfunctions and ways to eliminate them
Checking the health of the unit is done using a multimeter. After the engine is started, the voltage at the battery terminals should be 13.6 V. If the value is higher or lower, this indicates a break or short circuit of the windings, oxidation of the slip rings, a malfunction in the brush assembly, or voltage regulator.
The generator unit may not work well due to weak belt tension or its breakage. In this case, you need to adjust the tension or replace the belt. Faulty voltage regulator, needs to be replaced. If a breakdown, short circuit, or damage to the rotor windings is detected, it should be replaced. If there is a break or short circuit in the stator windings, it requires replacement. If the diodes are damaged, the rectifier unit is replaced.
Nuances of moving a generator
The disadvantage of domestic Niva SUVs is the location of the generator unit - at the bottom of the engine compartment. It constantly gets contaminated when driving off-road, and coolant constantly drips. The problem is solved by moving the generator upstairs (the author of the video is SARTANETS).
To transfer, you will need a set of keys, a bracket, mounting bolts, and a V-belt. You can make a generator transfer bracket with your own hands according to the drawing below.
Drawing of a homemade bracket
Sequence of actions during transfer:
- We dismantle the propeller, pump and remove the belt.
- By unscrewing the standard bracket, you can remove the generator.
- We cut off the bead around the side of the cylinder head and on the cylinder block.
- Then you should unscrew the two bolts and two studs.
- Next, the assembly is installed on a new bracket and final assembly is performed.
Thus, moving the generator unit upstairs is not difficult.
Guide to removing and connecting the generator
To remove the unit, you need to prepare a set of tools: keys “10” and “19”, ratchets with heads, a hammer and a small extension.
The process consists of the following steps:
- First of all, remove the negative terminal from the battery.
- Next, you need to remove the engine protection and the right mudguard.
- Then, using a hammer, carefully knock out the mounting bolt and remove it.
- At the next stage, you need to disconnect all the wires going to the generator: the plug and the wires secured with a nut.
- Then the fastening on which the belt tensioner is located is unscrewed.
- By removing the belt, the assembly can be dismantled through the hole that was formed after removing the protection.
- After replacement or repair, install the unit in reverse order.
Price issue
The VAZ 21214 generator has good repairability, which allows you to significantly save money if worn or broken parts are replaced in a timely manner.
If you change the complete unit, the cost of replacement will be as follows:
- generator 21214 – 3125 rub.;
- lower mount – 133 RUR;
- fastening bolt - 53 rub.;
- tension bar - 55 rub.;
- relay RS-527 – 57 rub.
Fastening drawing
The drawing suggests moving the generator to the place of the hydraulic booster. To do this, you need to make a bracket and install it next to the power steering. You need to select washers for the bracket ears in advance.
This option uses a belt with a size of 1220 mm. It is important that the angle of its wedge must be exactly 40 degrees. An excellent solution would be to buy a belt with ZIL 157. The return hose has a center length of 1115 millimeters, and the high-pressure pressure hoses are 1450 mm.
Check all dimensions carefully, remember the saying: measure 7 times, cut once, there is no need for mistakes here. There is no standard hole for these hoses in the right casing, so you will have to take it and cut it yourself.
The bracket itself for moving the device upstairs is made according to this drawing:
Click to enlarge
How to replace power steering fluid in a Chevrolet Niva
The power steering system itself is a Chevrolet Niva hydraulic system, part of the steering mechanism to make it easier to turn the steering wheel and set the trajectory. If the power steering fails, it is possible to drive the car, but the steering wheel will be difficult to turn and will become heavy.
The power steering fluid level in a Chevrolet Niva can be determined by the marks on the plastic power steering expansion tank.
During operation, Chevrolet Niva power steering fluid can leak in various places, most often through hoses. As a result, the power steering oil level will drop.
Driving without fluid in the Chevrolet Niva's power steering puts you at risk of breaking the power steering pump, which costs a lot of money, since it will run dry. As a result, it will suffer serious damage and fail. The power steering pump in the Chevrolet Niva starts working as soon as you start the car. If your Chevrolet Niva is left without oil in the power steering system, then the best solution is to call a tow truck.
Intensive use of the Chevrolet Niva makes the color of the power steering oil darker over time, often with a burning smell.
This is a reason to think about replacing it. Overheating of the oil often occurs when the steering wheel is held in the extreme position for a long time, until it boils; the pressure in this case is maximum. You should also not leave your car parked for a long time with the steering wheel turned all the way.
Quick prevention and inspection of Chevrolet Niva power steering includes:
monitoring the power steering oil level and its quality in the power steering expansion tank, checking the tension of the drive belt on the Chevrolet Niva power steering pump, assessing the condition of the hoses - cracks, leaks, fogging, as well as searching for leaks at the joints of power steering elements.
There are two ways to replace the fluid in the Chevrolet Niva power steering:
- partial replacement of power steering fluid for Chevrolet Niva.
- complete replacement of power steering fluid for Chevrolet Niva.
To partially replace the power steering oil, you will need a syringe (with a tube) and the oil itself, enough so that at the end of the work it will no longer be dark.
Partial replacement of power steering fluid in Chevrolet Niva:
- Unscrew the cap of the Chevrolet Niva power steering expansion tank.
- Using a syringe with a tube, completely pump out the fluid from the power steering reservoir.
- Fill the reservoir with new fluid to the MAX level.
- We start the engine and turn the steering wheel left and right to the extreme position.
- We turn off the engine and repeat step No. 1 again until we get the required result - light oil.
The following method for changing power steering oil in a Chevrolet Niva will allow you to achieve almost 100% replacement.
Complete replacement of power steering fluid in Chevrolet Niva:
Operating principle of the hydraulic control system
In the video below you can watch how a self-installed power steering works (the author of the video is Vladislav Mantula).
Reg.: 04/07/2005 Topics / Messages: 8 / 439 From: Moscow Age: 20 Car: 21213 2000
What is preferable and why, if you do not pay attention to the difference in price?
Reg.: 02.02.2005 Topics / Messages: 16 / 769 From: Moscow, Chertanovo. Age: 57 Car: 2121395
If I didn’t feel sorry for the money on my old lady, I would definitely install an EUR, as it seems to me more reliable and much easier to install.
Reg.: 07.28.2005 Topics / Messages: 1 / 2646 From: Ivanovo Age: 43 Car: Nivka2121. g.v. worn-out 1.9i and other minor tuning Murzik MV 300TD 1993
Reg.: 12/06/2004 Topics / Messages: 628 / 51730
rdoctor: Power steering, unlike electric power steering, dampens the transmission of impacts from the wheels to the steering wheel - when hitting a pothole at speed, the steering wheel will not be torn out of your hands. Actually, this is the main (and perhaps the only) plus of the power steering. The power steering uses a standard steering gearbox. With a booster, you will be spinning the wheels more often on a stationary car, which will shorten the life of the standard RR. The power steering comes with its own gearbox.
As for the rest, the EUR has only advantages. Price, ease of installation. And the fact that if the power steering malfunctions, you will simply get a standard steering wheel, and not a steering wheel that can barely be turned (although we have never heard of malfunctions in our power steering).
But the question is... Does our Nivsky power steering change the force on the steering wheel depending on the speed, or not? I want the steering wheel to stiffen as the speed increases, and not remain weak. As far as I understand, the power steering monitors the speed (does it really load the steering wheel as it increases?) And the power steering? Is he just unloading? Or does it still track? (how does it track, by the way, if it does track?)
People, let me know who installed the Nivo EUR, how is it in terms of quality? I want to buy it, it’s cheaper than the Priorovsky one and the lock, the steering wheel and steering columns don’t need to be changed, everything is original. The only difference is that the Priorovsky one has height adjustment.
How does power steering work? Its main element is a pump, which, using a belt from the crankshaft, sucks in oil and pumps it into the distributor. The latter, in turn, monitors the force applied to the steering wheel and, using a torsion bar (follower device), helps turn the drive wheels. When moving in a straight line, the torsion bar does not twist, so the distributor channels are blocked and the oil drains back into the reservoir.
Power steering is most often useful when parking and turning, making the work of your hands three times easier. We can also say that the mechanism weakens the transmission of microshocks from the road surface to the steering. The mechanism is also useful in case of a sharp drop in tire pressure. The disadvantages of power steering include the fact that it interferes with “feeling the car”, so designers need to achieve a compromise between informativeness and tightness of the steering wheel.
Foreign manufacturers conduct a lot of research in order to make the hydraulic booster light at low speeds and elastic at high speeds. To do this, German hydraulic boosters from ZF are equipped with pressure modulators, which limit the oil pressure in the operating circuit as speed increases. In addition, circuits with power steering driven by an electric motor are acceptable, which makes it possible to change the pump performance in accordance with the rotation of the electric drive. Sometimes the gear ratio is also changed.
Dismantling and connecting the generator on Niva 2121: step-by-step instructions
On Niva 21214 cars there is a generator of type 9412.3701, on VAZ 21213 - type 371.3701, on Niva Chevrolet there is a generator 2123.
All of them are alternating current electric machines with electromagnetic excitation, having a built-in rectifier unit with silicon diodes and an electronic voltage regulator.
The maximum current produced by the generator unit type 9412.3701 is 80 A, voltage - 13.2 - 14.7 V, rotation - right.
Design of unit 21214
The unit covers are attached to the stator using 4 bolts. The covers have bearings installed. They rotate the rotor shaft. In the front bearing, the inner race is clamped with a nut along with a thrust ring and washer. The 2nd bearing is also pressed into the back cover.
The stator has a 3-phase winding, one of the ends of which is connected to a rectifier unit consisting of 6 diodes. Of these, 3 diodes are negative, 3 are positive. According to the polarity, they are pressed into the plates. The entire structure consists of a rectifier unit, which is located on the back cover of the generator unit covered with a protective casing.
The design of the unit also includes contact rings and brushes. On the back side of the back cover there is a brush holder, which is structurally connected to the voltage regulator. The rectifier contains a capacitor that protects the electrical network from power surges.
Basic malfunctions and ways to eliminate them
Checking the health of the unit is done using a multimeter. After the engine is started, the voltage at the battery terminals should be 13.6 V. If the value is higher or lower, this indicates a break or short circuit of the windings, oxidation of the slip rings, a malfunction in the brush assembly, or voltage regulator.
The generator unit may not work well due to weak belt tension or its breakage. In this case, you need to adjust the tension or replace the belt. Faulty voltage regulator, needs to be replaced.
If a breakdown, short circuit, or damage to the rotor windings is detected, it should be replaced. If there is a break or short circuit in the stator windings, it requires replacement. If the diodes are damaged, the rectifier unit is replaced.
Nuances of moving a generator
The disadvantage of domestic Niva SUVs is the location of the generator unit - at the bottom of the engine compartment. It constantly gets contaminated when driving off-road, and coolant constantly drips. The problem is solved by moving the generator upstairs (the author of the video is SARTANETS).
To transfer, you will need a set of keys, a bracket, mounting bolts, and a V-belt. You can make a generator transfer bracket with your own hands according to the drawing below.
Drawing of a homemade bracket
Sequence of actions during transfer:
- We dismantle the propeller, pump and remove the belt.
- By unscrewing the standard bracket, you can remove the generator.
- We cut off the bead around the side of the cylinder head and on the cylinder block.
- Then you should unscrew the two bolts and two studs.
- Next, the assembly is installed on a new bracket and final assembly is performed.
1. Schematic illustration of unscrewing the fastening material2. Car with belt removed3. The unit is in a new location
Thus, moving the generator unit upstairs is not difficult.
Guide to removing and connecting the generator
To remove the unit, you need to prepare a set of tools: keys “10” and “19”, ratchets with heads, a hammer and a small extension.
The process consists of the following steps:
- First of all, remove the negative terminal from the battery.
- Next, you need to remove the engine protection and the right mudguard.
- Then, using a hammer, carefully knock out the mounting bolt and remove it.
- At the next stage, you need to disconnect all the wires going to the generator: the plug and the wires secured with a nut.
- Then the fastening on which the belt tensioner is located is unscrewed.
- By removing the belt, the assembly can be dismantled through the hole that was formed after removing the protection.
- After replacement or repair, install the unit in reverse order.
Electrical connection diagram
Price issue
The VAZ 21214 generator has good repairability, which allows you to significantly save money if worn or broken parts are replaced in a timely manner.
If you change the complete unit, the cost of replacement will be as follows:
- generator 21214 – 3125 rub.;
- lower mount – 133 RUR;
- fastening bolt - 53 rub.;
- tension bar - 55 rub.;
- relay RS-527 – 57 rub.
Nuances of moving a generator
The disadvantage of domestic Niva SUVs is the location of the generator unit - at the bottom of the engine compartment. It constantly gets contaminated when driving off-road, and coolant constantly drips. The problem is solved by moving the generator upstairs (the author of the video is SARTANETS).
To transfer, you will need a set of keys, a bracket, mounting bolts, and a V-belt. You can make a generator transfer bracket with your own hands according to the drawing below.
Drawing of a homemade bracket
Sequence of actions during transfer:
- We dismantle the propeller, pump and remove the belt.
- By unscrewing the standard bracket, you can remove the generator.
- We cut off the bead around the side of the cylinder head and on the cylinder block.
- Then you should unscrew the two bolts and two studs.
- Next, the assembly is installed on a new bracket and final assembly is performed.
Thus, moving the generator unit upstairs is not difficult.
Guide to removing and connecting the generator
To remove the unit, you need to prepare a set of tools: keys “10” and “19”, ratchets with heads, a hammer and a small extension.
The process consists of the following steps:
- First of all, remove the negative terminal from the battery.
- Next, you need to remove the engine protection and the right mudguard.
- Then, using a hammer, carefully knock out the mounting bolt and remove it.
- At the next stage, you need to disconnect all the wires going to the generator: the plug and the wires secured with a nut.
- Then the fastening on which the belt tensioner is located is unscrewed.
- By removing the belt, the assembly can be dismantled through the hole that was formed after removing the protection.
- After replacement or repair, install the unit in reverse order.
Electrical connection diagram
Price issue
The VAZ 21214 generator has good repairability, which allows you to significantly save money if worn or broken parts are replaced in a timely manner.
If you change the complete unit, the cost of replacement will be as follows:
- generator 21214 – 3125 rub.;
- lower mount – 133 RUR;
- fastening bolt - 53 rub.;
- tension bar - 55 rub.;
- relay RS-527 – 57 rub.
Total: 3423 rub.
Loading …
Scheme of moving the generator upstairs in Niva VAZ-21213
The Niva has excellent cross-country ability and can compete with many modern foreign-made jeeps. However, due to such a significant drawback, most owners of these cars experience significant inconvenience, and therefore decide to improve this vehicle. This can be done by moving the generator upward. The fact is that during testing of the VAZ-21213 for cross-country ability, sand, dirt, stones and water may enter the generator. However, there is another, quite significant drawback - coolant constantly gets onto the generator. This problem can be solved by using the above method. But how to do it right?
It should be understood that if you use your VAZ-21213 in most cases for trips around the city or on the highway, then there is no need to move the generator. But if the Niva is used for off-road driving, then you simply cannot do without it.
Characteristics of the standard generator
The main characteristics of the generator installed by the manufacturer in Niva 21214, 21213, 2121 will be considered using the example of generator type 9412.3701:
- current – 80A;
- voltage – 13.2 V,
- rotation is right.
The cost of standard models of electric generators is 5-7 thousand rubles. If the unit breaks down, it is possible to replace its components or completely replace it with the original or analogues. The prices of the most common ones are presented in the table.
| Analogue | vendor code | Cost, in rubles |
| Generator VAZ-2104-21073,21214 | 9412.3701-03 | 5900 |
| Generator VAZ-2104-21073,21214 | 372.3701-03/05 | 3800 |
| Generator VAZ 2121-21213,21214 | 9412.3701 | 5450 |
The table shows that in the process of replacing a generator on a Niva, you can give preference to a cheaper universal analogue.
| Analogue | vendor code | Cost, in rubles |
| Generator VAZ-2104-21073,21214 | 9412.3701-03 | 5900 |
| Generator VAZ-2104-21073,21214 | 372.3701-03/05 | 3800 |
| Generator VAZ 2121-21213,21214 | 9412.3701 | 5450 |
Should I install a more powerful current generation unit?
We have already described above why the unit wears out quickly. An excellent solution is to install a new generator. Another common reason is the installation of off-site equipment that consumes a lot of electricity. The current strength of a standard unit is not always enough, so you should think about installing a more powerful generator.
The model depends on the year of manufacture of the car and engine. For example, the first Nivas with a 1.6 power plant have a device with a remote regulator, which was used in the “classics”. In more modern machines the regulator is already built-in.
If you want to buy an aftermarket unit, it would be wise to get a 2003 model year Chevrolet. The selection must be made according to the catalog numbers and parameters that are present in this table:
If you can modify the mounts yourself, then the list of available generators can expand significantly. Craftsmen even install devices from foreign cars.
In any case, you should strive to modernize and improve your car. And this applies not only to electricity. The Niva is a reliable SUV, but it lags far behind its foreign competitors in terms of comfort. You can move on to this issue immediately after improving the technical component of the car.
Replacing and tensioning the VAZ 2121 alternator belt with your own hands
Suspension lift Niva 21214 do-it-yourself drawing
Replacing alternator belt rollers on Niva Chevrolet
Alternator belt tension VAZ 21214 injector
We check the belt tension by its deflection between the pulleys of the units. 1. With normal belt tension, its deflection under a force of 98N (10 kgf) should be 10–15 mm between the pump pulleys and the generator
2
. . or 12–17 mm between the pump and crankshaft pulleys. We adjust the belt tension by shifting the generator (with its fastening nuts loosened): from the engine to increase the tension or to the engine to decrease the tension.3. To replace the belt, loosen the nut securing the generator to the tension bar with the “17” head on the carburetor engine.4. . or a “13” head - on an injection engine. We move the generator towards the cylinder block to loosen the belt tension.5. We move the generator, acting on it with a screwdriver as a lever in the slot of the tension bar:
on a carburetor engine;
6. on a VAZ-21214 engine.
Install the belt in reverse order. Turn the crankshaft clockwise two turns and check the belt tension. Excessive belt tension causes increased loads on the generator and pump bearings.
The original alternator belt on a VAZ 2121 can serve the driver for about 100 thousand kilometers on domestic roads, such messages came from many owners of the people's favorite. But it is not always possible to find an original alternator belt on the automobile market; the problem is that sellers tend to deceive gullible customers and the service life of the basement belt can be reduced by 2-3 times. Today we will tell you how to replace the alternator belt on a Niva with your own hands in a garage.
When you already have a new alternator belt in your hands, you need to prepare a 17-mm open-end wrench and a convenient place for repairs. As people say, I'll leave this video here.
Video. DIY alternator and drive belt replacement
1. The image shows how to properly loosen the alternator belt tensioner nut.
2. When the nut is slightly loosened, you need to move the car's alternator to the side to have good access to the belt. The arrow in which direction you need to move the generator is shown in the photo.
3. Remove the belt from the pump pulley, see the image for more details.
4. The alternator belt has been completely removed, now you can begin installing a new one.
The cost of a new belt is about 100 rubles. We carry out the installation in the reverse order, also do not forget about tensioning the alternator belt, you can watch the video above about this operation.
Insufficient tension on the alternator belt can also lead to its failure. If the belt slips, its full effectiveness is not used. And as we know, this particular part is the connecting link between the generator and the battery, which transfers energy from one unit to another. In simple words, if the belt is not fully used, the battery charge drops.
If you suddenly hear an incomprehensible whistle coming from under the hood of your vehicle, you should know that water has gotten onto the stretched alternator belt. This means that you need to replace it and tighten it well. To do this, you will need a 17mm ratchet wrench and a 19mm socket wrench.
How to tighten the VAZ 2121 alternator belt
1. Open the hood and unscrew the nut that secures the generator and tensioner plate.
2. Do not loosen the fastening nut too much.
3. Now you can tighten the belt. This is done like this: grab the tensioner nut with your hand and move the generator down. If you move it up, the belt, on the contrary, will loosen.
4. When the correct position is found, tighten the tensioner nut. 5. Tighten the bottom bolt and start the engine. If you hear extraneous noises or see that the belt is slipping, you need to repeat the procedure.
6. Testing must be carried out with the maximum number of electrical appliances turned on. 7. If in this case the battery produces at least 13 Volts, then everything is done correctly.
Many drivers overdo it and tighten the belt too much, forgetting that this can lead to bad consequences. Among them are belt stretching and, as a result, slippage and bearing wear.
Pay close attention to your car and pay attention to extraneous sounds. Let's remember that in the previous article we talked about
Mounting drawings for injection Lada 4×4 with power steering (VAZ 21214)
The author of the design proposes to move the generator to the place of the power steering, having previously installed the following bracket in its place:
Belt 1220 mm profile “A” (ZIL157), wedge angle 40 degrees. High pressure pressure hoses have a length at the centers of the fitting holes of 1450 mm. Return sleeve - 1115 mm. You will have to cut a hole for the hoses in the right protective casing. The belt is 710 mm long, other dimensions are the same. The photo on the left shows the hydraulic pump bracket, on the right - the power steering in the new place.
Turn the power steering pump upside down. Result of moving the generator to the top:
There are ready-made kits for moving the Lada 4×4 generator upwards on sale, but the price for a piece of iron can be greatly inflated. Thus, by making such a bracket ourselves, we extend the service life of the generator and save money.
Have you ever encountered such a modification? How did you solve a similar problem? Let us remind you that in another article we determine whether the Lada 4×4 needs a more powerful generator.
Keywords: 4x4 generator
Share on social networks:
Found an error? Select it and press Ctrl+Enter..
Source
