Hello again! As usual, new interesting notes regularly appear on the pages of my blog that relate to everything related to cars, as well as other useful information for drivers. We have already paid attention to polishing work: this includes polishing headlights at home and making your own polish, since it is desirable to maintain the body and other exterior elements in an attractive condition. An equally important role in creating an impression is played by car tires and rims. Let's see what polishing discs with your own hands is and what effect it brings.
Grinding Methods
Before you start polishing, you must, of course, get rid of all the flaws on the discs, and this can only be done by grinding using abrasive materials.
The most popular among car enthusiasts is the diamond groove offered by tire services that use special high-precision equipment with program control that ensures high quality of work performed.
You can polish the discs yourself. Doing this manually is very labor-intensive, so everyone tries to use improvised tools that can rotate attachments with sandpaper: electric drills, pneumatic tools, etc.
To speed up the grinding process, some talented people assemble special machines that can rotate disks fixed in them and, during the rotation process, grind them using a drill. This speeds up the work significantly.
To impart rotation, many people use their own car - jack up the wheels, put the car on jacks, turn on the engine and grind the discs as they rotate.
Types and features of wheel rims: stamped and not only
When you decide to polish yourself, study the types of car wheels, because for each type there are rules and costs.
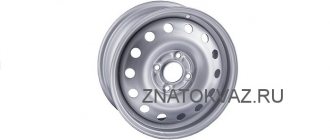
Stamped wheels are a common type of “shoes” for cars. They gained popularity due to their low price, 1000-1500 rubles. More often, stamped ones are “native” to the car, and drivers are in no hurry to change for others. And there’s no point in that, because these ones won’t split when they fall into a hole, but will crumple, as a result of which they can be repaired without any problems
The disadvantage of this type is its weight, unlike forged and cast analogues. Also, the lack of variety in appearance is a disadvantage. But this problem can be easily overcome with the help of wheel covers, which will change the appearance of the car.
Cast
Cast ones differ from stamped ones in their lightness, because while the former are steel, the cast ones are aluminum. The second advantage of this material is thermal conductivity, which helps remove heat from the brake mechanisms. The technology for manufacturing alloy wheels allows you to create any shape, which is why car owners love them.
But there are also disadvantages. If the discs fall into a hole, they will crack, and it is impossible to restore them, only replace them by purchasing one for 4000-5000 rubles. Despite this, the cast material has many supporters among drivers.
Forged
Automotive forged wheels combine the advantages of the first two types. Despite their lightness, forged ones are durable and do not split if they fall into a hole. But there is also a minus here. Due to its strength, the load is transferred to the suspension, so getting into holes with a forged version is fraught with serious damage.
Forging is a very durable invention and is very popular
They do not differ in variety of appearance, but the price is maintained at the level of 3000-4000 rubles.
But no matter what choice you make, over time you will need to polish the wheels, and we’ll figure out how to do it yourself further.
What you need for polishing
To protect them from the effects of precipitation, all discs are coated under production conditions with protective paints or varnishes, which, after drying, acquire strength equivalent to the hardness of metal. Removing the coating by stripping is a very labor-intensive task, so special removers for paint and varnish are used.
In addition to the paint cleaning agent and the above tools, and polishing machines, you will need:
- attachments for grinding and polishing,
- sandpaper of different grits from P240 to P1200,
- GOI paste of different grain sizes,
- polish,
- protective varnish,
- fabric and rubber gloves,
- respirator or gas mask.
Preparatory stage
Polishing aluminum wheels begins with cleaning. Factory wheels are covered with a special varnish film. When it dries, it changes and hardens. It is impossible to remove these residues physically; they resort to chemical paint removal. When buying a remover, ask clearly what tasks it is for and what components are included in it. This chemical can be toxic and unusable, especially if the disc is powder coated. It is advisable to use varnish remover. It is important to pay attention to removing the remaining liquid itself - it can cause corrosion. And the rest of the dirt should go away. Pay attention to disc wear. The quality of processing of a damaged disc with a bent rim will be questionable.
How to polish wheels yourself
The disassembled discs are cleaned of dirt, the paintwork is removed with a wash and the degree of their damage is determined.
It should be noted that such solvents are very toxic and you need to work with them outside or in a well-ventilated area, protecting your hands with rubber gloves and wearing a respirator. After removing the paint, the discs must be washed with water.
Depending on how deep the scratches are on the discs, the sandpaper grit is selected - for minor damage, P1000 is also suitable.
Many car enthusiasts found grinding using their car to be the simplest and most effective method. Having installed the disk on the axle of the raised car and turning on the engine in 4th-5th gear, grind it while rotating, applying sandpaper to it. It is necessary to take into account that the disc will heat up, so the abrasive will need to be periodically dipped in water.
As you remove deep scratches, you need to switch to abrasives with a smaller grain size, and before doing this, carefully clean the disc with a cloth from dust and remnants of the previous sandpaper - this will prevent the appearance of new scratches. The result of the work of smaller grains should be the removal of grooves from large ones. During the grinding process, 3-4 such transitions will be needed. You should not overdo it with sanding, especially when using coarse sandpaper, otherwise you can change the profile of the disc.
Since during this work a significant amount of powdery dust is formed, consisting of metal particles and sand, it is necessary to think about personal safety measures: work only with gloves, safety glasses and a respirator.
After removing the scratches, you can proceed directly to polishing. If the machine will continue to be used, the engine must be switched to 3rd gear. Next, apply GOI paste to a piece of felt and rub it into the surface of the disk. Since it is very thick, it is preheated or dissolved in gasoline.
You need to start, as when polishing, with a coarse-grained paste and, as the color changes during the polishing process, switch to a fine-grained paste (they differ in color - the fine-grained one is darker). The result of this work should be a mirror-like shine of the disks. It ends by removing any remaining product with a clean cloth. To preserve the results of your work for a long time, the discs must be coated with a protective polish, or even better, a protective varnish, which has a longer shelf life.
Precautions and Tips
Any human activity, if not handled carefully, can cause a lot of trouble. To prevent this, take care to ensure health safety and perform the job correctly.
- Before you start polishing, take care to protect your skin: wear gloves and a mask that covers your face, because most polishes and varnish for aluminum wheels are toxic;
- You should not use maximum effort to remove defects. Light pressure on the polishing cloth is enough;
- Do not allow the surface to overheat - grinding the discs is carried out at a slow pace by hand and at low speeds when using a grinding machine;
- Before purchasing a polish, make sure that it does not contain anhydrous ammonia or acids. If they are present, the use of polish will lead to corrosion;
- If it is not possible to remove the wheels, it is better to polish them manually so as not to touch the machine on any foreign surface of the car.
In addition, there are little tricks that will simplify the work.
- Polishing discs to a mirror shine with your own hands will go faster if, using GOI paste, you heat it up or dilute it in kerosene;
- Don't have a sander? No problem - use an ordinary drill at low speeds;
- Deep scratches can be removed with a file, and marks from the curb can be cut off with a grinder;
- Do-it-yourself grinding of brake discs in hard-to-reach places will go faster when done by hand, and to get into grooves or threads that cannot be polished with a machine, use a toothbrush with a polishing cloth wrapped around it;
- Instead of polish, buy regular toothpaste;
- Primer treatment will serve as an additional protective layer;
- The varnish will lay down in an even layer if you spray it from the can in a circular motion;
- Weekly washing of discs with special protective shampoos will help maintain the polishing effect;
The mirror polishing of the discs is complete. Now admire the reflection of puddles in the shiny surface and don’t be afraid of possible damage on the road. Remember to repeat the procedure every season or every 6 months.
Source krasimavtomobil.ru
How to give your car's rims a mirror look without buying new ones? With the help of polishing, of course!
But we want to warn all the lazy people that this will take more than one hour, and you will need a lot of strength. So if you haven't decided to shell out for new rims yet, then be patient! After all, you will have to work with both dust from abrasives and fumes from chemical pastes and paint and varnish solvents.
Toothbrush
Once you have prepared the cleaning mixture, take a soft bristle brush soaked in water (you can use an old toothbrush) and begin cleaning the surface of the wheel, inside the spokes and around the nuts. Thanks to the length and small head of the toothbrush, you can reach even hard-to-reach places. If the wheel begins to dry out, add more water to the cleaner. Otherwise, you risk scratching the surface.
Wheel bolt wells do not need to be cleaned with soft brushes. On the contrary, it is better to use a universal cleaner and stiffer bristles. Wheel wells always collect plaque and dirt, so it's best to use a brush with firm bristles and a long handle that will allow deep penetration into the hole.
After brushing the wheel rim, rinse thoroughly and wipe it with a clean cloth to remove any remaining dust. Now that you've removed the dirt and buildup, use a hose to rinse the entire wheel. Direct the water onto the spokes and into the lug nut holes. Let the wheel sit for a few minutes. Once dry, use a clean, lint-free cloth to remove any remaining dirt.
FakeHeader
Comments 44
After putting on the tires and removing the masking tape, were there any traces of glue/smudges left on the rim? I’m just wondering how to protect the polished shelf from damage during tire fitting, so that later I don’t have to worry about polishing it with a napkin!
the glue from the masking tape does not stay on the polish, I always use it
There is zero information, “my sandpapers, my pastes”, well, I felt like writing something like that, don’t call the post “Educational program...”.
You know the community rules, right? If you like the result, I’ll answer all your questions in a personal conversation :)
no, I don’t know, to be honest. where is it written about this?
Cool! Straight 100, do you need the toughest one first? Not 1000, but exactly 100?
I even stop at 600 before polishing; I started removing paint with 100 grit
She's very tough :-)
I need to remove the paint, so I tore it off with it
Oh, what's the matter...and if I just need to polish, there is no paint...which one should I start with?
it turned out very cool. well done
Well, everyone, of course, you got carried away... The result is very good
and I will teach:) 3 years of experience allows you to teach and have your own methodology
You've already started talking like a professor)
Fire! Thanks, Friend, added to bookmarks!
wow, that’s really cool))) how can I polish mine like that and remove traces of the curb...
you need a little patience and desire and I will advise how and with what
And tell me where (in which special stores) is it better to look for foam rubber sandpaper?
It turned out very beautiful...
I probably had to sweat))) cool wheels!)))
The CDs were recently delivered. Which were assembled by crooked installers. The regiment was killed so much that it had to be welded
experience of recent work on monoblock disks - the welding is still visible as a light cloud and there is still a possibility of pores forming in the weld seam. I don’t notice this when welding forged shelves of collapsible disks; they are welded and polished perfectly
It turned out great, it looks completely different!
Finally fire! polishing of course on a machine?
manually it is easy to achieve the result with a rotating drill
It’s more convenient to grind, of course, on a rotating machine or in gear
I polished the shelves that year and achieved a mirror effect, but there is one significant thing! If you do not varnish the shelf after polishing, at the first rain you will understand that your polished aluminum shelf will simply begin to oxidize))) And then Alu Shine will come to your aid)) if you do not treat a polished shelf, it will quickly turn into unusable) Good luck on the roads)
no need to frighten the experienced :) I have 3 years of experience in using polished discs, polishing care is simple: www.romanmers.com/questio…myit-polirovannyie-diski/
besides, the varnish on a polished shelf does not stick and remember about repairability, a polished shelf can always be sanded and polished in case of damage, but if your shelf was varnished, what would you do if it was damaged?
my shelf is not varnished) So a question for those who have it varnished)
Very often, car wheels are one of the first elements of car tuning, as their owners want to emphasize their status and individuality. But no matter how expensive the discs are, sooner or later they become faded and dull. Polishing the discs can help with this problem.
Warnings
- To avoid damage to the hard drive, you need to make sure that the drives are completely dry after polishing and are free of wax or polishing compounds. Only after this can you try to read data from them.
- You should not apply solvent to the surface of CDs, because it can change the chemical composition of the substrate and lead to the appearance of a film, making the disc unreadable.
- Any of the methods for saving disks can lead to further damage to them, so be sure to follow the instructions.
- If you want to turn the disk towards the light to check it for holes in the protection layer, you should try not to look at the light for a very long time. For this, a 60-100 watt lamp is enough to notice the holes in the foil layer. The disk cannot be turned towards the sun.
Waxing
Since this method is the least expensive and completely uncomplicated, more attention should be paid to it. A little wax for car body and wheels should be applied to a clean cloth. This substance repels moisture and dirt and does not allow plaque and dust to penetrate into hard-to-reach places. Metal sealant has a similar effect. It protects not only from dirt, but also from oxidation, but is much more expensive.
Rub the wax over the entire surface of the wheel. Rub it on aluminum spokes and rubber tires. It takes 10-15 minutes for the layer to dry completely. The wax seems to “seal” the texture of the wheel, creating a water-repellent film. In this case, the protective coating is invisible and has no tint.
Once the wax has dried, the surface will become slippery and can be easily wiped off with a clean, dry cloth. Touch the treated disc with your finger – it should remain dry. After polishing, the wheels look shiny.
If you repeat this procedure with wax at least once a week, you will be able to keep your rims looking presentable for much longer. Simply rinse the wheels with water, dry them with a clean cloth, and then apply wax.
Source
