How to remove the pallet on Niva 21213
Lada 4x4 (VAZ-21214): Replacing the oil pan gasket
We replace the gasket when an oil leak is detected at the junction of the crankcase pan and the cylinder block, when tightening the pan mounting bolts cannot eliminate the leak.
We carry out the work on an inspection ditch or overpass.
We remove the mudguards of the engine compartment (see “Removing the mudguards of the engine compartment,” p. 282). Drain the oil from the engine (see “Changing the engine oil and oil filter”, page 18). We unscrew the nuts securing the cushions of the left and right power unit supports to the front suspension cross member brackets (see “Replacing the power unit supports,” p. 97). We unscrew the nuts and bolt securing the front axle gearbox to the suspension brackets of the power unit and the engine cylinder block (see “Removing the front axle gearbox,” p. 191).
Place the adjustable stop under the clutch housing.
. raise the power unit. For fixing the power unit.
. We insert wooden blocks between the support pads and suspension brackets.
. and lower the adjustable stop.
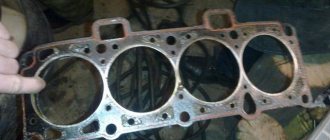
After cleaning the mating surfaces of the cylinder block and oil pan, install a new gasket. We carry out assembly in reverse order.
Removing the engine sump gasket on a VAZ 2121 and Niva 2131 is done to replace it in case of damage, which is accompanied by the presence of oil smudges at the junction of the sump and the engine block. The cause of a leak can be not only its damage, but also deformation of the pan itself, which often occurs as a result of engine overheating. In this article, we will consider the process of replacing the gasket. First of all, you need to try to tighten all the bolts securing the pallet, while observing the cross-to-cross sequence; if this step does not help, then proceed to the repair. First of all, prepare a standard set of tools; the car must be driven into an inspection hole or overpass. Then do the following sequence of actions:
- First of all, you need to drain the oil from the crankcase. It must first be warmed up; to do this, the engine must run for several minutes. Hot oil drains better.
- Next, we dismantle the protection of the oil pan and the engine compartment.
- Loosen the left and right power unit mounts.
- We disconnect the gearbox mount to the brackets of the front axle and the engine block, which will give us the opportunity to slightly raise the power unit and thereby remove the pan.
We place an adjustable stop under the engine, lift it, which allows us to make the previously loosened support fastenings, and insert suitable sized wooden blocks into the gaps between the supports and suspension brackets. Then we lower the adjustable stop, thereby putting the load on the wooden blocks.
- Using a ten-point socket, unscrew all the bolts securing the pan and remove it.
- Next, remove the gasket itself.
- Before installing a new one, thoroughly clean the mating surfaces on the block and pan.
At this point, the repair work to replace the oil pan gasket on the VAZ 2121 and Niva 2131 has been completed. We install the new one in the reverse order.
Remove the pan in the field without removing the engine
Removing the gasket
You will have to drive the car into a pit or use a lift if you have one. The next steps are:
The crankcase protection is removed;
The oil is drained from the engine: the plug is unscrewed from the valve cover on top of the engine so that an air seal does not form. A bucket is placed under the crankcase. On it, from below, unscrew the plug - and take a break in the fresh air while the oil drains; It is quite difficult to turn around for further movements under the bottom, so you will have to raise the engine. To do this, the engine mount mounts are screwed together on both sides. To raise the motor, you need either a cross beam or a hand hoist. Let's assume there is a traverse available. When you unscrew the nut in the center of the tool, the engine rises by 3 centimeters
Important! The studs should not jump out of the bracket; The mounting bolts of the crankcase itself are unscrewed; The pan is picked up with a screwdriver and disconnected from the cylinder block along with the gasket; If there are any stuck rags on the block, they need to be cleaned off. Some repairmen use a knife for this, forgetting that this is how they scratch the block
Lazy, but smart and thrifty, they take something plastic or wooden - whichever is closest and fits in size; Dismantling is complete, we are preparing a new gasket.
How to remove the oil pan on a foreign car
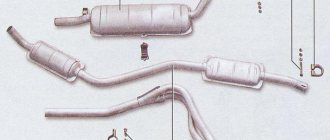
Instructions are provided for the 2003 Mitsubishi Space Star 1.6. In this case, the pan is bolted and located above the muffler. First you need to drain the oil and unscrew the bolts securing the exhaust pipe to the muffler.
Now place a stop under the muffler and remove the rubber bands (usually there are two of them). The stop is necessary to ensure that the lambda probe is not overly stretched and the wires are not damaged.
First you will have to unscrew the gearbox casing, which prevents you from removing the necessary part - you need to remove the casing itself and the plate under it.
Cover that needs to be removed
Next, unscrew the bolts located around the perimeter of the pallet (with a 10-point head), due to which it is held in place.
After this, the tank is still held in place by the sealant. In order for the pan to begin to detach, it is necessary to tap its body with a rubber mallet. If the spare part is not yet worn out, do not hit it too hard, otherwise you may pierce the metal.
Now the part will come off easily
After removal, it is important to check the condition of the oil sump mesh. If there are deposits, the mesh is unscrewed and washed in solvent
It is also important to remove any remaining sealant and then treat the surfaces with a degreaser.
Old and new oil pans
Then everything is put together in reverse order.
In addition to the instructions given, you can also watch a video with step-by-step removal of the pallet:
Stages
The procedure for replacing the cylinder head gasket on a VAZ 2106 consists of the following steps:
- Disconnect the car from power by disconnecting the negative terminal from the battery.
- Drain the coolant into a prepared container.
- Remove the air filter, valve cover, air damper control drive.
- At the next stage, it is necessary to align the timing marks on the camshaft and crankshaft so that you do not have to set the valve timing again during assembly.
- Next, you need to dismantle the carburetor and ignition distributor with high-voltage wires.
- After unscrewing the tensioner cap nut, you should loosen the tension on the timing chain.
- Having loosened the fastening of the gear, it is necessary to dismantle it. Removing the camshaft sprocket
The chain should be tied with wire so that it does not accidentally fall into the motor.
Next you need to remove the bearing housing along with the camshaft. The next step is to disconnect the exhaust manifold from the cylinder head and all pipes. After loosening the clamps, you need to remove the radiator inlet pipe and the thermostat bypass hose. Next, you need to unscrew the cylinder head mounting bolt located next to the ignition distributor. Then you need to unscrew the ten mounting bolts of the cylinder head and dismantle the unit along with the unscrewed bolts. Next you need to remove the old gasket. Before installing a new consumable, it is necessary to thoroughly clean the adjacent surfaces from dirt and remnants of the old gasket. Having degreased the contacting surfaces, you need to install a new consumable.
Installing a new consumable The cylinder head mounting bolts should be tightened using a torque wrench with the tightening torque specified in the VAZ 2106 operating instructions. Next, we reassemble in the reverse order. At the same time, we control the coincidence of the marks and adjust the belt tension. The valves should also be adjusted. After final assembly, you need to check the operation of the engine.
This completes the replacement of the gasket on the VAZ 2106.
Why are oil seals needed and how are they designed?
Engine cylinders need protection from foreign substances entering the combustion chamber. It is the oil seals (or valve stem seals) that play the role of a kind of protector. Their task is to prevent oil from penetrating while the valve stems are operating. If the caps have lost their function, they must be replaced. Otherwise, carbon deposits will begin to appear on the walls of the engine, which will lead to increased oil consumption.
Valve seals have a very simple structure. They consist of only three elements:
- Base. This is the oil seal frame, which is made in the form of a steel bushing. This element ensures the strength of the spare part.
- Spring. It ensures the tightness of the mechanism by pressing the rubber tightly against the valve stem.
- Cap. This is the main element of the device, made of rubber. With its help, excess oil on the rod is eliminated.
Preparation for replacing valve stem seals of VAZ 2106
We will consider replacing valve stem seals on a VAZ 2106 without removing the head, so it will be both easier and more difficult. The simplicity lies in the fact that there is no need to dismantle the head. And the difficulty, which is also logical, is not to drop the valve into the cylinder.
First, unscrew the chain tensioner, then you will need to tighten it. This is necessary so that you can remove the camshaft gear without any obstacles. Next, remove the valve cover and mark the position of the gear on the chain. This is necessary in order not to set marks later. In principle, you don’t have to do this, but it’s easier this way.
Now we unscrew the gear, remove it and secure the chain so that it does not fall into the crankcase. If this happens, you will have to remove the pan, radiator, front cover and then adjust the timing. In general, it’s not very pleasant.
Now remove the camshaft housing. Next, we unscrew the spark plugs to make it easier to rotate the crankshaft. We hold the chain tight and set the piston of the first cylinder to top dead center (TDC). This is why you need a key to rotate the crankshaft. To get exactly to TDC, you need to align the mark on the crankshaft pulley with the last mark on the front cover along the way.
Replacing the oil pan gasket on a VAZ 2110 with your own hands
Actually, why is this crankcase gasket necessary? The “tens” engine includes many units, components and systems. The crankcase is the engine body and plays a vital role. After all, it is it that contains all the main elements of the engine inside itself and provides them with the necessary protection and allows oil to circulate.
Main reasons for replacement
In fact, replacing the oil pan gasket on a VAZ 2110 may be necessary if it is damaged. There are not many reasons:
- Impacts on the oil pan;
- Gasket deformation;
- Exposure to high internal pressure, which violates the integrity of the gasket;
- A confluence of several factors at once.
Symptoms of a problem
If the replacement is carried out incorrectly, the rupture may occur again, foreign particles will get inside the crankcase, sealing will be insufficient, which will lead to failure of the engine or its individual components.
It would seem like a simple gasket, but what a burden of responsibility lies on it.
To determine the need to replace the gasket, you should pay attention to the characteristic signs of such a problem:
- Oil is leaking.
- There is a decrease in pressure in the oil system.
- The oil level drops more rapidly than usual.
Preparing for work
Preparation plays a big role in successfully replacing the oil pan gasket. Actually, this event will not be very difficult.
- Drive the car into the pit or lift it using a lift;
- Provide high-quality light so that you can carefully inspect the condition of the pallet;
- Remove the crankcase protection if you previously installed it on your VAZ 2110;
- The oil pan must be cleaned because a large amount of dirt and oil accumulates on it. It is also recommended to clean the areas adjacent to the oil pan;
- The easiest way to detect a leak is when the engine is warm, but only at idle speed. This will increase the pressure in the oil system and will show how serious the problem is with oil leaking through the oil pan gasket.
Replacing the pan gasket
Nowadays, various types of sealants and additives that can eliminate leaks have become quite popular. But these are all the machinations of marketing companies. In fact, these funds are of little use. The sealant can only give a temporary result so that you have time to get to the garage or service station, where you can change the gasket.
Attempts to use such methods sometimes end sadly. The pressure increases, the gap becomes even larger, and the oil leaks out almost completely. If such a problem catches you on the road, far from the service station, no one will envy you.
Now we will tell you exactly how this is done.
- It is necessary to remove the oil pan in case of a leak or during engine repairs. If you need to repair the engine, but you have never installed a gasket before, we advise you to combine these two activities.
- Also, dismantling the crankcase and installing a new gasket makes it possible to perform another useful procedure for your car - changing the oil. Combine them.
- First of all, remove the mud flaps from the front wheels of the car.
- Now drain the oil. If you have changed it at least once, there should be no problems at this stage.
- Unscrew the three bolts that secure the lower clutch housing cover and remove it.
- Arm yourself with a 10mm socket, with which you unscrew all 16 bolts responsible for fastening the oil pan.
- Remove the pan. It would be advisable to clean it, rinse it thoroughly with special products.
- After removing the pan, you will find a gasket at the joints. If the car has been in use for a long time, its condition will not be the best. But you don't care anymore, since you plan to change it.
- Remove the old gasket from the joint and clean the surface of all kinds of contaminants. The cleaner the connection, the more securely the new gasket will fit into its rightful place.
- It is recommended to strengthen all joints using a special automotive sealant. The gasket itself does the job well, but it is never a bad idea to supplement its level of protection. Sealant is an affordable pleasure for every car owner.
As you can see, the procedure for replacing the oil pan gasket in a domestic VAZ 2110 car is not at all complicated. Try to combine several procedures at once, since you decide to remove the pan. Let’s hope that you won’t have to repair the engine; the “ten” will serve faithfully for many years to come.
Step by step replacement
1. We drive onto the overpass.
2. Unscrew the four bolts securing the crankcase protection.
3. Unscrew and remove the engine splash guard. It is secured with several bolts.
4. Unscrew the drain bolt. Prepare containers for used oil in advance.
Before unscrewing the plugs, the engine needs to be warmed up.
5. Unscrew the nineteen bolts securing the crankcase cover.
6. After unscrewing the fastening bolts, the crankcase cover cannot be easily reached. The beam is in the way.
7. In order to remove the cover, you need to unscrew two engine mounts. The first airbag unscrews from under the hood on the left side. The other one is from under the car, through the hole in the beam.
Next, we raise the car 10-12 centimeters, go to the pit and place a wooden block under the gearbox. We lower the car and it turns out that the body will lower, and the engine and gearbox will stand on a block. Please note that you do not need to lift the car higher than 10 centimeters; if you lift it higher, you can bend the fuel pipes when you lower it.
8. Remove the crankcase cover and the old gasket, usually it sticks to the block.
9. Install a new gasket on the base of the pallet, seat the gasket on the sealant.
10. Coat the upper part of the gasket with sealant and install the crankcase cover in place.
11. Secure the crankcase cover with nineteen bolts.
12. Remove the stand from under the gearbox and screw on two engine mounts.
13. Tighten the drain plug in the crankcase cover and fill in new oil to the level.
14. Install and secure the mudguard, as well as the crankcase cover protection.
If you do not understand any point in the work, write your questions in the comments. I will help and advise.
Video lesson
You can replace valve seals (oil seals) with your own efforts, without removing the cylinder head. Even a novice car enthusiast can do this, without the help of professional car mechanics.
Purpose of valve stem seals VAZ-2107
When the car engine is running, parts of the gas distribution mechanism are constantly in motion. In order to reduce friction, oil is supplied to them, which can seep through the gaps into the combustion chamber of the engine. To seal the gaps and protect the internal combustion engine cylinders from external influences, caps are placed between the guide bushings and valve stems. They are also called valve seals or seals.
Oil scraper cap device
The design of the valve seal is quite simple and consists of the following elements:
- Ostova. The steel bushing serves as a strong frame for the seal.
- Pressure spring.
- The rubber part that fits tightly to the stem.
The cap consists of these elements
In Soviet times, the rubber element of the oil seal was made from fluorine-containing polymers (fluoroplastic), which were not durable. Currently, wear-resistant valve cuffs are produced from rubber and its derivatives, resistant to aggressive influences.
When should the oil seal be replaced?
During operation of a car engine, valve seals are constantly exposed to temperature, oil and exhaust products. This leads to natural wear of the rubber part and weakening of their springs. The resource of high-quality cuffs is designed for 100 thousand kilometers.
If the car has not been used for several years, then before using it it is also necessary to replace the caps - they have dried out during the period of inactivity.
Signs of seal wear
Deformation of oil seals can be identified by the following signs:
- The color of the exhaust smoke becomes white, blue/gray.
- Oil consumption increases sharply - more than 1 liter per 1 thousand kilometers.
- Spark plugs become covered with soot and carbon deposits.
These signs may also require checking the cylinder-piston group or the entire gas distribution mechanism.
If worn valve seals are not replaced in time, then due to loss of tightness on the cylinders, valves and pistons, carbon deposits will form and the pressure will decrease. The power unit will begin to stall at idle or lose power, and will soon require major repairs.
How to replace valve seals on a VAZ-2107 yourself
Let's consider replacing valve seals using the example of a Lada 2107 equipped with a carburetor internal combustion engine.
Required tools and accessories
- standard set of garage keys;
— a device for dismantling valves (depressurizer);
- tweezers or magnet;
Step-by-step replacement of valve seals
Replacing valve seals begins with dismantling the timing shaft. This process is described in detail here. After completing the dismantling work, you need to unscrew the spark plugs.
The crankshaft is set to the TDC position of the first and fourth valves - they are kept from falling into the cylinder by the pistons, and the seals can be replaced on them.
- To ensure that the valve is “closed” after drying, insert a tin (or other soft metal) rod into the spark plug hole.
A rod of tin or other soft metal
This is how the desiccant is fixed
Special tool for removing oil seals
We perform pressing using this mandrel:
After installing new seals on the valves, you need to return the camshaft to its place.
- Install the bearings, put washers on the studs, and tighten the housing mounting nuts.
- Align the mark on the crankshaft sprocket with the block mark.
- Install the gear to the camshaft.
- Return the chain to the shaft pulley and tighten the sprocket mounting bolt. Adjust the chain tension level.
- Adjust the valve mechanism clearances. Install the distributor caps, cylinder heads and air filter.
Replacing the cylinder head cover gasket of a VAZ 2107
The valve cover gasket (cylinder head cover) is a layer of sealing material that performs the following functions:
- reliable fastening of the cover to the cylinder head;
- protection of the valve block from aggressive elements, dust, dirt;
- sealing the space under the cover, preventing oil leaks.
The following materials are used to produce valve cover gaskets:
- Rubber. The material is elastic, but due to temperature changes it changes its characteristics - it “dumbs” in frosty weather, and softens in the heat. The rubber gasket does not last long.
- Rubber with the addition of cork or other porous fillers. Such a gasket has high sealing characteristics, but it must be installed very carefully. Often, during installation, the rubber-cork gasket is treated with liquid sealant.
- Paronite (asbestos or non-asbestos) is a rubber material with mineral additives that has been molded and vulcanized. Paronite gaskets for cylinder head covers are the most common today. They seal well, are resistant to aggressive influences and are relatively durable.
- Cardboard. The material for valve covers undergoes special treatment and is resistant to water, oil, gasoline, etc. They are characterized by the least durability.
Signs of valve cover gasket wear
— presence of coolant or oil stains at the junction of the cover and the block head;
If the "seven" engine is covered with oil smudges, then it is necessary to replace the valve cover gasket.
Tool
- 10mm socket head.
- Collar.
- Dry rags, rag.
Step by step replacement
- Remove the air filter and unscrew its housing.
- Disconnect the throttle valve drive.
- Unscrew the cover fasteners and remove the washers.
- Remove the cover from the studs. Remove the old gasket. Carefully wipe the joints with the new seal, removing any dirt.
- Install the new gasket exactly and carefully place the cover in place.
- Tighten the valve cover fasteners.
The previously removed parts are installed in the reverse order.
How to avoid engine damage in the event of a sump failure
Let's start with the fact that the damage listed above threatens not only passenger cars, but also vehicles with increased ground clearance (city crossovers and SUVs).
At the same time, one of the most serious problems, along with dented sills or various problems with the chassis, can be considered a situation when, for one reason or another, the engine sump was broken.
It is important to understand that this malfunction can cause the car’s engine to fail in a matter of seconds, and its restoration will require expensive repairs or even a complete replacement of the internal combustion engine with a contract engine. First of all, you need to take into account that it is strictly prohibited to continue driving a car with a broken pan.
The fact is that the pan itself on most cars is a kind of reservoir for engine oil (an exception is a system with a dry sump)
First of all, you need to take into account that it is strictly prohibited to continue driving a car with a broken pan. The fact is that the pan itself on most cars is a kind of reservoir for engine oil (an exception is a dry sump system).
From the sump, the oil pump of the lubrication system constantly takes in lubricant, after which it supplies engine oil under pressure to the loaded rubbing elements and components inside the power unit.
It is quite obvious that the engine oil will simply leak out even through a minor crack in the sump, and without the proper amount of lubrication, the oil pressure will drop, oil starvation will begin, as a result of which the engine will be subject to severe wear. If the leak is strong, then the power unit can completely jam in just a few minutes.
In view of the above, the following recommendations must be adhered to:
- If, while driving, there was a collision with any obstacle or the driver felt an impact in the area of the front axle of the car, then the load should be removed from the internal combustion engine as quickly as possible (release the gas, reduce the speed, lower the engine speed to the minimum, stop car and turn off the engine).
- Then you should open the hood and carefully inspect the car engine from above and below. When inspecting the upper part, you should check the integrity of the engine mounts and their fastenings, inspect the internal combustion engine for fresh leaks at the gasket locations, etc. As for the lower part, it is highly advisable to find the place where the blow directly fell.
As already mentioned, most cars have a “wet” sump that contains the oil. In this case, the pan is conditionally the lowest point of the motor. It is necessary to carefully inspect the specified pallet for cracks, strong dents, fresh chips, etc. If there is no oil leak, then you should just remember where the impact point is.
Then (only if there are no strong and extensive dents on the pan) the engine can be started, after which you need to evaluate the operation of the power unit for extraneous noise, knocking, etc. You also need to make sure that the emergency oil pressure light on the dashboard does not light up. If everything is in order, you can continue driving on your own.
At the same time, in the future, you still need to visit the service station, showing the specialists the area where the impact occurred. The fact is that this place may need to be further strengthened, since next time even a slight blow to the pallet can lead to the formation of a large split, etc.
So, if a strong dent is visible, but there is no leak, or a crack was found in the oil pan through which engine oil flows with varying degrees of intensity, then the engine cannot be started. In this case, it is necessary to replace or repair the broken engine crankcase.
Possible problems when removing the engine sump
Usually it is not possible to remove a part if the bolts are rusty. They need to be unscrewed carefully so that the pins do not break off. It is necessary to preheat the mounting location, and then slowly unscrew the bolt. In domestic cars, the bridge often gets in the way after unscrewing the fasteners. In this case, you should not try to cut off the interfering strips. The problem is solved by removing the oil pump.
It is important to raise the engine to a sufficient height. Otherwise it will be impossible to get to the pallet
The engine is raised until it reaches the nuts securing the mounts. It is convenient to use a diamond-shaped jack for this operation. It needs to be installed under the box; when lifted, the engine will move. Procedure:
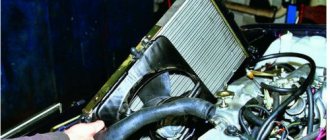
- Disconnect the receiving pipe from the manifold, pull out the rods coming from the radiator and heater.
- Disconnect the gas draft loop located on the right, unscrew the casing from the stove.
- Pull out the oil dipstick. Disconnect the tube in which it is placed.
- Remove the clutch box, and then the shield located below the radiator.
- Disconnect the rear support post from the crossbar. Raise the box with a jack, then the handbrake drum will begin to rest against the body. The rear pillar will have to be supported.
- Place a jack under the crankcase and disconnect the cushions. Raise the engine until it stops.
- Place several planks between the motor feet and the cushions. Remove the jack and carefully secure the engine.
- Unscrew the fasteners that hold the crankcase in place. To do this you will need a key with a universal joint. To remove the tray, you need to pull it back.
If there is no jack, a traverse made of timber will do. The beam must be positioned parallel to the radiator. Next, the pin is attached to the engine and threaded through the yoke. Then you need to carefully tighten the nut on the stud. The motor will begin to rise slowly.
It happens that when you try to pry the pan with a screwdriver, it does not budge. In this case, the part gets stuck somewhere inside. First you need to check that all the bolts are unscrewed. In most engines, the cover is held on by 15 bolts, less often by 14. If everything is unscrewed, this means that the oil intake tube is stuck. To solve the problem, you will have to unscrew the tube from the pump.
Tips and tricks
It is possible to dismantle the part only if the preparatory work is carried out correctly. First, the car is placed above the inspection hole; if this is not possible, the body is raised with a jack. After this, it will be possible to get to the crankcase and adjacent parts.
To carry out manipulations, good lighting is required. Without illumination, it is difficult to remove a spare part from a hard-to-reach area. If you have a powerful lamp, it will be possible to inspect the pallet and make sure that there are no dents or holes on it. You will also have to check the condition of the gasket.
If a hole has formed in the housing, repairs can be made using argon welding. Minor cracks are repaired by cold welding, but before doing so, the oil is drained and the surfaces are degreased. Leaks at the junction of the engine block and the sump indicate the need to replace the crankshaft oil seal. Slight sweating around the drain plug is not considered a deviation from the norm.
Welded engine sump
The pan can be accidentally punctured when driving off-road, even with high ground clearance. Many car owners install protection that covers the pan from impacts and complicates access to it. The protection is dismantled in advance; it is usually held on by several bolts and can be unscrewed without any problems.
Before dismantling, it is advisable to wipe the tray and surrounding elements with a rag. This makes it more convenient to carry out work, and it is easier to see damage to the body. If oil spills out, the location of the leak is determined visually. To check the integrity, you need to turn on the engine at idle speed. In this mode, oil will quickly begin to flow out through the hole. If after removal you find damage to the gasket, do not throw it away. It is better to take the old seal with you when going to the store. Then it will be easier for the seller to select a similar spare part.
How to disassemble a generator in a VAZ-2107
To quickly disassemble the VAZ-2107 device you will need the following set of tools:
- open-end or socket wrench designed for 19;
- ratchet equipped with an extension;
- heads size 8 and 10;
- hammer.
After they are unscrewed, follow these step-by-step instructions:
- Turn the unit over and lightly press the ends of the bolts. Your task is to ensure that the fastener heads penetrate between the pulley blades; this is the only way to secure it in a stationary state.
- Armed with wrench 19, unscrew the pulley fixing nut, securing the VAZ-2107 generator well in a stationary position.
- Next, separate the 2 parts of the device; this is easy to do if you tap the ear of the fastener with a hammer. You should have two parts left in your hands: the rotor and pulley, as well as the stator and winding.
- There is a pulley in the rotor that needs to be removed by pulling it towards you.
- Be vigilant - after removing the pulley, the key is no longer fixed and may get lost, so remove it carefully and set it aside for now.
- Pull out the rotor with bearing. If you need to replace the old rotor with a new one, now is the time to do it. A new device costs 350 rubles in auto stores. If you need to replace the winding and stator, then you will have to pay a little more - 400 rubles.
Piston repair: what you should pay attention to
Modern materials and technologies for manufacturing parts make it possible to operate the engine under very intense conditions. The maximum crankshaft rotation speed reaches one hundred revolutions per second. In this case, the piston and connecting rod reach a translational speed of up to 30 m/sec twice for each revolution (two hundred times per second). and the same number of times they come to a complete stop, causing huge cyclic inertial loads (the weight with such acceleration increases by more than a thousand times). Therefore, technologists try to make the piston as light as possible, making it from an aluminum alloy with a cast steel plate that compensates for thermal deformations. The piston has stiffening ribs and hard anodizing, up to the fire zone, which protects the bottom and the groove of the upper compression ring from burning out. Friction is reduced by the most advanced brands of oils with additives. But it is impossible to avoid wear, so periodically, after a certain mileage, the piston VAZ 2106 is replaced. It is better to do this when the first symptoms appear:
Operating a car with wear and tear can lead to damage that will require major repairs, which will increase the price many times over.
How to dismantle the piston yourself
First of all, it is necessary to thoroughly wash the engine, since after disassembly it will be difficult to prevent grains of sand and dirt from getting inside. The engine must be placed on a sturdy rack at a height convenient for work. Prepare rags, a set of tools and accessories:
- socket, ring wrenches and heads 10 mm., 12 mm., 13 mm., 14 mm., 17 mm., 19 mm., 22 mm., and wrench 36 mm.;
- a set of thin flat probes;
- bore gauge;
- micrometer;
- calipers;
- torque wrench;
- device for compressing rings on the piston;
- bushing for installing piston pins;
- gas-burner;
- hammer;
- core;
- portable lamp;
- large flathead screwdriver.
Tip: Before disassembling with your own hands, all parts are marked with a core, and a photo of the initial location is taken with the numbers and marks of the removable parts so that they can be installed in their place if they are suitable.
Disassembly sequence
- The engine with the head, pan and side covers removed is laid on its side to allow access to the pistons and connecting rods. Wrench 36 mm. the crankshaft is rotated to the position of maximum extension of the nuts of a pair of connecting rods.
- Using a head and a long wrench, you need to unscrew two nuts each, securing the connecting rod cap of the first and fourth cylinders, you can use any one, but it is more correct to follow the chosen sequence. By lightly tapping with a hammer, the cover moves out of place, allowing you to easily remove it from the studs. It is advisable to first familiarize yourself with the stages of work via video.
Tip: The caps and connecting rods form a pair; during their manufacture, the final boring of the mounting hole is done in assembled form, so they are marked with the cylinder number and cannot be replaced. You need to make sure that the numbers match when assembling and are directed in the same direction.
- Using the wooden handle of a hammer, resting against the pin, the connecting rod with the piston is pushed out through the upper plane of the cylinder block. The crankshaft is rotated to the maximum extension position of the nuts of the other two connecting rods. All four pistons are disassembled in the same way. The main bearings are unscrewed and the crankshaft is removed for visual inspection.
Attention: The main bearing caps are marked with marks; it is very important to place them only in their place, since they are not interchangeable; this is required by the boring technology and assembly instructions.
- The liners are removed from the connecting rods and covers. When repairing a VAZ 2106, the piston rings are replaced, starting with the upper compression ring, all the rings are sequentially removed from the pistons, and the piston pins are knocked out with a bushing. If possible, it is better to use a press. The parts and the block are washed with kerosene, blown with compressed air, the cooling and lubrication channels are purged.
- Sanded surfaces are wiped and checked for damage. For inspection, a portable lamp is used, changing the angle of illumination to conveniently examine small scratches. Cracks are not allowed; if they are detected, defective parts will have to be replaced, including the block.
- Wear is measured using a bore gauge in four planes located from the top plane at a distance of 5mm, 15mm, 50mm. and 90 mm. In each plane, two measurements are taken in perpendicular directions.
Replacing the oil pan and its gasket on a VAZ 2101-VAZ 2107
Welcome! Today, many people already know such a thing as an oil pan, but not everyone knows what it really is, when it needs to be changed and how to properly replace it on cars of the “classic” family - we will look at these questions today.
Note! To replace the pan and its gasket, you will need to prepare a few things in advance: First, be sure to stock up on wrenches, or you can use an extension, universal joints and sockets instead!
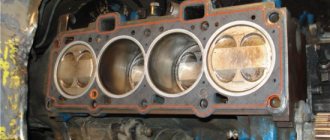
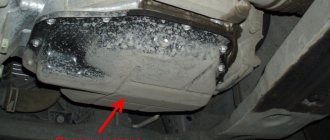
Where is the oil pan and its gasket located? The pan is located at the very bottom of the car engine; unfortunately, in order to fully see the pan it is necessary to remove the crankcase protection, which is done in the figure below:
Note! The blue arrow indicates the gasket that is located between the cylinder block and the crankcase pan!
When do you need to replace the oil pan and its gasket? The pan must be replaced if it is deformed, due to which the engine oil that was located in it begins to flow out of the pan itself.
The pan gasket must be replaced if it is strongly compressed and if it is torn, how do you understand this, you ask? Usually, when the gasket is deformed, engine oil begins to flow through it, but the leak can also be treated by simply tightening the bolts that secure the oil pan, but if tightening the bolts does not produce any results and the leak does not stop, then replace the gasket with a new one.
Main causes of low oil pressure
The main reasons for low oil pressure on classic VAZ models are as follows:
- Using low quality oil or the wrong type of engine.
- Oil filter clogged.
- Malfunction of the pressure sensor (you can check it by measuring the pressure with a mechanical pressure gauge).
- Clogged oil receiver or failure of the oil pump.
- Damage to the oil receiver as a result of mechanical deformation of the oil pan.
One of the reasons why the oil pressure light comes on is a faulty sensor.
All these reasons can lead to failure of the oil pump and its replacement. When purchasing a new pump, preference should be given to original products and trusted manufacturers. Otherwise, the result may be unpredictable.
The actual life of an oil pump is determined both by the quality of the product itself and the quality of the oil and oil filter used. Its failure in most cases is associated with wear of the gears and drive axis. At the same time, the repair is quite simple. On a pump removed from the car, you only need to replace the worn elements with new ones.
Repair
Removing the oil pan is a fairly simple procedure, which is performed after first hanging the car on a lift. During its implementation, the specialist inspects the condition of the pallet and its internal part, after which a decision is made on the advisability of replacing it. It goes without saying that if the source of the oil leak is the gasket, the pan will not need to be replaced. The entire removal and installation procedure takes about an hour.
At the same time, installing the oil pan in place is a more labor-intensive operation, since it requires careful adjustment and careful tightening of the bolts. It should be noted that during the procedure, regardless of its tasks, it is necessary to replace the gasket, as well as the oil in the vehicle’s power unit. In addition, it would be useful to install engine protection on the car in order to protect the sump from possible damage.
- Sign up for repairs
- or by phone:
- +7
What problems most often arise
Despite the decline in quality indicators, the body of the “seven” was subject to corrosion in the third year in certain places. These are the sills, supports, side members and wings, since the elements were not hot-dip galvanized.
The front and rear parts of the VAZ 2107 body are protected by a metal bumper, but after an impact, loads are transferred in waves to the bottom, as well as to all base elements, this leads to the formation of cracks in the protective coating. When moisture gets in, the bottom begins to rust both inside and out.
The most common problems with the bottom of the VAZ 2107 model range:
- It ages quickly from dynamic loads when driving on uneven roads.
- The first spots of corrosion are in cavities and closed pockets.
- If the bottom of the VAZ 2107 is not treated with an anti-corrosion coating, then the machine steel sheet used for the body loses 0.2 mm per year.
- Welding seams, bolt attachment points, sills, fenders are the most vulnerable elements.
Bottom repairs are carried out both with and without welding, depending on the degree and depth of corrosion.
Product quantity
Buy motor oil only in specialized stores for car enthusiasts, otherwise you risk spending your money on a low-quality fake, which will have a very negative impact on the operation of the car’s engine. In this case, you need to know how many liters you need to use.
The VAZ 2107 engine, type injector and carburetor, holds about 4 liters (according to experienced car enthusiasts, approximately 3.75 liters). No one can say exactly how much it will be consumed by the machine, since leaks are always possible. That is why it is necessary to have a couple of liters in reserve so as not to get into an unforeseen situation.
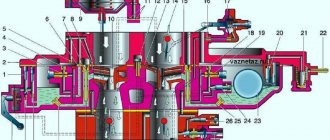
Diagram of the standard crankcase ventilation system
The crankcase ventilation system of VAZ engines consists of two circuits that operate at different load modes and speeds:
- The small ventilation circuit is connected to the valve cover and the intake manifold (behind the throttle body). This connection diagram provides intensive crankcase ventilation due to the vacuum that occurs in the intake manifold when the throttle is closed. To avoid an effect such as hyperventilation, the cross-section of the small circuit is limited by a jet in the cable throttle body with a diameter of 1.7 millimeters. This circuit operates in the region of 800-1500 rpm.
- A large ventilation circuit is connected to the valve cover and the air pipe (in the pre-throttle space). This scheme provides intensive crankcase ventilation at high speeds. The cross section of the large contour is 16-18 millimeters
Possible faults
Malfunctions of this part do happen, and it is dangerous to ignore them, since loss of oil threatens serious and expensive repairs of the internal combustion engine. They can be easily diagnosed by oil leaks - a characteristic small puddle that remains on the asphalt after an overnight stay and a wet sump. The causes of leaks may be:
- loose oil pan bolt;
- gasket wear;
- loose drain plug;
- cracks in the metal.
Cracks in metal are a much more serious problem than a poorly tightened bolt. They can appear as a result of impacts with large stones, curbs, etc. Even if protection is installed under the crankcase, it can crack due to non-compliance with the bolt tightening torques recommended by the manufacturer. A crack can also occur if the drain plug is overtightened after an oil change or repair. It has a slightly conical shape, is made of a harder metal, and can tear the pan. Such a crack is difficult to see, and some service workers, trying to eliminate the leak near the plug, tighten it even more, which subsequently aggravates the situation.
Types of engine protection
Depending on the material used to make the protection, there are several types of engine sump protection.
- Structural steel . It is the most excellent option for any car, which is achieved by the presence of stiffeners. In addition, the steel from which such protection is made has good elasticity, which allows it to return to its original shape after deformation.
- Aluminum . Unlike steel, aluminum protection does not have stiffening ribs stamped on it, but this does not prevent it from being a worthy competitor to steel, the weight of which is much higher than that of aluminum. Aluminum protection is quite expensive.
- Plastic . Usually, it is made of carbon, Kevlar, carbon fiber, etc. It has a fairly low weight, but is significantly inferior in strength, since it usually crumbles upon impact.
Replacing the oil pan gasket
Replacing the oil pan gasket
The work associated with replacing engine seal parts is quite labor-intensive and requires a lot of time and effort. But what can you do, the car requires care and attention, such is the lot of every car enthusiast.
If you notice that oil leakage has appeared around the perimeter of the oil pan mounting to the cylinder block, try to eliminate the leak by tightening the mounting bolts. When tightening, the bolts should be pulled smoothly, since excessive force can lead to pulled threads or tearing off the bolt head, which entails additional repairs (you may have to drill out the bolt or re-thread the cylinder block, which is extremely inconvenient in cramped conditions).
After tightening the bolts, you again find oil leakage; you need to replace the oil pan gasket. In exceptional cases, it is possible to eliminate a leak using a sealant (this is if, for example, you are on the road and you do not have the opportunity to replace the gasket with a new one). Next, you will need an inspection hole or a lift, and you will also need a tool. A set of 10.13 socket heads, universal joints, and a long adapter is best suited.
1. Remove the shield protecting the crankcase.
2. Next, you need to drain the oil from the engine, unscrew the oil plug from the valve cover, which is located on top of the engine, thereby ensuring air access necessary for normal oil drainage, prepare a bucket or any suitable container, unscrew the lower oil plug on the crankcase, and completely drain the oil.
3. since, due to the limited distance, you will not be able to remove the crankcase, you will need to lift the engine, to do this you need to unscrew the nuts securing the engine mounts on the right and left sides.4. It is possible to lift the engine using two devices: a manual hoist and a cross beam. Next, we will describe the method of lifting the engine using a traverse. Having installed the yoke, lift the engine by about 3 cm; to do this, you need to turn the nut in the middle of the yoke.5. It is necessary to lift the engine so that the pins do not come out of the bracket holes.6. Carefully, so as not to lick the edges on the bolt head, use sockets or a spanner and unscrew the crankcase mounting bolts.7. Using a screwdriver, pry up the oil pan and separate it, together with the gasket, from the cylinder block. If any gasket residue remains on the cylinder block, you must remove them with a sharp object or a knife, without leaving scratches on the attached surface.
8. Before replacing the oil pan gasket with a new one, it is recommended to remove any remaining oil from the attached surfaces of the oil pan with a clean rag. cylinders and oil sump. Next, apply a thin layer of silicone sealant to both sides of the new gasket. Install the gasket on the pallet, tighten the bolts, and, pressing the pallet to the block. cylinders, crosswise without using excessive force, tighten the bolts, assemble all the early removed parts in the reverse order of disassembly.
Replacing the oil pump
To replace the VAZ 2106/07 oil pump, the car should be placed on a lift, inspection hole or overpass. In extreme cases, you can use a jack.
Necessary tools and equipment
To replace the oil pump you will need:
- set of socket wrenches;
- knife;
- jack;
- durable wooden block;
- wooden spacer;
- container for draining oil;
- new oil pump gasket;
- new pan gasket;
- new oil pump.
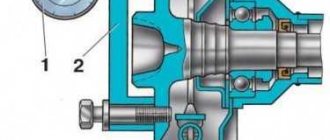
Oil pump removal procedure
The oil pump is replaced as follows:
- Clean the bottom of the engine from dirt. After unscrewing the protection fastening, remove it.
When replacing the oil pump, it is necessary to remove the crankcase protection
The oil drain plug is unscrewed with a hex wrench
To disconnect the engine from the body, you need to unscrew the nuts securing the lower supports
The engine is lifted using a jack and a wooden spacer
To dismantle the pallet you will need to unscrew the mounting bolts
The oil pump is removed along with the gasket
Oil pump installation procedure
Installation of a new or repaired pump is carried out as follows:
- Install a new pump with a new gasket.
- Tighten the pump fastenings.
- Reinstall the pan cover along with a new sealing element. Tighten all mounting bolts evenly.
- Lower the engine and install the supports in place. Tighten the fastening nuts.
- Install and secure the crankcase protection.
- Fill with new engine oil.
Video: replacing the oil pump on classic VAZ models
Size of the drain plug of the vase tray
Greetings to all colleagues, in an unequal fight against the dark side of unfinished components in our machines =)
Preface... I went to work early in my life, from the age of 15, I didn’t like any science, I didn’t want to study)))) I immediately went and got a job in a convoy with passenger buses, taxis and cargo equipment. In exchange for my studies, I began to comprehend the technique, so to speak, experimentally in practice, right on the battlefield, so to speak))) But then I also went to study at the same time, where would I be without theory =) And when it came to the point of changing the repair oil in a bus engine, for example, when you unscrew the drain plug to drain the used oil, there was a magnet on the plug! This magnet collected fine shavings from the production of various parts of the internal combustion engine. My duties included cleaning off this “hedgehog” of shavings and screwing them back in, pouring in fresh oil, etc. In gearboxes or axles, transfer cases, there were also such plugs, with the same magnets, and the same functions)
And now thorium) With such plugs, the service life of the internal combustion engine increases, since metal shavings are caught by a magnet, which could get into rubbing areas, and like lapping paste or a file, would increase friction and, accordingly, the production of the same journals of the crank mechanism, which quickly leads to engine overhaul. Naturally, we don’t want this, so I thought, why did the VAZ auto engineers miss this, well, it’s not so much perfect metal or some other technology) And I decided to introduce neodymium magnets into our drain plug! But before doing this, I got rid of our standard plug, it has a problem, no matter how you tighten it, it still leaks, and there is nothing to do about it: