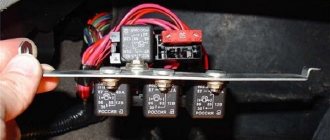
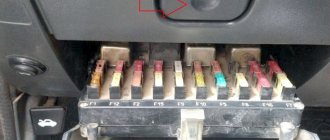
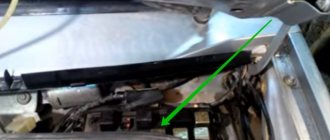
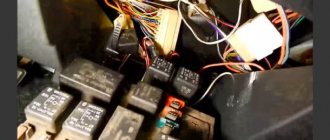
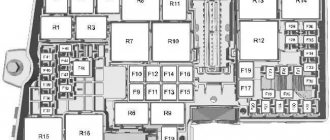
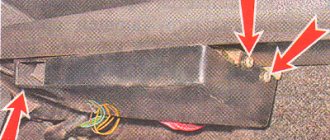
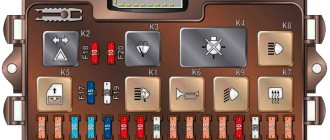
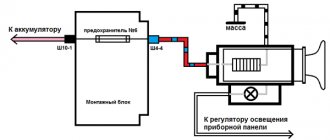
K1 – relay for turning on headlight cleaners; K2 – relay-interrupter for direction indicators and hazard warning lights; K3 – windshield wiper relay; K4 – lamp health monitoring relay; K5 – power window relay; K6 – relay for turning on sound signals; K7 – relay for turning on the heated rear window; K8 – headlight high beam relay; K9 – relay for low beam headlights; F1-F20 – fuses
F1 (10 A) Rear fog light lamps and rear fog light indicator lamp. Electric motors for headlight cleaners (at the moment of switching on). Headlight washer motor.
F2(10A) Direction indicators, relay-interrupter of direction indicators and hazard warning lights (in hazard warning mode). Hazard warning lamp.
F3 (7.5 A) Interior lighting. Individual interior lighting lamp. Luggage compartment lighting. Ignition switch illumination lamp. "Check engine" indicator lamp. Brake light bulbs. Trip computer (or clock)
F4(20A) Cartridge for connecting a portable lamp. Relay for turning on the heated rear window (contacts). Rear window heating element
F5 (20 A) Sound signal. Horn relay. Cooling fan electric motor.
F6 (30 A) Electric windows. Power window relay (contacts).
F7 (30 A) Heater motor. Windshield washer motor. Electric motors for headlight cleaners (in operating mode). Cigarette lighter. Glove box lighting lamp. Relay for turning on the heated rear window (winding).
F8 (7.5 A) Right fog lamp.
F9 (7.5 A) Left fog lamp.
F10(7.5 A) Side lamps on the left side. Indicator lamp for turning on the side light. License plate lamps. Engine compartment lamp. Instrument lighting switch. Illumination lamps for switches, instruments, cigarette lighter, ashtray, heater control levers.
F11 (7.5 A) Side light bulbs on the starboard side.
F12(7.5A) Right headlight (low beam).
F13 (7.5 A) Left headlight (low beam).
F14(7.5A) Left headlight (high beam) and indicator lamp for turning on the high beam headlights.
F15(7.5A) Right headlight (high beam).
F16 (15 A) Direction indicators, relay-interrupter of direction indicators and hazard warning lights (in direction indication mode). Reversing lamps. Relay for monitoring the health of lamps. On-board control system display unit. Instrument cluster. Indicator lamp for emergency oil pressure. Parking brake warning lamp. Brake fluid level warning lamp. Battery discharge warning lamp. Trip computer (or clock). Generator field winding (in engine starting mode)
And how many fuses usually go to it? I don’t know the brand of alarm, there are no instructions, they were installed a long time ago and far away in Moscow, I’m too lazy to put it there.
The problem is this: the alarm system does not control the central locking. That is, it is armed, but does not block the doors. All doors are locked with the key.. What do you need to see?
Guys, help. does not work. Signaling. Where is. Alarm fuse. On VAZ 2114 Alarm alligator
Where should the plug for connecting the fog lights be located?
by Adminrive · Published 06/10/2016
Is it difficult to replace the trunk lid yourself or is the best service?
by Adminrive · Published 02/27/2017
As soon as the temperature is more than 70, you restart and everything is fine.
by Adminrive · Published 03/03/2015
21 comments
- Comments 20
- Pingbacks 0
where you installed it... look for the alarm unit
Nikita, found it. Where's the fuse?
Pasha, the thickest power wire comes from her and there should be
It should be hanging somewhere on the wire
Alexey, I didn’t find it. There's a ton of wires there. You're confused
Where is the secret button? Then at least.
There in this pile there should be somewhere, everything in one place and before this button, although I don’t know, maybe some smart guy installed it and threw them the fuck away
Pasha, this is a jack. She then why do you think it’s like resetting the settings?
Pasha, look for a chip on the block from which purely 2 wires come out and follow the wires
Nikita, what if there is a block. Unscrew. A screwdriver. Could there be a fuse there?
Fuse box
The fuse box in Grant is located to the left of the steering column, near the light switches. To remove the cover and access the fuses and relays, pull the top left side of the cover towards you. It’s made conveniently, everything is at hand and you don’t have to climb anywhere when getting up from the driver’s seat. Maybe this is a hint that they will often have to be changed, or maybe just convenience - the developers know better.
F1 (15 A) - engine control unit, injectors, ignition coil, cooling fan relay, short circuit 2x2.
If you have problems with electronics, and replacing this fuse does not help, in the worst case scenario, you will have to reflash the ECU or replace it. Also, if this fuse blows, the injectors and ignition coil stop working, which makes engine operation impossible. Therefore, if the Grant does not start, check this fuse first.
F2 (30 A) - electric windows.
If they do not work and replacing the fuse does not help, try unplugging it completely or removing the terminal from the battery for a couple of minutes, then connect it again. In this way, all temporary errors should be reset and if this is the case, the power windows will work again.
F3 (15 A) - alarm. If it doesn’t work, check this fuse, as well as the emergency light button, its contacts and the functionality of the lamps.
F4 (20 A) - windshield wiper, airbag. If the airbag warning light on the instrument panel comes on, check this fuse. The problem could be either in it, or in the electronic unit, or in the pillows themselves.
If the windshield wiper does not work and this fuse is intact, also check relay K6, the power handle, the reliability of the connectors connected to it, as well as the electric wiper drive itself.
F5 (7.5 A) - terminal 15 of the ignition switch. If you have problems turning on the ignition, check this fuse, as well as the reliability of the wire connections to the lock terminals.
F6 (7.5 A) - reverse lamp. If it does not work, but this fuse is intact, check the lamp itself, as well as the contacts connecting the connectors to the headlight.
F7 (7.5 A) - Mass air flow sensor, adsorber valve, oxygen sensor, speed sensor. If the engine runs erratically, does not idle, or stalls spontaneously, the problem may be this fuse or the corresponding sensor. We already had an article on how to check the mass air flow sensor.
F8 (30 A) - heated rear window. If it does not work, check this fuse, the terminals connecting the wires to the heater, and the integrity of its elements.
F9 (5 A) - right side lamps
F10 (5 A) - left side lamps. If the dimensions do not light up, the problem may be in these fuses or in the lamps themselves, as well as their connectors. It wouldn't hurt to check the headlight switch on the dashboard.
F11 (5 A) - rear fog lights. If they do not work, but this fuse is intact, the problem may be in the switch on the dashboard or in the lamps themselves, as well as their connectors
F12 (7.5 A) - right low beam lamp F13 (7.5 A) - left low beam lamp. If the low beam does not work in two headlights at the same time, the problem may be in the K9 relay, or in the low beam switch and its contacts. If only one lamp does not light, it is most likely the fuse or the lamp itself that needs to be replaced.
F14 (10 A) - right high beam lamp F15 (10 A) - left high beam lamp. If both high beam headlights do not work, the problem may be in relay K7. If there is only one, replace the fuse and/or lamp.
F16 (10 A) - Front right fog lamp
F17 (10 A) - Front left fog lamp. If they do not work, check the switch on the dashboard and its contacts. If one fog light does not work, the lamp is most likely burned out and needs to be replaced.
F18 (15 A) - heated front seats. If it does not work, but the fuse is intact, check the heating button on the dashboard.
F19 (10 A) - ABS. If, when you press the brake pedal on a slippery road, the wheels lock and the pedal does not spring back, then the ABS is not working and the problem may be in this fuse or in the mechanical elements of the braking system.
Relay and fuse diagram for VAZ 2110
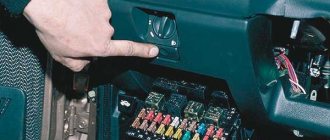
The mounting block, in which the main fuses and relays are located, is in the cabin. Its location is to the left of the driver, below the dashboard, like other cars from this manufacturer. Relays are traditionally designated on the diagram by the letter K, and fuses by F. There are 8 fuse elements in the main block:
| Relay no. | Purpose |
| K1 | Lamp condition |
| K2 | Front glass cleaner |
| K3 | Relay-breaker for direction indicators and hazard warning lights |
| K4 | Low beam |
| K5 | Turning on the high beams |
| K6 | Additional starter relay |
| K7 | Heated rear window |
| K8 | Rear fog light |
As for fuses, there are 20 of them:
| Fuse no. | Current (amps) | Description of fuses |
| F1 | 5 | License plate lamps. Instrument lighting lamps. Indicator lamp. Trunk light. Left side lamp |
| F2 | 7,5 | Near left headlight |
| F3 | 10 | Far left headlight |
| F4 | 10 | Right fog light |
| F5 | 30 | Door window motors |
| F6 | 15 | Portable lamp or socket |
| F7 | 20 | Engine cooling fan motor. Sound signal |
| F8 | 20 | Heated rear window. Turning on the heated rear window |
| F9 | 20 | Recirculation valve. Windshield and headlight cleaners and washers. Rear window heating coil |
| F10 | 20 | Reserve |
| F11 | 5 | Right side light |
| F12 | 7,5 | Right low beam |
| F13 | 10 | Right high beam. High beam warning lamp |
| F14 | 10 | Left fog light |
| F15 | 20 | Electrically heated seats. Trunk lock lock |
| F16 | 10 | Relay-breaker for direction indicators and hazard warning lights (in hazard warning mode). Hazard warning lamp |
| F17 | 7,5 | Interior lighting. Individual lighting. Illuminated ignition switch. Brake light bulbs. Clock or trip computer |
| F18 | 25 | Glove compartment lighting. Heater controller. Cigarette lighter. |
| F19 | 10 | Locking door locks. Relay for monitoring the health of brake light lamps and side lights. Direction indicators with warning lamps. Reversing light. Generator excitation winding. On-board control system display unit. Instrument cluster. Clock or trip computer |
| F20 | 7,5 | Rear fog light |
Main unit
The main mounting block is located near the driver's seat on the front panel, to the left of it. The niche is closed by a plastic lid with a shutter above it in the shape of a button - to open it you need to press it. Under the cover there are fuses, numbered in the diagram from F1 to F20 - they are responsible for all vehicle control elements, except for those placed in an additional block (there are three of them). The power of the fuses is different. There are also eight relays responsible for the main elements of the car control power circuit.
Console additional mounting block
You can find it inside the center console. It is located behind a plastic cover attached with screws, to the left of the front passenger seat. The block contains three relays and three fuses. In particular:
- Fan motor relay;
- Ignition relay;
- Fuel pump motor relay;
- Engine ECU and ignition module fuse;
- Fuse for electronic elements of the fuel supply system;
- Fuse for the electrical circuit of the speed and oxygen sensors, as well as the air flow meter and the canister purge valve.
The power of all fuses is rated at 15 Amps.
Mounting block connection diagram
Numbering of plugs in the connecting blocks of the mounting block and the colors of the wires connected to them
In the diagram, the letters indicate the following colors:
- B - white;
- Ch - black;
- F - yellow;
- O - orange;
- G - blue;
- P - pink;
- Z - green;
- C - gray;
- K - brown;
- P - red.
If the letters are together, then wires of two colors must be connected to the plug.
Changes in switching and layout of mounting blocks
The most important innovation in the VAZ 2110 fuse box from old to new models affected the location of the fog lamp fuse. In the first modifications, this device was located behind the block, and not inside it, and was supported by a bundle of wires, without being equipped with a board. Over time, the designers provided a special board for it, which was still located outside the main unit, but was placed to the left of the console. Only ten years later did it find a place among the other fuses.
Blocks with different layouts differ in numbering. The first models with 6 relays have the number 2110-3722010, while those equipped with 7 devices were marked 2110-3722010-08, and the most modern ones - 2110-3722010-01. Modifications that do not have relay legs for turning on the front lighting are marked as 21110-3722010-12. Also, the manufacturer produces units equipped with legs, but not relay K1, which can be either with or without jumpers - in both cases, independent installation of the device or jumpers instead of it is allowed.
Table of circuits protected by fuses on the VAZ 2110
The table shows all the circuits located in the main mounting block.
Components and principle of operation of a car alarm
Car alarm components
The car security system consists of an immobilizer, which is the brain of the alarm system, various sensors, locks, interlocks and warning systems. The immobilizer itself consists of a control unit and an electromagnetic relay, which breaks the circuits. In modern signaling systems, these elements are not connected by additional wires, which makes them less noticeable.
The principle of operation of the alarm is simple - when you press the remote control button, data (codes) are exchanged, if the codes are accepted, the car is unlocked. The same principle as a key/lock, but a little more technologically advanced.
In many cars, the covers of the fuse and relay boxes contain their descriptions, often in English. For those who have difficulty with this, we have prepared a detailed explanation of the symbols (translation into Russian). The first table contains the most common ones, followed by a more detailed list.
p, blockquote 1,0,0,0,0 —>
p, blockquote 2,0,1,0,0 —>
p, blockquote 3,0,0,0,0 —>
Table with designation
p, blockquote 4,1,0,0,0 —>
| A/C | Air conditioner |
| ABS | ABS |
| FLT | Generator |
| ALT-S | Generator |
| F.V. | Engine switch |
| DEF | Window heating |
| DOME | Interior lighting |
| DOOR, ROOM | Door |
| ECU | Engine control (control) module |
| EDU | Injection control |
| EFI | Electronic injection control system in TOYOTA vehicles |
| ENG MAIN | Main engine |
| FAN | Fan |
| FOG | Fog |
| Fr | Front |
| R-TAIL | Tail lights |
| GAUGE | Dashboard, speedometer |
| HAZARD | Alarms |
| HAZ-TRN | Emergency - turns. |
| HEAD | Headlights |
| HEAD-LH | Left headlights |
| HEAD-RH | Right headlights |
| HORN | Sound signal |
| HTR | Heater |
| I/UP | Idling |
| I.G. | Ignition |
| IGN | Ignition |
| MAIN | Main |
| P/W | Radio |
| POWER | Nutrition |
| RAD | Radio |
| Rr | Rear |
| S.I.G. | Light a cigarette |
| SPARE | Spare |
| ST | Starter |
| STOP | Stop signal |
| TAIL | Lights / Dimensions |
| TURN | Turn signals |
| WASH | Windshield washer |
| WIP | Wiper |
| WIPER | Wiper |
The cigarette lighter fuse is usually designated as C-LIGHT, CIGARE, POWER OUTLET.
p, blockquote 6,0,0,1,0 —>
The fuse is probably the cheapest part of a car alarm. It protects the rest of the device from strong current surges, for example, during a sudden start. The fuse takes the entire blow and burns out. The alarm does not work and the damaged element must be replaced with a new one. But to do this you need to find where the alarm fuse is located. The installation location of the alarm and fuse depends on the brand of the security system, the car and the imagination of the car mechanic.
Contents of the article: 1. Where is the alarm fuse located in VAZ2 cars. Where is the alarm fuse located in the Kalina3 car. Where are the Starline4 alarm fuses located? Where is the Tomahawk 5 alarm fuse located? Where is the Jaguar alarm fuse located?
Where is the alarm fuse located?
Where is the alarm fuse located in VAZ cars?
Fuses are expected to need to be changed from time to time, so they should be placed in an accessible location. Usually they are connected to wires near the alarm unit. The next task is to find the block itself. In VAZ cars it is often placed to the left and below the steering wheel. If the alarm is not detected in a traditional place, you can go the experimental route. Wires from the LED or from the shock sensor should lead to the block. You can also sit in the car in complete silence and try to catch where the clicking sound of the relay is coming from.
Where is the alarm fuse located in a Kalina car?
There are possible options here, depending on who installed the alarm - a private master or an official service locksmith. If the latter, then next to the air duct under the cover, at the driver’s feet. If a private trader worked:
- to the right of the pedals, under the panel;
- in a niche behind the control levers for the car’s heating system;
- on the floor behind the electronic control unit.
Where are the Starline alarm fuses located?
Starline is a Russian company that has been developing and producing alarm systems for almost 30 years. They are relatively inexpensive, yet effective; a special feature is increased cryptographic strength. They operate in a huge temperature range - from -450 to +850C, and are adapted to combat urban noise.
In a car, such an alarm is usually placed under the dashboard behind the brake light. You need to find the thickest 30 A red wire coming out of the block. A fuse should be located on it, 10 cm from the block itself.
Where is the Tomahawk alarm fuse located?
Tomahawk is a Taiwanese alarm system that has been sold in Russia through a dealer network for a long time. It has become a favorite among local motorists; many install it themselves. As a rule, the place chosen for this is behind the dashboard or behind the glove compartment. Fuses are traditionally located on wires near the main unit.
Where is the Jaguar alarm fuse located?
How to find it
Window lifter button connection diagram
As soon as the window regulators stop responding to button presses, many car owners begin to panic: indeed, electrical repairs are not cheap, not to mention the cost of spare parts for the average foreign car. However, not everything is so dramatic, because the most common reason for window regulator failure is a burnt out element.
Typically, such a shield is located under the instrument panel or, for example, on its end side. Having found out where the required fuse is located and found out what its rated current is, you can safely replace the element with a new one and check the functionality of the power windows on your car.
In most cases, this procedure solves the problem with the window drive not working. If this does not help, then it is worth checking the integrity of the circuits with a tester and making sure that the element was replaced according to the diagram, and its rating actually matches the required one.
Components and principle of operation of a car alarm
Car alarm components
The car security system consists of an immobilizer, which is the brain of the alarm system, various sensors, locks, interlocks and warning systems. The immobilizer itself consists of a control unit and an electromagnetic relay, which breaks the circuits. In modern signaling systems, these elements are not connected by additional wires, which makes them less noticeable.
The principle of operation of the alarm is simple - when you press the remote control button, data (codes) are exchanged, if the codes are accepted, the car is unlocked. The same principle as a key/lock, but a little more technologically advanced.
Starline equipment compatibility
To understand which key fobs are suitable for the installed model, compare the availability of built-in functions:
- control module from a phone via Bluetooth;
- GSM interface;
- LCD display;
- hood lock control;
- engine blocking relay;
- immobilizer bypass relay.
There aren't many interchangeable Starline key fobs, but there are many other options that are only partially compatible with each other. For example, after replacement, sometimes automatic start, opening the trunk and hood of a hotel, etc. do not work. It is better to avoid using key fobs that do not fit completely to avoid system failure.
There are two ways to solve the problem:
- go to a specialized service station (gas station);
- Disconnect power from the on-board network for 15 minutes.
The second method does not always work, but sometimes after it the control panel can switch to programming mode without any problems.
Starline A9, which does not require long-term maintenance, does not work well in the cold season. The reason is simple: oxidation of the contacts has occurred. For prevention, it is necessary to treat all connectors associated with the alarm once a year. With prolonged use, the hinges also become damaged and will need to be completely replaced or repaired.
Which fuse makes the alarm sound?
look at the weight stamp. maybe she's weakened. It’s near the “bell” I’ll add, but regarding the smell, it’s most likely a weak contact and that’s why it’s melting. Perhaps the “jamb” went along the mounting block. and this threatens to replace it.
So maybe he’ll just turn on the siren
Most likely the problem is in the signal itself or in the wiring. I don't think there is a fuse there. perhaps also terminals to the signal or to the alarm control panel itself (to the brains)
Read the manual for the alarm, maybe the program on the key fob is wrong, I also foolishly dismantled the siren, but it turned out just like that, without sound, I set it up according to the manual, now with a short press without sound, a three-second press with sound. Good luck.
How to check the fan switch sensor using a multimeter?
To check, you will need water, an empty container, a thermometer and a heat source (gas or electric stove). Checking the fan switch sensor is no different from.
- The principle is as follows: you need to pour water into the container.
- Lower the threaded part of the DVV there.
- Connect the multimeter terminals to the sensor contacts and turn the device into resistance measurement mode, or into “continuity” mode.
- Now gradually heat the water.
- After the water temperature reaches ~92°, the contacts of the working fan switch sensor should close, after which the multimeter should make a sound.
If you are convinced that the sensor is faulty, replace the sensor.
Fuse and relay diagram
| Fuse | Current strength, A | Protected circuit |
| F1 | 15 | – Relay for turning on the engine cooling fan – Short circuit 2x2 – Controller (engine control unit) – Injectors – Ignition coil |
| F2 | 30 | Electric windows |
| F3 | 15 | Alarm |
| F4 | 20 | – Windshield wiper – Airbag |
| F5 | 7,5 | Ignition switch terminal 15 |
| F6 | 7,5 | Reversing light |
| F7 | 7,5 | – Canister valve – Mass air flow sensor – Oxygen sensor 1/2 – Speed sensor |
| F8 | 30 | Rear window defroster circuit |
| F9 | 5 | Side lights on starboard side |
| F10 | 5 | Side lights on the left side |
| F11 | 5 | Rear fog lights |
| F12 | 7,5 | Low beam on starboard side |
| F13 | 7,5 | Low beam on the left side |
| F14 | 10 | High beam on starboard side |
| F15 | 10 | High beam on the left side |
| F16 | 10 | Front fog lamp on starboard side |
| F17 | 10 | Front fog lamp on the left side |
| F18 | 15 | Heated front seats |
| F19 | 10 | ABS (Anti-lock Braking System) |
| F20 | 15 | – Horn – Trunk lock – Transmission – Cigarette lighter – Diagnostic connector |
| F21 | 15 | Electric fuel pump |
| F22 | 15 | central locking |
| F23 | 10 | Daytime Running Lights |
| F24 | 7,5 | Air conditioner |
| F25 | 10 | – Interior lighting – Brake light |
| F26 | 25 | Anti-lock braking system |
| F27 | – | Spare |
| F28 | – | Spare |
| F29 | – | Spare |
| F30 | – | Spare |
| F31 | 50 | Heated windshield |
| F32 | 30 | – Heater – Electric power steering |
| Relay | Description |
| K1 | Heater fan relay. |
| K2 | Power window relay |
| K3 | Starter relay |
| K4 | Ignition switch terminal 15 relay |
| K5 | Turn signal and hazard warning relay |
| K6 | Wiper relay |
| K7 | High beam relay |
| K8 | Horn relay |
| K9 | Low beam relay |
| K10 | Heated rear window relay |
| K11 | Controller relay (engine control unit) |
| K12 | Electric fuel pump relay |
Lada Granta mounting block under the hood:
| F1, 50A | Electric power steering; |
| F2, 30A | Heater fan |
| F3, 60A | Generator |
| F4, 60A | Generator |
| F5, 30A | Dipped headlights. |
New family
(from September 2022):
Where is the fuse for the kgb fx-7 alarm (Lada Kalina)
The fuses are located at a distance of 15-20 cm from the main alarm unit, which in turn is hidden either under the panel or under the display; you can track the installation location of the main unit using two thin wires from the LED.
Good morning Igor) 199081 Attention! There are no obligations here! Here everyone only needs sex! Possibility of quick meetings, many single girls, guarantee of safety. ClickSex dating in your city
Fuck it, she needs an alarm if it's a Lada Galima
The alarm fuses are not exposed, but hidden next to the block. Get under the steering wheel and look
First mounting block
Another difference between the Lada Granta and its predecessors is the quantity: now the mounting block has 32 fuses. For a better understanding, it is recommended to familiarize yourself with the diagram of this element (Fig. 2). So, for example, fuse F1 is responsible for protecting the circuits of the ignition coil, injector, engine control unit and fan. F2, in turn, is responsible for the safety of power window components. F3 and F4 - hazard warning lights and windshield wiper/airbag respectively. And elements F9, F10 ensure the operation of the side lights.
It is important to know that each fuse has a limit on the amount of current it can carry. For example, F8, which is responsible for the rear window heating circuit, is capable of passing a current of 30 Amps. At the same time, the F6, which controls the operation of the reversing light, is designed for 7.5 Amps. As you might guess, these indicators directly depend on how much current is needed to operate this or that equipment in the car. You can become more familiar with the controlled circuits and components, as well as learn about the capacity of each fuse by looking at the diagram (Fig. 3).
As for the relays used, there are 12 elements that support the operation of the corresponding devices (heater fan, starter, electric fuel pump and others).
The power fuse box, which is located in the engine compartment, contains five fuses:
- F1 - 50A - Electric power steering.
- F2 - 30A - Heater fan.
- F3 - 60A - Generator.
- F4 - 60A - Generator.
- F5 - 30A - Low beam headlights.
General characteristics of Starline key fobs of different models
Almost all Starline signaling devices sold in the CIS (a91, a93, a9, a94) are equipped with two key fobs:
The main key fob is recognizable by its characteristic small display and the presence of three or more control buttons. Unlike the additional control panel, it is equipped with a small antenna. This variety is always released with feedback.
The main remote control performs the display function. But its display is not just for easy setup and reporting of car intruders.
In addition, it performs the following functions:
The number of control buttons depends on the model: the more multifunctional the “signal”, the more buttons it has. Basic key fobs can have up to 5 buttons. The secondary control panel does not have an information display and has three or four buttons.
With it you can perform basic actions:
- activate vehicle security;
- turn off the alarm;
- turn off the siren and so on
Manufacturers can supplement the “report” with an additional keychain, a copy of the main one with the same functionality. But this is found in expensive car alarms.
“data-medium-file =” https://i0.wp.com/avtoivan.ru/wp-content/uploads/2019/01/Signalizacija-Starlajn.jpg?fit=300%2C214 “data-large-file = "https://i0.wp.com/avtoivan.ru/wp-content/uploads/2019/01/Signalizacija-Starlajn.jpg?fit=660%2C471" data-lazy-src = "https://i0 wp .com / avtoivan.ru / wp-content / uploads / 2019/01 / Signalizacija-Starlajn.jpg? fit = 660% 2C471 “data-lazy-srcset =” https://i0.wp.com/avtoivan.ru/wp-content/uploads/2019/01/Signalizacija-Starlajn.jpg? w = 660 660w, https://i0.wp.com/avtoivan.ru/wp-content/uploads/2019/01/Signalizacija-Starlajn jpg? resize = 300% 2C214 300w "data-lazy-sizes =" (max-width: 660px) 100vw, 660px" />
Circuit breakers
F1 (10 A) - rear fog lights, their activation lamp on the panel. Headlight cleaner motors (turn on). Headlight washer motor. If your rear fog lamps do not work, check the button to turn them on. When connecting a PTF, a fuse is usually installed, which is located directly on the wire behind the button. Check it out. Check the lamps. The PTF lights only when the low beam is on; this should be taken into account when searching for the cause.
If the headlight cleaner or washer does not work, see the information about relay K1, and also check the fluid level in the washer reservoir and its pump.
F2 (10 A) - turn signals, their relay-breaker and hazard warning lights. Hazard warning light. See information about relay K2, the main problems and solutions are described there.
F3 (7.5 A) - interior lighting.
Individual light lamps. Trunk lamp. Illumination of the ignition switch. Check engine lamp. Stop lights. Trip computer, clock.
If your brake lights stop working, check the fuse, although it is unlikely to be the problem. In models VAZ-2114, VAZ-2115, rear lamps are a disease. The problem is the board on which the lamps are installed. The solution is to replace this board with a new one, in this case it is not known how long the new one will work. The simplest solution is to solder the wires to the lamps directly, or replace the connectors with connectors from another VAZ model, for example 2106.
If it's not the circuit board, check the brake light switch (frog) located by the brake pedal. This can only be the case if none of the brake lights are on, even on the spoiler. If the signal on the spoiler is on, but the others are not on, the problem is most likely in the rear light board. Also check the chips that connect to this board and their contacts. If these connectors fail, they must be replaced or the contacts inside them must be bent.
The VAZ-2114 model has two brake light lamps, the VAZ-2115 model has four. The lamps themselves may also fail individually, you just may not notice it. In some cases, it may be the wiring under the dashboard. If you don’t understand electrics, contact a car service center; most of them have long learned to deal with such problems and it will not be difficult for the technician to find the fault.
F4 (20 A) - portable lamp. Heated rear window. See information about relay K7.
The radio, cigarette lighter, and clock DO NOT WORK Thread starter Sadhu
DIY car window lift repair
Someone tell me something
Ivan (Rodrigo) did you look at the fuse?
Alexander (Rhea) it's all because of the fuse
Ivan (Rodrigo) Or the chain itself.
Pavel (Jumaane) Ivan, I looked, it’s not a fuse, I changed about 5 of them
Pavel (Jumaane) Ivan, what kind of chain is that?
Ivan (Rodrigo) Well, usually the radio is powered from the cigarette lighter.
Sergey (Brionna) Gee, the poor guy's wire got burned...
Gennady (Megha) hello everyone, I have a similar problem - I just put in a fuse, it immediately burns out - I looked through the wires and didn’t find anything - I insulated everything I could, at first the cigarette lighter seemed to work - then I decided to pump up the tires - after five minutes the fuse burned out again
Oleg (Dumaka) the cigarette lighter works on its own, but when you connect the DVR, charging does not go to the recorder. What could it be? PM plz.
Sanya (Hassin) Look at the track on the fuse board!!!!!! It was the same problem
Dimka (Dunstan) Oleg, try to check the charger itself, my original charger did not reach the end of the cigarette lighter with the “pipe”, so it did not turn on.
And the best option is to do it like me! Throw the wire from the ignition switch onto this charger from the recorder, insulate everything and secure it with a tie under the glove compartment, and the wire is easily hidden under the visor trim! There is no need to constantly plug and unplug the plug, just start the car - it turns on, turn it off - it turns off!
Oleg (Dumaka) Dimka, WILL THIS RECORDER BE COMPLETELY TURNED OFF????
Aynur (Makelesi) they are all on one guard or standing
Aydar (Iukikina) change the cigarette lighter to a new one, and check all the wiring, you will burn out somewhere)
Vladimir (Nafshiya) comrades, we need help! VAZ 2107, 09 onwards, the injector failed, the cigarette lighter of the radio and the clock (everything is powered from the cigarette lighter) the current flows to the fuse block and there is a whole wire from the block to the cigarette lighter! Apparently the track in the fuse block has burned out, is it possible to bridge the wire to something else???
Alexey (Manasi) Vladimir, buy a soldering iron already. The time has come.
Vladimir (Nafshiya) Alexey, I don’t know how to solder
Alexey (Manasi) Vladimir, it means it’s time to learn. There is nothing complicated. https://www.mastervintik.ru/forum/viewtopic.php? f=11..PS. And as a child you should have attended a radio club.)
