Often, car owners have a situation where the rear brake lights do not light up. An experienced motorist can guess what the reason might be. Therefore, it will not be difficult for him to determine the source of the malfunction and eliminate the problem. For beginners and inexperienced owners, it is advisable to contact specialists or study reliable information on car repairs.
This article outlines the main causes of this malfunction and provides recommendations for eliminating it. The owner of the car can make the repairs himself or contact a car service center.
Causes of malfunction
The main reasons for this malfunction are:
- defective or burnt out light bulb;
- break in electrical wiring or plug connections;
- fuse blown due to a short circuit or overload in the on-board network;
- limit switch malfunction;
- problems with electronic systems or units.
Such malfunctions can usually occur on high-mileage vehicles. However, there are exceptions.
Body
How to change the bumper of a Chevrolet Tahoe with your own handsInstalling the glove compartment of a Chevrolet TahoeReplace the washer reservoir of a Chevrolet Tahoe with your own handsRemove the gas tank of a Chevrolet TahoeReplace the side mirror of a Chevrolet TahoeReplacing the heater fan of a Chevrolet TahoeInstalling windshield wipers of a Chevrolet TahoeWhere to place the jack of a Chevrolet TahoeRemove the rear fender of a Chevrolet Tahoe with your own handsRemoving the rear seat of a Chevrolet TahoeInstalling the rear window of a Chevrolet TahoeWith Removing the rear trim Chevrolet Tahoe doorsRepair of Chevrolet Tahoe engine protectionReplacement of Chevrolet Tahoe crankcase protectionHow to replace the rear view mirror of a Chevrolet TahoeRemoving the gas tank cover of a Chevrolet Tahoe with your own handsReplace the lock cylinder of a Chevrolet Tahoe with your own handsHow to replace the windshield of a Chevrolet Tahoe with your own handsRemoving the gas tank flap of a Chevrolet Tahoe with your own handsRemove the trunk trim of a Chevrolet TahoeRemove the driver's door trim of a Chevrolet TahoeRemove the headliner of a Chevrolet Tahoe with your own handsRemove the interior trim of a Chevrolet Tahoe with your own handsRemoving the seat trim of a Chevrolet Tahoe with your own handsRemoving the dashboard of a Chevrolet Tahoe with your own handsRemoving the front fender of a Chevrolet TahoeRemove the front seat of a Chevrolet TahoeRemoving the front door trim of a Chevrolet Tahoe with your own handsRemove the headrests of a Chevrolet Tahoe with your own handsHow to remove the airbag of a Chevrolet TahoeRemove Chevrolet Tahoe dashboard with your own handsChange rubber bands on Chevrolet Tahoe windshield wipersReplace the seat belt of a Chevrolet TahoeHow to remove the radiator grille of a Chevrolet TahoeRemoving the power window handle of a Chevrolet TahoeRemoving the power window of a Chevrolet Tahoe with your own handsReplacing the door seal of a Chevrolet TahoeReplacing the washer nozzle of a Chevrolet TahoeDo-it-yourself repair of windshield wiper blades of a Chevrolet Tahoe
Brake lights don't come on completely
If the brake lights on the car stop lighting completely, then you should look for a break in the wires, in the limit switch or a faulty fuse. The search for a breakdown should begin with the fuse box. On its cover there is usually a table showing which circuit is protected by which fuse link. If it is missing or the information in it is unreadable, you can use the owner's manual for the vehicle.
If the required fuse has blown, it cannot be replaced until the cause is determined. This usually happens when there is a short circuit or the insulation of the wires is damaged and they touch the housing. A similar effect is observed when water gets into electrical connections. In this case, it is necessary to dry the area where moisture has entered. To speed up the process, you can use a hair dryer (being careful not to melt the wire insulation or sheathing elements). Then you need to remove the fuse from the holder and test the circuit after it with a multimeter.
Often the wires fray at the point where they pass from the body to the trunk lid. Typically, the casing must be removed to detect cable damage. Therefore, in the absence of proper experience, it is better to entrust this work to a service center. If damage is found, the insulation coating must be restored. To do this, you can use ordinary insulating tape.
If the fuse is OK, you can assume the limit switch is faulty. It is located in the pedal assembly. It is necessary to inspect the condition of the switch and test it with a multimeter while the brake pedal is pressed. The multimeter should show a resistance of less than 1 ohm. If it is large or the switch has mechanical damage, it must be replaced. Due to the complexity of such an operation, it is better to entrust it to experienced car service workers.
If both the fuse and the limit switch are not damaged, this indicates a broken wire. To find such a fault, you will also need to open the casing. If you lack experience, it is better to entrust these actions to a car service.
If a wire break is detected, it is necessary to strip the insulating layer from the wire, make a connection and insulate the joint. A break in a section of wire is repaired by soldering. To insulate the connection, you can put on heat shrink tubing and heat it until it is fixed to the wire. If the terminal breaks, it is removed from the plastic case and replaced with a new one, crimping the stripped end of the wire into it, then inserted back.
How to change the reverse sensor on a VAZ 2107
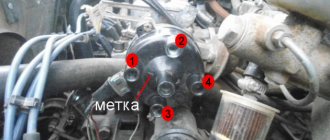
Before replacing the sensor, it is advisable to clean the gearbox of dirt. If this is not done, it may get into the oil, which is located in the crankcase. Replacement of the VAZ 2107 reverse sensor is carried out in the following sequence:
- disconnect the wire tips from the sensor contacts;
- Using a 22mm wrench, unscrew the old sensor from the gearbox, removing it along with the metal washer;
Note: if the sensor is “stuck” and cannot be unscrewed using a wrench, you can try to unscrew it using a chisel and hammer
However, this must be done with extreme caution so as not to damage the gearbox housing, which is made of a fragile aluminum alloy.
- clean the sensor seat;
- put a new washer on the new sensor and screw it into the gearbox using a 22mm wrench;
- Place the wire ends on the sensor contacts.
Now you know how to change the reverse sensor on a VAZ 2107
After installing the new sensor, pay attention to how tightly the wire tips fit on the sensor contacts. They should not dangle or fall off
If necessary, tighten the tips using pliers. It is a good idea to clean the tips before placing them on the sensor contacts. This way you can be sure of reliable contact on this connection.
What is needed for replacement
To change the part, you only need two things: a 22mm wrench and a new reverse sensor with a metal washer-spacer. It is advisable to use a socket wrench with a long wrench. But, if you don’t find one, you can get by with a cap or even a carob.
Separate brake light does not light up
If only one brake light does not light, then the most likely problem is the lamp or poor contact in the socket. In this case, you need to disassemble the trunk trim on the side of the car where the signal is not lit. If necessary, remove the lamp unit, remove them from the sockets or holders, carefully inspect the contacts in the socket and on the lamp base.
The presence of rust, traces of oxidation (white or greenish coating), soot, as well as dust or moisture confirms that the brake light does not light due to missing or poor contact in the circuit. Cleaning the indicated areas will help eliminate the problem. To remove rust and oxides, you will need a sharp object, such as a screwdriver. It is also necessary to check the serviceability of the lamp. To do this, you can use a multimeter or the on-board voltage supplied to the lamp via wires through a fuse. The burnt-out lamp is replaced with a similar new one.
Search principle
To find a fault in any vehicle on-board network system, you should use the method of sequential elimination of elements. The point is to consistently check electrical appliances and sections of the circuit, excluding elements from the list of reasons that could cause a breakdown. To do this, you need to clearly understand the design and operating principle of the system. When troubleshooting, you need to move from the components that require the least effort to check, to the most difficult to diagnose elements.
Electrical diagram
We immediately emphasize that the pinout of connectors and color markings of wires may differ not only between different models of the same automaker, but also among one model of different years of manufacture. Before you start searching for the cause of the breakdown, you need to find an electrical diagram specifically for your car model.
The additional brake light does not light up
If the additional brake light does not light up, this indicates a break in its wires or an unreliable connection. It usually connects to one of the stock brake light sockets. It is necessary to ensure that the wires are securely fastened and that there are no signs of oxidation.
If they are present, it is necessary to cut off the damaged end of the wire, clean it again and connect it to the socket. If the cable is broken in another place, it is advisable to install a new one. In this case, it is better to use a thicker wire (to avoid recurrence of the malfunction).
parking lights
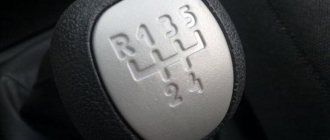
Dimensions on the VAZ-2107 are activated by the leftmost of the four key switches located under the gearbox control lever . This switch is a three-position switch: the side light, along with the license plate light and instrument lighting, is turned on in the second position.
The side lights are activated by a three-position switch located under the gearshift lever.
On the fuse block, which is located under the hood of the car near the windshield closer to the passenger seat, the rear side lights fuses are numbered F14 (8A/10A) and F15 (8A/10A). In this case, fuse F14 is responsible for the operation of the side lights of the left front headlight and the right rear light, as well as:
- a lamp indicating the operation of the dimensions;
- license plate lights;
- engine compartment light bulbs.
We recommend: Self-replacement of the golf 3 timing belt: step-by-step instructions, photos and videos
Fuse F15 is installed in the side light circuit of the right headlight and left rear light, as well as:
- instrument lighting;
- cigarette lighter lamps;
- glove compartment lighting.
If one of these lamps does not work, you should check the integrity of fuses F14 and F15.
Read about repairing VAZ-2107 fuses: https://bumper.guru/klassicheskie-modeli-vaz/elektrooborudovanie/blok-predohraniteley-vaz-2107.html
Fuses F14 and F15 are responsible for the operation of the side lights.
Malfunction of LED brake lights
If, after carrying out the measures described above, it is not possible to determine the reason why the brake lights do not light, you should clarify the type of lamps used. They can be made using LEDs. Their installation has a number of features. Typically, LED lamps have a certain polarity for connecting to the vehicle’s on-board network.
Manufacturers always take this into account when developing. Incorrect connection results in the lamp not lighting up. In some cases, such inclusion may lead to damage. If a connection polarity violation is detected, this indicates that the repair on the vehicle was carried out by an unqualified person.
Brake system
How to replace the brake fluid reservoir of a Chevrolet TahoeInstalling the ABS unit of a Chevrolet TahoeHow to replace the abs sensor of a Chevrolet TahoeRepairing the rear brake discs of a Chevrolet TahoeReplacing the rear brake pads of a Chevrolet Tahoe with your own handsChange the brake pads of a Chevrolet TahoeHow to change the front brake discs of a Chevrolet TahoeInstalling the front brake pads of a Chevrolet TahoeReplace the handbrake of a Chevrolet TahoeRepairing the brake cylinder of a Chevrolet Tahoe xoKak change the brake fluid of a Chevrolet Tahoe with your own hands. Change the brake pipes of a Chevrolet Tahoe. Installing brake hoses of a Chevrolet Tahoe with your own hands. Repairing the handbrake cable of a Chevrolet Tahoe. How to replace the hand brake cable of a Chevrolet Tahoe.
Car alternator malfunction
LED lamps are very sensitive to voltage surges in the on-board network (along with this, the current through the LEDs increases, which leads to their destruction). The voltage may increase if the generator components (namely the stabilizer) are faulty. This is especially common on domestic cars due to the lower quality of component production compared to more well-known brands.
Therefore, if the brake light on a VAZ 2114 or another model does not light up (provided that LED lamps are used), you should also check the generator and replace the damaged element, then change the lamp.
Such a malfunction can occur periodically and is associated with wear and tear of the entire generator. If the brake lights on the VAZ 2115 do not light up and other breakdowns often occur, you should also think about replacing it with a more reliable car (in some cases, this is more profitable than constantly investing money in endless repairs).
Auto-assistance
In the diagram we presented, the elements are depicted as close as possible to how they look in reality. Don’t be alarmed if you only find a schematic diagram for your car with symbolic images of the elements. Schematic diagram of external lighting for VAZ 2114, 2115:
- 3 – mounting block;
- 8 – lamps for side lights and brake lights;
- 11 – brake light limit switch;
- K4 – relay for monitoring the serviceability of brake light lamps and side lights.
Fault localization Understanding the operating principle allows you to determine exactly why the brake lights may not light up:
Malfunction of brake lights together with other indicators
Quite often, the brake indicator lamp is used together with the side lighting of the car. One cylinder contains two filaments, one end of which is connected to the base, and the other two are brought out to separate contacts. If the brake lights and parking lights do not light up, the most likely loss of contact is at the point of their connection to the body (“ground”) of the car or in the socket. This can happen due to a broken wire or oxidation. The broken end is connected to the terminal by soldering or crimping. Oxides are cleaned off with a sharp tool (knife or screwdriver); after repair, it is advisable to cover the joint with paint or grease to prevent re-oxidation.
It is quite rare to encounter a malfunction when not only the brake light, but also the other indicators on the car do not light up. This is usually observed in “drowned” cars that have somehow been in water (as a result of careless driving or an accident). Even after thorough drying, moisture still remains inside the interior trim and electronic components. Its presence leads to increased oxidation of conductive surfaces. In such a car, having eliminated the malfunction of one system, you cannot be sure that it will not appear again.
Light bulbs
Burnt out light bulbs are the most common reason for signals and headlights not working. Remove the screws and lenses (you can access through the trunk or check your vehicle's repair manual for the exact location). Click on the bulbs and turn them counterclockwise to remove them.
Light bulbs need to be replaced if they become dark or the filaments are broken. Choose new light bulbs of the same type and wattage. In most European cars, the same bulb does the job of the rear light and the brake light. This light bulb has double filaments, which allows them to work independently of each other.
Other causes of brake light failure
Sometimes the reason why the brake light on a car does not light up is a malfunction of the electronics. In this case, it is better to take the car to a service station.
There are also exceptions, for example, when a defective light bulb comes across. In addition, lamps may burn out due to normal wear and tear. In these cases, the problem is solved by simply replacing them.
Do not forget that you need to contact only trusted workshops. Often, the intervention of unskilled workers leads to additional malfunctions.
Transmission
Removing the clutch fork of a Chevrolet Tahoe with your own hands Replace the air filter of a Chevrolet Tahoe Replace the speed sensor of a Chevrolet Tahoe How to replace the clutch disc of a Chevrolet Tahoe Change the gearbox of a Chevrolet Tahoe with your own hands Repairing the driveshaft cross of a Chevrolet Tahoe Change the oil in the gearbox of a Chevrolet Tahoe Installing the oil filter of a Chevrolet Tahoe with your own hands Replacing the outer grenade of a Chevrolet Tahoe with your own hands Remove the pedal Chevrolet Tahoe clutchesReplacing the Chevrolet Tahoe speedometer driveReplace the inner CV joint boot on a Chevrolet TahoeHow to change the boot on a Chevrolet Tahoe grenade with your own handsInstalling the outer CV joint boot on a Chevrolet TahoeChange the gear shift lever on a Chevrolet TahoeReplace the cabin filter on a Chevrolet Tahoe with your own handsInstalling the rear axle oil seal on a Chevrolet Tahoe with your own handsChange the gearbox oil seal on a Chevrolet TahoeHow to change the oil seal Chevrolet Tahoe gearbox with your own hands Change the axle shaft seal of a Chevrolet Tahoe How to change the drive seal of a Chevrolet Tahoe How to replace the gearbox seal of a Chevrolet Tahoe with your own hands Replacing the fuel filter of a Chevrolet Tahoe Replacing the clutch cable of a Chevrolet Tahoe Replace the automatic transmission filter of a Chevrolet Tahoe How to change the engine filter of a Chevrolet Tahoe Replace the air conditioning filter of a Chevrolet Tahoe Remove the clutch cylinder of a Chevrolet Tahoe
Electrics
Remove the Chevrolet Tahoe battery How to replace the battery in a Chevrolet Tahoe key fob How to replace the battery in a Chevrolet Tahoe key with your own hands Replace the battery in the Chevrolet Tahoe remote control Replace the Chevrolet Tahoe fuse box Replace the Chevrolet Tahoe solenoid relay Replace the Chevrolet Tahoe side lamp Repair a Chevrolet Tahoe tail light Removing a Chevrolet Tahoe tail light with your own hands Installing a Chevrolet Tahoe ignition switch Installing a coil ignition of a Chevrolet Tahoe with your own handsRemoving the power window button of a Chevrolet TahoeRepairing a low beam lamp in a Chevrolet TahoeReplacing a lamp in the glove compartment of a Chevrolet TahoeHow to replace a lamp in the dimensions of a Chevrolet TahoeReplacing lamps in the high beam of a Chevrolet TahoeInstalling lamps in the reverse of a Chevrolet Tahoe with your own handsChange the lamp in the turn signals of a Chevrolet TahoeChange the lamp in the dashboard of a Chevrolet TahoeChange lamp in the fog lights of a Chevrolet TahoeChange the lamp in the PTF of a Chevrolet TahoeReplace the lamp in the headlights of a Chevrolet Tahoe with your own handsInstalling the interior lighting lamp of a Chevrolet TahoeChange the brake light lamp of a Chevrolet Tahoe with your own handsReplacing the tail light lamp of a Chevrolet TahoeRemoving the left headlight of a Chevrolet Tahoe with your own handsRemoving the window lift motor of a Chevrolet TahoeRemoving the headlight of a Chevrolet Tahoe with your own with your own handsRemove the right headlight of a Chevrolet Tahoe with your own handsHow to change fuses on a Chevrolet Tahoe with your own handsHow to replace the cigarette lighter fuse on a Chevrolet TahoeChange fog lamps on a Chevrolet TahoeRepairing a turn relay on a Chevrolet TahoeChange the starter relay on a Chevrolet TahoeInstalling a windshield wiper relay on a Chevrolet Tahoe with your own handsRepairing Chevrolet Tahoe spark plugs with your own handsReplacing Chevrolet Tahoe generator brushes with your own hands handsChevrolet automatic transmission diagram DIY TahoeChevrolet Tahoe acoustic system circuit with your own handsChevrolet Tahoe fuel pump circuit with your own handsChevrolet Tahoe fuse box circuit diagramChevrolet Tahoe engine control unit circuitChevrolet Tahoe cooling fan circuit diagramChevrolet Tahoe fuel pump circuit diagramChevrolet Tahoe cooling fan circuit diagramChevrolet Tahoe air conditioner wiring circuitChevrolet Tahoe circuit diagram and switching on the front axle of a Chevrolet TahoeChevrolet Tahoe starter switching diagram with your own with your own handsChevrolet Tahoe headlight switch circuitChevrolet Tahoe generator circuitChevrolet Tahoe oil pressure sensor circuit diagramChevrolet Tahoe oxygen sensor circuit diagram DIYChevrolet Tahoe coolant sensor circuit diagram DIYChevrolet Tahoe speed sensor circuit diagramChevrolet Tahoe temperature sensor circuit diagram DIYChevrolet Tahoe fuel level sensor circuitChevrolet engine wiring diagram Tahoe Wiring diagram for windshield wipers DIY Chevrolet Tahoe Wiring diagram for ignition Chevrolet Tahoe do it yourself Wiring diagram of the ignition switch Chevrolet Tahoe Wiring diagram of the sound signal of Chevrolet Tahoe Injector diagram of the Chevrolet Tahoe do it yourself Wiring diagram of the carburetor of the Chevrolet Tahoe Wiring diagram of the headlight range control of the Chevrolet Tahoe do it yourself Interior lighting diagram of the Chevrolet Tahoe Wiring diagram of the heater of the Chevrolet Tahoe Wiring diagram of the cooling of the She engine Vrolet TahoeDashboard wiring diagram of a Chevrolet Tahoe do it yourselfWiring diagram of the headlights of a Chevrolet TahoeHeater diagram of a Chevrolet TahoeScheme dashboard of a Chevrolet TahoeDo-it-yourself wiring diagram for a Chevrolet TahoeDo-it-yourself wiring diagram for fog lights on a Chevrolet TahoeDiy wiring diagram for a fuel pump relay for a Chevrolet TahoeElectric diagram for a pressure relay for a Chevrolet TahoeDo-it-yourself wiring diagram for a Chevrolet Tahoe turn signal relay diagramChevrolet Tahoe regulator relay diagramChevrolet Tahoe starter relay wiring diagramElectros DIY Chevrolet Tahoe injection system circuit diagramChevrolet Tahoe ignition system circuit diagramChevrolet air conditioning system diagram TahoeChevrolet Tahoe cooling system circuitChevrolet Tahoe engine management system wiring diagramChevrolet Tahoe starter circuit DIYChevrolet Tahoe windshield wiper circuit DIYChevrolet Tahoe power window circuit diagram DIYChevrolet Tahoe brake light circuit diagramChevrolet Tahoe fuel pump circuitChevrolet Tahoe fuel system wiring diagram Chevrolet Tacho brake system diagramChevrolet Tahoe central locking diagramChevrolet Tahoe instrument panel wiring diagramECU wiring diagram Chevrolet Tahoe
Engine
Change the antifreeze Chevrolet Tahoe with your own hands with it with your own hands with your own stilers Tahoe with your own hands, with your own hands, replace the Chevrolet Tahoe engine control unit with your own hands, replace the chevrolet stroke adhesive collector tachts on the chevrolet stamp Tahalet Constantinople Chevro Years of the Tahoel of the exhaust manifold stroke Tahoe repair of the hydraulic compensators Chevrolet Tahoe, the head of the Chevrolet cylinder block tacholine pressure from the pressure sensor Chevrolet Tahoe oilsReplace the knock sensor of a Chevrolet TahoeReplace the oxygen sensor of a Chevrolet TahoeReplace the crankshaft sensor of a Chevrolet TahoeReplace the mass air flow sensor of a Chevrolet TahoeHow to change the coolant sensor of a Chevrolet TahoeHow to replace the camshaft sensor of a Chevrolet TahoeHow to replace the temperature sensor of a Chevrolet Tahoe with your own handsReplace the fuel level sensor of a Chevrolet Tahoe with your own handsRepairing the idle speed sensor of a Chevrolet TahoeHow to change the DMRV of a Chevrolet TahoeRemove the valve cover of a Chevrolet TahoeHow to replace the air conditioning compressor of a Chevrolet TahoeRepairing the heater valve of a Chevrolet TahoeRemove the engine cover of a Chevrolet TahoeChange the oil in a Chevrolet Tahoe automatic transmissionChanging the oil in a Chevrolet Tahoe engine with your own handsReplacing the valve stem seals of a Chevrolet TahoeReplace the oil scraper rings of a Chevrolet Tahoe with your own handsHow to replace the oil pump She growing up Tahoe with his own Do-it-yourself repair of Chevrolet Tahoe valve guides Installation of the Chevrolet Tahoe timing chain tensioner with your own hands Installation of the Chevrolet Tahoe generator belt tensioner roller Replace the Chevrolet Tahoe engine mounts with your own hands Replace the Chevrolet Tahoe coolant Replace the Chevrolet Tahoe engine mounts Repair the crankshaft bearing Chevrolet Tahoe Replacing the Chevrolet Tahoe pump How to change the piston rings of a Chevrolet Tahoe with your own hands Replace the gasket Chevrolet Tahoe cylinder headInstalling the cylinder head gasket Chevrolet TahoeReplacing the valve cover gasket Chevrolet TahoeRepairing the manifold gasket Chevrolet TahoeInstalling an air conditioner radiator in a Chevrolet TahoeInstalling a heater radiator in a Chevrolet TahoeInstalling a camshaft in a Chevrolet TahoeHow to replace the expansion tank in a Chevrolet TahoeReplacing an alternator belt in a Chevrolet TahoeReplacing a timing belt in a Chevrolet Tahoe do it yourselfRepairing the Chevrolet Tahoe air conditioning beltHow to replace the oil seal Chevrolet Tahoe engineReplace the Chevrolet Tahoe crankshaft oil sealInstalling the Chevrolet Tahoe camshaft oil seal yourselfReplace the Chevrolet Tahoe valve sealsRepair the Chevrolet Tahoe starterInstalling the Chevrolet Tahoe thermostatReplace the Chevrolet Tahoe fuel pumpReplace the timing chain of the Chevrolet TahoeDo it yourself Chevrolet Tahoe crankshaft pulley repair