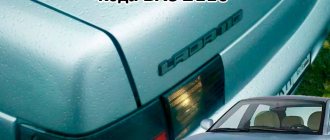
The VAZ 2110 car has long been known to Russian drivers. And this is not surprising, since its manufacturer is the Volzhsky Automobile Plant. It first appeared on the market in 1995, and production ended more than ten years ago. Despite this, the car is still often found on Russian roads today.
The VAZ 2110 is a reliable, comfortable, inexpensive to maintain and quite beautiful looking front-wheel drive sedan. If you compare the cost of consumables with foreign cars, you will notice a significant difference. The price of spare parts, fluids and other things for the VAZ 2110 is several times lower. It is also worth noting the efficiency in fuel consumption. A car with a 1.6 liter unit spends 8-10 liters of gasoline per 100 km. Quite playful and fast, acceleration takes 11 seconds.
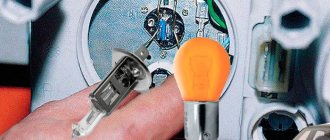
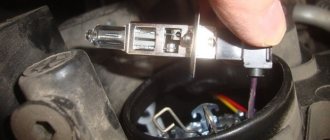
Having become the owner of such a car, you need to know the type and power of light bulbs that the manufacturer has provided for it. Since periodically they burn out and require replacement.
Lamp manufacturers - the choice of users and experts
As of the beginning of 2022, the following brands of lamps for VAZ 2110 headlights are available on the Russian market (in descending order of quality and cost):
| Philips X-treme Vision +130% - the luminous flux, according to the manufacturer, is increased by 30%, there is a so-called xenon imitation. Price - from 800 to 1000 rubles. |
| OSRAM Nightbreaker UNLIMITED + 110% - this lamp has a luminous flux increased by 10%, its cost is about 900 rubles. |
| OSRAM ULTRA LIFE - lamps are characterized by durability and a price from 500 to 650 rubles. |
| Beacon H1 12V 55W Super Light +50% - the manufacturer positions its products as an affordable product for a wide range of car enthusiasts. The luminous flux is sufficient. The cost ranges from 250 to 350 rubles. |
Other malfunctions affecting the illumination of the rear lights
The reversing lights may not light due to a faulty switch. To troubleshoot, you need to do the following:
- disconnect the connector;
- unscrew the switch with a 21 key;
- remove the switch and replace it with a new one.
Note. The operation should be carried out quickly so that there is no large leakage of engine oil from the gearbox.
A malfunction of the car's lights may be caused by problems with the hydraulic corrector. With its help, you can change the angle at which the headlights are tilted (this is due to the different load levels of the car). The hydraulic corrector consists of a master cylinder, which is mounted on the dashboard, actuator cylinders of the headlights and connection tubes. It cannot be disassembled and cannot be repaired. The assembly part should be replaced. Removal and installation of the main cylinder of the headlight hydraulic corrector occurs in stages:
- remove the handle and cylinder lining by prying it off with a screwdriver;
- unscrew the nut with a 22" head;
- remove the hydraulic corrector.
The trunk light may also need replacing. In this case you need:
- Disconnect the cable and terminal of the negative battery;
- disconnect the rear light from the block with wires by opening the trunk lid;
- press the fastener parts and remove the holder with lamps from the flashlight body;
- unfasten the lamp by unscrewing two nuts;
- loosen the three nuts that secure the decorative trim of the luggage lid and unscrew the nut closest to the lamp;
- lift the cover and remove the lamp;
- The new lamp is installed in the opposite order to that described above.
Note. When installing the flashlight, first place the flange of its body under the decorative trim, and then tighten the nuts securing the trim.
Many cars of the VAZ family, including the VAZ 2110, have a problem that affects safety and also causes a lot of trouble for drivers. The rear light board is a thin strip with conductive tracks. You have to change this tape quite often, and with it the burnt out light bulbs. You can use the option of inserting iron cartridges from the VAZ 2101. So, to do this, you need to:
- remove and disassemble the rear lights, removing the board and the tape from them;
- buy single cartridges for stops and dimensions;
- purchase copper wire with a cross-section of 2.5 mm, connectors, M3 bolts;
- mark the places for the cartridges and drill them, finishing the holes with a file;
- to modify the cartridges for clearance and brake lights, turn the tip terminals 180 degrees;
- completely cut out the cartridges from the turn signals;
- secure the cartridges to the plastic with bolts and nuts;
- connect all the cartridges, laying the pluses on the turn signal, stops and dimensions;
- extend the connector block and install everything on the car.
Note. Before installation, you should check everything to ensure there is no short circuit.
Replacing turn signal lights
Replacing turn signals on a VAZ 2110
But if you need to replace the turn signal for some other reason, then you need to read these instructions:
- First, you should disconnect the block with wires from the turn signal, and then from the headlight (see Repairing a VAZ 2110 headlight with your own hands);
- Next, press the latch, then turn the hydraulic corrector and remove it from the headlight housing;
- Then you need to unscrew the nuts that secure the headlight and turn signal;
- After this they can be easily removed;
- You need to unscrew the two fastening screws, which will allow you to disconnect the turn signal from the headlight;
- Install the headlights and turn signal in the reverse order. Make sure they are properly secured.
Replacing the turn on a VAZ 2110
So, let's look at the algorithm for how to replace the turn signal on a VAZ 2110:
- Unscrew the decorative panel, which is secured with 2 bolts. Take the 8 key and start turning it counterclockwise to quickly and easily complete the task;
- When the decorative panel is dismantled, it is necessary to begin dismantling the trim. A 10mm wrench will help with this. If the fasteners are completely unscrewed, you can remove the bar;
Replacing the front turn signal of a VAZ 2110
- When you gain access to the remaining fasteners, you need to unscrew the 2 bolts securing the bumper. Due to this, freedom of action will appear, thanks to which you can easily detach the eyelash. To do this, you need to remove the latches attached to the wing;
- When the headlight is removed, you need to unscrew the 2 mounting screws, which will allow you to remove the turn signal;
- Everything is put together in reverse order.
Replacing the front turn signals of a VAZ 2110
The most inconvenient part about replacing headlights is screwing in the bolt located under the bumper. The easiest way to do this is with a socket wrench.
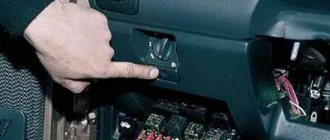
Replacing the turn signal handle
Turn signal handle
If the turn signal handle is broken, then the following problem appears: when the steering wheel is turned to the left, the turn signal lights up and indicates that the driver wants to turn. But during the turn itself it does not snap off. After that, it continues to burn and does not turn off. This leads to the driver feeling awkward: he is driving in a straight line, but the turn signal indicates that the car wants to turn.
So, replacing the turn signal handle is accompanied by the following manipulations:
First you need to remove the cover under the steering wheel, which is held on by 2 bolts.
- You need to replace the old handle with a new one. It is as easy to insert as it is to remove. Therefore, there will be no problems with this.
- Now we need to check how it works. To do this, you need to start the car and switch the turn signal knob. If it is working correctly, the turn signal will automatically turn on and off when you change the position of the turn signal knob.
- You can install it in place without difficulty. After this the lid is screwed on.
Purpose
The front lights are called head lamps; they are located in the headlight unit in front of the car on both sides. They are the outermost ones in the lighting system, and owe their name to the fact that they show the width of the car to oncoming vehicles.
Various options for side lights and daytime running lights
The rear lights are intended for exactly the same mission—so that you can be seen by those driving behind you. This is especially true when overtaking; you don’t want someone to hit your “swallow” without seeing its real size.
Tuned tail lights
Hence the important advice: if it suddenly happens that you need to go at all costs and you discover that the light bulb in the left side light has burned out, replacing it with a new one is impossible due to the lack of one, don’t be lazy and move it from the right side. And we will tell you how to do this.
What about LEDs?
The LED light source is also not installed on domestic cars. We have already explained the issue of installing LEDs, when it is possible and when it is not.
In general, this is a more modern type of head light, and has come into fashion quite recently. A number of manufacturers for their models have even begun to provide documentation for the possibility of installing LED lamps in such headlights when obtaining vehicle type approval. These include, for example, Hyundai and Kia. This, of course, does not mean that you can simply replace the halogen lamps in such cars with LED ones. But changes are made in a somewhat simplified mode. In addition, even the most budget models - Kia Rio and Hyundai Solaris - are equipped with xenon.
But we are talking about VAZ cars. And for them, LED lamps in headlights, unfortunately, are prohibited, since the design of their light source module does not provide for the installation of anything other than incandescent (halogen) lamps.
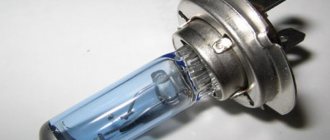
Types of lamps
For the VAZ 2110, the manufacturer provides for the installation of only one type of lamp - halogen. Structurally, they are a glass container filled with iodine or bromine gas (these chemical elements belong to the halogen group, hence the name of the lamps). The gas in the cylinder is under pressure, this guarantees against air getting inside and premature failure of the lamp. The light is emitted by a tungsten metal spiral. Currently, this type of lamp is considered obsolete.
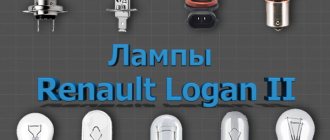
You can familiarize yourself in detail with the types of lamps used and their characteristics in the table below.
Why won't LED bulbs fit into regular headlights?
Most car headlights are more than just a bulb in a reflector attached to a positive and negative light. This is truly a high-precision system, honed by generations of engineers. In the scientific community, there is even a separate direction for studying the influence of light, the basis of any engineering thought - it’s called photometry.
Intensity, or power of the luminous flux (the unit of luminous intensity is measured in candela), luminous flux measured in lumens (Lm), illumination, luminous efficiency and many other equally important parameters.
Right down to reflectors (a complex system of mirrors), which have a strictly adjusted shape for each type of light source. For elliptical optics - one, for dual incandescent H4 lamps - another. Well, for LEDs - the third.
And all this so that the light emitted by the lamp hits the road in such a way as to ensure maximum visibility for the driver without blinding oncoming traffic.
Most LEDs do not emit light from the same location in the headlight housing as incandescent bulbs, and from that point on they are doomed to produce mediocre results!
Types of lighting
To ensure reliable and long-lasting headlight performance, car enthusiasts can choose from LED, xenon, halogen or conventional incandescent low beam bulbs
The following types of lamps are popular among owners of the VAZ 2110, as well as 2111 models:
- Philips Vision. Capable of providing a third more light than halogen models. They are also significantly superior in quality and durability to the factory lighting of many car models. Often these are the lamps that are installed in machine production, which is an indicator of the high quality of the model. In terms of price-quality ratio, they are considered one of the best options for VAZ;
Philips Vision bulbs
- Philips VisionPlus. The model is a modernized Philips Vision type. It illuminates the road surface 60% better than the standard halogen model, which provides greater light output;
Modernization of standard lights
Now it’s time to start tuning the rear lights of the VAZ 2110. The easiest option to improve the appearance of the car is to replace the standard lights with, for example, Osvar sticks.
Rear LED lights for VAZ 2110 “stick” type
This is not difficult to do. We go to the store, buy them, remove the standard ones (see section “Removing block headlights”), and put the purchased ones in their place. As a rule, there is no need to make any modifications to the connectors or solder connections. Moreover, the “sticks” from the 112 model will fit perfectly on the VAZ 2110. The result will be something like this:
“Sticks” installed instead of the standard rear lights of the VAZ 2110
But we don’t look for easy ways, especially if we like to do things with our own hands and according to our own ideas. You can modify and modify the standard taillights, but to do this you will have to disassemble them.
How to take them apart
According to the designers' idea, the rear lights of the VAZ 2110 are non-separable - the glass is tightly nailed to the headlight body. Maybe with some creepy solvent like dichloroethane or using ultrasonic or microwave welding. But we will still try to disassemble the device, and in such a way that it can be assembled afterwards.
To work, we will need the headlight itself, a knife that we don’t mind, and a gas stove or any other burner.
Since glass cannot be removed by any other methods, we will literally cut it off. We remove the board with the light bulbs from the device. We heat the knife and begin to slowly cut off the glass around the perimeter.
Cutting off the rear light glass of a VAZ 2110 with a hot knife
We cut through on three sides - on the side of the side lamp and on the sides. We don’t touch the top side, because there the glass overlaps with the lantern body, and it won’t be possible to cut it off neatly.
The glass is placed on top of the device body
After making several passes with a knife, we begin to disconnect it at the top. We insert the knife, as shown in the photo below, and gently rock it, trying to tear the glass away from the body at the gluing site.
Removing the glass at the top of the headlight
After the glass comes off on top, there will be two more places that hold it. They are marked with arrows in the photo below. We do the same: we insert a knife between the glass and the body in the place where it still holds, and tear it off with light rocking.
Peeling off of glass in the area of the reflector
If everything is cut well, the glass can be easily removed.
Removing glass from the rear light of a VAZ 2110
All that remains is to bring beauty. Take a file and align the melted edges of the glass and body.
All that remains is to remove these melted burrs
Comparison of halogen, xenon and LED lamps
From the point of view of purely consumer properties, the primacy of automobile lamps is as follows:
- LEDs are the most modern automotive lighting products. They surpass their competitors in all respects - durability (capable of operating with a reduction in the brightness of the luminous flux by a maximum of 10% for more than 25 thousand hours), energy efficiency (consume a minimum of energy, most of which is converted into light radiation), cost (initially they were expensive, but Now they are significantly cheaper than competitive designs).
- Xenon - they are also called gas-discharge. Outwardly, they are similar to halogen ones, but they differ sharply in the principle of operation and internal design. In xenon lamps, the interior of the cylinder is filled with the noble gas xenon (hence the name), and the light does not arise from the glow of a metal arc, but as a result of the glow of the gas in the cylinder. The difference between the operation of xenon lamps is the release of a significant amount of heat and light radiation from that part of the spectrum, which leads to burnout of the reflective coatings of the reflectors. The service life of these lamps is about 4-5 thousand hours; their installation requires a headlight of a special design with a lens, position corrector and washer. The cost is significantly higher than halogen ones. It is true that the brightness of the light flux, and therefore the range of the illuminated section of the road, is higher.
- Halogen - this type of lamp was originally provided by the manufacturer of the VAZ 2110. Both manufactured headlight designs were designed for halogen lamps. The service life is quite modest - about 500-1000 hours. The brightness and range of illumination are also much inferior to competitors. The advantages are proven design and affordability.
Important! In the late 1990s and early 2000s, it became popular among many car enthusiasts to install xenon lamps that were not provided for in their headlights. It was enough to purchase an installation kit and use the simplest tools. The brightness of the headlights increased significantly, but due to the unforeseen nature of such an upgrade, the risk of blinding oncoming drivers and oneself during snowfall increased, and visibility decreased (to a level below standard halogen ones) during rain and fog. Now such a replacement is directly prohibited by law and can lead to serious consequences for the car owner.
Does it make sense to put LEDs in lamps?
photo: vintagecarleds.com
LEDs, when properly placed and properly adjusted (in theory), can convert minimal power input into large amounts of light, which makes the technology attractive overall.
All things being equal, it appears that replacing energy-hungry discharge lamps with brighter, lower-power LEDs kills two birds with one stone. Plus, LED has an “instant on” effect and visual clarity of light (which in practice tires drivers on long trips more due to the sharp transition from bright light to dark than the soft gradient of conventional discharge lamps and even xenon), which forces experimenters put them on your cars. Also, and this is one of the main advantages, LEDs can give old cars a modern style.
Simply put, LED headlights are easy-to-install, easy-to-access “toys” with a flair of safety and technology that make cars look cooler.