The traffic regulations of any country now have a clause obliging drivers to drive with low beam headlights or daytime running lights on even during the day. There are no DRLs on the VAZ-2110. And the factory headlights don't work very well. Poor low beams are a nuisance for drivers and one of the causes of accidents involving pedestrians. The factory low beam lamps of the VAZ-2110 shine so that pedestrians are not always visible on dark roads. Drivers are trying to replace standard light bulbs with alternative options. Let's look at what a good low beam bulb for a VAZ-2110 should be and what types of these products exist.
What kind of light bulbs are in the PTF VAZ 2112?
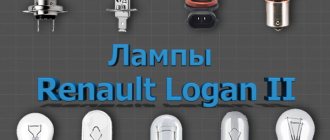
Lamps used in Lada 112 hatchback VAZ-2112 cars
| Light device | Quantity, pcs | Lamp type |
| Front marker light | 2 | W5W |
| Front direction indicators | 2 | PY21W |
| Front fog lights (depending on configuration) | 2 | H3 or H1 |
| Side direction indicators (depending on configuration) | 2 | W5W or WY5W (yellow bulb) |
Typical faults
A burnt-out light bulb, of course, is not the only malfunction of the rear light device. He can refuse for many reasons, the main ones of which we will consider:
- Fuse blown;
- Oxidation of connecting blocks;
- Failure of the lighting device itself;
- Failure of the breaker relay (only for direction indicators and hazard lights);
- Failure of limit switches (brake light, reverse signal);
- The power wire is broken or shorted to the body.
Circuit breakers
The issue with fuses is easily resolved. We open the mounting block, which is located to the left of the steering column and is fixed with a mechanical button.
The VAZ 2112 mounting block is fixed in the panel with a button
We press the button, tilt the block and check the serviceability of the following fuses:
- F1 – side light (left side);
- F11 – side light (right side);
- F16 – power supply of the breaker relay (turns, alarm);
- F17 – brake light;
- F19 – direction and reverse indicators;
- F20 – rear fog light.
Finding the necessary inserts is not difficult - they are all numbered directly on the panel of the mounting block:
Location and designation of relays and fuses of the VAZ 2112 mounting block
Pads and connectors
The next problem is the connecting blocks. Moisture could get into them, they could oxidize or burn. Focusing on the wiring diagrams (section “Connection diagram”), we disconnect all the connectors, not forgetting about those that connect the mounting block. We check the condition of the contacts: they should be clean and shiny, no debris, signs of oxidation or burning. If necessary, clean or replace.
The mounting block pads are located on its rear side. Unscrew the fixing screw, remove and turn over the mounting block.
In order to remove the mounting block on the VAZ 2112, it is enough to unscrew one screw
When dismantling the mounting block, we try not to lose the fixing bracket, which is secured with the same screw.
Flashlight
Failure of the light fixture itself is also a fairly common malfunction. To solve this problem, it is not necessary to remove the flashlight. It is enough to remove the back panel with the lamps (see the section “How to change light bulbs”) and disconnect the power supply from it. Both the tail and corner lights use a flexible circuit board.
Removed panel of the corner lamp of VAZ 2112
We carefully inspect the traces of the printed circuit board for fracture, burning or oxidation. If necessary, we clean (oxidation), “treat” with a soldering iron and scraps of thin mounting wire. If “treatment” is impossible, we simply buy a board and install it to replace the failed one.
You can simply buy the boards for the rear and corner (left) lamps of the VAZ 2112
We inspect the contacts of the socket and lamp, and clean if necessary. If it cannot be repaired, we replace it.
Lamp sockets (left) P21W and P21W+T4W
Relay-breaker for direction indicators and hazard warning lights
The relay is located in the mounting block under number K3 (see photo from the “Fuses” subsection). We pull the relay out of the block, turn on the ignition, the turn switch and with a piece of wire we alternately close contacts 49a-49 and 49a-31 of the block. If the turn lamps come to life, change the relay.
Limit switches
The switch responsible for the reverse lamp is located on the gearbox and closes automatically when reverse gear is engaged. Turn on the ignition, pull off the block from the limit switch and use a piece of wire to close its contact to the body (engine or gearbox). If the signal lights up, change the limit switch.
Checking the reverse limit switch of VAZ 2112
The brake light switch also operates automatically, but when you press the brake pedal, it also lights up the brake light lamps. It is located in the cabin above the brake pedal lever and is equipped with two single-contact blocks.
The brake light limit switch has two blocks
We remove the pads, turn on the ignition and use a piece of wire to connect the contacts of the pads to each other. If the “stops” light up, change the limit switch.
Wiring
When the supply wires are shorted to the body, the corresponding fuse immediately burns out. A new one burns out either immediately after installation (a “reliable” circuit) or regularly while driving (a circuit occurs during vibration and shaking). In any case, the reason is frayed insulation. The most likely places for a malfunction are: the harness passes through body ribs, moving parts, and when passing through holes in the body.
A break occurs much less frequently, because before it completely rubs out, it will begin to short-circuit to the body, giving time to find the problem. The locations of this malfunction are the same as during a short circuit.
We carefully inspect the corresponding power harnesses, find them, and remove them using electrical tape and, if necessary, a soldering iron (not twisting!).
Connection diagram
But before you start troubleshooting the rear light of the VAZ 2112, it would be useful to get acquainted with its connection diagram. The connection diagram for turn signals on a VAZ 2112 is as follows:
Installation diagram of turn signals VAZ 2112
The rear light bulbs are marked here with the number 6, and they are activated when the ignition switch 3 is turned on by switch 7. Relay-breaker K3, located in mounting block 2, is responsible for the “blinking”.
The connection diagram for brake lights, reverse gear and dimensions of the VAZ 2112 looks like this:
Installation diagram of external lighting devices VAZ 2112
Here the number 6 indicates the side lights, 7 the brake light, and 13 the reverse indicators. The dimensions are activated using switch 3, and the ignition does not need to be turned on. The stop light lamp is turned on by limit switch 11, the reverse light by limit switch 10. These signals will light only when the ignition switch 4 is turned on.
The base may vary
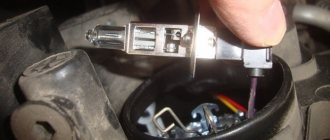
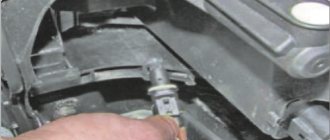
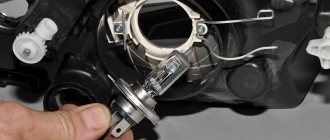
Depending on what type of fog lights your vehicle has, the base may be different. There can be two socles: H3 and H11.
In this database PTF N4
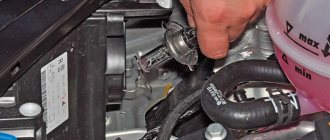
Installation of LED lamps in a standard base
Let's just say that LED PTF lamps glow worse.
The man still managed to glue the xenon. Now it’s very cool to drive in the dark, it’s heaven and earth compared to the factory light.
The base of the lamp depends on the manufacturer, I personally have Bosch fog lights and there are bulbs with an H4 socket, but maybe H3. My light bulbs are made in China, the so-called “halogen xenon”, they glow very well, and most importantly, they are not prohibited in our country.
VAZ doesn’t particularly worry about installing base headlights into the factory fog lights of the VAZ-2114, because this is not a premium car. There are the cheapest basic lamps. Therefore, I advise all owners of this model to change them to xenon ones. Believe me, you will immediately notice a huge difference.
Source
About choosing LED products
The choice of truly high-quality LED lamps on the modern market is small. These are all the same brands that produce halogen lamps:
- Philips.
- Osram.
- Narva.
There are also domestic ones.
Experts conducted a series of independent tests, during which they managed to create a certain rating. During the tests, all parameters were checked. Thus, the best performance is found in Osram and Philips products. This is a completely expected result. In second place are domestic products. But when installing LED lamps, it is necessary to consider whether the optics are designed for such a product. If the headlight is made to work with halogen types, then all the advantages that the lamp has will come to naught. It makes sense to buy the same halogen, but with higher performance.
How to improve stock lights
In principle, the rear lights of the VAZ 2112 have optimal lighting characteristics, so there is no need to improve anything particularly. The only thing you can do is improve their appearance somewhat and make them more economical by replacing incandescent lamps with LEDs. The easiest (but not the cheapest) way to change the appearance of the lights is to replace them with more original ones. For example, on the so-called “sticks”.
The rear stick lights look much more presentable than the standard ones
How to remove tail lights and disassemble them
But if we want to start tuning the standard lights, we first need to remove and disassemble them.
Back light
The rear light, which is responsible for the brake light and reverse gear, can be easily removed. Open the trunk door and disconnect the power supply from the lamp.
Removing the power supply from the rear light of a VAZ 2112
Squeeze the clamps and remove the panel with the board and lamps.
Removing the canopy panel
Using a size 8 wrench, unscrew the 2 nuts that secure the device.
Rear light fastening nuts
Loosen 3 nuts securing the decorative reflective trim, and unscrew the fourth one, located closer to the lamp being removed, completely.
Partial dismantling of the decorative trim
Lift the cover and take out the flashlight.
The taillight can now be removed
Corner lantern
Open the trunk door and unscrew the four screws securing the trunk trim closer to the light being removed - two from the bottom, two from the side.
Partial removal of trunk upholstery
We bend the upholstery and see the back of the lamp.
The corner lamp of the VAZ 2112 is located behind the upholstery
Remove the power supply from the device.
Removing the power supply
Using a size 8 socket wrench, unscrew the three nuts securing the light fixture.
These nuts secure the taillight
We push the device back in the direction of travel of the car and remove it from the body.
Removing the corner lamp VAZ 2112
How to disassemble
Unfortunately, the rear lights of the VAZ 2112 are non-separable, so you will have to break them, not disassemble them, but in such a way that they can be repaired later. This can be done in two ways: sawing the body or cutting it with a hot knife. In the first case, it is convenient to use circular attachments on a drill. If you don’t have attachments and don’t want to buy them, you can use a piece of a regular hacksaw blade for metal.
Cutting a lantern with a circular nozzle
To implement the second method, you will need a knife and a gas stove. Heat the knife and cut the lantern around the perimeter. After removing the glass, we clean all melted areas with a file. Barbarism, of course, but it works.
Disassembling the rear light using a hot knife
Assembling the lantern is easier - just connect the halves and fill it with glue, for example, “Moment” or similar. To prevent the lantern from falling apart while the glue dries, you can first grab the parts with a soldering iron at several points.
Assembly of the rear light device VAZ 2112
Halogen lamps
They are also widespread. The products are ideal for use in foggy conditions. The low price makes them accessible to everyone. A significant disadvantage of such light is poor road lighting. But there are manufacturers who make high-quality and bright light bulbs for cars. The light bulb is a flask made of quartz glass. There is an inert gas inside it. These are halogen vapors. The lamp can become very hot during operation, and quartz glass best withstands working in such conditions. There are a huge number of types of these light bulbs on the market.
They are distinguished by their base. VAZ-2110 low beam lamps must be equipped with an H1 socket. Also on sale are products of type H4. They are also used in low beam. The halogen lamp is powered by 12V and has a rated power of 55W. As for the clarity and brightness of the light flux, these characteristics depend on the color temperature of the particular light bulb. The maximum values are 5000 K.
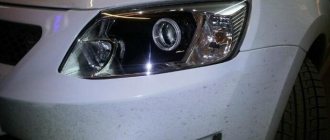
Xenon light
Over the past 10 years, which is how long they have been in operation, these lamps have managed to win the hearts of the majority of owners of foreign and domestic cars. There is a wide range of light bulbs on the market. Xenon products are significantly brighter than traditional halogen light. Disadvantages include difficulties during the installation process and the need to purchase and install an ignition unit. The price of the kit starts from one and a half thousand rubles, excluding installation.
The xenon lamp provides significantly better visibility for the driver of the car, and therefore increases the level of safety. The luminous flux of such optics will be 2.8 times higher than that of halogen optics. At the same time, the power consumption is one and a half times less. Xenon light is as close as possible to natural light (it has no visible yellowness). The service life of such gas-filled products is 5 times longer than that of an ordinary lamp. Such light not only increases safety, but also attracts the attention of other road users. And one more advantage - the headlight shines with a pure white, not a yellow beam. This makes the car stand out from the crowd.
Types of lighting
To ensure reliable and long-lasting headlight performance, car enthusiasts can choose from LED, xenon, halogen or conventional incandescent low beam bulbs
The following types of lamps are popular among owners of the VAZ 2110, as well as 2111 models:
- Philips Vision.
Capable of providing a third more light than halogen models. They are also significantly superior in quality and durability to the factory lighting of many car models. Often these are the lamps that are installed in machine production, which is an indicator of the high quality of the model. In terms of price-quality ratio, they are considered one of the best options for VAZ;