Warmth in the cabin in winter is the key to the health and well-being of the driver and passengers.
Due to the complexity of the heating system design, service station technicians recommend contacting service centers for diagnostics and subsequent repair of breakdowns.
If you decide to repair it yourself, then follow the instructions.
The device of the stove of the Daewoo Nexia car
The stove allows you to create a comfortable microclimate for the driver in the interior of any car. In addition, it heats the glass, freeing them from ice or frost. All this is especially true in the cold season.
An important condition for the operation of the stove on the Daewoo Nexia is the power unit warmed up to the standard temperature. The stove starts heating well only after the engine has warmed up.
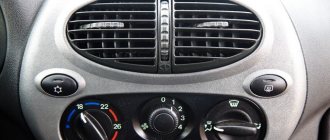
The heater control unit is located on the central panel of the cabin
The interior heating system consists of the following parts:
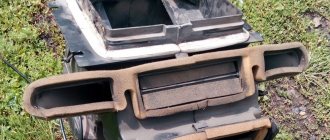
- Radiator (heat exchanger). It warms up the air and blows on the windows from the passenger compartment. The air temperature increases due to the exchange of heat between the walls of the radiator and the heated antifreeze that comes from the engine.
- Supercharger (fan). The supercharger is an electric motor with rotating blades. Changing the rotation speed allows you to regulate the flow of air coming from the stove, making it more or less intense.
- Thermostat damper. It allows the driver to regulate the operation of the supercharger. The damper controls all air flows passing through the radiator, allowing you to change the temperature in the cabin. The device is located in the general structure of the stove.
- Executive element. This unit is a plastic lever that controls the air flow. During operation, it opens or closes the heat pipe of the radiator and directs air flows to different areas of the cabin (window blower, foot area, rear, etc.).
- Hoses and lines. Coolant heated by the engine, which is the main source of heat for the stove, is forced to circulate through them.
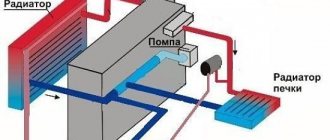
A typical diagram allows you to understand how a heater radiator works
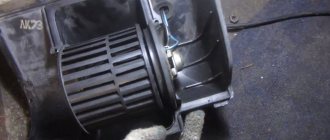
The electric motor of the Daewoo Nexia car heater has a cylindrical shape and a plastic-metal body. Its technical characteristics are as follows:
- rated voltage - 12 V;
- current strength - no more than 20 A;
- impeller speed - 3600 rpm;
- impeller diameter - 140 mm;
- blade height - 68 mm;
- fan type - centrifugal.
The electric motor is designed to ensure normal operation of the stove in any conditions
The stove vacuum switch is a damper control device. The driver from the cabin can set a comfortable operating mode for the stove by moving the levers on the control unit. If it is not possible to direct the air flow to the desired area of the cabin, minor repairs will be required.
Warm-cold switch or blower direction switch? If the first - look at the “beard” under the tidy on the right (where the passenger’s knees are) - there is a cable that moves the damper lever. Perhaps he jumped off or something else happened to him, move the handle and see if it works. And if there is blowing, then, most likely, the hose (thin, almost like the rod from a handle) coming from the intake manifold into the cabin (under the tidy) has come off - the damper drive is vacuum, and the vacuum is taken from the intake through the hose.
Heating modes are controlled by a switch from the passenger compartment
General ventilation of the interior is carried out through the air intake, which is located in the area of the Daewoo Nexia windshield. The air intake takes in the required amount of air, supplies it to the stove components - there it warms up and enters the cabin.
Features of the operation of the Daewoo Nexia car heater in recirculation mode
Car owners know that it is impossible to operate a Daewoo Nexia car for a long time with a stove operating in recirculation mode - the concentration of carbon dioxide in the cabin can greatly increase. Therefore, it is recommended to use this mode only when crossing areas with strong odors (landfills, fires, etc.).
It is also not recommended to turn on recirculation in winter, as condensation will quickly begin to accumulate and freeze on the glass. This will make it very difficult for the driver to see.
Causes of stove malfunctions
Most often, people think about warmth in the cold season, but sometimes, instead of the expected warmth, the driver is faced with the fact that the stove in the Daewoo Nexia car does not heat well.
An open or air cooling system is designed to cool the machine's engine and remove heat using air flow. Without a well-functioning heating system, it is impossible to achieve a comfortable and warm temperature in the car interior. And if one day you are faced with the problem that the stove in the Daewoo Nexia does not work, it means that there are problems and problems in the cooling system. But don’t panic and call a car service center.
In most cases, you can solve the problem yourself. There are several most common reasons that lead to the Daewoo Nexia stove not heating well:
- air jams. They form when air gets inside with the change of antifreeze or if there is damage to the cylindrical block.
- radiator contamination. This happens when insects, dirt, dust, leaves, sealant, water get in contact, or if low quality antifreeze is used,
- The coolant tank cap does not hold the required pressure,
- severe contamination of the cabin filter,
- broken fan,
- damage to the radiator damper,
- Unstable heating results from failed bearings.
Fuses Daewoo Nexia N150, 2008 - 2022
Most of the power supply circuits of the electrical equipment of the Korean sedan are protected by fuses. Headlights, electric fan motors, fuel pump and other powerful current consumers are connected through a relay. The protective elements are installed in mounting blocks, which are located under the hood and in the trunk.
The diagrams of the Daewoo Nexia N150 2nd generation 2008, 2009, 2010, 2011, 2012, 2013, 2014, 2015, 2022 model year are considered
In the cabin
To access the mounting block, remove the plastic cover in the instrument panel. On the inside of the mounting block cover there is a diagram of the arrangement of elements installed on the outside of the block. .
| Fuse and relay diagram of the Nexia 150 cabin unit | ||
| Arrangement of elements on the outside of the mounting block | ||
| № | Current, A | Protected Circuits |
| F1 | 10 | ECU (battery circuit). |
| F2 | 10 | Side lamps, license plate lights, instrument cluster and control lights. |
| F3 | 15 | Ignition system relay circuit. |
| F4 | 20 | High beam headlight lamps. |
| F5 | 10 | Low beam lamp of the left headlight. Electric drive for adjusting the direction of the light beam of the left headlight. |
| F6 | 10 | Low beam lamp for the right headlight. Electric drive for adjusting the direction of the light beam of the right headlight. |
| F7 | 30 | Fuel pump fuse, fuel injectors. |
| F8 | 20 | Turn indicators, brake lights. |
| F9 | 30 | Windshield cleaner. |
| F10 | 10 | Fuel tank filler flap drive. |
| F11 | 10 | Relay for turning on the electromagnetic clutch of the air conditioning compressor. |
| F12 | 30 | Cooling fan motor (low speed). Heater fan. |
| F13 | 20 | Reversing lamps. Generator excitation circuit. Instrument cluster, cigarette lighter fuse Nexia, melodic sound signal, clock. |
| F14 | 30 | Sound signal. Cooling fan (high speed). |
| F15 | 20 | Alarm. Interior lamp. Trunk light bulb. |
| F16 | 30 | Window lift motor gearboxes. |
| F17 | 10 | Audio system (circuit from ignition switch). |
| F18 | 30 | Trunk lid lock control. Rear window heating timer. Central locking. Audio system (battery circuit). |
| F19 | 30 | Heater fan 4th speed relay. |
| F20 | 30 | Fog lights. |
| K1 | Cooling Fan (High Speed) | |
| K2 | Direction indicators. | |
| K3 | Fuel module (fuel pump). | |
| K4 | Fog lights. Rear fog lights. | |
| Arrangement of elements on the inside of the mounting block | ||
| № | Purpose | |
| K5 | Side lights, fog lights. | |
| K6 | Headlights. | |
| K7 | Cooling fan (low speed). | |
| K8 | Air conditioning compressor clutch. | |
| K9 | Sound signal. | |
| K10 | Headlights. | |
| K11 | Melodious signal. | |
| K12 | Turning on the 4th speed heater fan. | |
| K13 | Ignition system. | |
| K14 | Windshield cleaner. | |
| K15 | Rear window heating timer. | |
| F19 | Heater fan 4th speed relay fuse 30A | |
| F20 | PTF fuse 30A |
The operating principle of the Daewoo Nexia heating system
The heating system in a car is designed as follows. The engine of the machine becomes hot during operation. To cool it, antifreeze is used, poured into the engine cooling jacket. This liquid heats up along with the engine, and when heated, it goes into the main radiator of the car. From there, through a system of pipes, hot antifreeze enters a small radiator of the stove, blown by a small fan. Heat from there enters the cabin through special air ducts and heats it. In the rear doors of the car there are exhaust openings necessary for ventilation of the interior. Excess heat escapes through them.
Diagram of the main elements of the heating system on the Daewoo Nexia
Here it should be noted one feature of the Daewoo Nexia heating system: it can operate independently of the air conditioner. Such design solutions on passenger cars are quite rare. The heater of the Daewoo Nexia not only heats the interior, but also prevents the glass from freezing, and it can work together with the air conditioner. This feature is useful if the driver wants to reduce the air temperature in the cabin by several degrees without turning off the heater.
Features of controlling the Daewoo Nexia stove
The heating system on the car in question functions separately, without connection to the air conditioner. The stove warms and ventilates the interior, preventing fogging of the front and side windows.
Sometimes drivers turn on the air conditioning while the heater is on. This allows you to quickly refresh the air inside the car and continue to warm the windows from fogging. A special feature of the climate system control on Daewoo Nexia is the fact that cooling and heating are located in one module. Therefore, the driver just needs to use the regulators located on the instrument panel to control the temperature inside the car.
The Daewoo Nexia stove is controlled using the following elements that can be found on the instrument panel:
- fan speed switch. The adjustment occurs in the direction of decreasing or increasing this indicator. Moreover, the setting is not flexible and is limited to four positions;
- turning on the air flow recirculation mode;
- temperature adjustment by turning the damper;
- turning on the air conditioning system;
- air flow direction regulator inside the cabin, for example “Legs-Face”.
At the same time, the modes of the Daewoo Nexia stove are not affected by the position of the incoming air temperature regulator. The four fan speeds are changed using the difference in voltage supplied to the motor. In this case, the damper changes its position using a drive, and the thermostat is connected by a cable to the actuator.
Heater motor
The heater electric motor is installed behind the stove radiator. This compact motor rotates a plastic impeller, creating a continuous flow of air through the radiator tubes. The motor housing is metal, inside there is a rotor with copper winding and a central shaft on ball bearings.
The heater motor housing on the Nexia is made of tool steel
Metal-graphite brushes fit tightly to the rotor, removing the electrical charge. The engine catalog number is 6841SB566905. It is compatible with other Daewoo vehicles (for example, Daewoo Espero). Cost - from 5000 rubles.
Heater Vacuum Switch
The vacuum switch for the heater on the Daewoo Nexia is located behind the glove compartment. It is this device that is responsible for opening and closing the external air intake damper and the warm air recirculation dampers in the cabin.
The dampers on the Daewoo Nexia are opened using a vacuum switch
It is controlled using buttons located on the heater control unit. The device catalog number is ER200347893. The cost of a vacuum switch in Daewoo brand stores is from 600 rubles.
Heater fuse location
The Daewoo Nexia safety block is located under the dashboard, above the gas and clutch pedals.
The Nexia's stove fuse is located in the lower right corner of the block: it is green
It is closed with a plastic cover, on which there is a sticker with a diagram of the location of all fuses and relays.
The Nexia safety block is located above the pedals and is covered with a plastic cover
The fuse responsible for the heater is located in the lower right corner of the block and is designated as F19.
The fuse responsible for the Daewoo Nexia stove is marked F19
The same block contains a furnace fan relay, used in situations where the heater motor is running at low speeds.
Incomplete closing of the cold air damper
A common failure due to which the stove in a Daewoo Nexia does not heat well is the operation of the damper. It blocks air access to the radiator. The shutter stands in front of him. And in order for cold air to be supplied to the heat exchanger, the part must be raised. It is controlled using a cable drive. If it works with play, the damper will open slightly under the influence of its own weight - cold air from outside will flow through the gap. This gap will be small. But it is enough to significantly cool the air entering the cabin.
When moving the control handle to the “warm” position, there should be no free play. If there is no play, but the expected effect is also not observed, you will have to glue the edge of this damper using a D-shaped seal. To do this, you need to dismantle the lower radiator casing, having first removed the lower part of the console, and partially disconnect the radiator by moving it down a little. The edge of the damper can only be felt. Access to it is difficult, but the effect of such work is guaranteed. At the same time, you can glue the remaining parts of the heater body, as well as the heat exchanger itself around the perimeter, so that there are no gaps.
Main stove malfunctions
Failure of the stove can lead to unpleasant consequences for the driver. This is felt most strongly in the cold season. When such a situation occurs, it is first necessary to accurately diagnose the cause of the malfunction.
The stove heats the air poorly
Play may appear on the damper drive. In this case, the stove will operate normally, but due to the play, the damper will begin to bend under its own weight, forming a gap. Through this gap, cold air will begin to flow into the cabin, reducing the temperature in the cabin.
If the stove heats the air poorly, you need to adjust the dampers
This malfunction is due to the design features of the stove structure and the location of the damper. The damper is installed directly in front of the heater radiator and must always be in a raised position for free passage of cold air to the radiator. If the cable drive is weakened, it changes its initial position, and cold air begins to flow not to the radiator, but into the passenger compartment.
It is quite easy to fix this problem: you will need to seal the gap formed in the damper so that cold air flows do not enter the cabin through the stove. More detailed instructions will be provided below.
The heater works, but does not direct air flow to the legs
Sometimes the stove starts working strangely. It heats the air normally, but does not allow air flow to be directed to the lower part of the cabin. The problem, again, lies in the damper, the drive of which does not allow the lever to open the “feet” position. In this case, you will have to remove the central panel of the machine and adjust the cable mechanism.
The problem of the impossibility of turning on the “legs” mode can be solved by adjusting or repairing the damper drive
The stove doesn't work
There are two reasons for the failure of the Daewoo Nexia car’s stove:
- the electric motor has failed;
- An air lock has formed in the radiator.
First you need to make sure that there is no excess air in the system. To do this, you will need to open the hood and, with the engine warm, touch the antifreeze supply pipe connected to the radiator and the throttle hose with your hands. If one of them is much colder than the other, then an air lock has formed in the radiator, which can be removed in 5 minutes. To do this you need to do the following:
- Unscrew the cap from the expansion tank.
- Start the engine.
- To release air from the system, press the accelerator pedal firmly and sharply several times.
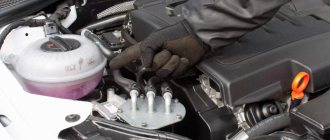
By unscrewing the reservoir cap and sharply pressing the gas pedal, you can free the system from the air lock
If no air lock is found, you will most likely have to change the electric motor. This work is not very difficult, but requires maximum concentration.
History of Daewoo Nexia
In the history of the Daewoo Nexia car there were only two generations: Nexia 1 (N100) and Nexia 2 (N150). The first generation of the car was produced from 1994 to 2008, and the second, after a slight restyling of the interior and body and a complete replacement of the engine with engines from Chevrolet Lanos and Lacetti cars, has been produced since 2008 to this day. Today we will focus on the Daewoo Nexia N100, describe its characteristics a little and give all the electrical circuits of the equipment.
Read more: Replacing the Lancer 10 heater motor
The basis for the creation of the Daewoo Nexia was the Opel Kadett, which was produced in 1984–1991. As you can see, Nexia was developed by the German concern Opel. Next, the South Korean company Daewoo modernized the car and released this particular miracle car, which, due to its low cost, is produced after restyling to this day. The assembly of the car was carried out on the territory of Uzbekistan - Asaka.
The car was made in both sedan and hatchback body styles (3-door and 5-door). Only gasoline engines were offered to choose from:
- G15MF - 1498 cm3 (75 hp)
- A15MF - 1498 cm3 (85 hp)
- F16D3 - 1597 cm3 (109 hp)
- A15SMS - 1498 cm3 (80 hp)
Transmission: 5-speed manual or 3-speed automatic.
Video - crash test of Daewoo Nexia:
This is probably the toughest crash test... the car was 100% disgraced in terms of safety.
How to increase air flow in the stove
Sometimes car owners are faced with the fact that the heater in the Daewoo Nexia car does not blow into their feet. In this case, experienced car enthusiasts are advised to disassemble the control unit and find the rubber membrane. There will be damage on it, most likely a small hole. The result is that air is sucked in and cannot move the dampers. The hole needs to be sealed with any good rubber glue, let it dry, then assemble the block.
Important! To ensure simultaneous blowing of the feet and windows, it is necessary to block the damper or its drives in an intermediate position. In the second case, the movement of the drive is limited to two positions: suction or extrusion. The first provides air flow to the legs, the second - to the glass.
In a Nexia car, the stove blows weakly and when its channels are clogged or air bubbles begin to form in the heating system. The easiest way to get rid of them is to turn off the engine, open the expansion tank cap, then manually pour in antifreeze. Clogged channels are cleaned with cleaners for the cooling system and washed for seven to eight minutes.
Additional pump
If at first glance everything works properly, but in a Daewoo Nexia car the heater blows cold air, this means there is a manufacturing defect. There is no need to be upset; everything can be fixed by upgrading the stove.
Some motorists install an additional electric pump from a GAZelle on their car; Bosch pumps are also suitable. The pump is installed so that the antifreeze returns from the stove to the engine, then the flow of heating air into the cabin increases.
Recommendations for care and maintenance
In order for the stove heater to work properly and operate at full capacity, you should:
- strictly adhere to the intervals of prophylaxis and diagnostics. The manufacturer recommends every 25,000 km;
- Fill the system with high-quality domestically produced antifreeze or antifreeze. Repairing the Daewoo Nexia stove is expensive, at least 3 thousand rubles;
- Always monitor the fluid level in the expansion tank. Do not allow it to fall below the minimum volume, as this leads to an increase in operating temperature and boiling of the motor;
- do not skimp on maintenance, do not pour distilled, running water into the cooling system.
How to determine the cause of the malfunction
Fuse location diagram
Without experience in servicing a technical device, it is extremely difficult to diagnose the source of the breakdown. For objective results, contact a workshop.
During an independent inspection, we recommend narrowing the search by grouping the breakdown “by characteristics.”
- Check the mechanisms for electrical components: the fan does not move when the switch is activated, the fan operates unstable, jerkily;
- Mechanical reason: the Daewoo Nexia stove blows cold air, insufficient airflow, weak air flow.
For repairs, we place the machine on a flat platform, or perhaps on an inspection hole for ease of diagnosis. We fix the rear row of wheels with wheel chocks, squeeze the parking brake, and move the rocker to the first gear position.
We start the engine, turn on the levers of the stove heating unit one by one. By this action we exclude (confirm) a breakdown in the electrical circuit. Let's assume it's a faulty fuse.
We carry out the replacement ourselves, without going to a workshop. In accordance with the instruction manual, the fuse responsible for heating is located under the index “F12”. We remove it, insert a new one, the work is completed.
The fuse module is located behind the instrument panel, on the left side. Access from the driver's side.
Afterword
Any motorist can not only figure out why the stove in the Daewoo Nexia does not heat up, but also correct the situation if the Nexia stove blows weakly or does not work in some directions of the hot air supply. The main thing is confidence in your abilities and strict adherence to the advice of professionals. Often the reason does not require an expensive visit to a car service center.
If you have an interesting experience in solving a problem with the stove in a Daewoo car, write to us! We will be happy to share your story and believe me, there will be many grateful readers! And don't forget to subscribe to our newsletter!
Source
Preparing to replace the heater radiator
Removing the heater radiator on a Daewoo Nexia, as well as on any other car, is not a pleasant task. Firstly, it will take a lot of time to sort out the tangle of wires and mechanisms, and secondly, you will have to sign almost every harness coming from the stove, so as not to confuse it later during installation.
The preparatory stage of work includes the following operations:
- Installing the car on the inspection pit.
- Disconnecting the negative terminal of the battery.
- Removing the protection from the engine (to make it easier to get to the radiator pipes).
- Coolant drain.
Without exception, all work on cooling and heating systems involves draining antifreeze.
After preparing the machine for work, you can begin to remove the heater radiator.
Nexia stove repair: what you need to know
As practice shows, on Daewoo Nexia the heater radiator fails quite often. The main one on the list of signs of malfunction is the occurrence of a radiator leak. To solve this problem, the device is dismantled, after which the radiator of the Nexia stove is replaced.
According to factory technology, the radiator is replaced only after removing the dashboard, but there is another way. Sequencing:
- it is necessary to drain the coolant from the system to prevent antifreeze from entering the vehicle interior;
- disconnect the inlet and outlet pipes from the engine compartment;
- remove the glove compartment and remove the stove radiator from its seat;
- We select the required radiator, referring to the original catalog number of the radiator of the Daewoo Nexia stove (03059812) and taking into account its dimensions.
If the radiator or pipes are clogged, you should try to clean them using cooling system flushing agents.
Also, repairing the Daewoo Nexia stove may require replacing fuses or dismantling the control unit. The fact is that malfunctions in the operation of the stove on the Nexia may be associated with blown fuses.
The fuses on the Daewoo Nexia are located in the vehicle interior (in the mounting block under the instrument panel). Sequence for replacing fuses:
- we find the fuse box to the left of the steering wheel and remove its cover;
- based on the information indicated on the inside of the cover (the purpose of each element), you will need to locate a red fuse with a rating of 10A;
- We pull out this element with pliers for inspection, and if necessary, replace the burnt fuse with a new one.
Another reason why the stove does not heat up may be a malfunction of the control unit itself. In fact, it is a panel with levers and switches located on the center console.
The dismantling of the control unit is carried out as follows:
- bend the fasteners for fastening the trim on the center console and remove it;
- Having disconnected the drive cable under the dashboard from the passenger seat, use a Phillips screwdriver to unscrew the fastening screw;
- Having removed the locking ring, remove the damper drive cable;
- using a screwdriver to pry the control unit on each side, carefully pull it towards you to unclip the latches;
- Having removed the vacuum lines from the used stove, pull out and disconnect the stove tap cable;
- Having disconnected the power terminal, pull the control unit towards you;
- remove the control unit for the stove, first making sure that all other connections and connectors are disconnected;
- The installation process is carried out in reverse order.
By the way, if the damper cannot completely shut off the supply of cold air (the temperature in the cabin decreases), the damper needs to be adjusted.
What tools will you need?
Disassembling the central panel and removing the clamps on the pipes require only screwdrivers, but a variety of them - both Phillips and straight, both small and very large. Therefore, you will have to stock up on a large number of different screwdrivers. The only tool you need as a handyman is a ratchet on “7”. No other keys or accessories are needed.
Ratchet on "7" - the main tool when replacing the heater radiator
What heating radiators are installed on the Daewoo Nexia?
Many Daewoo Nexia owners, even after a short period of using the car, notice that the factory radiator does not do its job very well. Of course, without proper interior heating, using a car in winter is extremely uncomfortable. Therefore, car enthusiasts are asking the question: which heating radiators, when installed on the Nexia, will work better than the factory ones?
The main advantage of the Daewoo Nexia heating system is that it conveniently includes a stove radiator from any other model. The only caveat is that the dimensions of the nodes and the location of the pipes must match.
Traditionally, products are used to replace the “original” heater radiator. However, the company's products are quite expensive, so not every car enthusiast can afford such a replacement. There are only two budget options:
- install the heater radiator from Lanos on the Nexia;
- connect the heater radiator to the VAZ-2106.
"Luzar" is a domestic manufacturer of units and mechanisms for various car models
. Having decided on the choice of model, you should pay attention to the material from which the radiator is made, and to the build quality of the product itself. Heating system radiators can be made of copper, brass or aluminum.
Products made from any material have approximately the same performance characteristics and conduct heat well. That is, the main selection criterion is still the build quality. If the radiator has smooth seams around the edges and an integral structure, then it will work longer.
Most car enthusiasts believe that copper radiators last longer than aluminum and brass ones, but in fact they have approximately the same service life
Recycling
The heating system of Daewoo Nexia implies the presence of an air recirculation function. This is a mode that involves using air from the cabin rather than from the street. This is relevant in cases where the car is passing through an area of heavy smoke or gas pollution. It is important to close all windows, otherwise there will be no point in switching.
However, the driver and passengers may feel a headache if this mode is turned on for more than 15 minutes. This is due to the fact that oxygen does not enter the car, and the concentration of carbon dioxide exceeds the norm. Therefore, recirculation is used only in extreme cases, when there is, for example, heavy smoke outside and action has to be taken to prevent harmful chemical compounds from getting into the car. As soon as the car has passed the danger zone, the mode is turned off.
Experienced drivers are aware of the fact that at low temperatures outside, using recirculation will lead to rapid fogging and subsequent freezing of the windows. This process can lead to an emergency on the road, especially if the car is moving quickly. Therefore, in severe frosts, it is better to refuse to use the mode, even if it is necessary due to smoke.
Video: Daewoo Nexia climate control unit - what breaks there!
It is also worth noting that on cars higher in class than the Daewoo Nexia, recirculation is used automatically when washing the windshield. The washer fluid does not always have a pleasant smell, and its evaporation occurs in the immediate vicinity of the air intake. Therefore, a system has been implemented that includes air intake from the passenger compartment.
In conclusion, it is worth saying that the design of the stove is not something complicated. The climate control unit is easy to understand for drivers, even if they are new to driving the vehicle.
The Nexia climate system, the design of which contains a heater, air conditioner and supply and exhaust ventilation, allows you to maintain a comfortable microclimate inside the car, regardless of weather conditions and air temperature. The main condition for the heating of a Daewoo Nexia car is that its power unit is heated to a certain temperature.
Replacing the stove radiator
The stove radiator has to be replaced no more often than once every 6–8 years of vehicle operation. Therefore, there is a high probability that the owner will, in principle, never encounter this kind of problem. Replacing the heater radiator is required in cases where it begins to leak or stops heating the interior.
I know, I changed it myself - according to the book, in fact everything is simpler than it is written there. There is no need to remove the dashboard, just remove the glove compartment (to have more space). You remove the plastic covers (there are 7 screws there), under the hood you disconnect the tubes that go to it, and pull out the radiator. I didn’t know how to change it, no one suggested it, I changed it in 8 hours (in total): 3 days in winter - several hours each, it was very cold -20 degrees. Just stock up on antifreeze, as some will spill out.
Where is it located?
The radiator of the Daewoo Nexia stove is located exactly in the center of the cabin. To be more precise, it is “hidden” behind the front panel of the car (just where the buttons for controlling the temperature modes in the cabin and the fan go out). The radiator is practically in contact with the wall of the engine compartment.
Because of this arrangement, changing the stove radiator is not very convenient - you need to disassemble almost the entire central panel. However, there is an alternative way to accomplish this task - working from the cavity of the engine compartment.
The heating radiator is located behind the control panel
How to remove a stove radiator with your own hands
Contrary to popular belief, replacing the heater radiator on a Daewoo Nexia does not involve removing the steering wheel or disassembling the central panel. Thanks to the convenient location of the stove itself, all work can be done under the bottom of the car on an inspection hole or overpass.
Procedure:
- Remove the floor console (it will interfere with free access to the radiator).
- Through the engine compartment you need to remove the pipes from the radiator. Each pipe can be easily removed if you first loosen and then completely unscrew the mounting bolts.
- Immediately after removing each pipe, you need to block the hole in the stove radiator - you can use a prepared rubber plug or an ordinary piece of rags.
- From under the bottom of the car you need to remove the adapter from the radiator.
- Next, remove the metal clamps that secure the radiator casing to the body.
- Using your fingers, you need to bend the casing clamps and pull the heater radiator towards you.
How to install a new radiator
Installing a new stove radiator is complicated only by connecting the pipes. In general, the procedure is quite simple:
- Change the O-rings on the pipes.
- Insert the new radiator into the old casing.
- Fix the casing inside the body, it is best to use new clamps.
- Connect the adapter.
- Connect two pipes (the main thing is not to confuse which one is responsible for the supply and which one is responsible for the removal of coolant).
- Reinstall the floor console.
- Pour antifreeze into the expansion tank.
- Connect the negative terminal on the battery.
Transmission
It was on the Nexia in the new body that the clutch for some reason began to look thoughtful. To switch on a particular gear without any problems, you need to wait a 3-second pause. Agree, in city traffic conditions this is not the most pleasant feature.
There was a period when fairly thin oil was poured into the gearbox at the factory. It heated up very quickly, losing its viscosity. The first symptom is knocking in the gearbox when the clutch pedal is operated suddenly. Experts recommended not waiting for the second and third symptoms, but simply pouring time-tested semi-synthetics into the box.
Today the plant has corrected itself: they began to pour SAEW80W-90 specification fluid into the gearbox, with a viscosity level more suitable for operation in summer conditions. In the Vehicle Operation Manual, the manufacturer recommends using less viscous oil of the SAEW75W-90 specification in winter conditions.
As for the frequency of oil changes in manual transmissions, it is 120 thousand km. The clutch lasts about 80 thousand km. CV joints run about 50–60 thousand km.
DIY diagnostics
If the fuse is intact, to check the operation of the fan you need to get to its power connector. The electric motor of the stove can be located either in the passenger compartment under the instrument panel, or in the engine compartment on the passenger compartment side behind the engine shield. You can find information about where the heater fan is located and how to get to it in your vehicle's owner's manual. There you will also find a circuit diagram for turning on the fan.
After studying the diagram, determine which pin of the connector suitable for the electric motor should receive “+” after turning on the first fan speed. Insert one of the control contacts into this pin, close the second contact to ground, turn on the ignition and turn the heater fan switch to any of the positions. If the control light comes on, then the problem is in the electric motor. If power does not arrive at the connector, you need to look for a break in the wiring in the circuit going to the heater switch.
Replacing brushes
To replace the brushes, you need to remove the impeller from the motor housing (usually held on by latches). If you were unable to find brushes from the auto parts catalog, unsolder the old brushes and select similar ones in size. If necessary, copper-graphite brushes can be filed with a file. To solder the brushes you will need a soldering iron, rosin and some solder. Before assembling the electric motor, clean the insides of wear debris from previous brushes.
If the fan, before it stopped turning on, made a squeak or excessive noise during operation, we recommend lubricating the bushings with lithol. Place a small amount of grease on the end of the bushing and heat it until it flows inside. If the fan operated silently, then lubricating the bushings is not recommended at all. The lubricant will trap dust, which over time will turn it into an abrasive paste.
We recommend watching a video that shows in some detail the process of troubleshooting the stove fan and replacing the brushes.
Only the last speed works or one of the speeds is missing
Fault in the additional resistor. The maximum rotation speed mode has what is called a direct connection, so we can conclude that the control circuit and the electric motor itself are working properly. A circuit with an additional resistor is used on most cars. But the rotation speed of the heater motor can also be controlled by a PWM signal.
Resistor check
You can check the additional resistor using a multimeter. To do this, just measure the resistance at the resistor terminals and compare the readings with the reference values for your car
Pay attention to the thermal fuse, which can burn out if there is a short circuit; there are also frequent cases of the element being unsoldered due to excessive heating of the resistor. You can find a similar resistor in a radio parts store.
The video below shows the process of servicing a non-removable stove motor. The only thing we cannot recommend is getting rid of the thermal fuse!
Automatic heater control does not work
The problem may be in the contacts of the electrical control circuit, the cabin air temperature sensor, the air damper position sensor, or in the electronic unit of the automatic heater control system (AHC).
Sequence of actions when dismantling the heater control module
Let us immediately note that there is nothing complicated in the procedure for removing it, but still, when performing each step, you must be careful, since there is a high probability of damage to the electronic board. Let's proceed to dismantling
It is necessary to carefully (so as not to break the latches) detach the module lining on each side in the area where the stove and radio are located. Then remove it from the central panel. The damper cable should be disconnected. The easiest way to get to it is from the front passenger seat. Unscrew the screw securing the damper cable
Carefully remove the retaining ring. Now you can remove the throttle cable
It is worth noting that during reassembly it is very important to set the correct tension, otherwise the heater damper will be controlled incorrectly, which will cause the heater to function incorrectly
At this stage you will need to be patient and perform it as carefully as possible, since now you need to unfasten the latches that hold the climate system module. They are located in the upper and lower parts of it
Using a flat screwdriver, you need to carefully pry them up and bend them
Important! The latches are made of brittle material that breaks easily. Vacuum tubes must also be removed
To do this, just loosen their fastenings a little, after which the hoses should be easily removed. The cable, with the help of which the handle interacts with the heater tap, is pulled towards itself. Next, remove the fan terminal from the block. Disconnect the power terminal. You can remove the Nexia climate system module from the central panel
The vacuum tubes must also be removed. To do this, just loosen their fastenings a little, after which the hoses should be easily removed. The cable, with the help of which the handle interacts with the heater tap, is pulled towards itself. Next, remove the fan terminal from the block. Disconnect the power terminal. You can remove the Nexia climate system module from the central panel.
When reassembling, it is important to pay attention to the contact areas of the terminals and, if necessary, clean them of dirt and corrosion. The need to dismantle the Daewoo Nexia heater control unit is mostly associated with replacing its backlight bulbs or adjusting the travel of the heater control levers. If most motorists have no problems with how to remove the heater control unit on a Nexia, the correct sequence of disassembling it causes some difficulties
Therefore, it is extremely important to know how to disassemble the heater control unit on Nexia in order to repair it
If most motorists have no problems with how to remove the heater control unit on a Nexia, the correct sequence of disassembling it causes some difficulties
Therefore, it is extremely important to know how to disassemble the heater control unit on Nexia in order to repair it
