2276-6-13-9-06
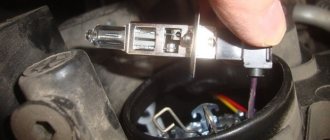
Remove the headlight bulb from the headlight housing.
Attention! The headlight lamp is halogen. You should not touch its glass bulb with your fingers, as traces from them will lead to darkening of the lamp when heated. You can remove dirt from the flask with a clean rag soaked in alcohol.
We install the new H4 lamp in the reverse order.
Replacing the turn signal lamp
Volkswagen Polo: replacing the low beam lamp
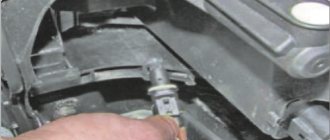
- First of all, open the hood, then using TORX T30 we unscrew the two fastening screws marked in the photo.
- Next, you need to turn off the power supply; to do this, press the latch and unclip it.
- Now, perhaps, the most difficult thing is to get the headlight unit out of the niche. To do this, press from the engine compartment on the bottom of the headlight. I’ll tell you, you’ll have to put in a decent amount of effort, because the headlight is held on by two more latches.
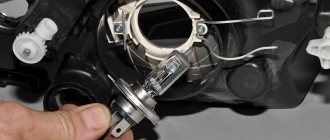
- Next, we dismantle the protective cover, under which the light bulb we need is located. We take it out by turning it counterclockwise. After this, the low beam lamp is replaced.
For clarity, I recommend watching the video on how to replace low beam lamps
This is interesting: How to change rights after expiration
2276-6-13-9-13
Remove the lamp from the socket.
We install the new W5W side light lamp in the reverse order.
[How to reduce maintenance costs for Volkswagen Polo sedan] [Maintenance of Volkswagen Polo sedan for 15 thousand km] [Maintenance of Volkswagen Polo sedan for 30 thousand km] [Tools required for maintenance of Volkswagen Polo sedan] [ Carrying out maintenance yourself - general recommendations] [Safety rules when carrying out car maintenance yourself] [Lamps used in the Volkswagen Polo sedan]
Replacing lamps in a Volkswagen Polo sedan headlight
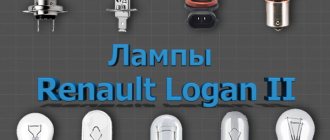
What lamps are installed in VW Polo
Note that the fifth generation of the model, produced from 2009 to 2015. in the low beam it has an H4 lamp; since 2015, after restyling, they began to install an H7 lamp. Be careful when purchasing lamps
For Volkswagen Polo 5 from 2009 to 2015.
- Low beam lamp H4 12v 60/55W
- Turn signal lamp PY21W 12v/21W
- Side light bulb W5W 12v5W
Selecting low beam lamps
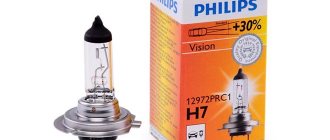
- PHILIPS H4-12-60/55 +30% Vision P-12342PR price from 140 rub.
- PHILIPS H4-12-60/55 LONGLIFE ECO VISION price from 280 rubles (with extended service life)
- BOSCH H4-12-60/55 Pure Light 1987302041 price from 145 rub.
- NARVA H4-12-60/55 N-48881 price from 130 rub.
- OSRAM H4-12-60/55 O-64193 price from 150 rub.
If you want the light to be brighter, you should choose the following lamps:
- NARVA H4-12-60/55 +90% RANGE POWER price from 350 rubles per piece
- OSRAM H4-12-60/55 +110% NIGHT BREAKER UNLIMITED O-64193NBU from 700 rub. piece
- PHILIPS H4-12-60/55 +130% X-TREME VISION 3700K P-12342XV price from 650 rubles per piece
These lamps are exactly the same power as regular lamps, but they shine much brighter. However, their service life is shorter than that of conventional lamps.
You can see how much the low beam lamps cost for a pre-restyled Polo sedan above; below is the price for the restyled version
Low beam lamp for VW Polo 5 restyling
H7 12v/55W lamp is installed in the low beam .
- PHILIPS H7-12-55 +30% P-12972PR Vision price from 250 RUR pcs
- PHILIPS H7-12-55 LONGLIFE ECO VISION P-12972LLECOB1 from 300 rubles with extended service life
- BOSCH H7-12-55 Pure Light 1987302071 price from 190 RUR pcs
- NARVA H7-12-55 N-48328 price from 170 RUR pcs
- OSRAM H7-12-55 O-64210 price from 220 RUR pcs
- OSRAM H7-12-55 +110% NIGHT BREAKER UNLIMITED O-64210NBU from 750 rubles per piece
It is worth noting that it is easier to replace a low beam lamp on a pre-restyling model than on a restyled one. Below, we will describe both replacement options.
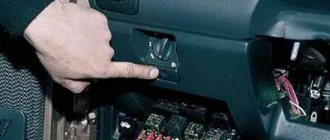
Headlight adaptation
Dismantling the headlight may be necessary if it is replaced, or if it becomes necessary to remove the front bumper. In this case, you will need to disconnect the block with the power wire and unscrew the two fastening screws in the upper part of the headlight using a 20mm Torx wrench.
Video: removing the headlight of a VW Polo Sedan
After installing a new headlight (or an old one after repair), as a rule, it is necessary to adjust the direction of the light fluxes. At a service station, conditions for adaptation are better, but if necessary, you can adjust the headlights yourself. On the body of the headlamp, you need to find regulators that adjust the light beam in the horizontal and vertical planes. When starting the adjustment, you should make sure that the car is fueled and equipped, the air pressure in the tires is correct, and there is a load weighing 75 kg on the driver’s seat. The sequence of actions in this case is as follows:
- the light beam control switch is set to position “0” (i.e., there is only a driver in the car or a driver with a front passenger);
- low beam turns on;
- one of the headlights is covered with opaque material;
- the light beam is adjusted in the vertical plane by rotating the regulator, which is located closer to the axis of the car, with a Phillips screwdriver;
- the same manipulations are performed with the second regulator;
- the second headlight is closed and the procedure is repeated;
- PTF adjustment is performed in the same way.
It should be remembered that when adjusting the headlights, the car must be located on a strictly horizontal surface. The point of regulation is to bring the beam angle into line with the value indicated on the headlight. What does this mean? On headlights, as a rule, the standard angle of “incidence” of the light beam is indicated: as a rule, this value is expressed as a percentage with the headlight on next to it, for example, 1%. How to check if the adjustment is correct? If you park the car at a distance of 5 meters from a vertical wall and turn on the low beam, then the upper limit of the light flux reflected on the wall should be at a distance of 5 cm from the horizontal (5 cm is 1% of 5 m). The horizontal line on the wall can be set, for example, using a laser level. If the light beam is directed above a given line, it will blind oncoming drivers; if below, the illuminated road surface will be insufficient for safe driving.
Vertical and horizontal headlight adjustments are made using white controls
Lamp type
Before you start replacing, you need to select a lamp. H4 double filament halogen lamps are used here . They differ from single-strand ones in the base, which has three contacts. Starting in 2015, bulbs began to be used (pay attention to this) .
Such lamps are widespread, so there will be no problems purchasing them. It is better to choose elements with a power of 50–60 W , designed for 1,500 hours of operation. The brightness value in such lamps reaches 1,550 Lm .
Light bulbs that produce light blue light should be avoided. If in dry weather they illuminate the space well, then in snow and rain such glow will not be enough. Therefore, it is better to choose regular halogen lamps .
Choice
Many car enthusiasts choose domestically produced light bulbs from. This is a good choice at a reasonable price.
"Mayak" lamps of the ULTRA H4 series with a power of 60/55 W.
It is advisable to purchase two lamps and replace them in pairs. This is due to two reasons:
- Light bulbs from different manufacturers usually differ in brightness and softness of light . Therefore, after installing a new lighting element, you will notice that the headlights shine differently.
- Since the lamps have the same resource, after the first one the second headlight will soon go out. In order not to wait for this moment, it is better to perform a simultaneous replacement.
To avoid having to crawl under the hood again in about half a month, it is better to immediately change both low beam lamps.
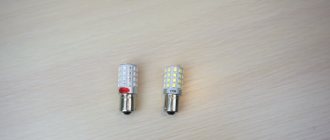
DRL option using LED strips
Some car owners resort to installing daytime running lights without purchasing lampshades with DRLs. LED strips are used for these purposes. The cost is much lower, and the options for tuning are expanding. One way is given below.
- Remove decorative plugs.
- Cut holes for the LED strip.
- Prepare the LED strip by cutting it into pieces of the required length.
- Insert the LED strip into its seats.
- Make electrical wiring.
- Fill everything with epoxy resin.
- Electrically connect both homemade DRL headlights.
- Install daytime running lights on the car.
- Check performance.